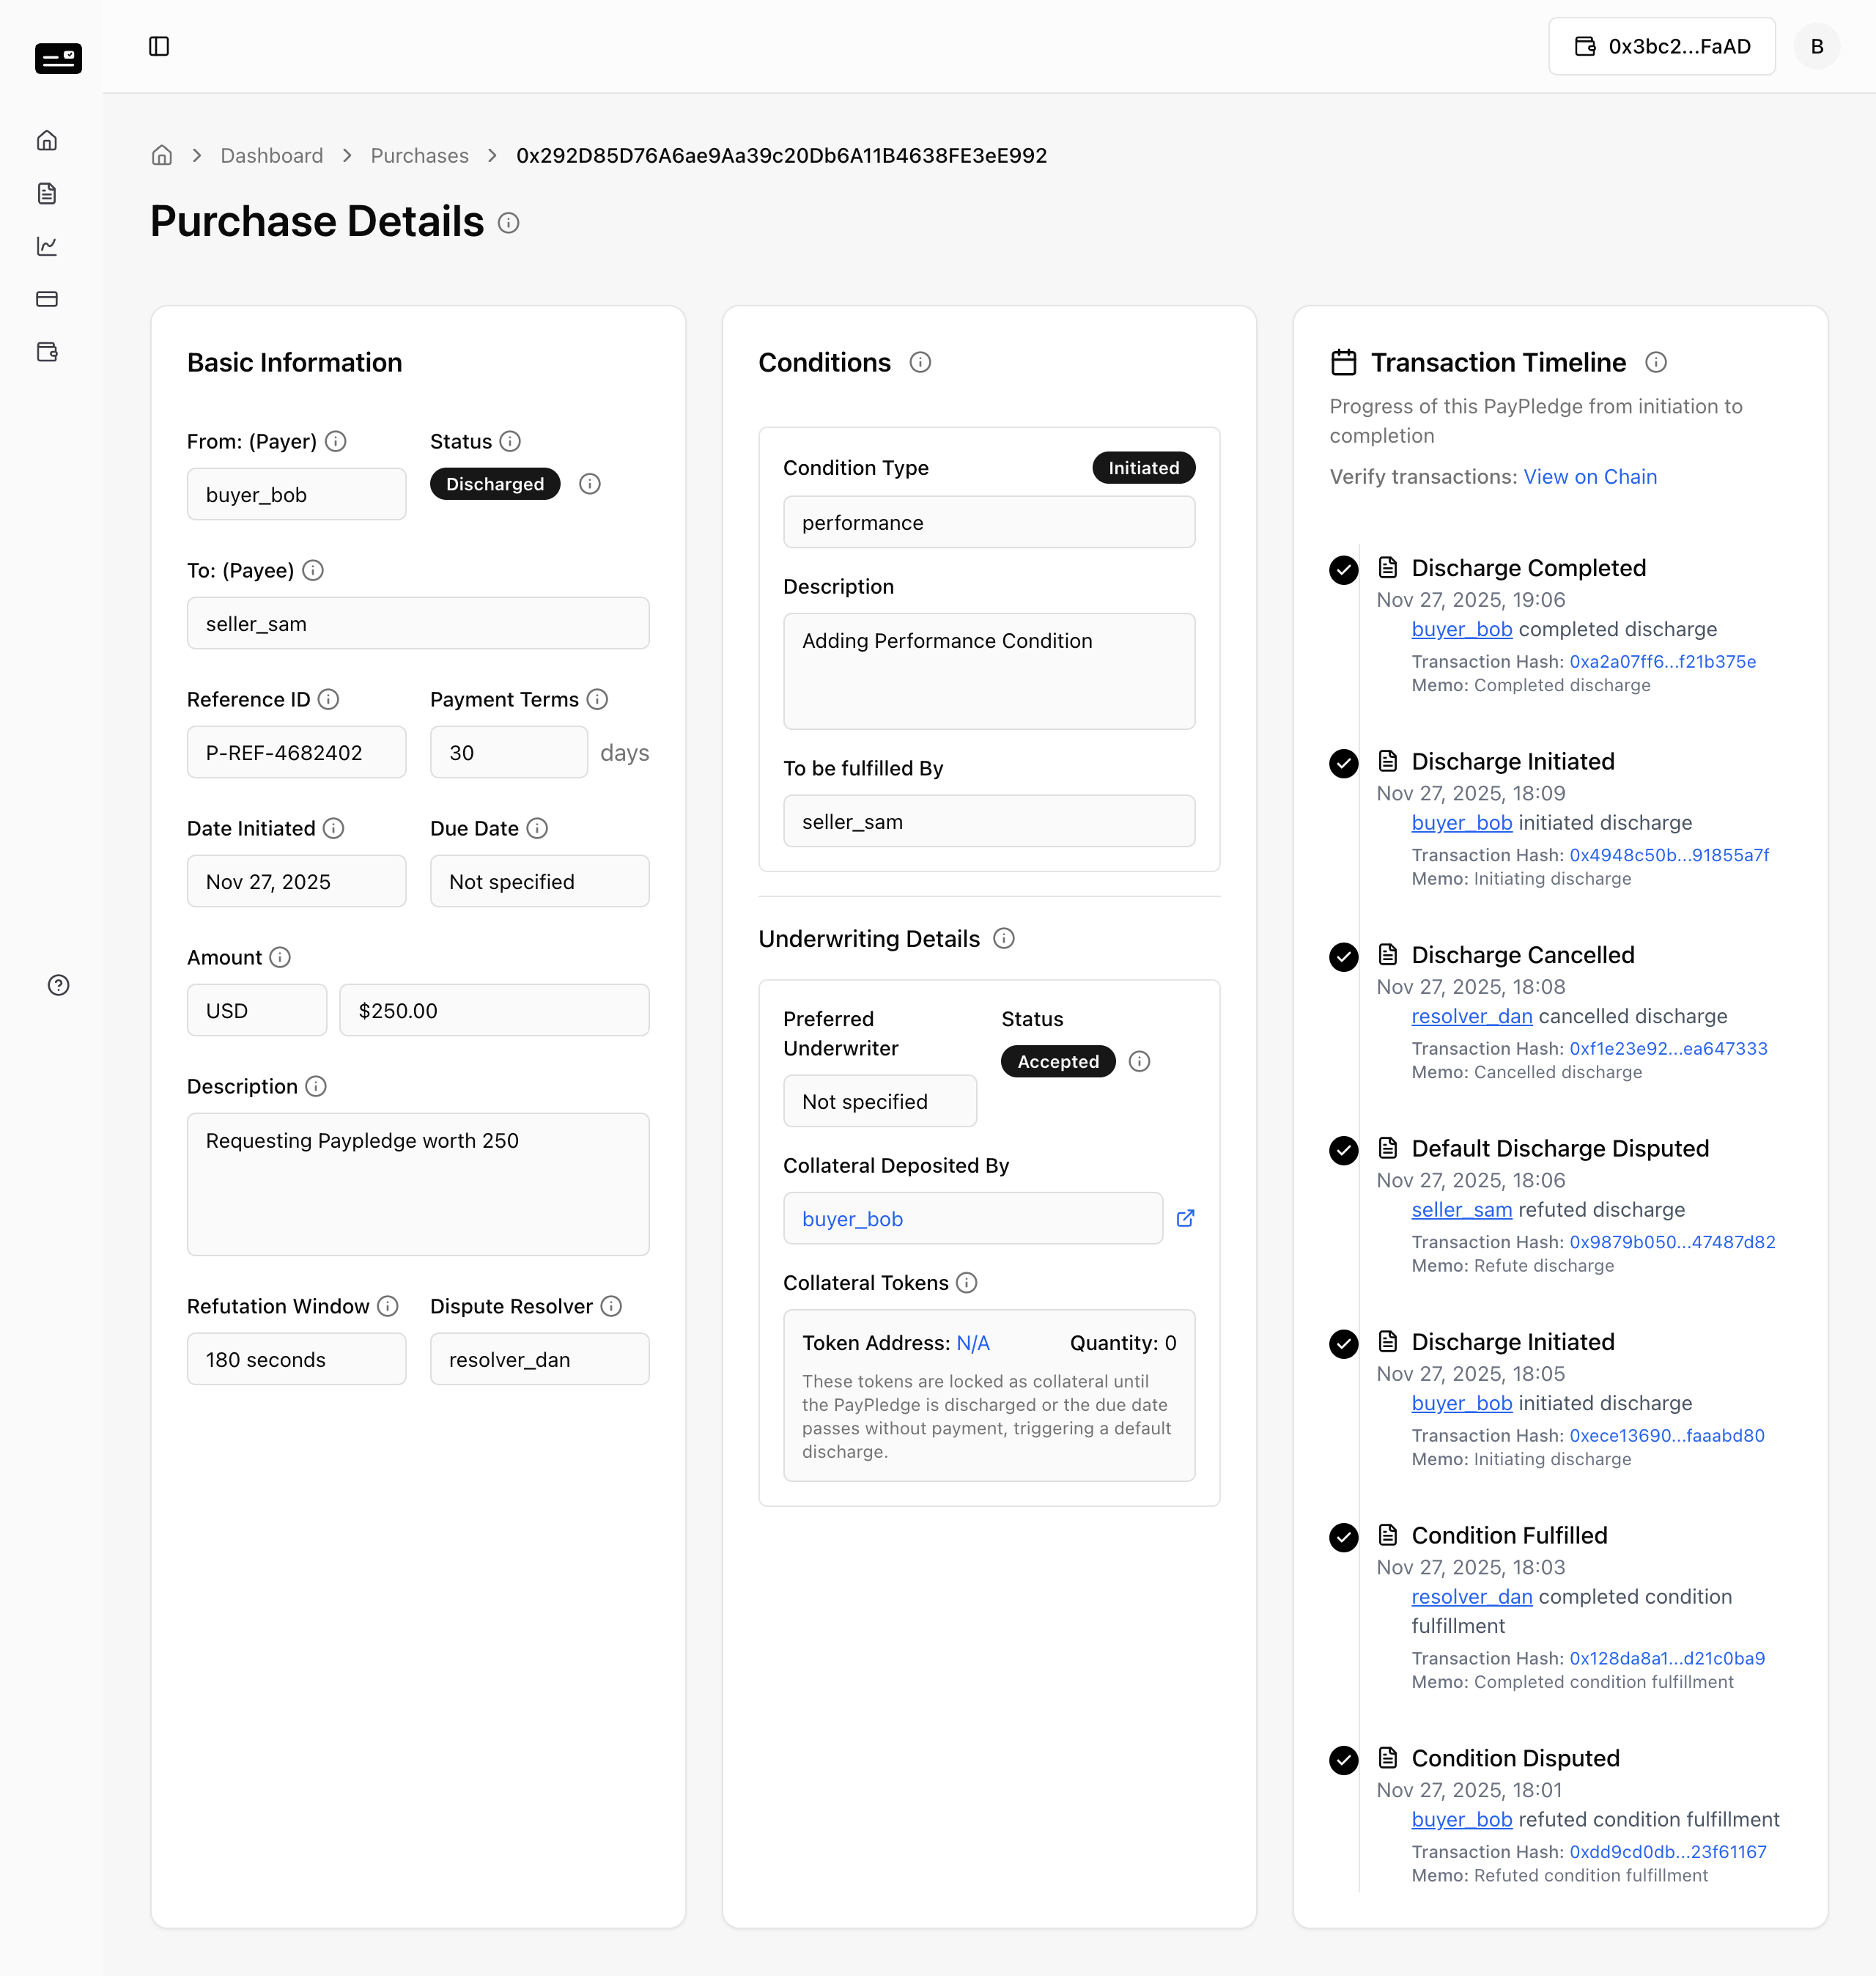
Appearance
SecureTrade Platform: End-to-End Flow Steps
Executive Summary
This document outlines the core user journeys within the SecureTrade ecosystem, demonstrating the interaction between Traders (Buyers/Sellers), Underwriters, and the Governance/Admin layer. It highlights the seamless integration of secure identity (Private SAFE), credit management, and the proprietary PayPledge™ execution flow.
Phase 1: User Onboarding & Authentication
Actor: Buyer
The journey begins with a secure, invite-only onboarding process ensuring all participants are verified and provisioned with the necessary on-chain infrastructure.
1.1 Invitation & Account Creation
Pre-requisite: The Platform Admin invites the Buyer, creating their account and pre-funding it with initial ETH (for gas) and TRADE-S (stablecoin) tokens.
1.2 Secure Login
The user accesses the platform via a secure, passwordless email authentication flow.
Step 1: The Buyer enters their registered email address. 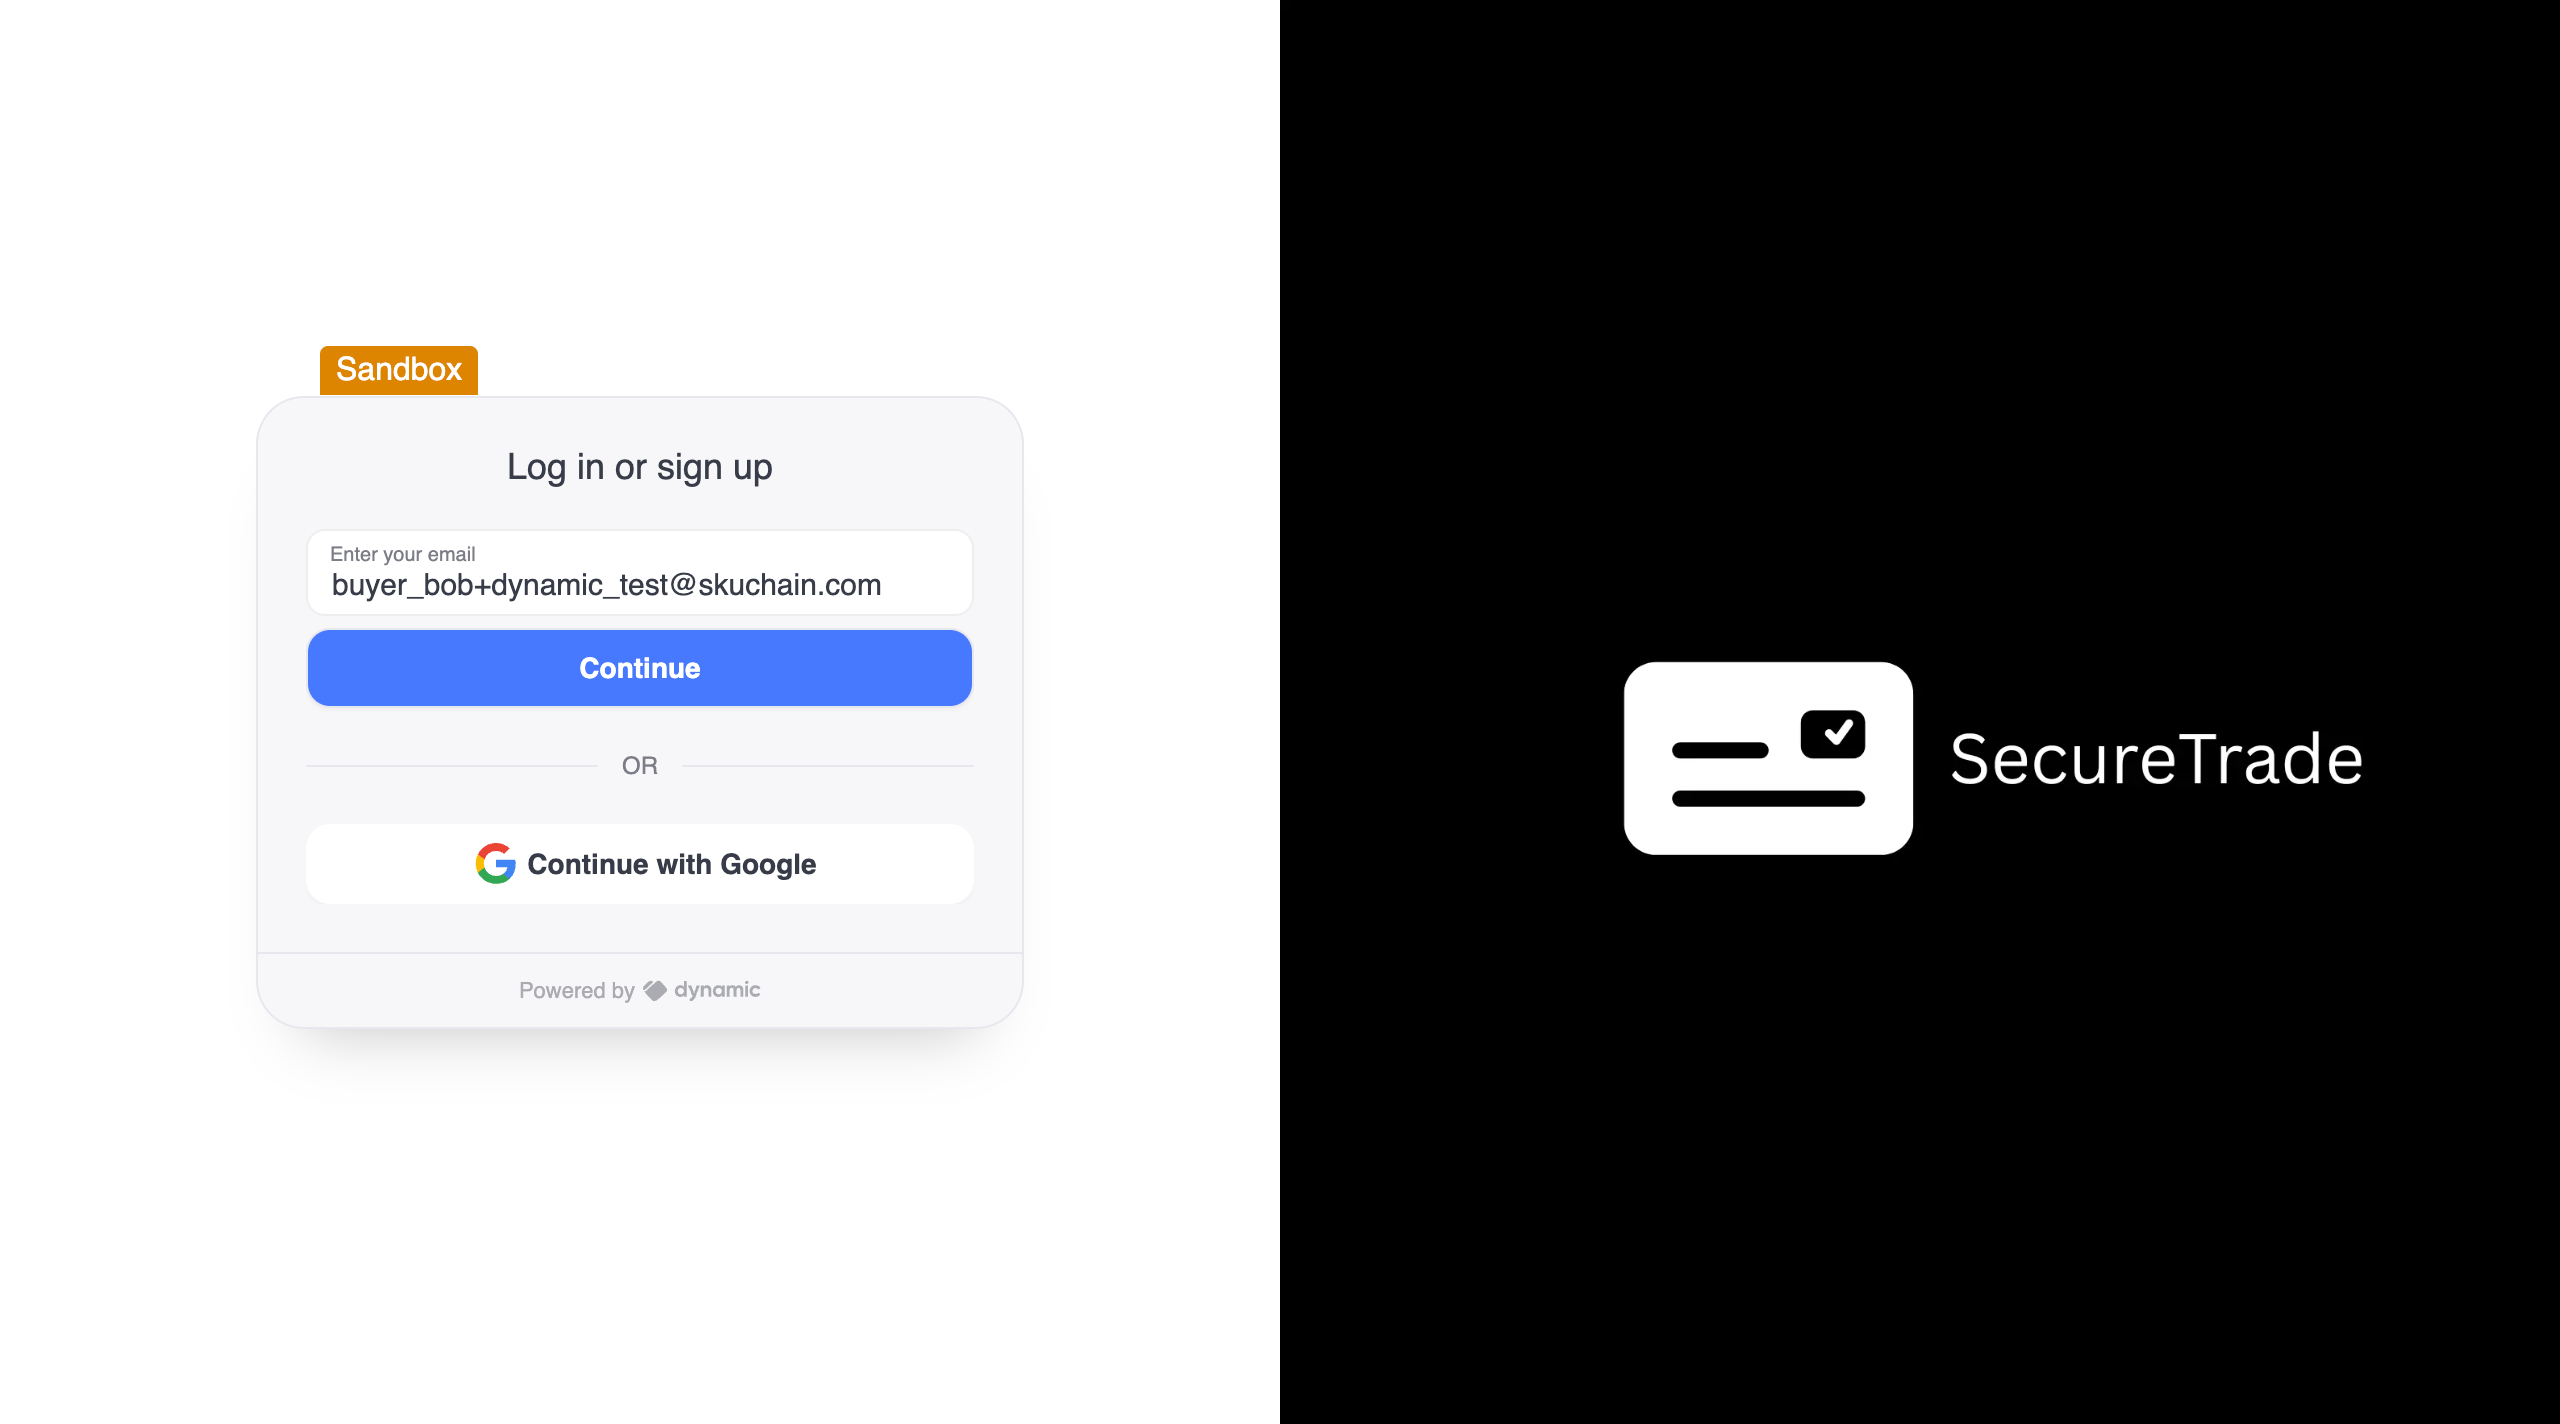
Step 2: The system requests a One-Time Password (OTP) sent to the user's email. 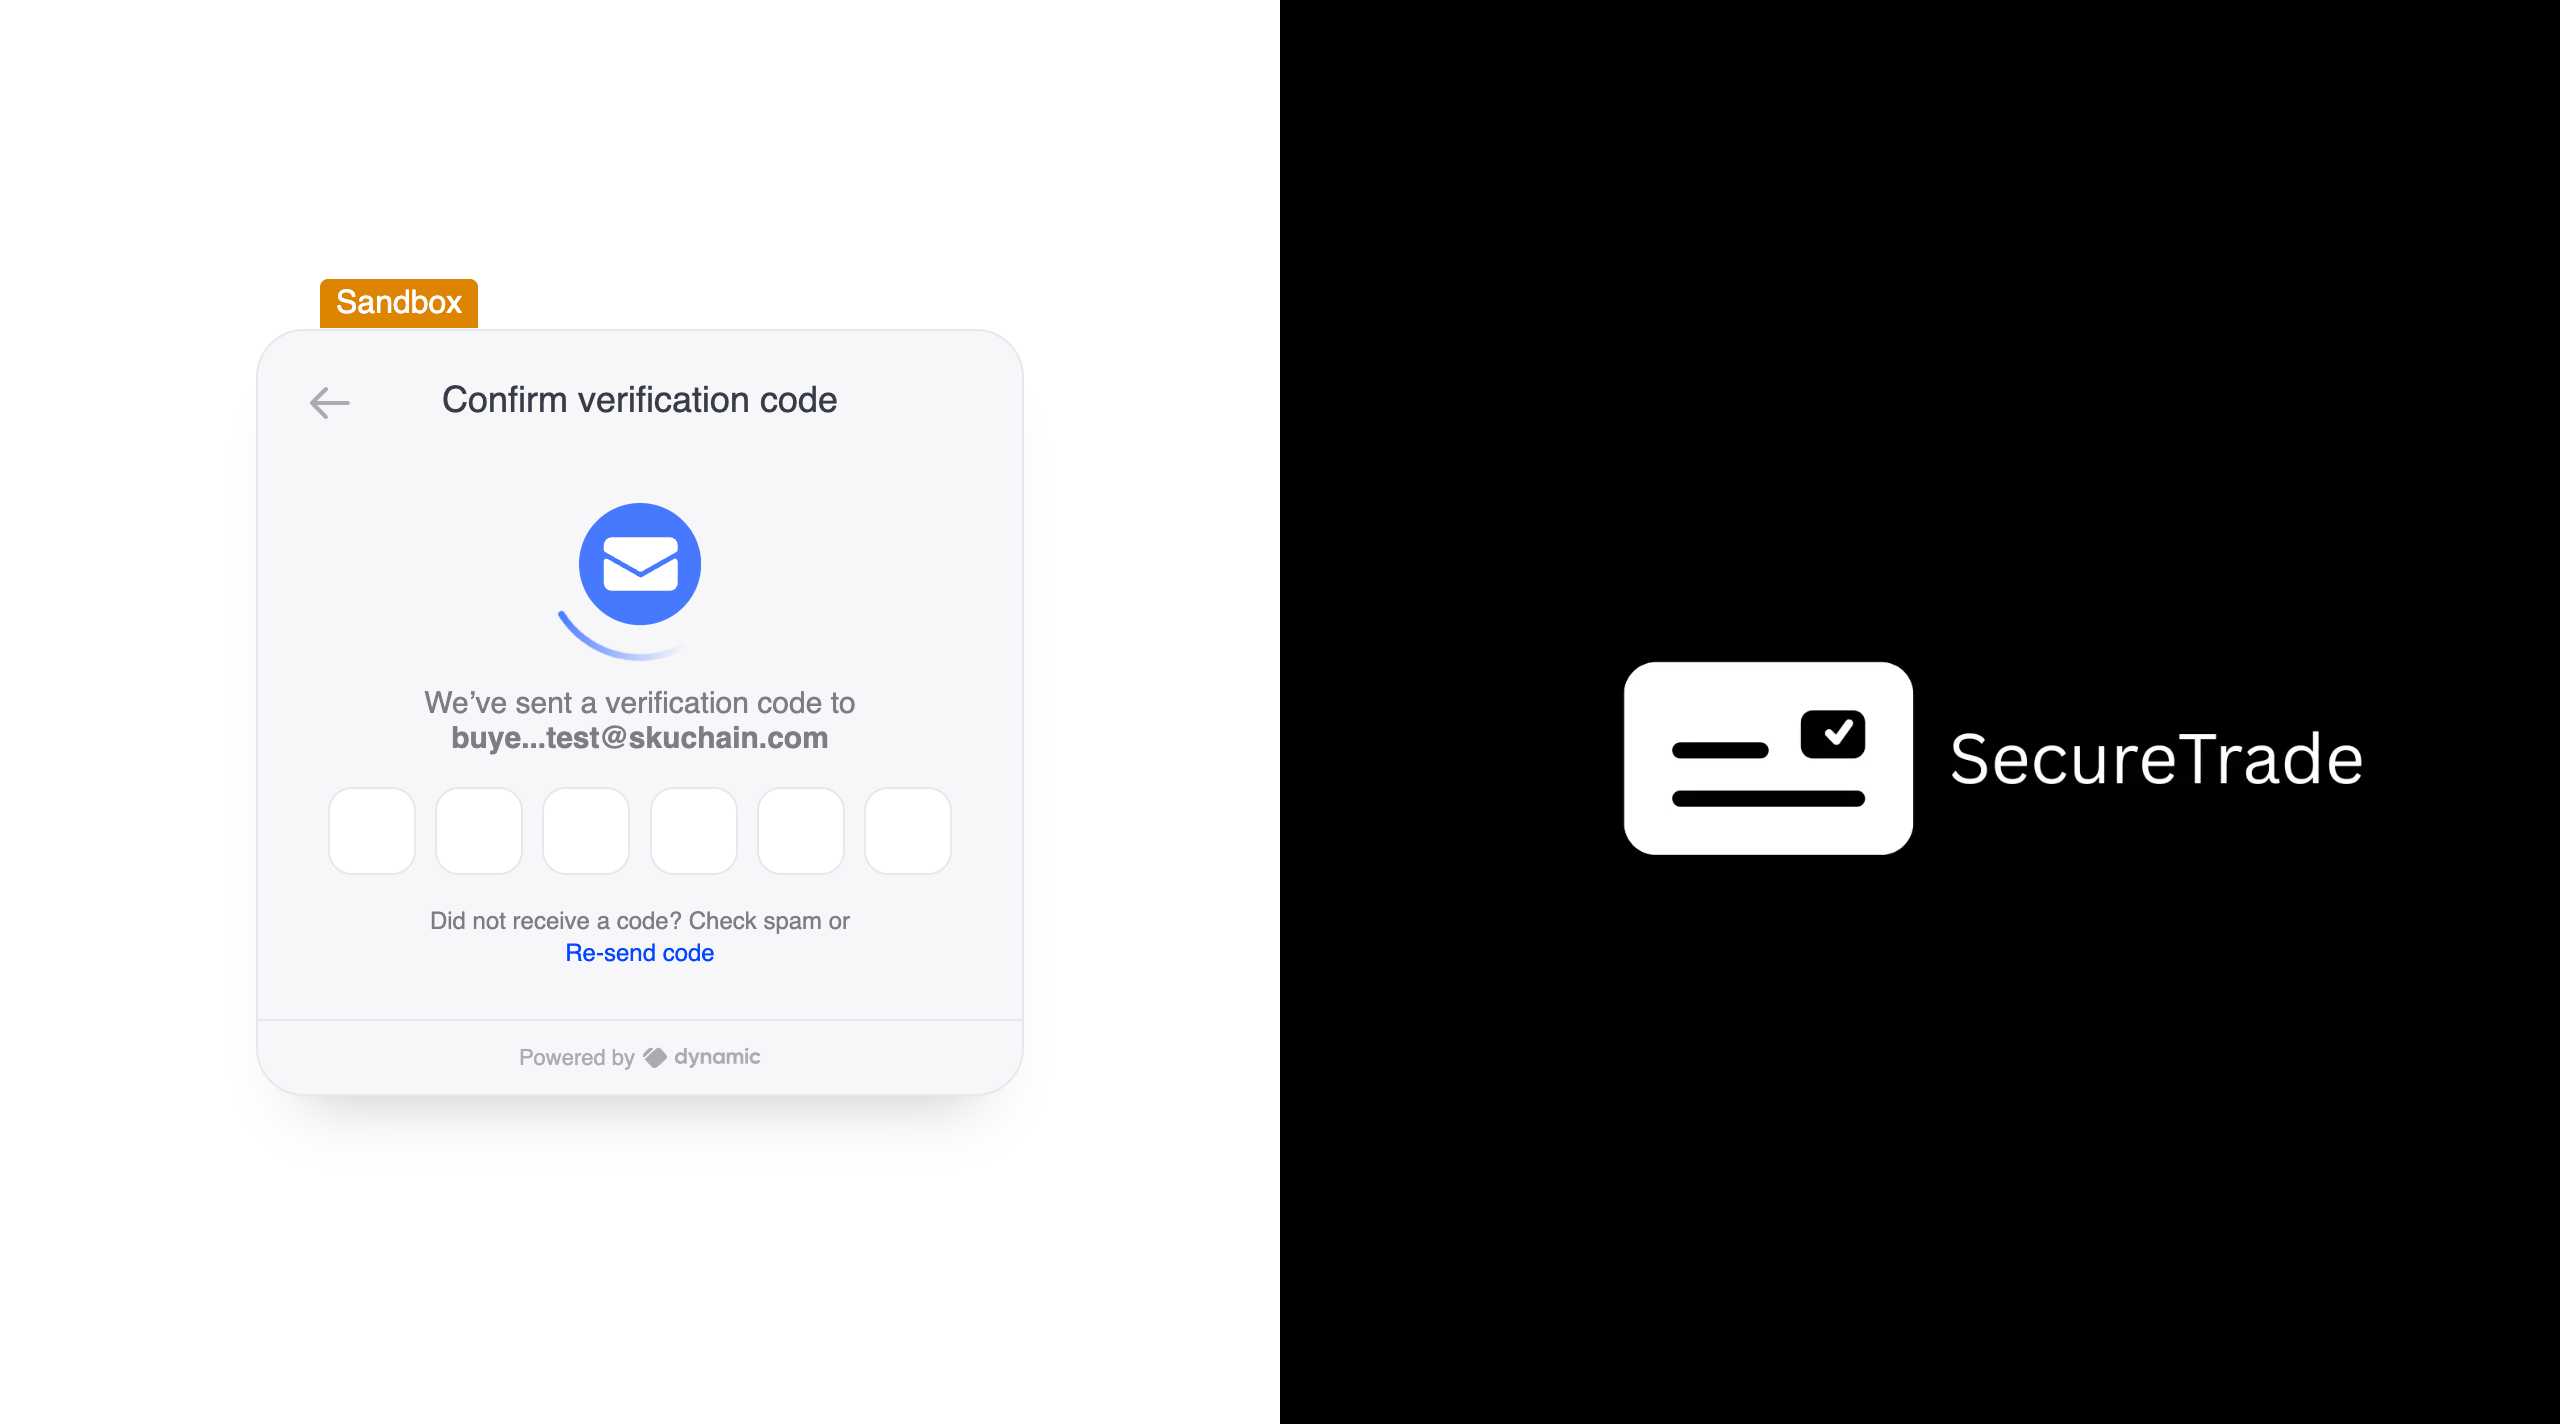
1.3 Automated Infrastructure Provisioning
Upon successful authentication, the "Onboarding" process triggers. This critical phase takes approximately 3 minutes and handles complex background operations:
- Deployment of user-specific smart contracts.
- Generation of the Private SAFE (for private network operations).
- Generation of the Public Safe (for Optimism network operations).
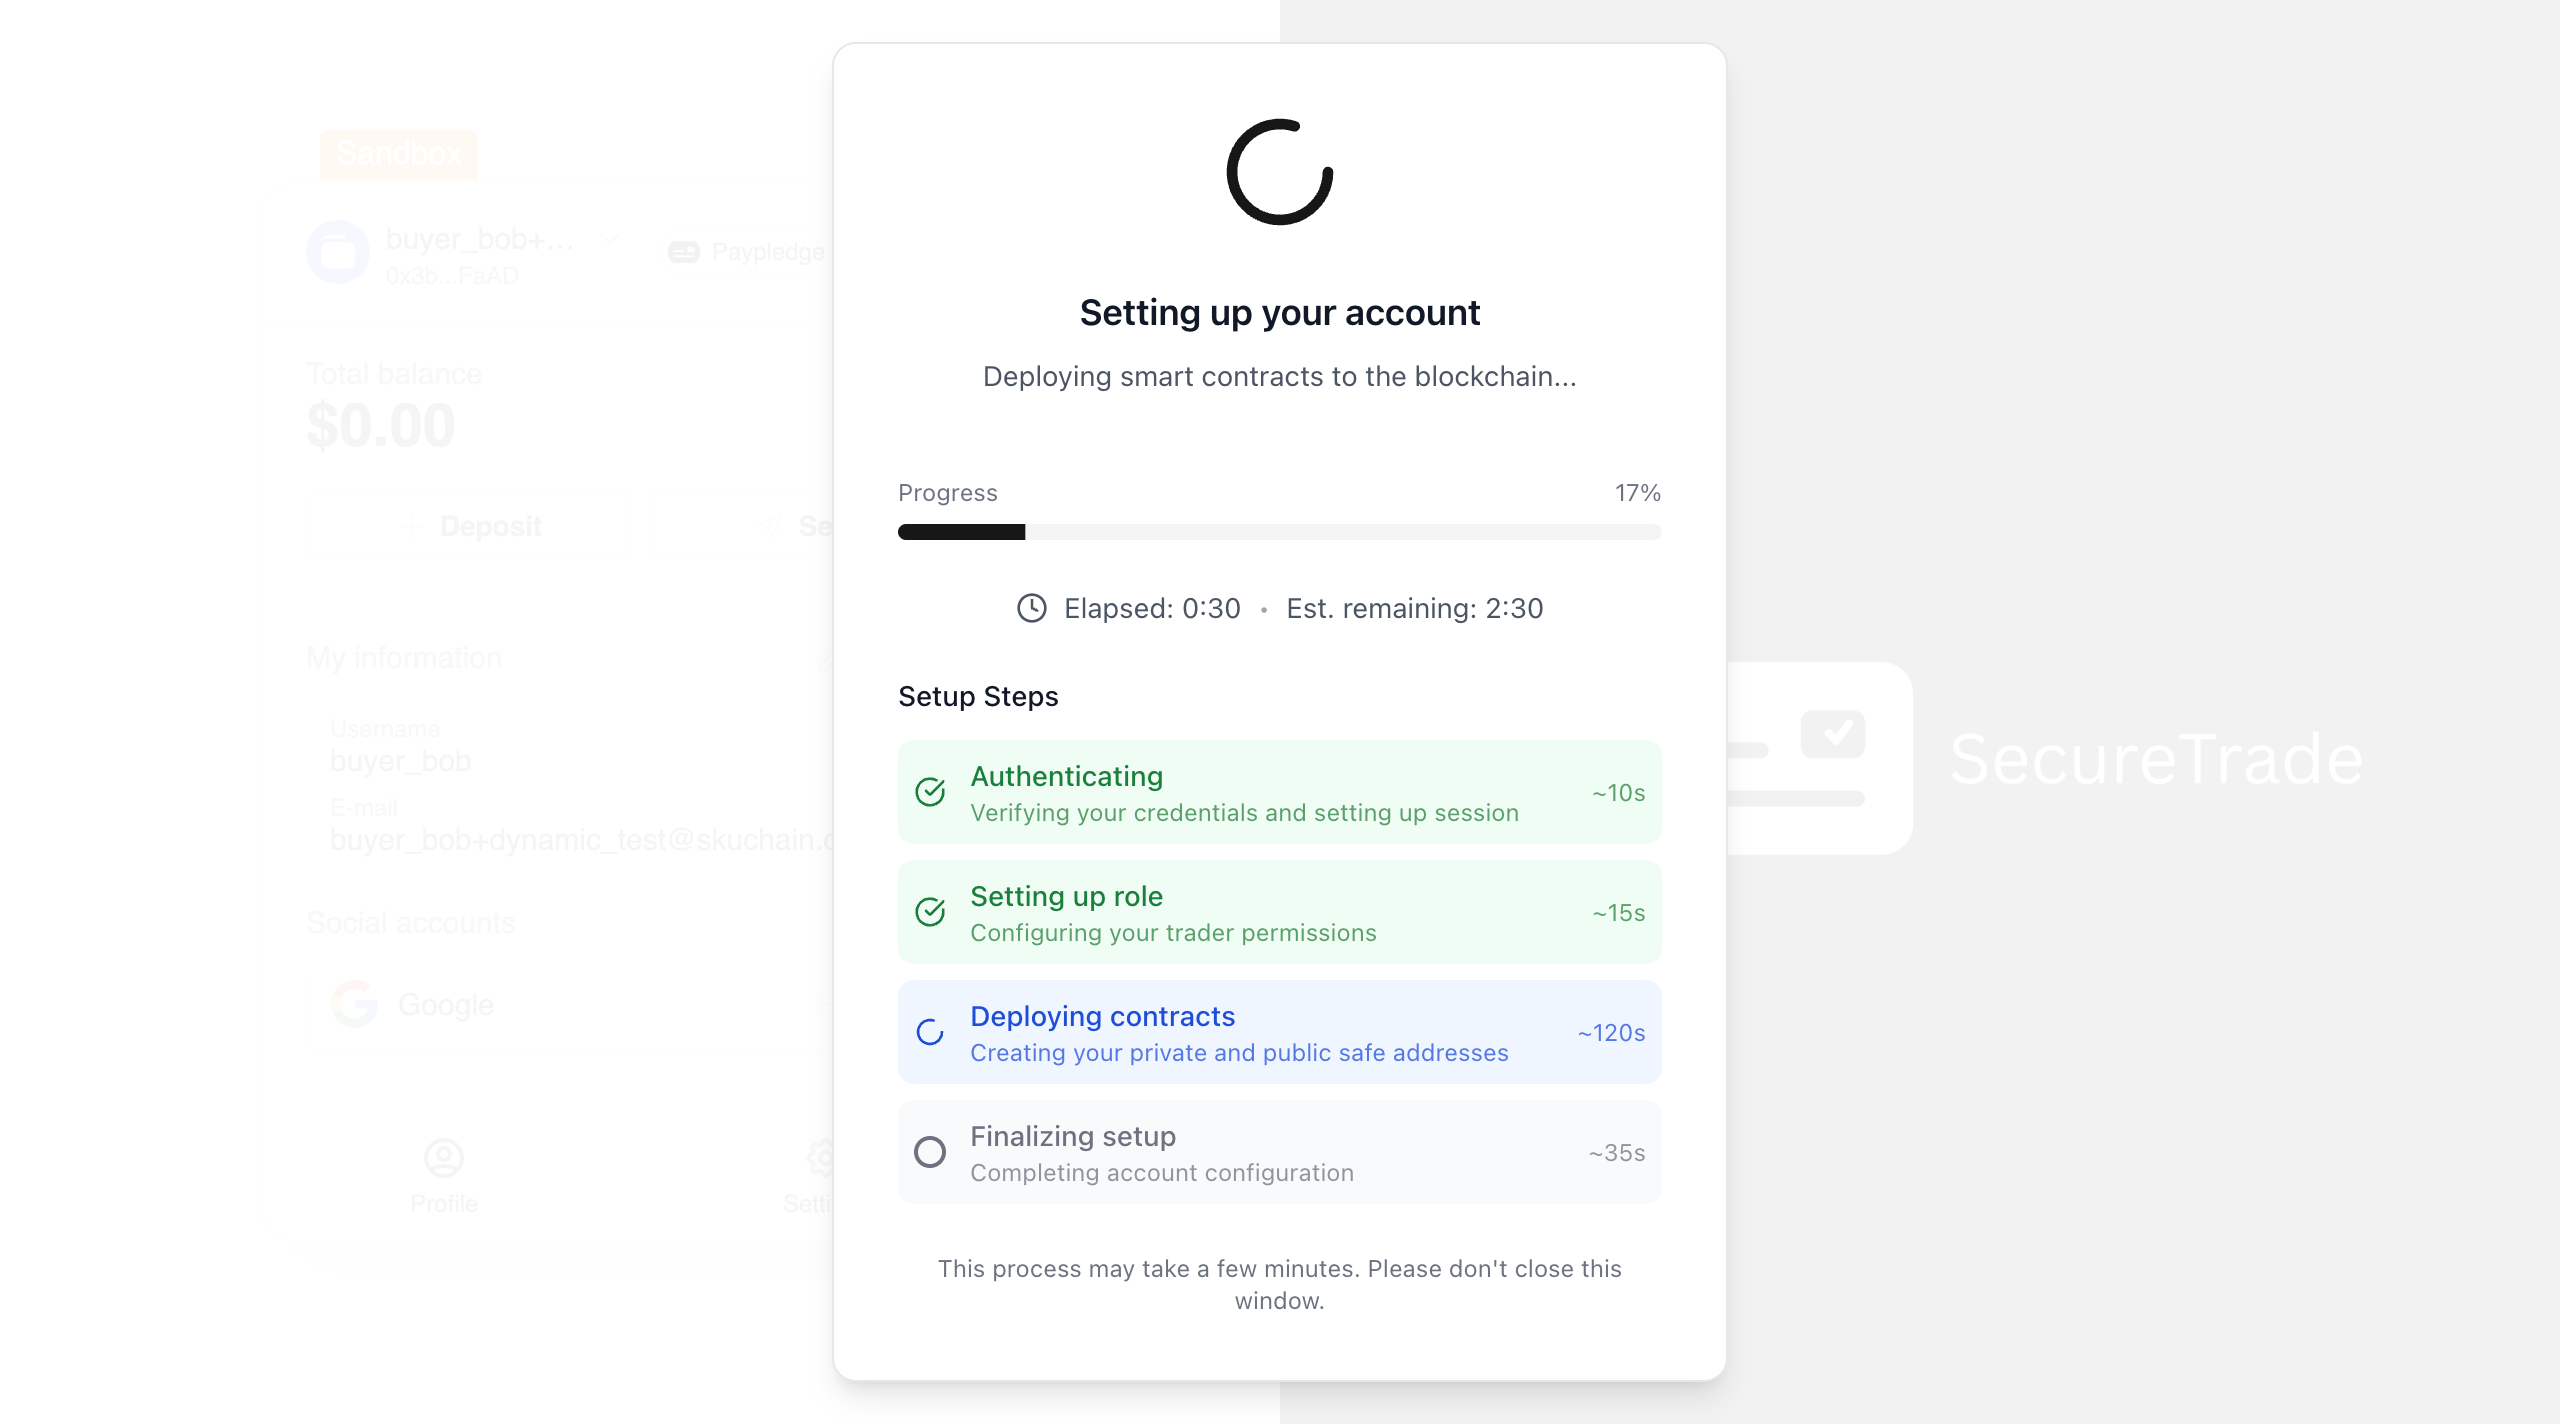
1.4 The Trader Dashboard
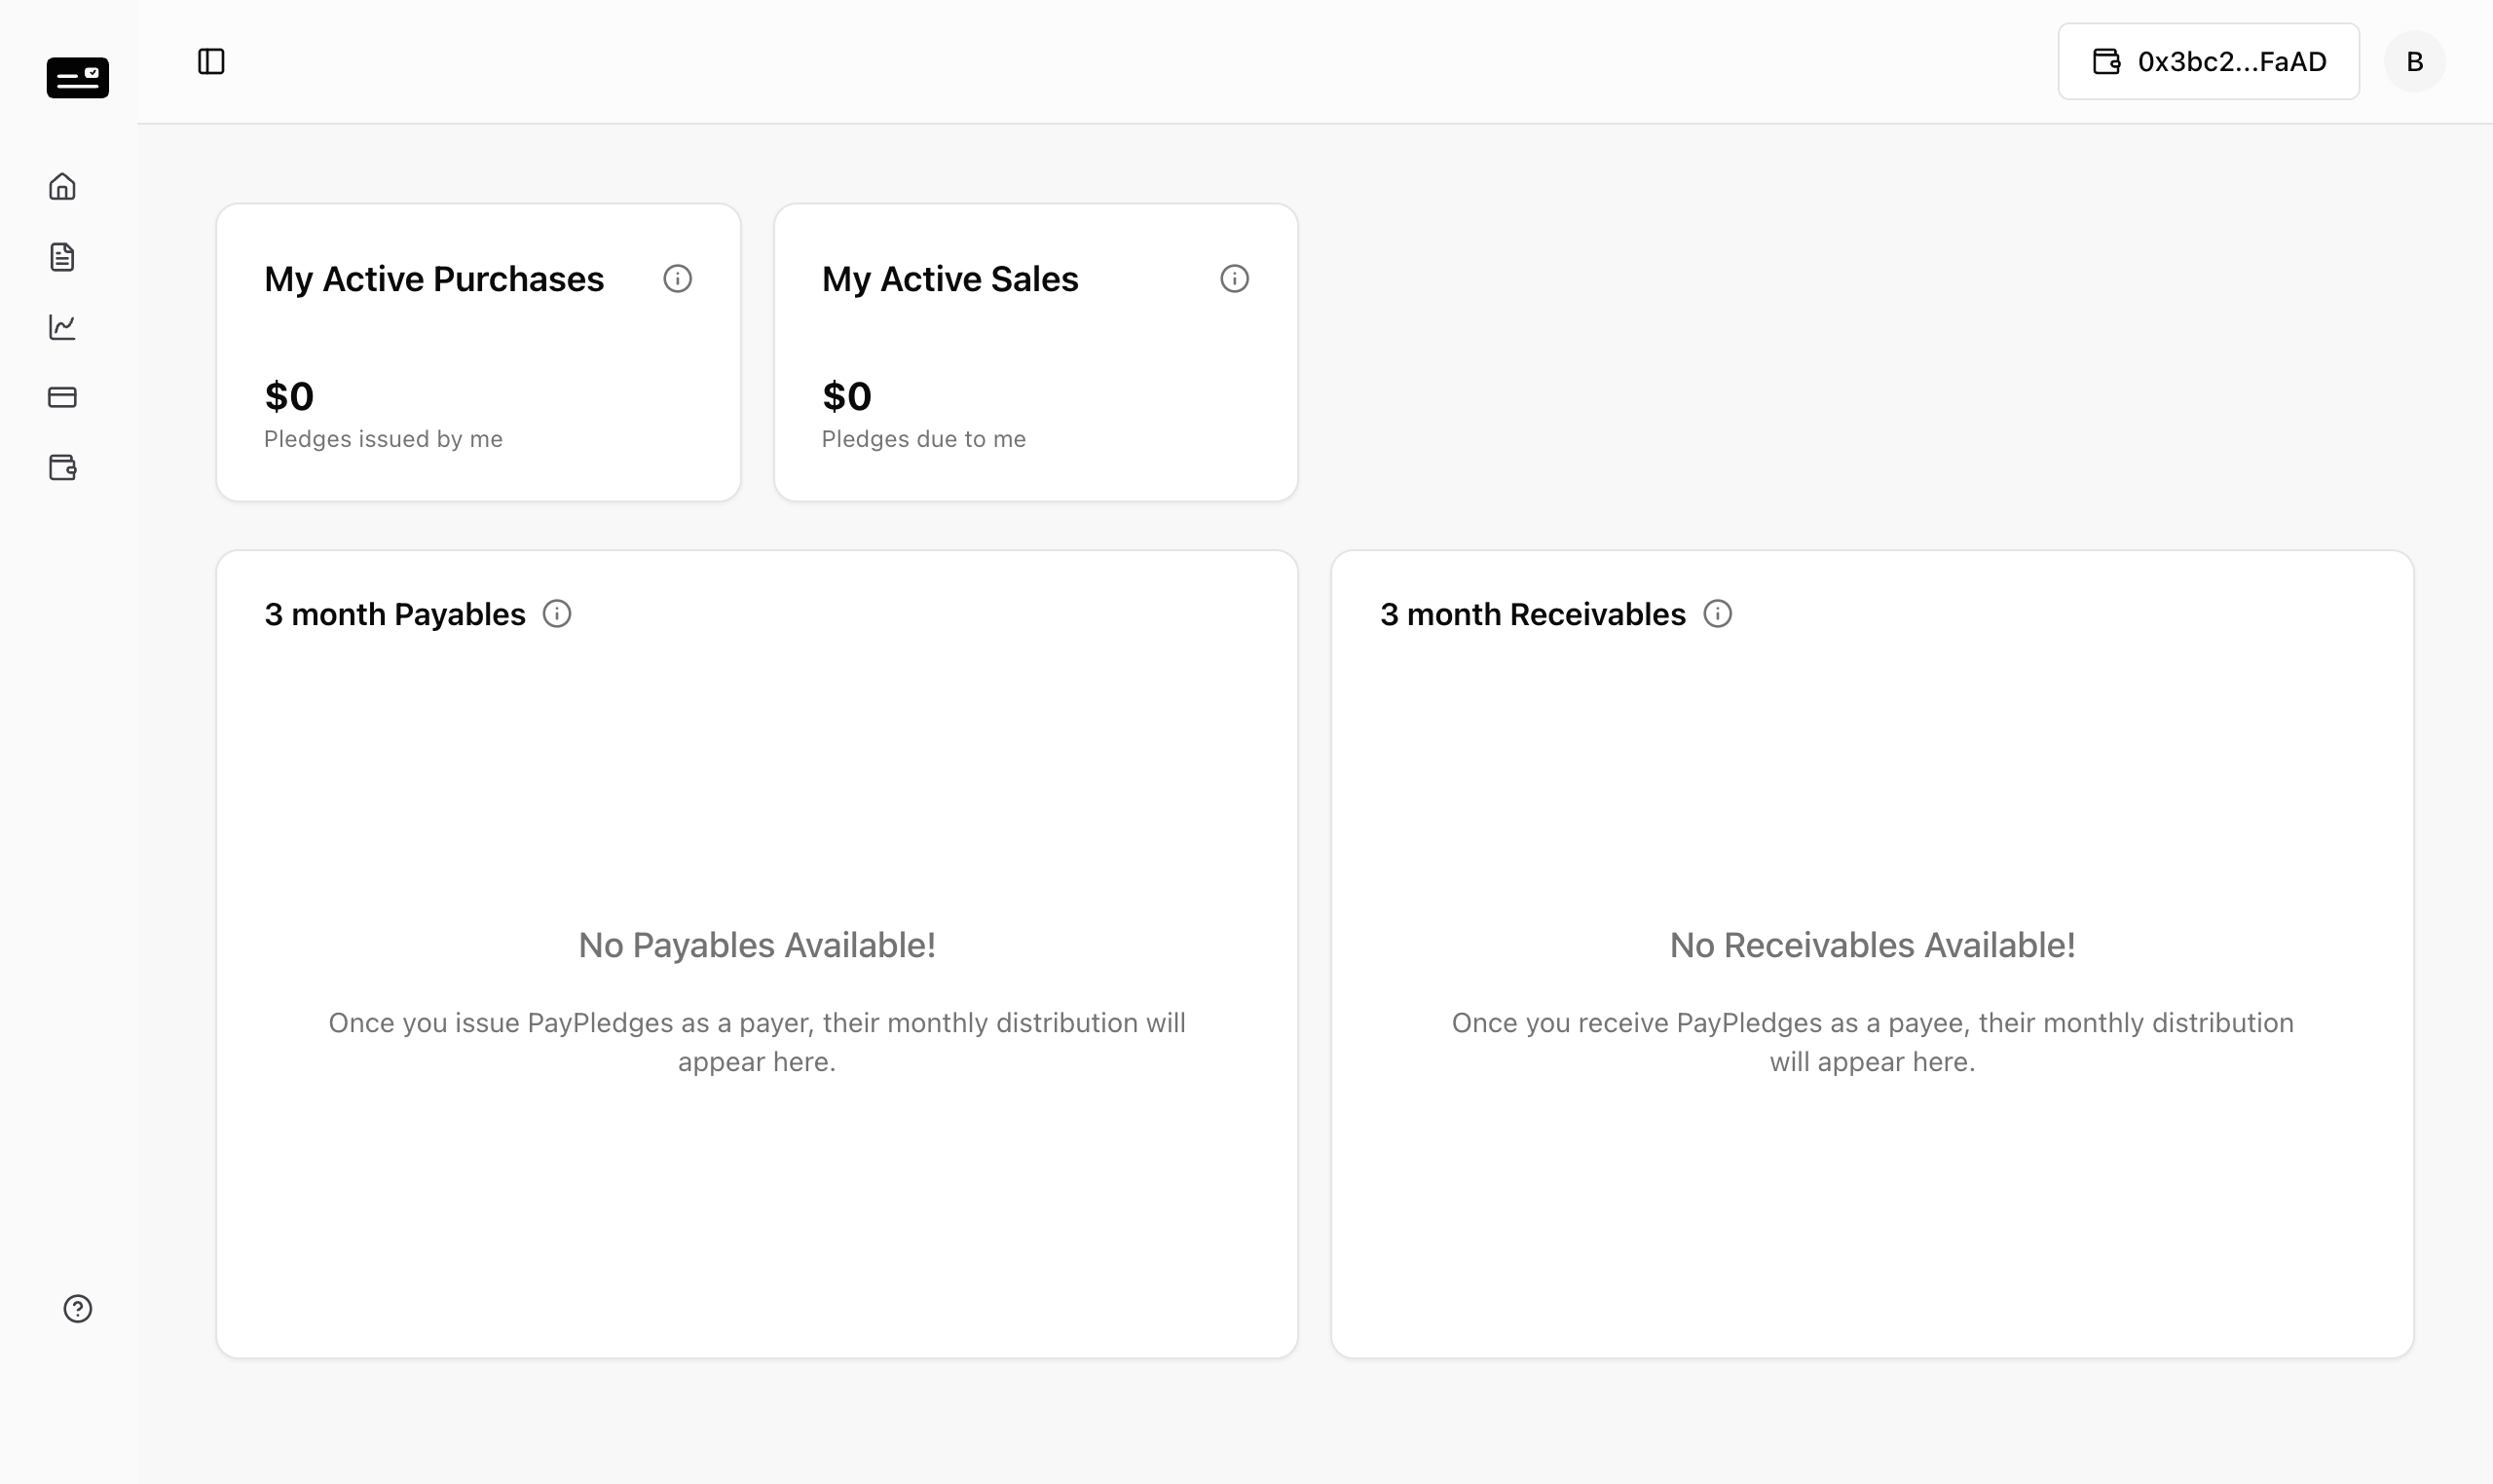
Once onboarded, the Buyer is directed to the main Dashboard. This command center provides a real-time overview of their financial standing.
Key Elements to Observe:
- Active Purchases & Sales: Summary of ongoing trades.
- Payables & Receivables: Financial obligations and expected incoming funds.
Phase 2: Credit Facility Establishment
Actors: Buyer, Underwriter, Admin
Before trading, the Buyer establishes a credit line to facilitate PayPledge issuance.
2.1 Initiating a Credit Request (Buyer)
The Buyer navigates to the Credit Requests module to seek financing.
Step 1: Navigate to the Credit Requests list page. 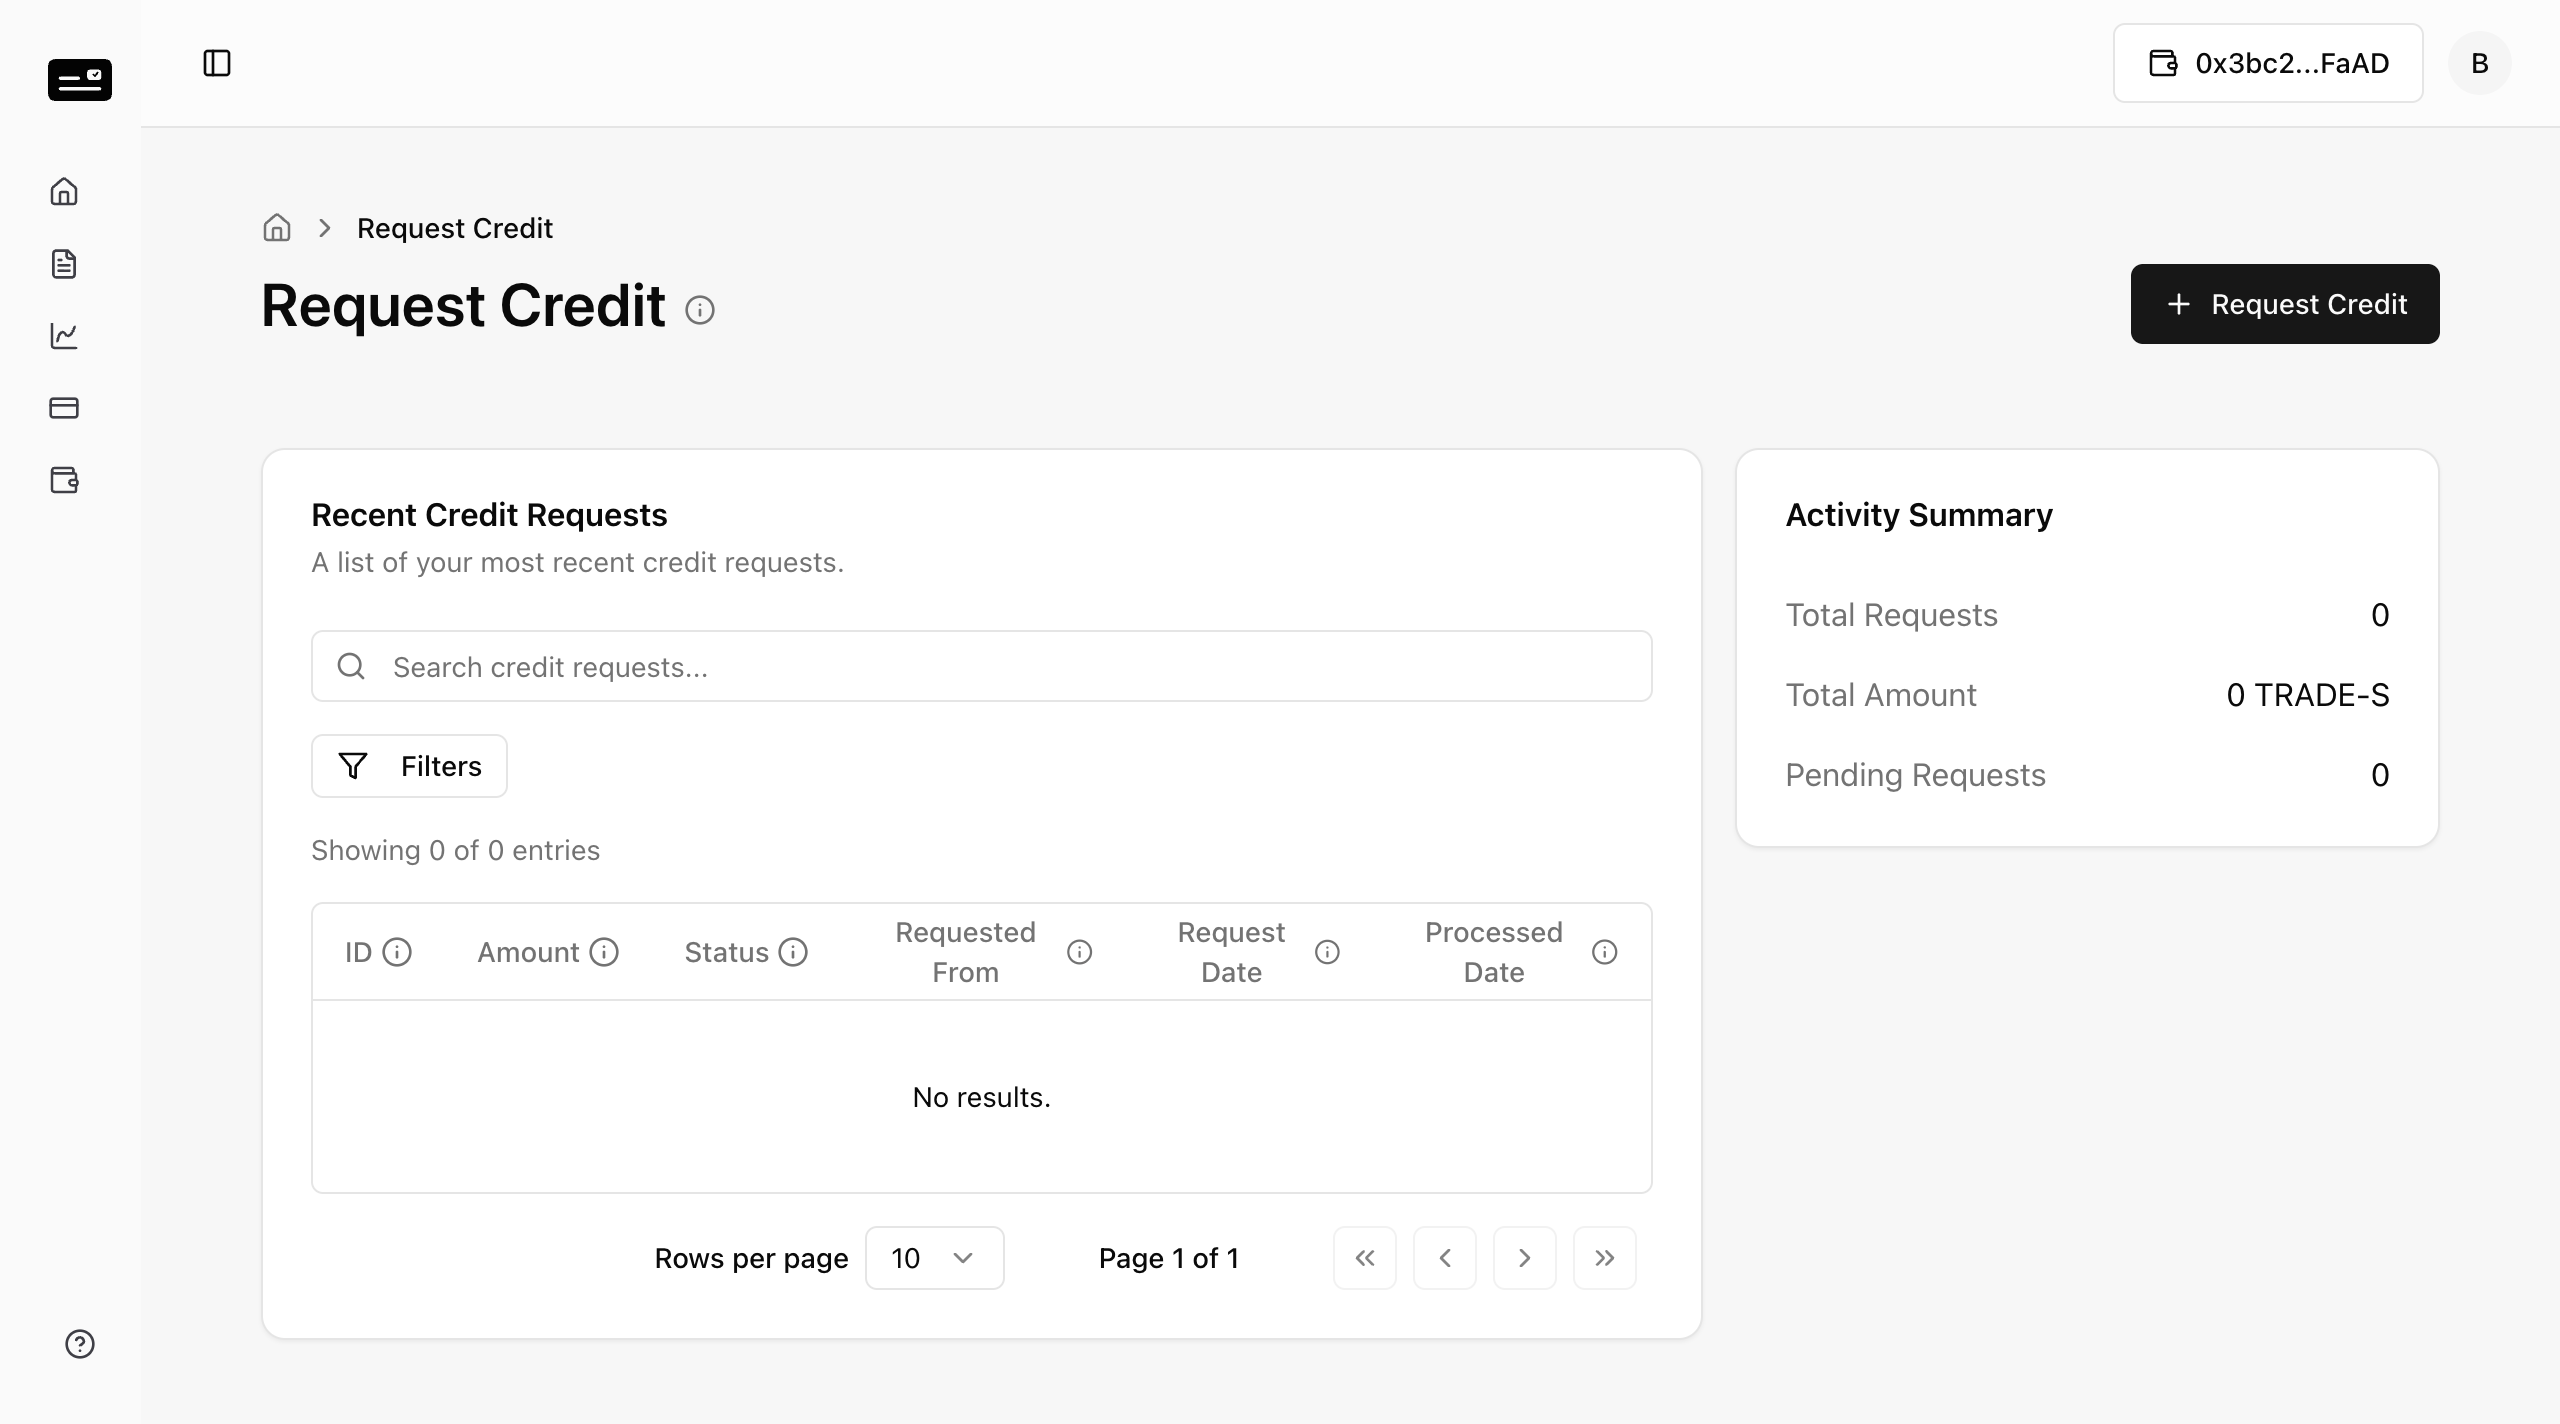
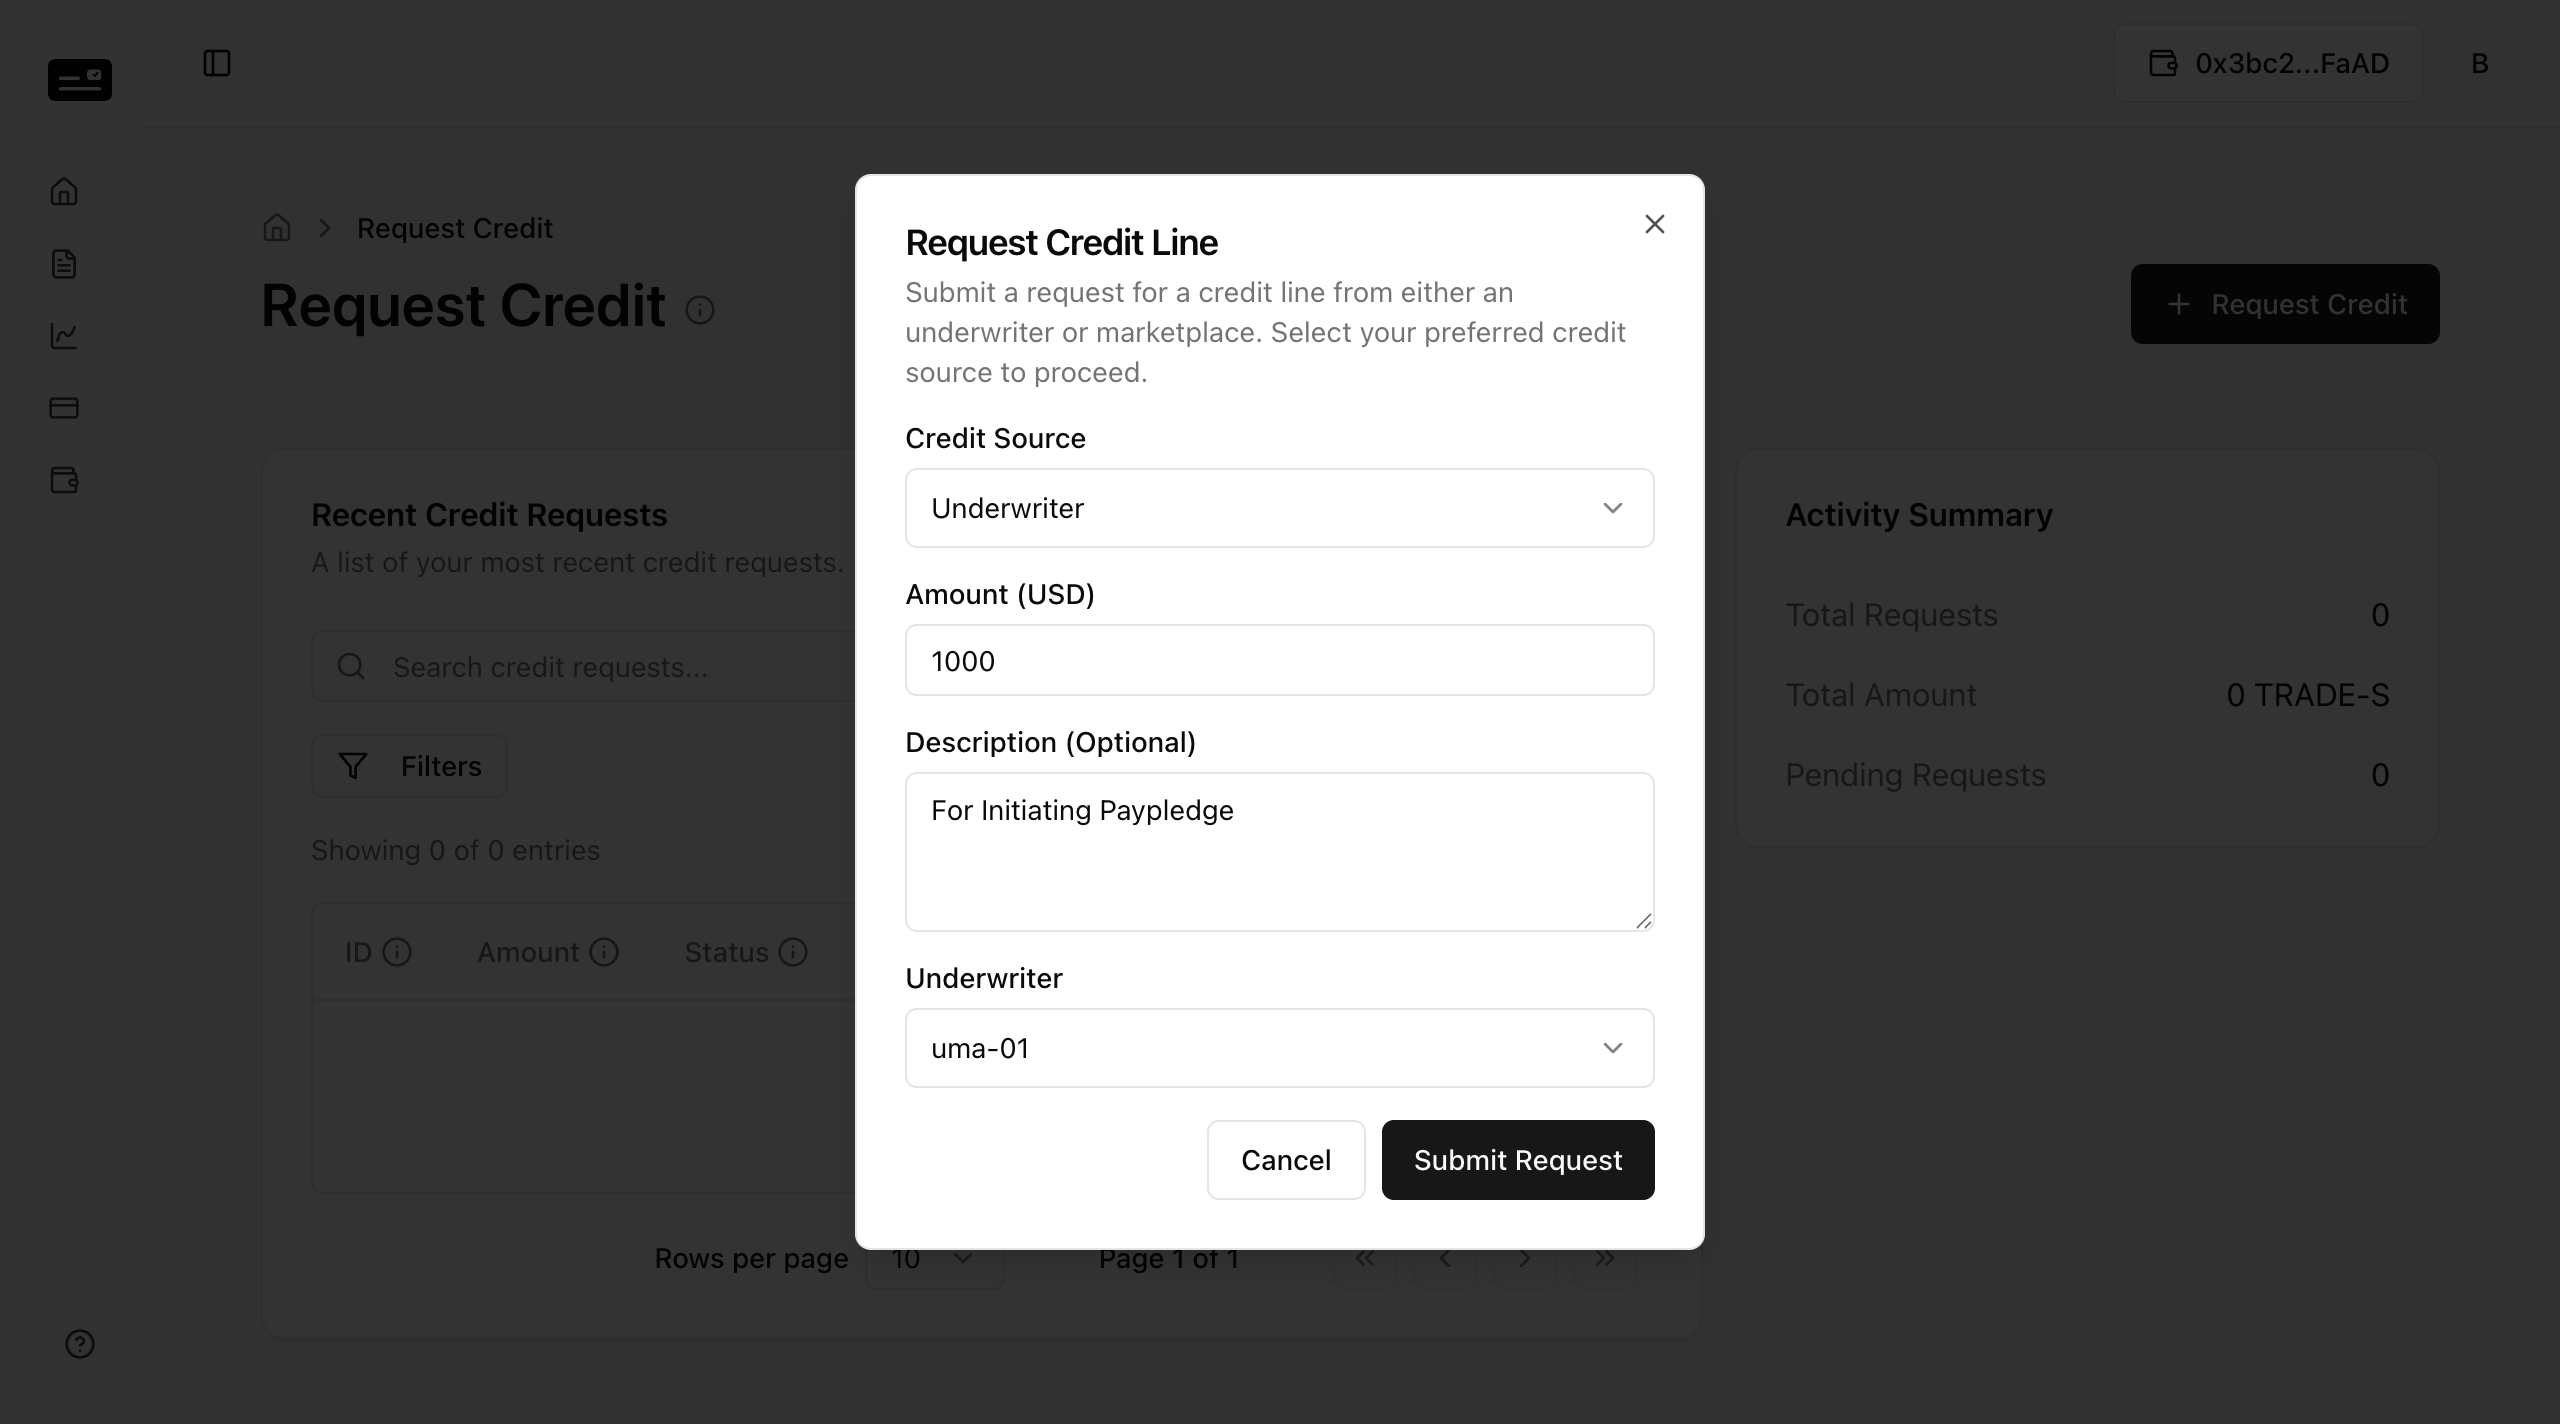
Step 2: Click "Request Credit" to open the application modal. Step 3: The Buyer selects the Credit Source (e.g., specific Underwriter or Marketplace), enters the requested Amount, and provides a Description. Step 4: Submit the request.
2.2 Underwriter Onboarding & Funding (Underwriter)
Note: The Underwriter undergoes the same rigorous onboarding process as the Buyer (Steps 1.2 - 1.3).
Upon accessing their Dashboard, the Underwriter first ensures they have sufficient liquidity (TRADE-S) to service credit lines.
Step 1: From the Dashboard, click "Request TRADE-S". Step 2: Fill in the description in the modal and submit the request to the Admin.
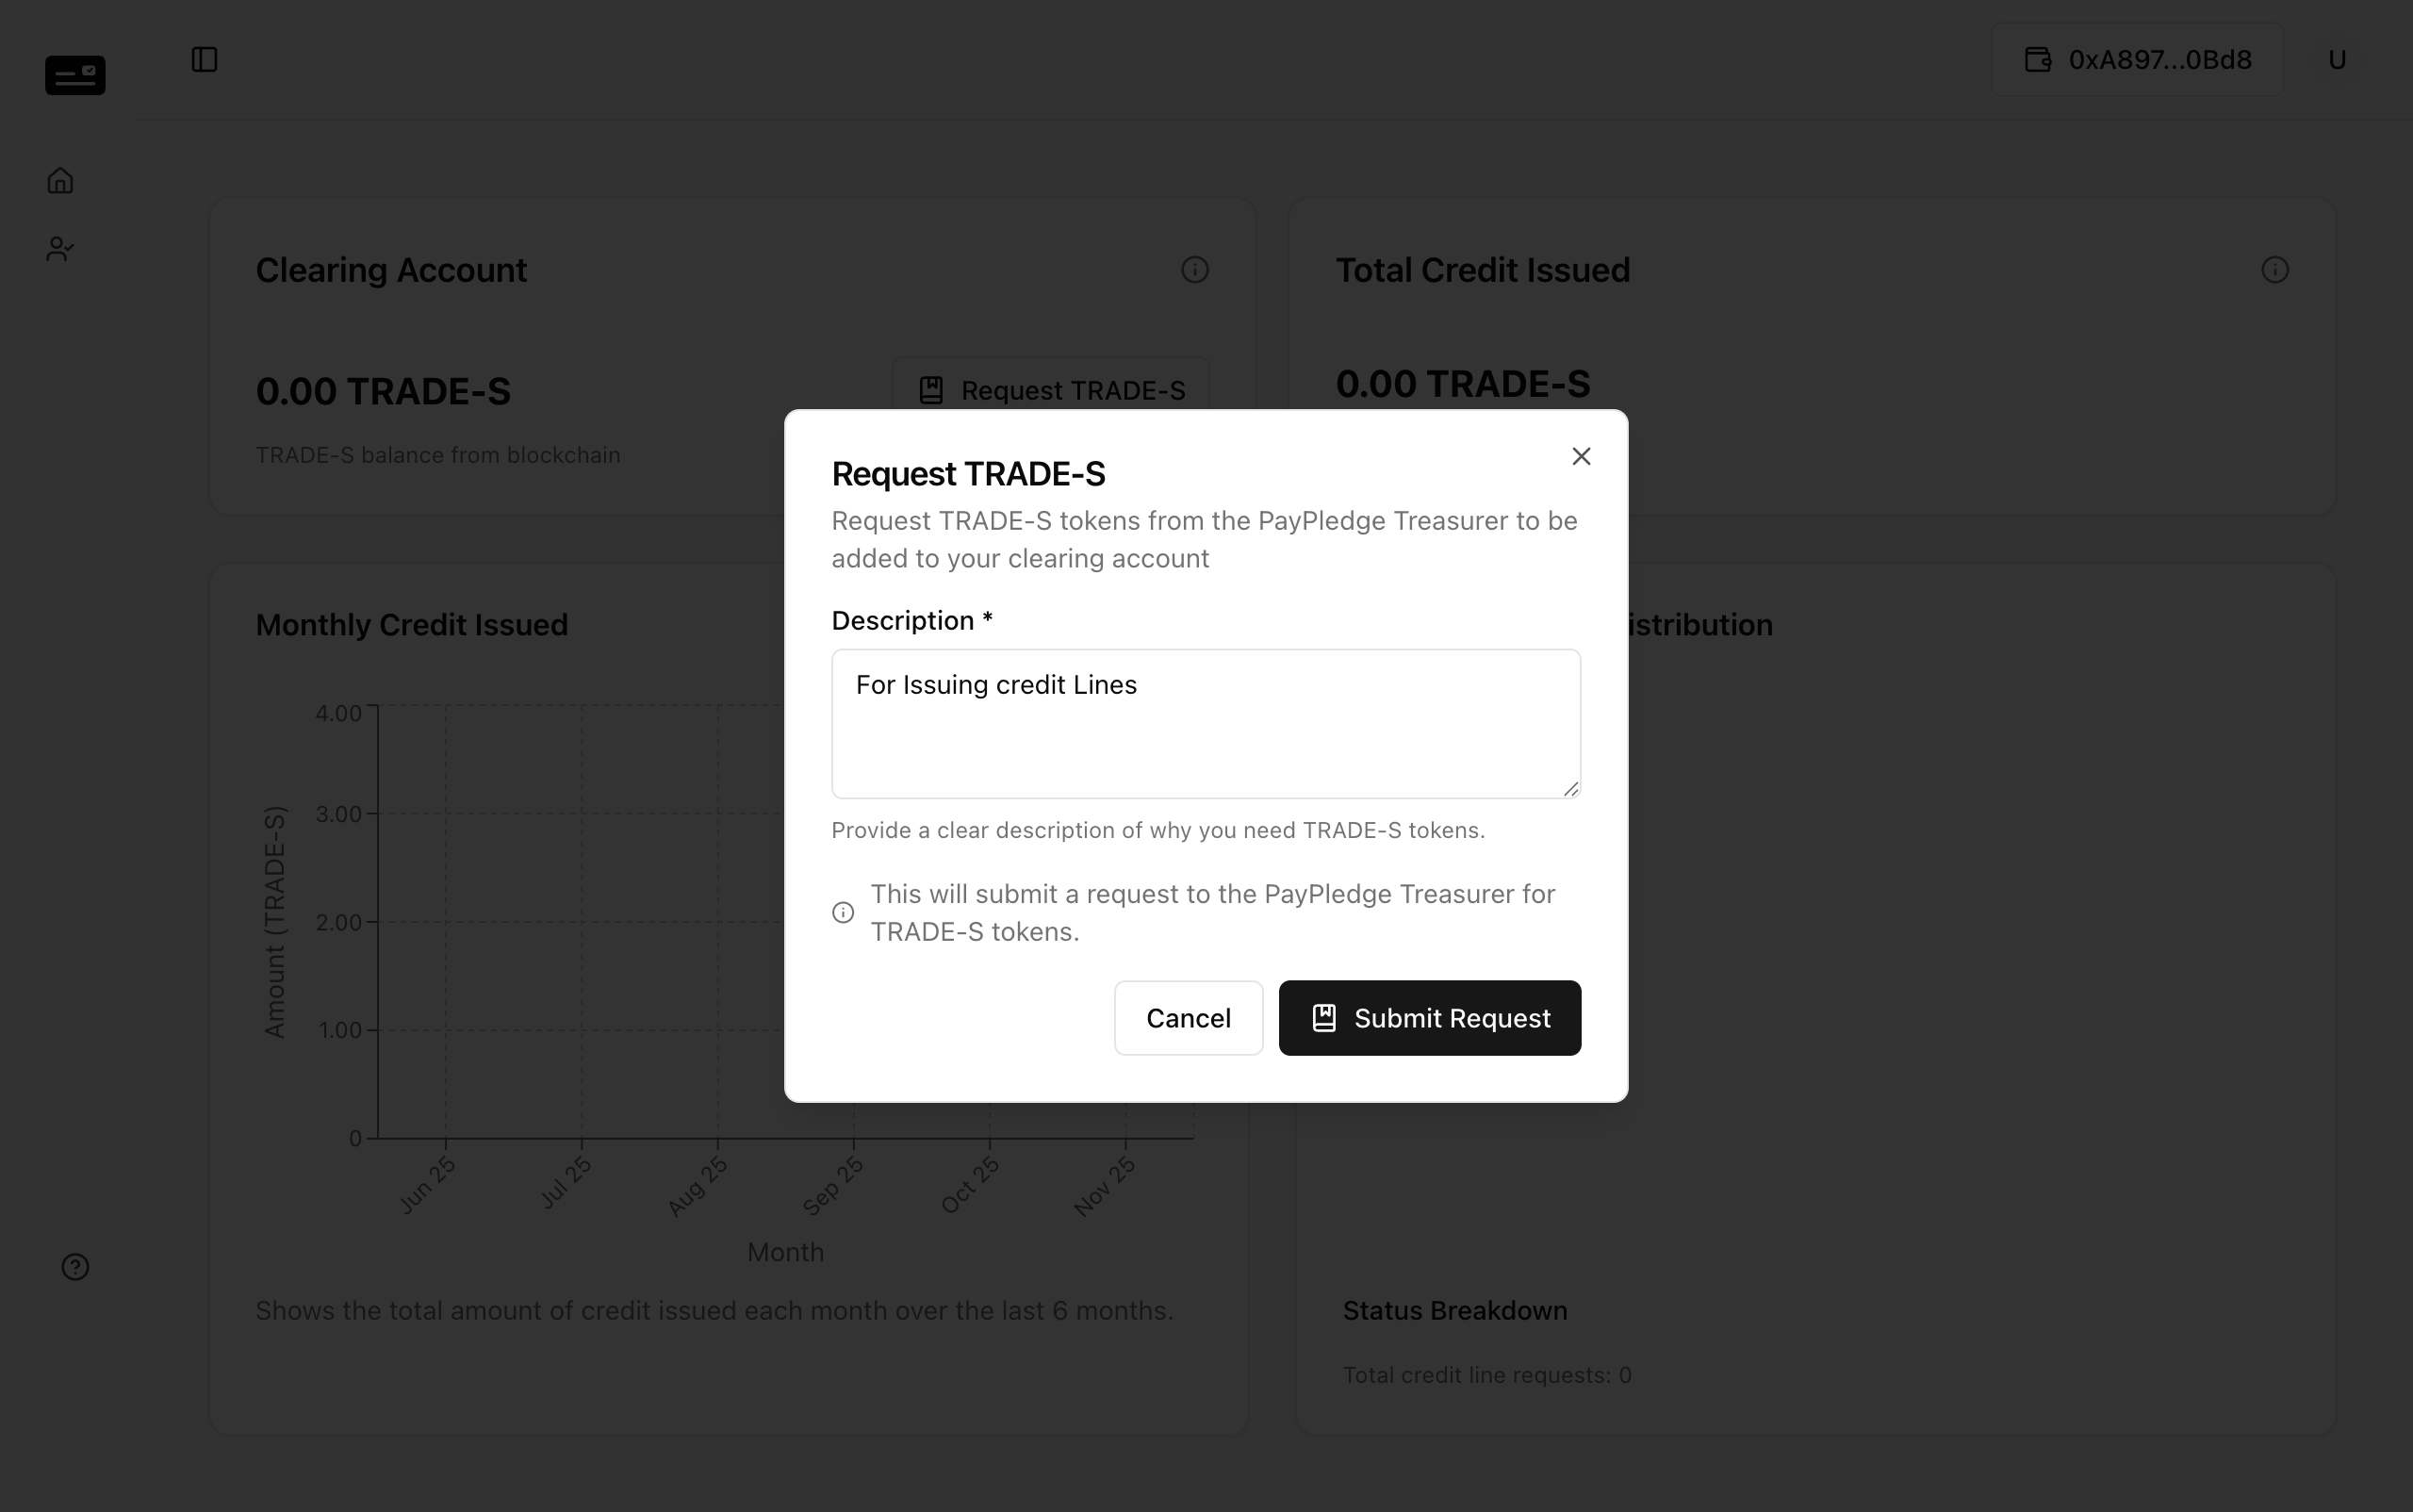
System Action: The Admin reviews and approves the request, dispensing TRADE-S to the Underwriter's wallet.
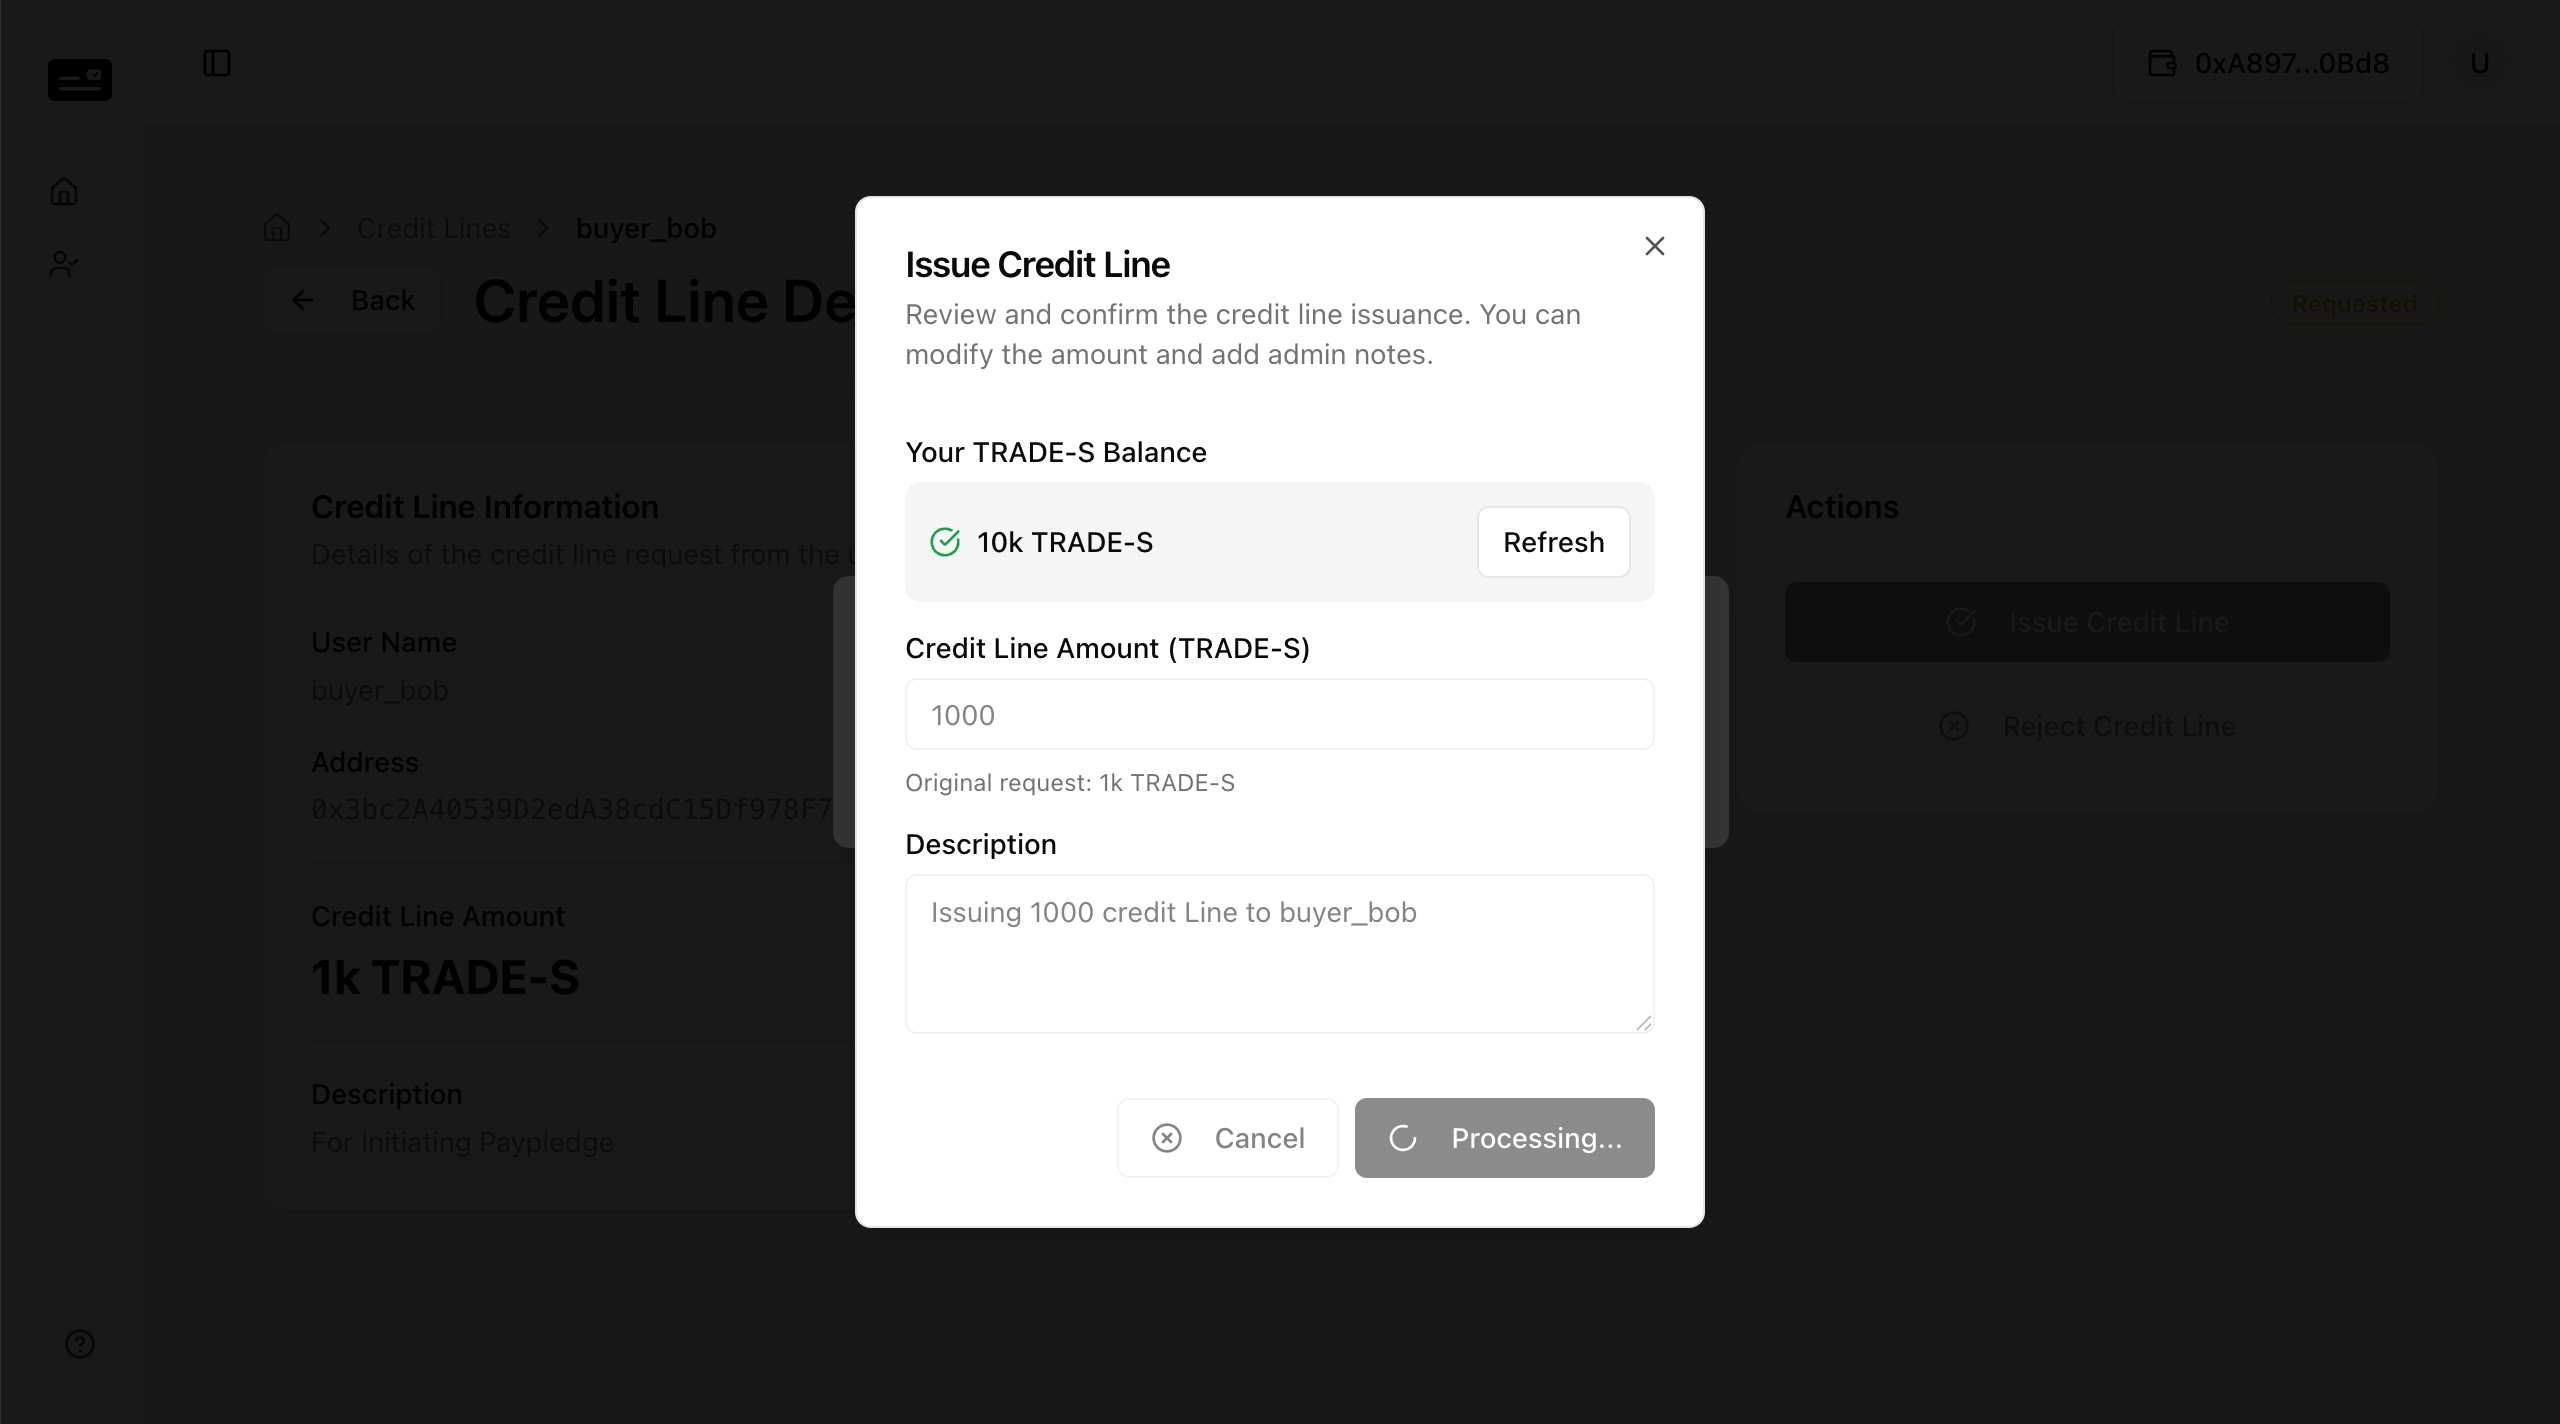
2.3 Issuing the Credit Line (Underwriter)
With funds available, the Underwriter processes the Buyer's request.
Step 1: Navigate to the Credit Lines page to view incoming requests. 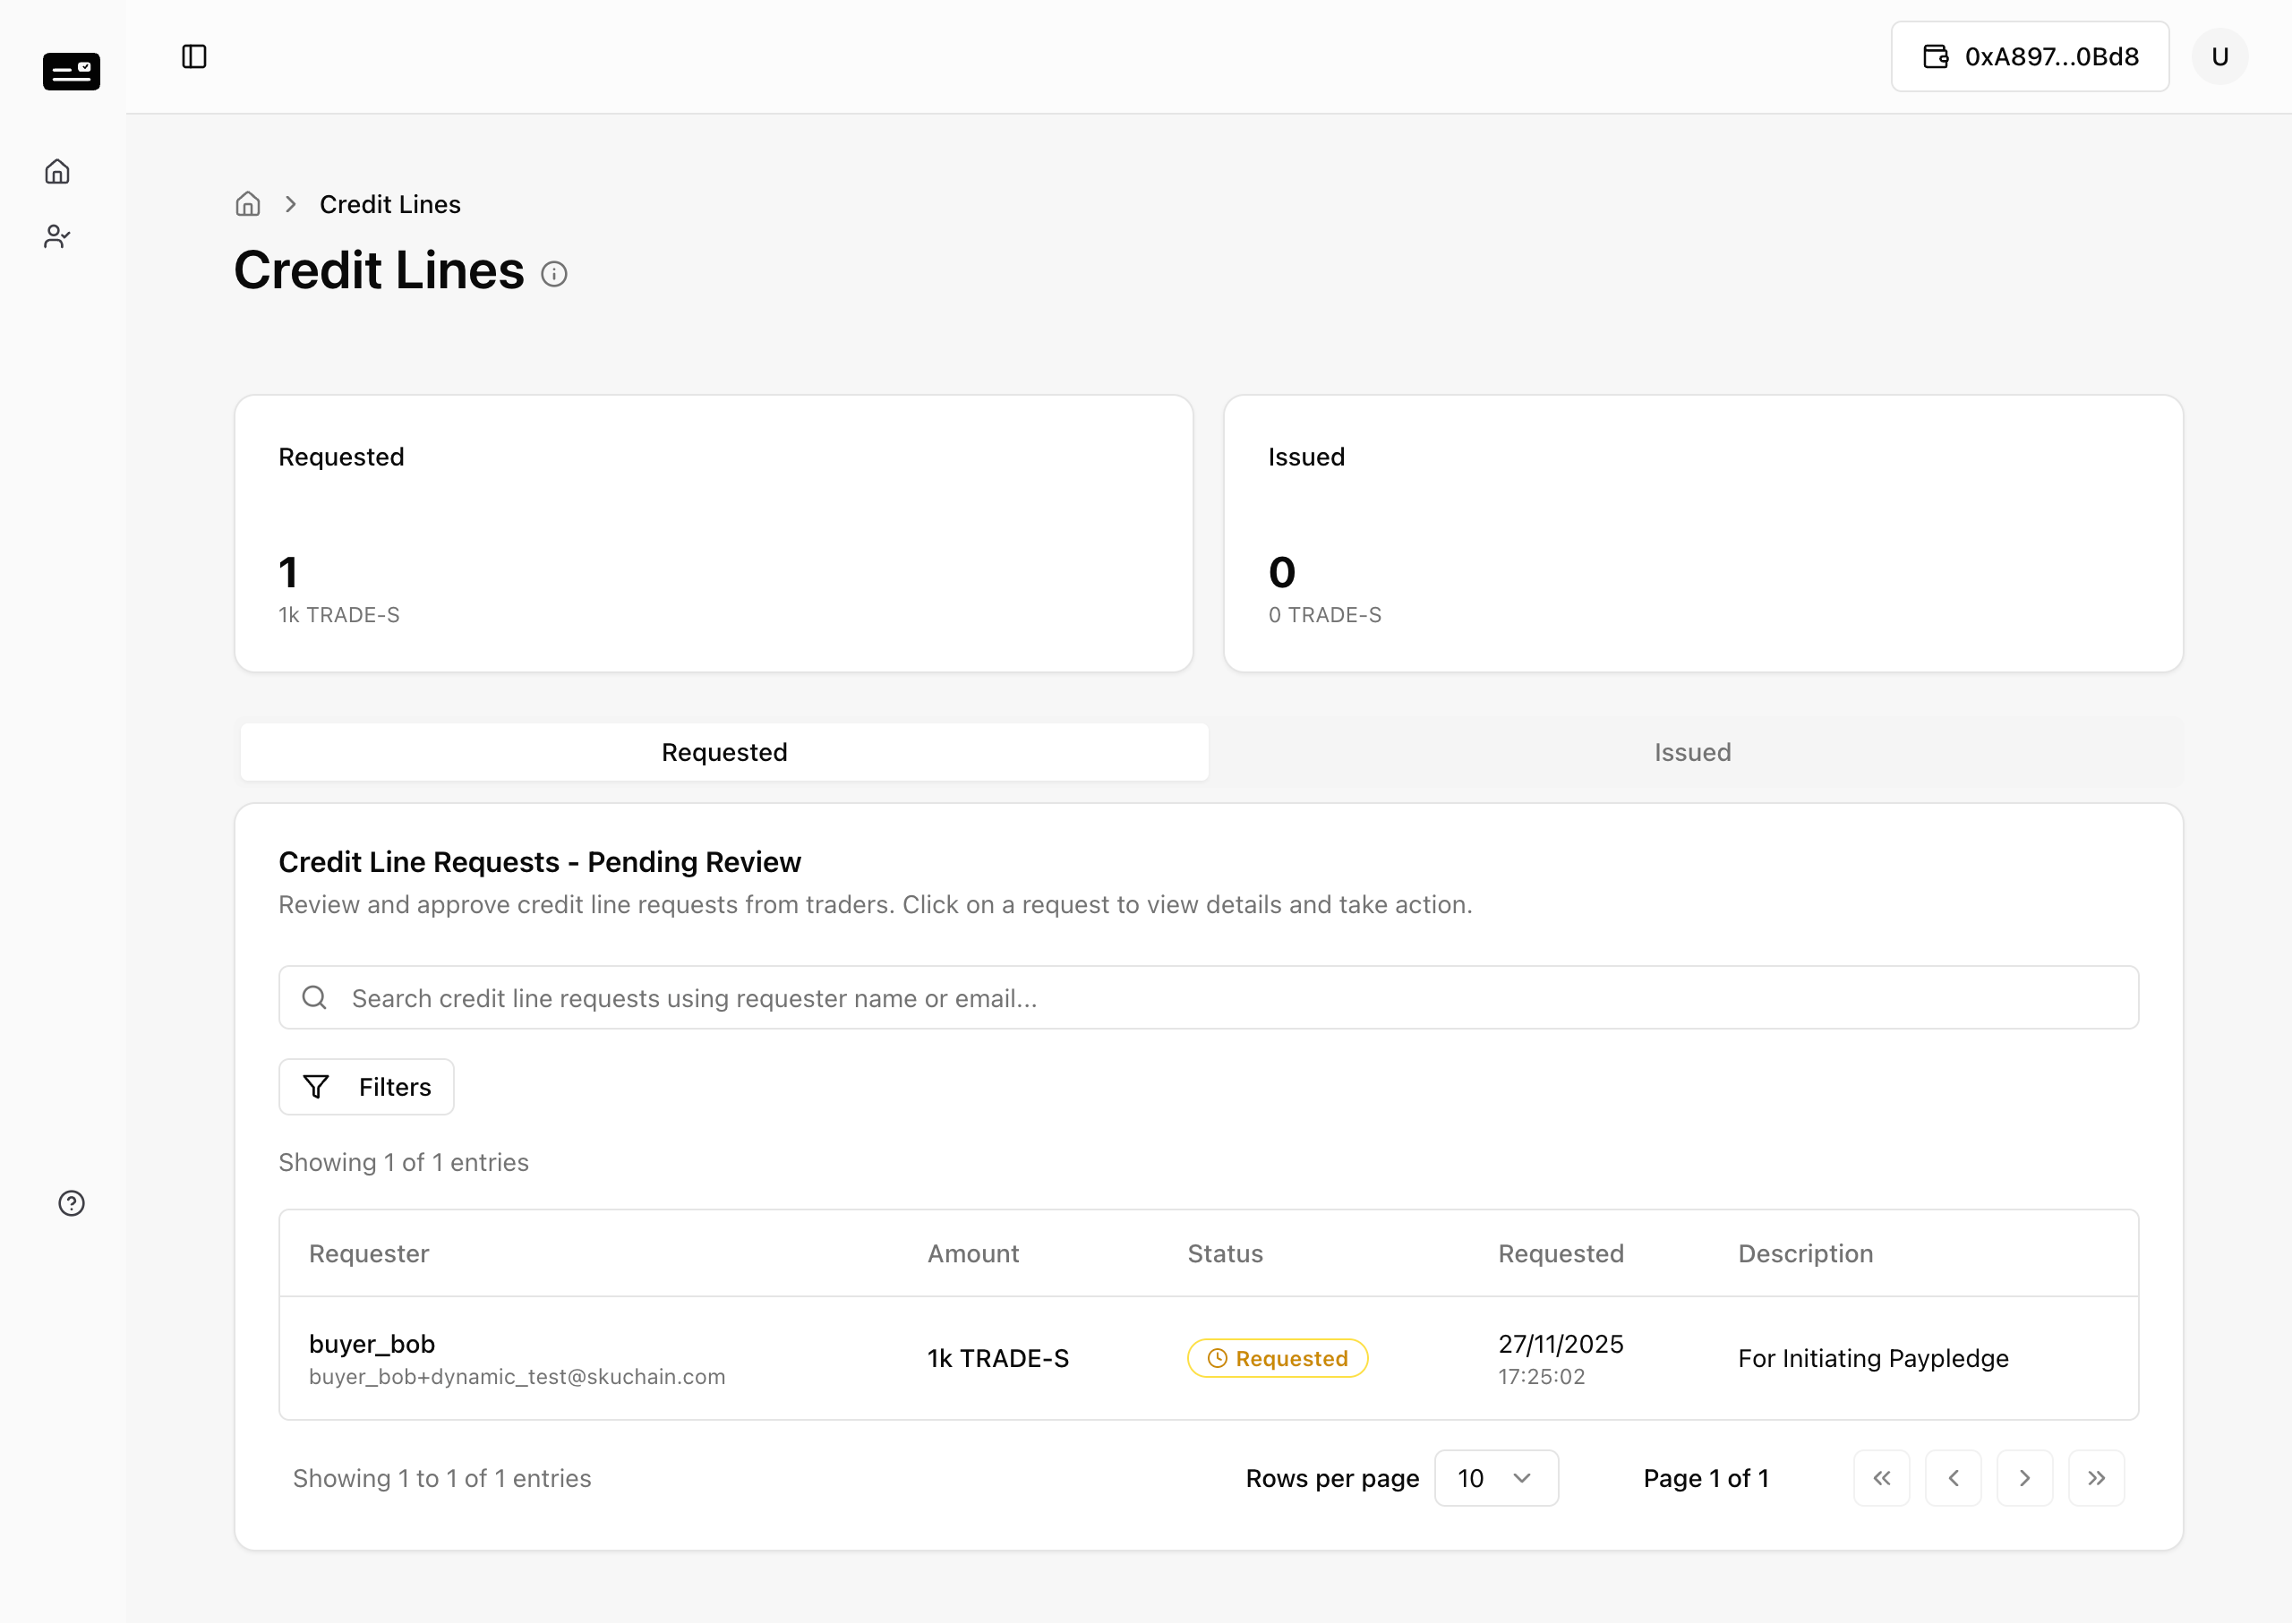
Step 2: Select the Buyer's request to review details. Step 3: The Underwriter issues the credit line. They have the discretion to approve the full amount or modify it before submitting.
2.4 Credit Verification (Buyer)
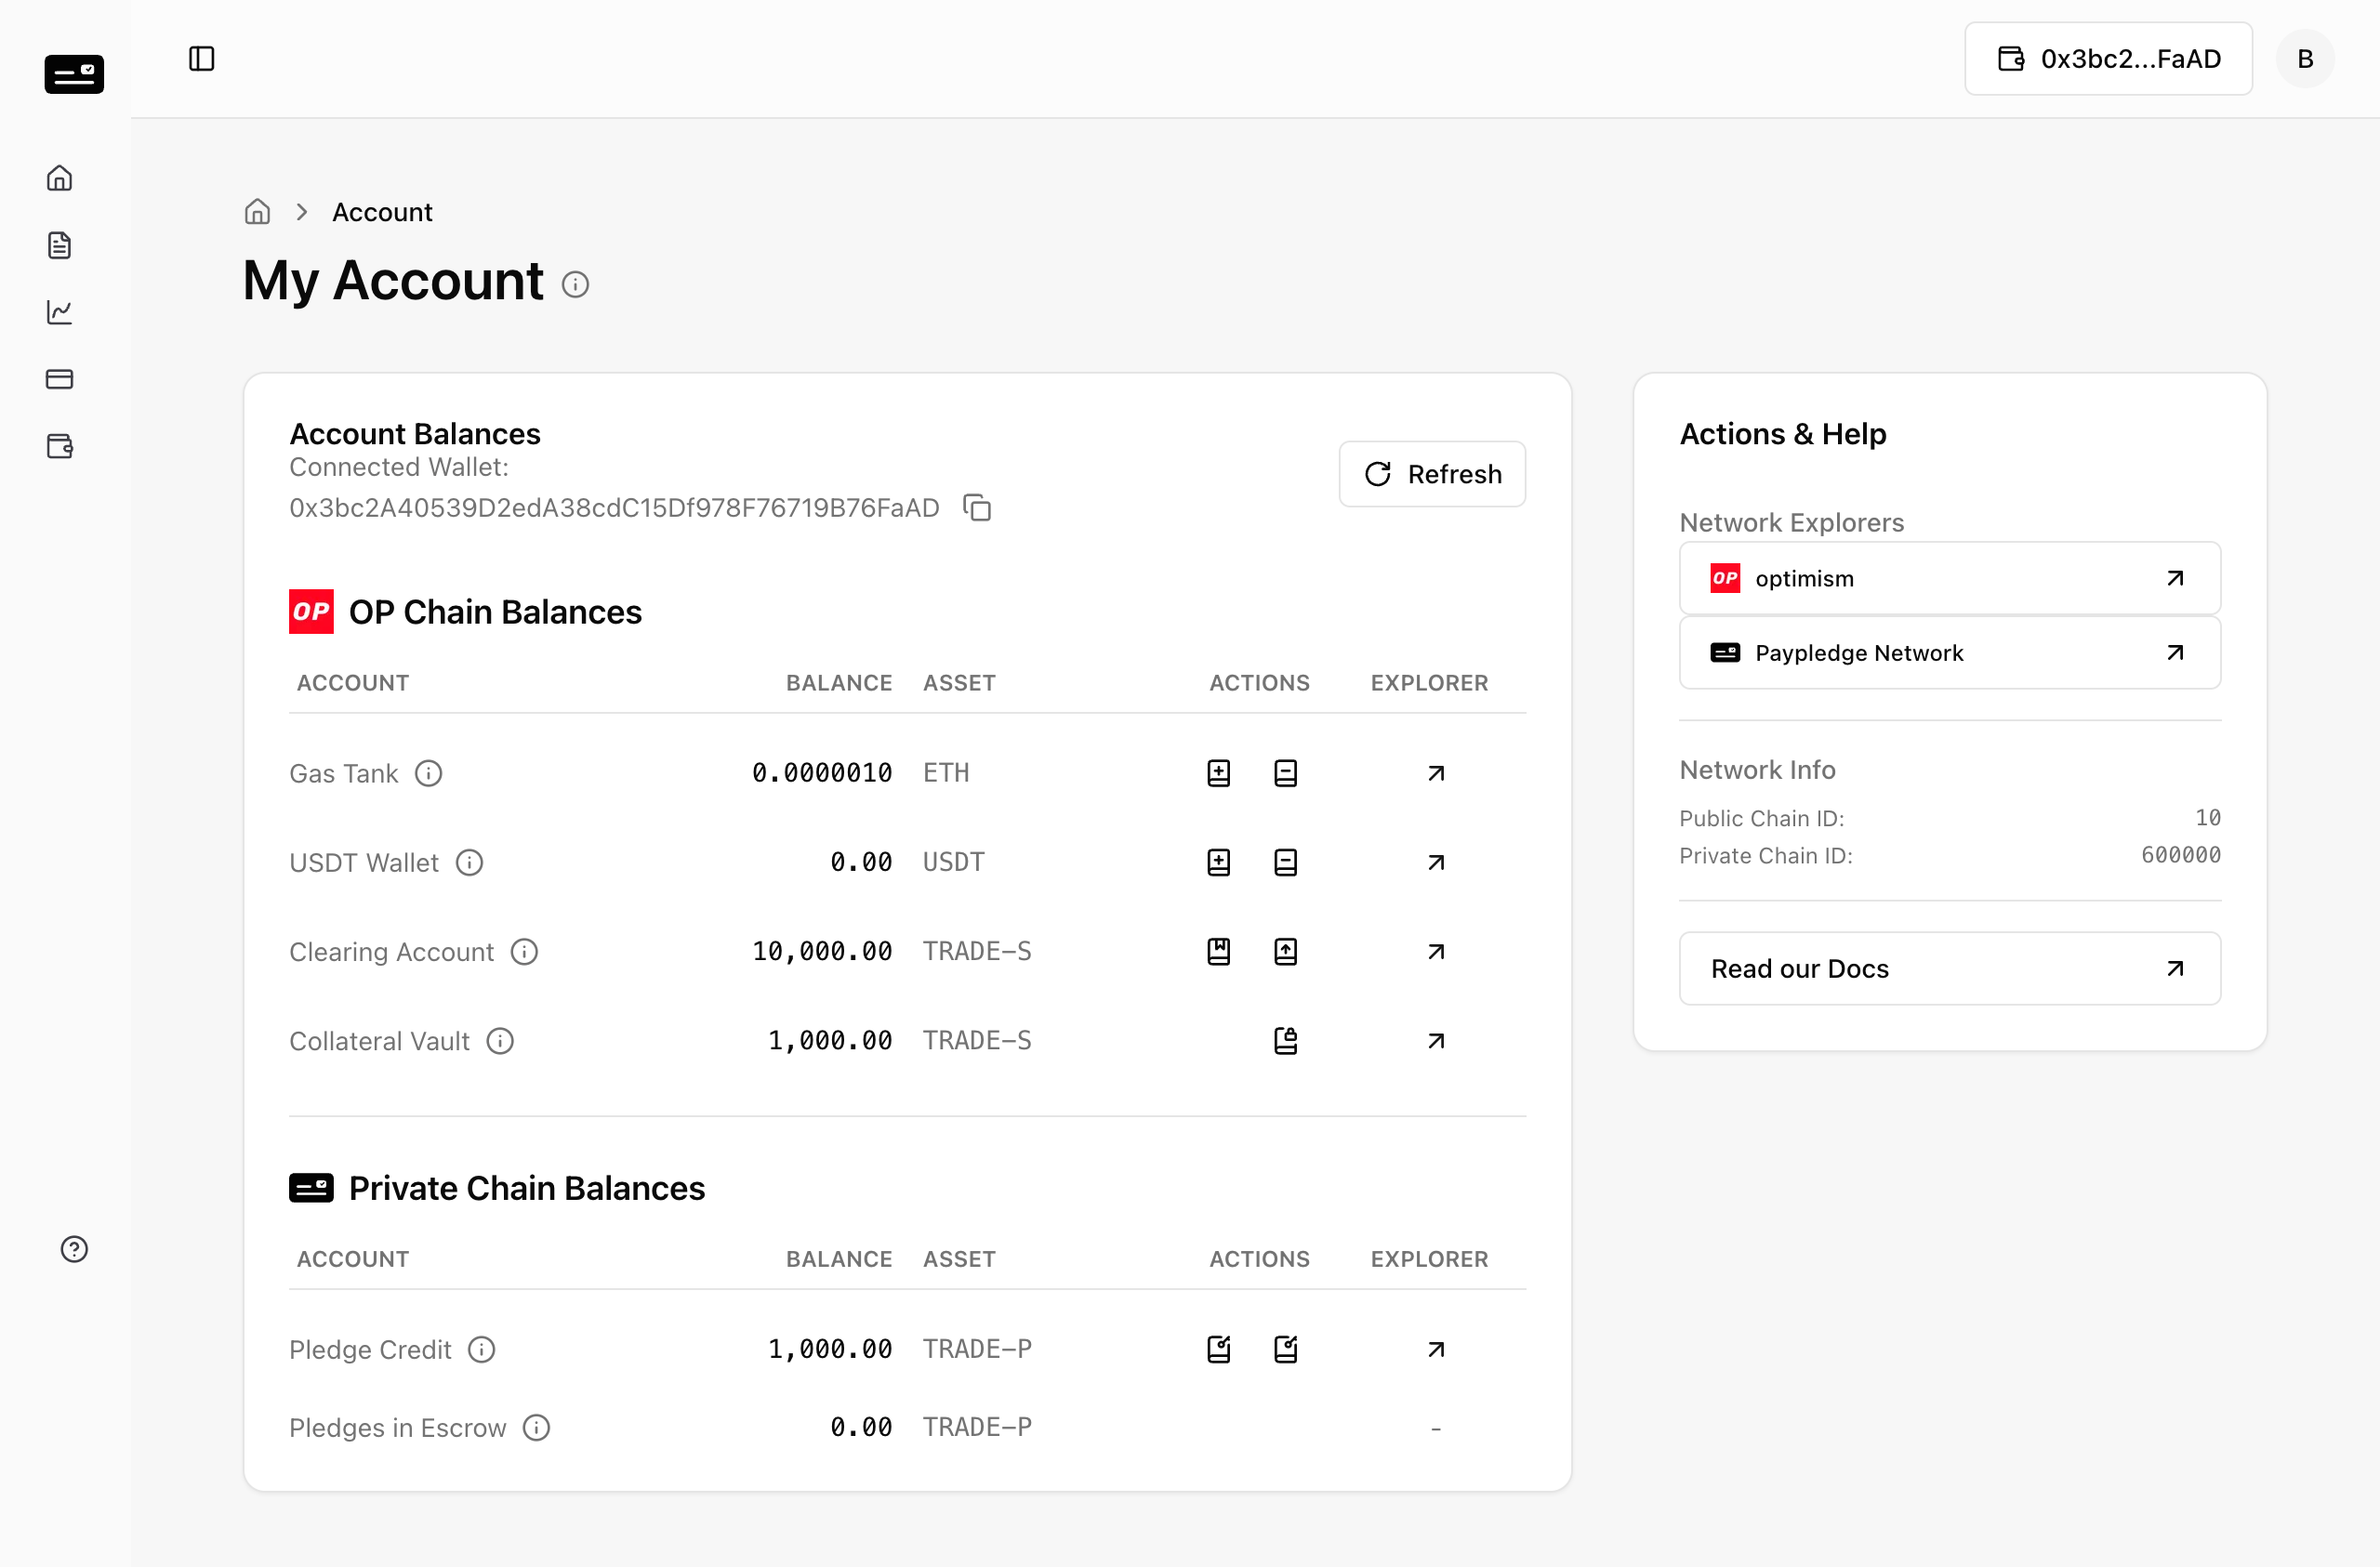
The Buyer confirms receipt of the credit line, which appears as TRADE-P (Pledge Credits) and tokens locked in their Collateral Vault.
Step 1: Navigate to the Account/Wallet page. Step 2: Verify the updated balances for TRADE-P and Vault assets.
Phase 3: PayPledge™ Execution
Actors: Seller, Buyer
With credit established, the trading cycle begins.
3.1 PayPledge Creation (Seller)
Note: The Seller undergoes the same onboarding process (Steps 1.2 - 1.3).
Step 1: From the Dashboard, navigate to the Sales List page. 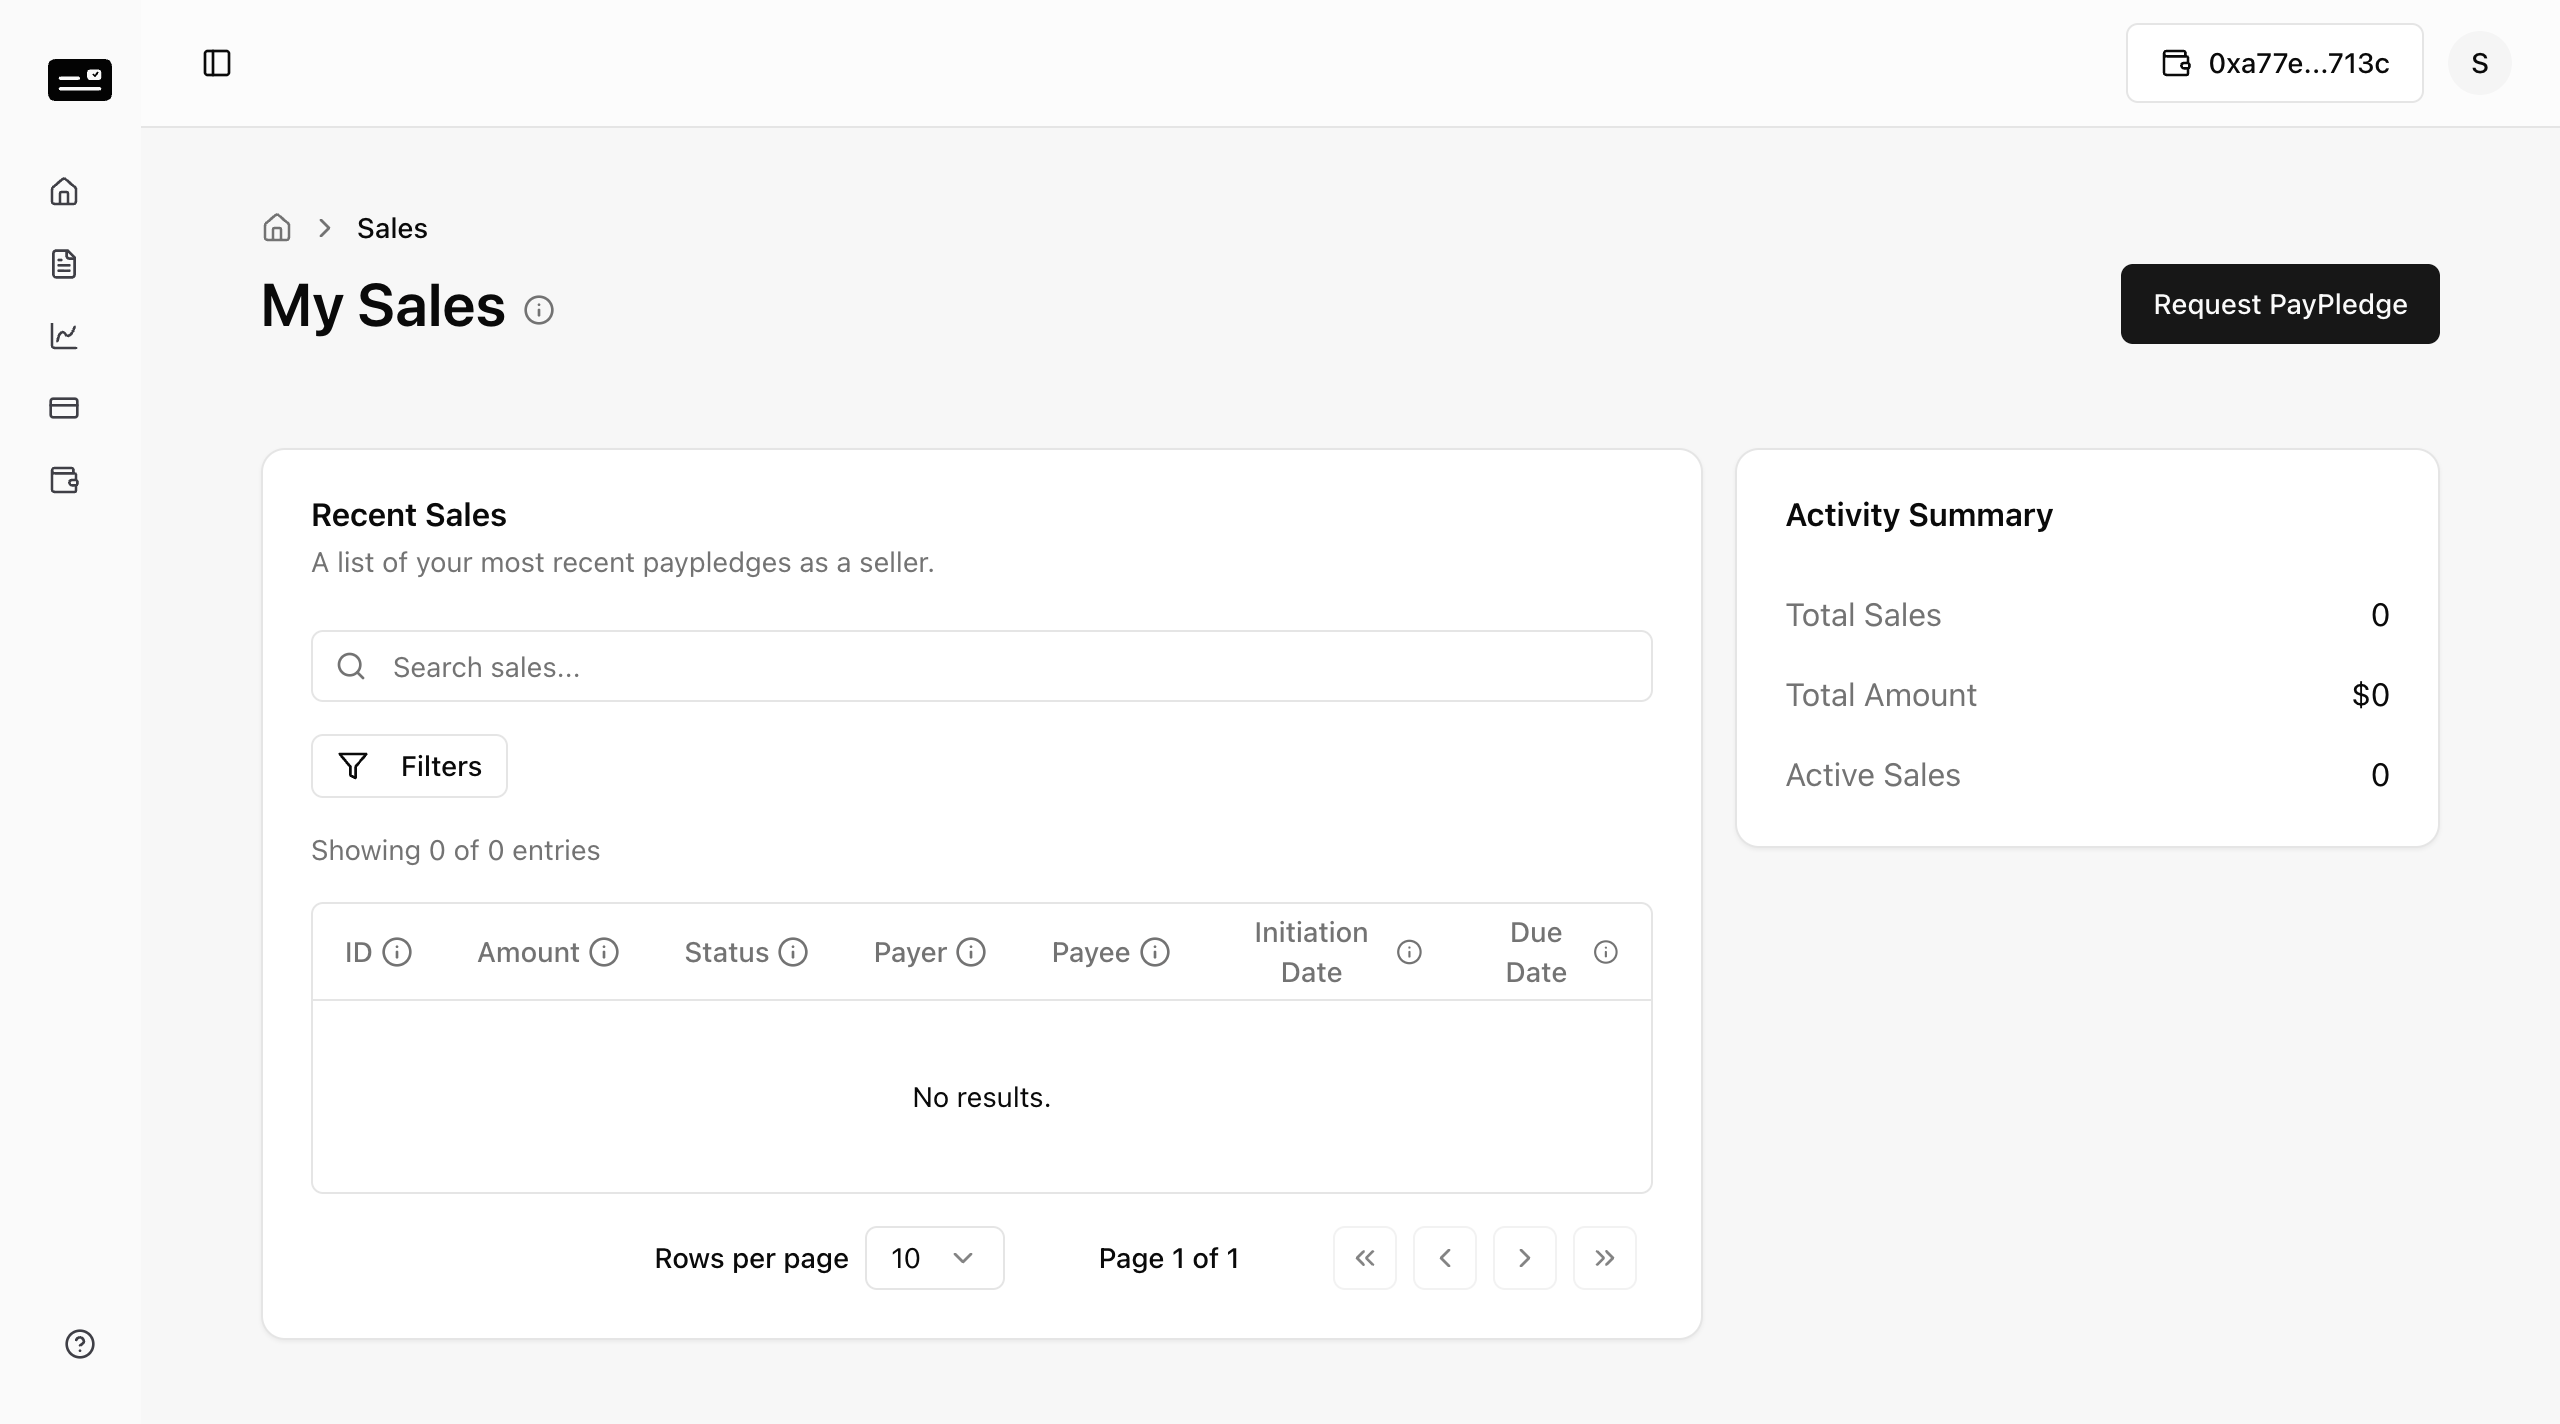
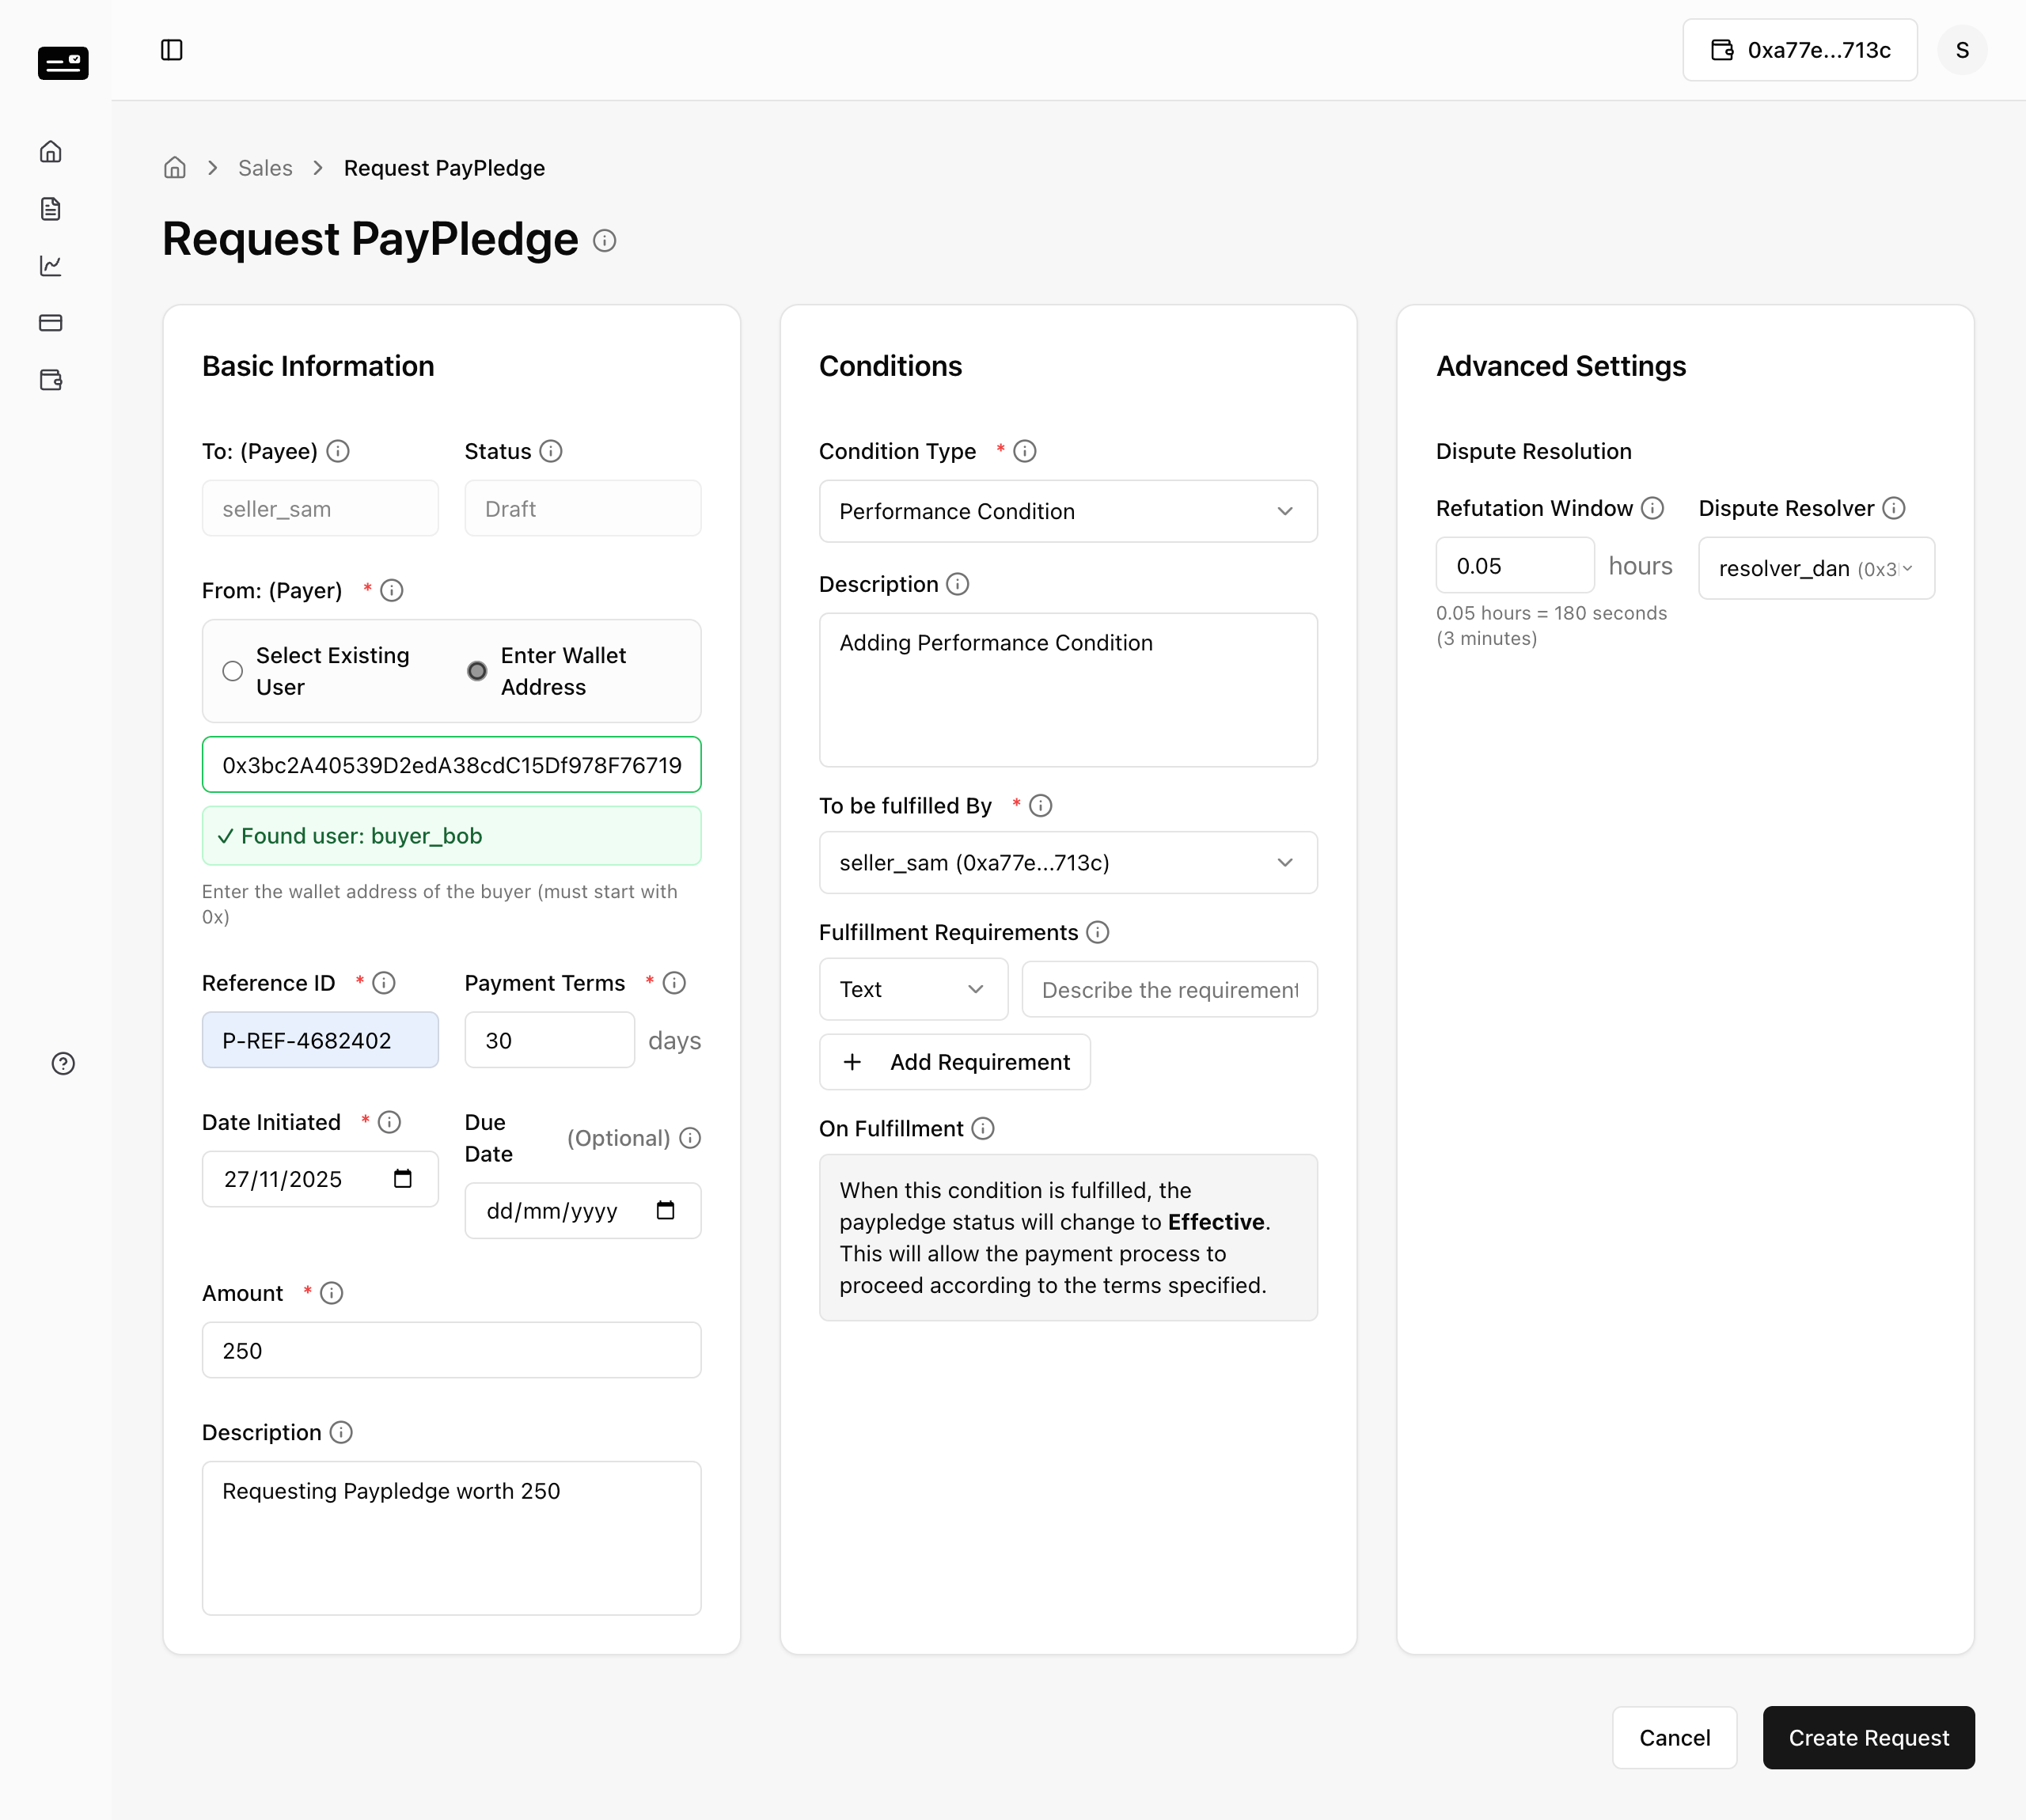
Step 2: Click "Request PayPledge". Step 3: Complete the Request Form:
- Enter Payer Name (The Buyer).
- Fill in all trade details (Amount, Terms, Conditions).
- Submit the request.
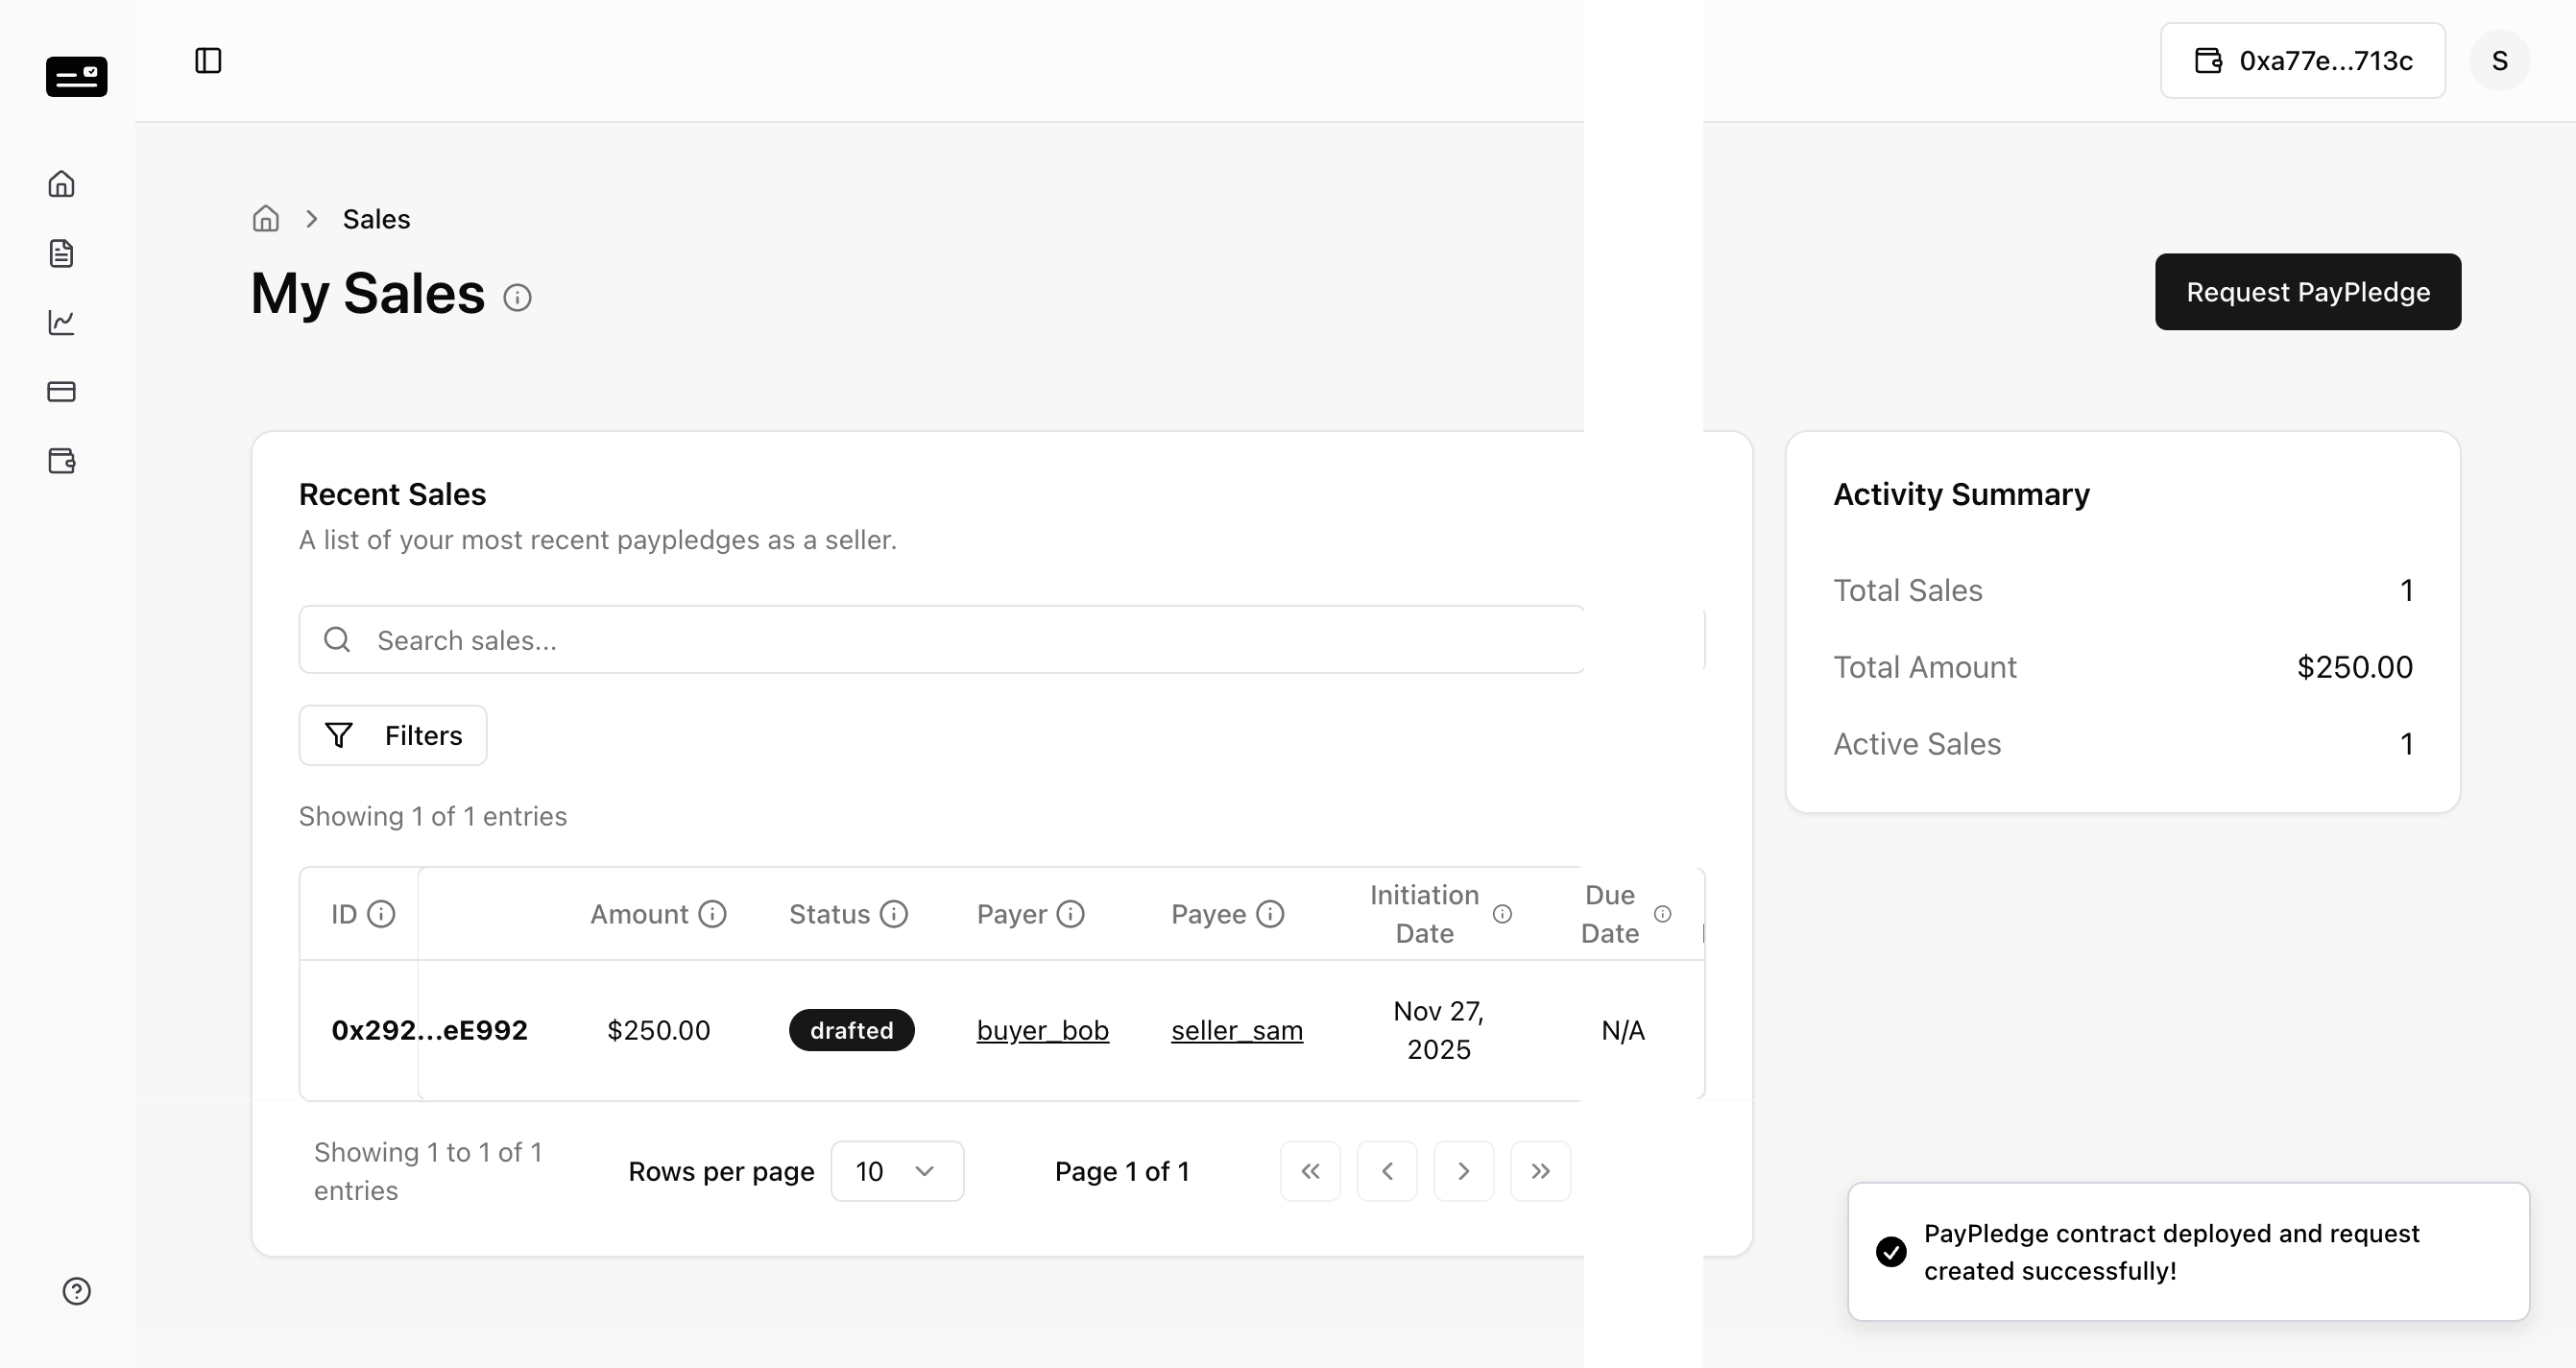
Step 4: The new PayPledge appears in the Sales List with a status of Drafted.
3.2 PayPledge Initiation (Buyer)
The Buyer reviews and accepts the trade obligation.
Step 1: Navigate to the Purchases List page. Step 2: Locate the Drafted PayPledge from the Seller.
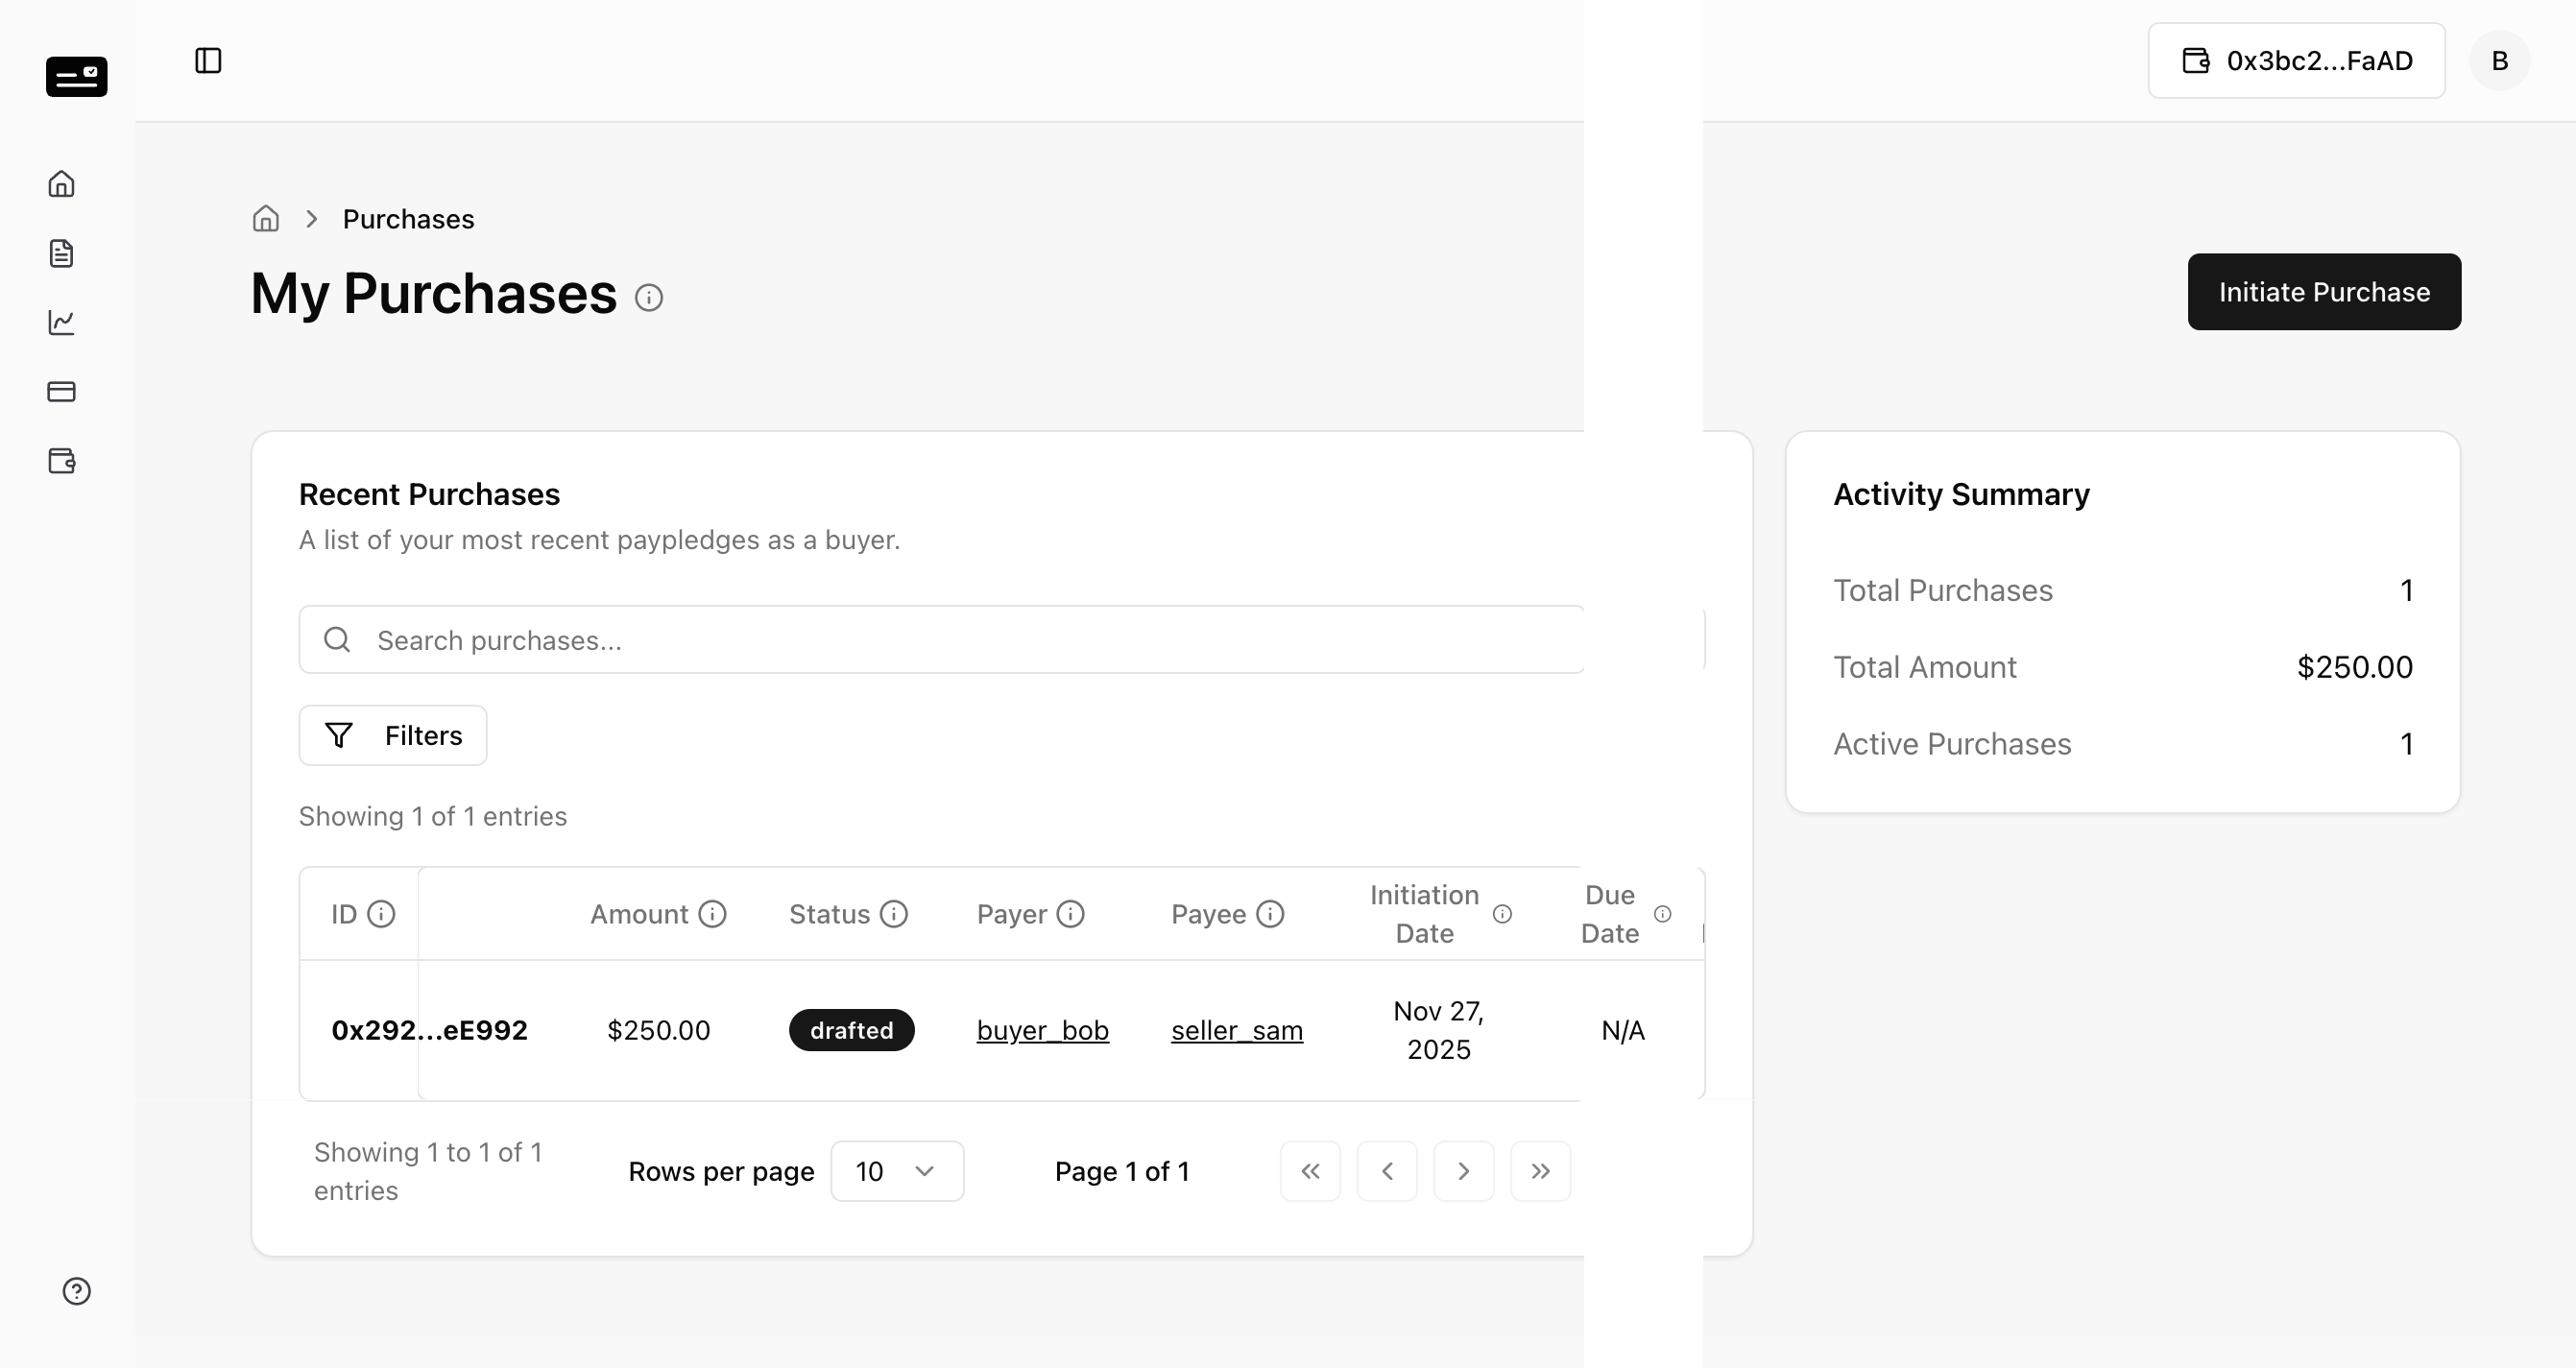
Step 3: Click on the PayPledge to view details and click "Initiate". Step 4: The Initiation Modal appears, displaying critical financial data:
- Platform Fee: Cost to initiate.
- Current Balances: User's available funds.
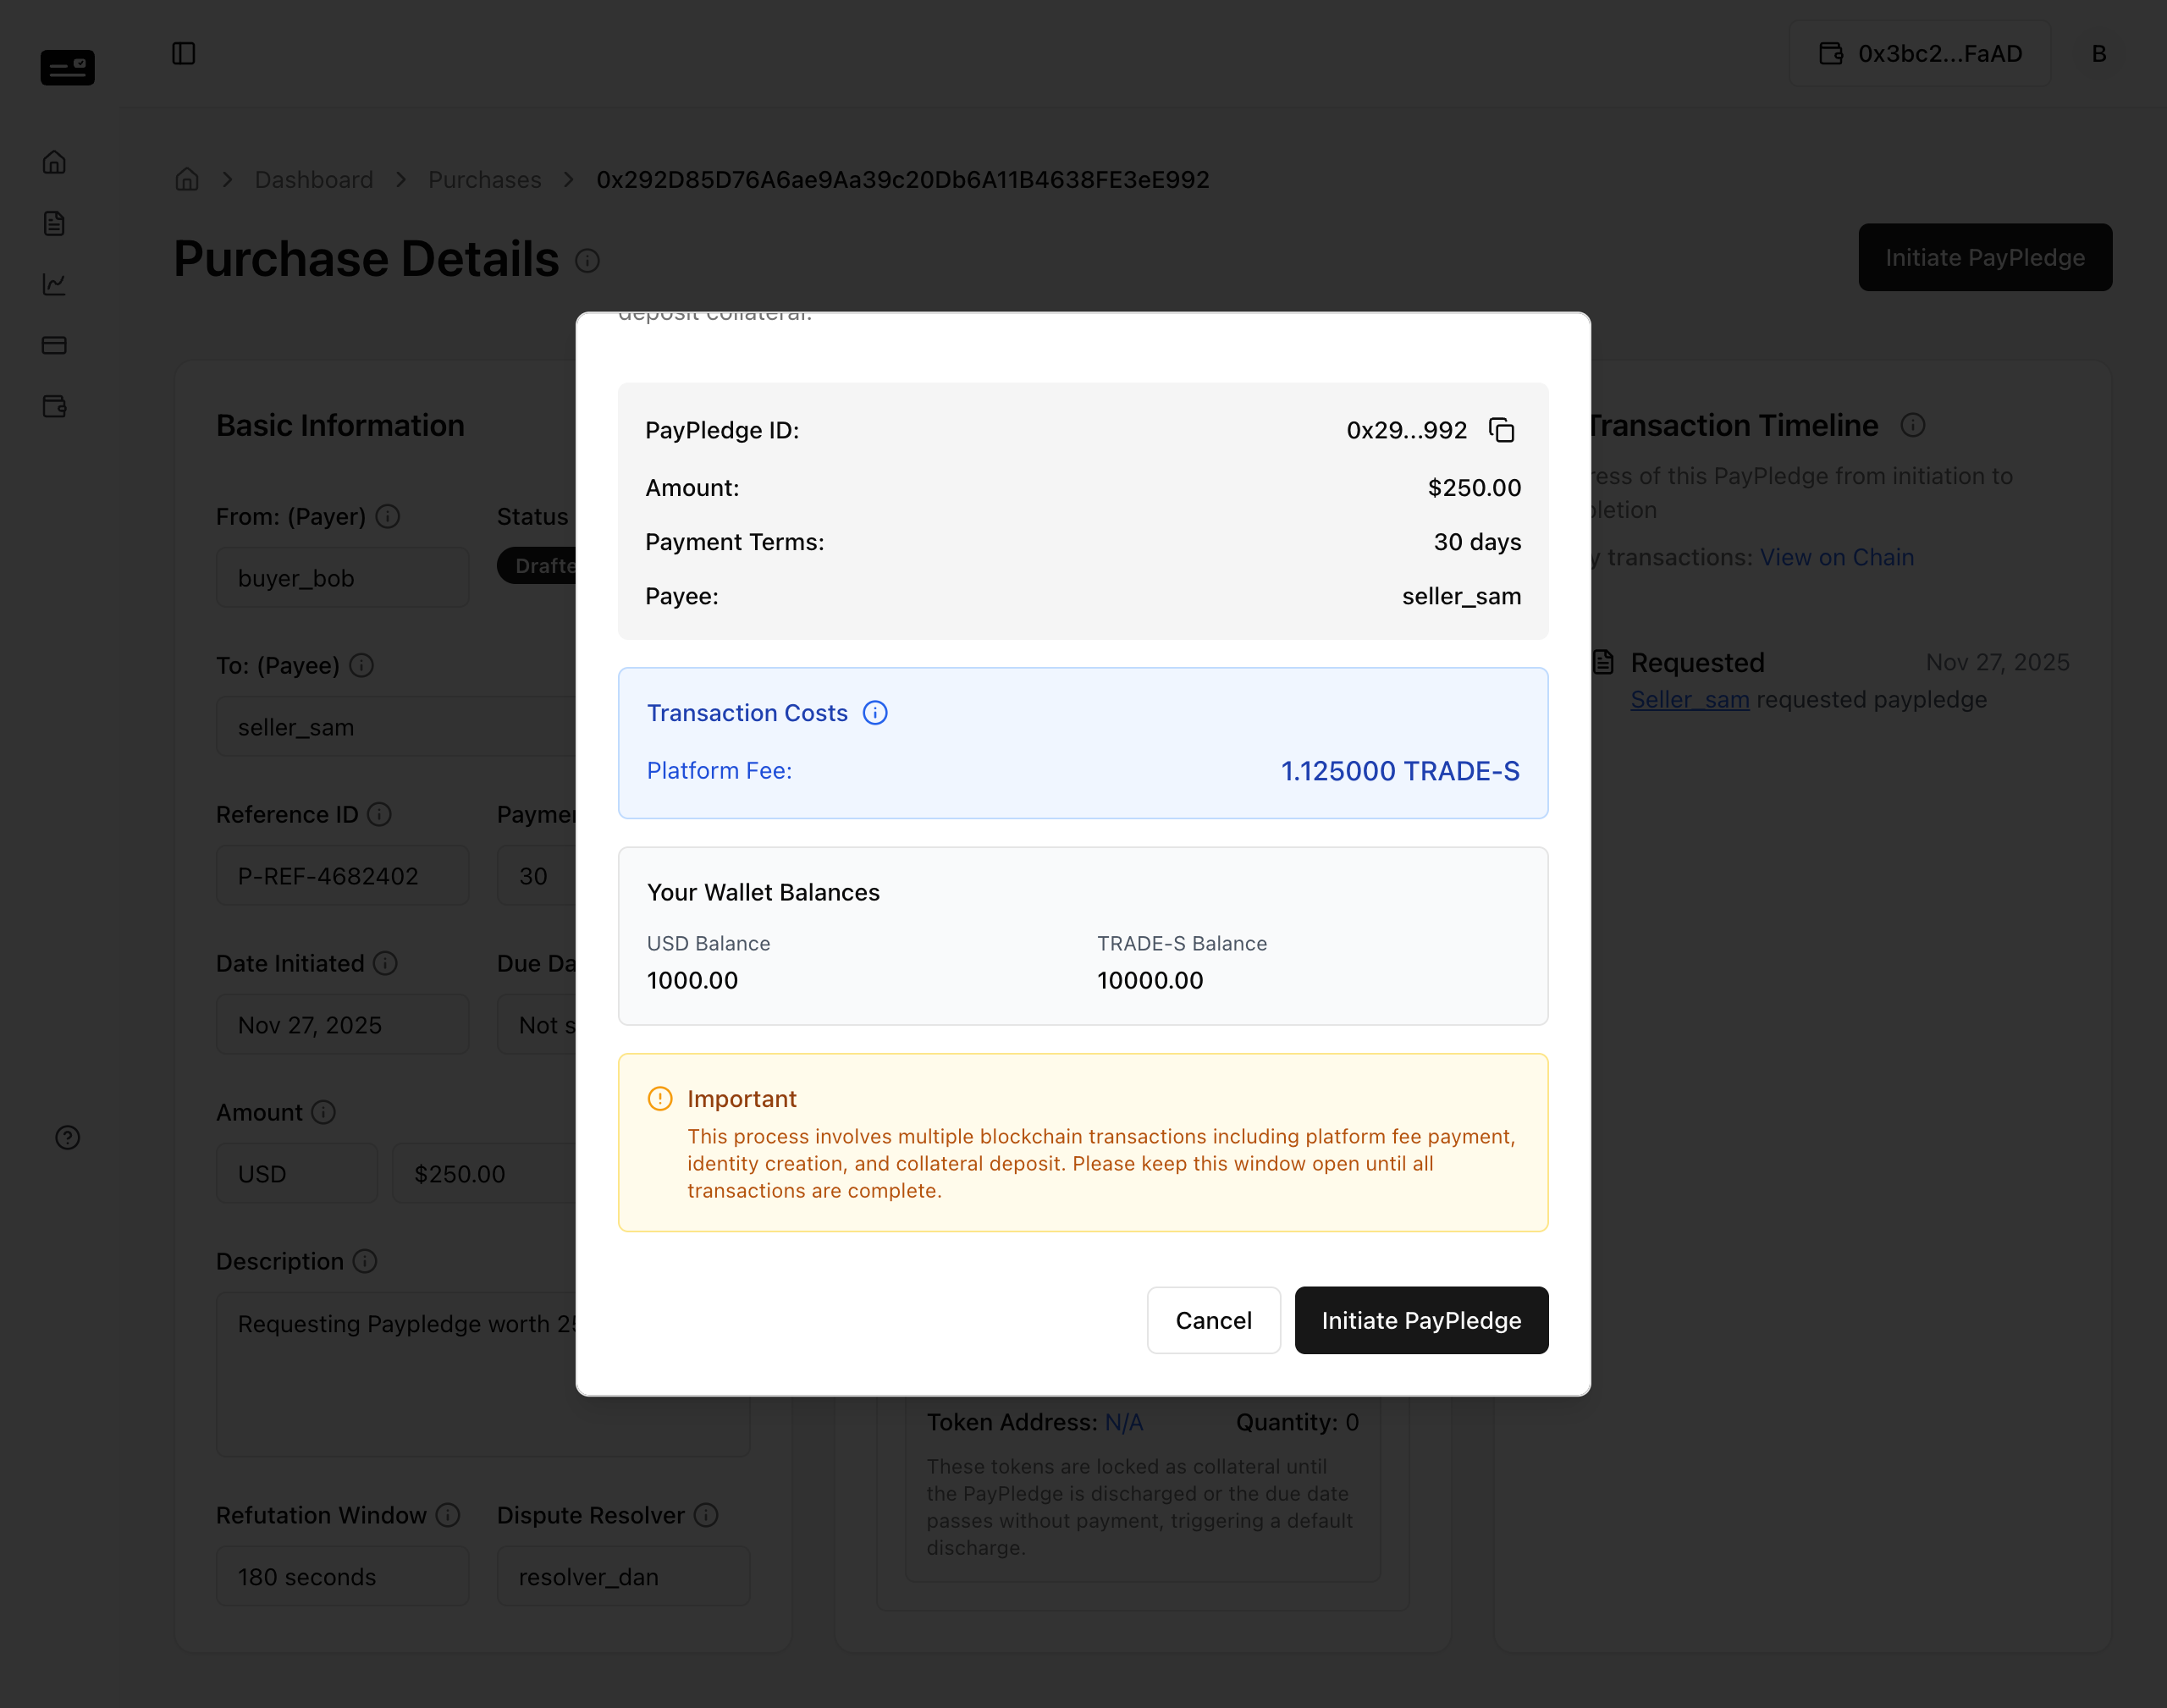
Step 5: Click "Submit". The system executes multiple on-chain transactions to lock collateral and formalize the agreement. Step 6: Once complete, the PayPledge status updates to Initiated. This can be verified in the transaction timeline.
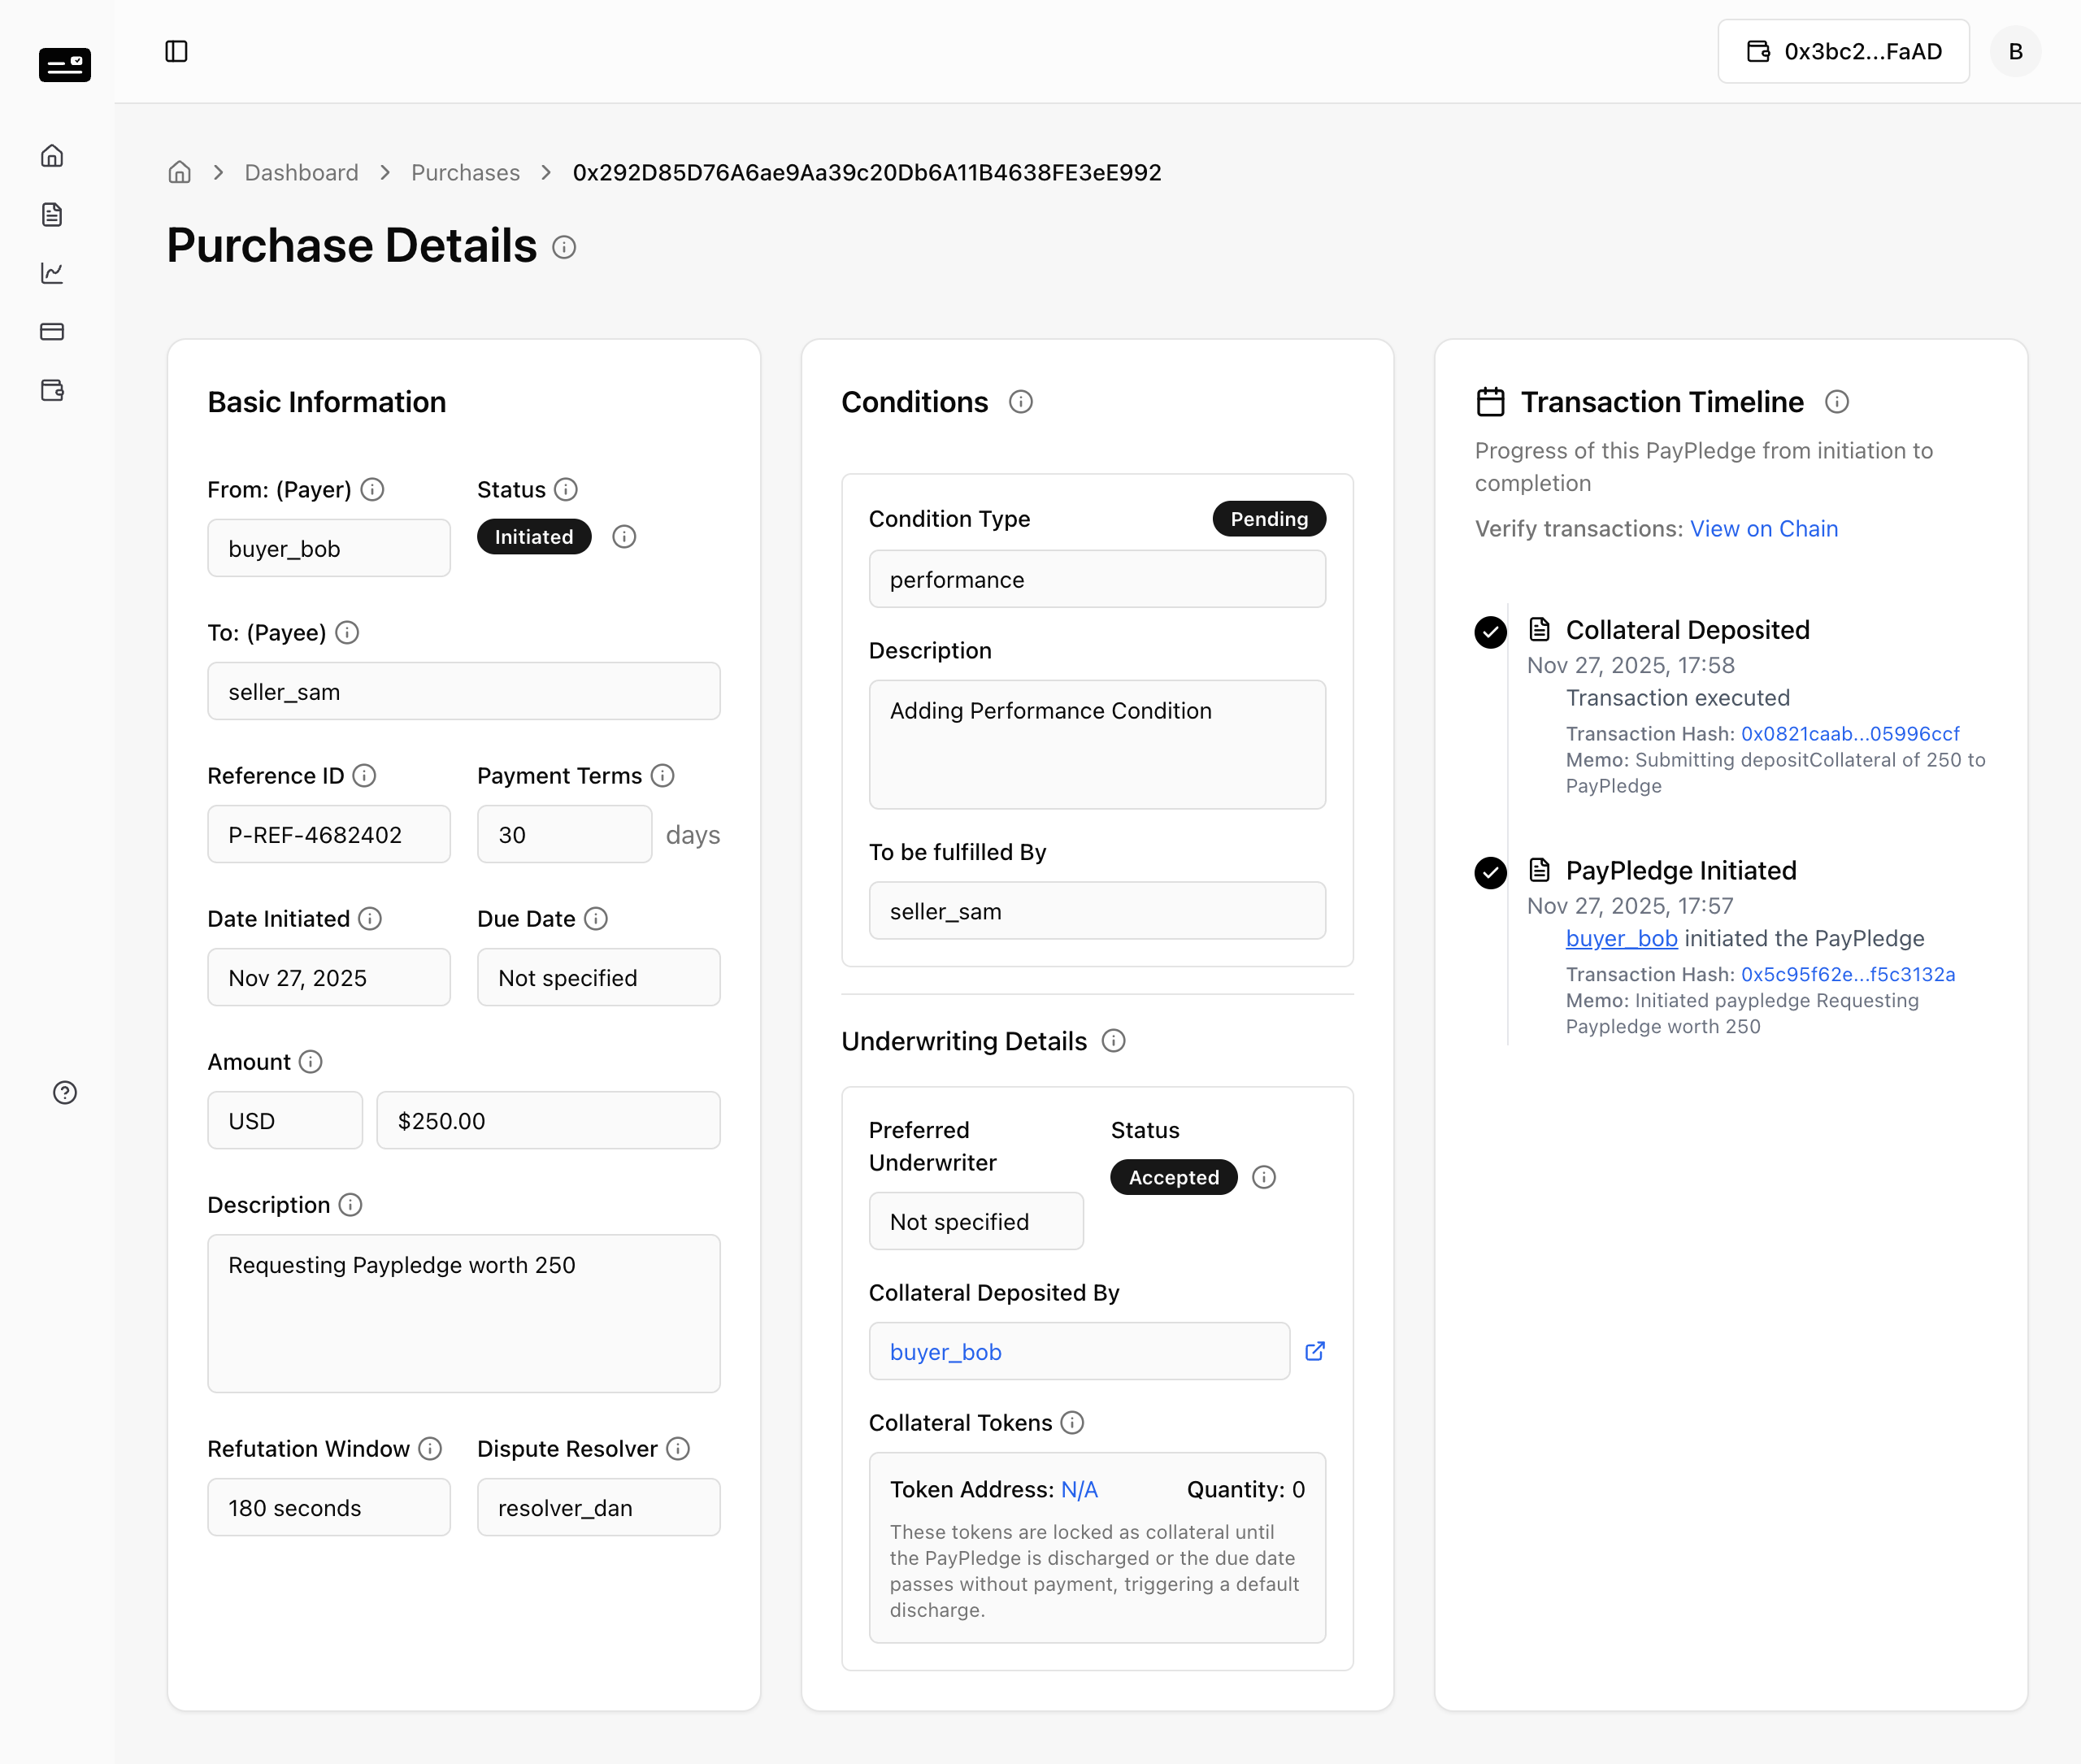
Phase 4: PayPledge Acceptance & Condition Fulfillment
Actors: Seller, Buyer
Once initiated by the Buyer, the Seller must acknowledge the agreement and subsequently prove performance.
4.1 Seller Acceptance
Step 1: The Seller views the Initiated PayPledge in their Sales List. 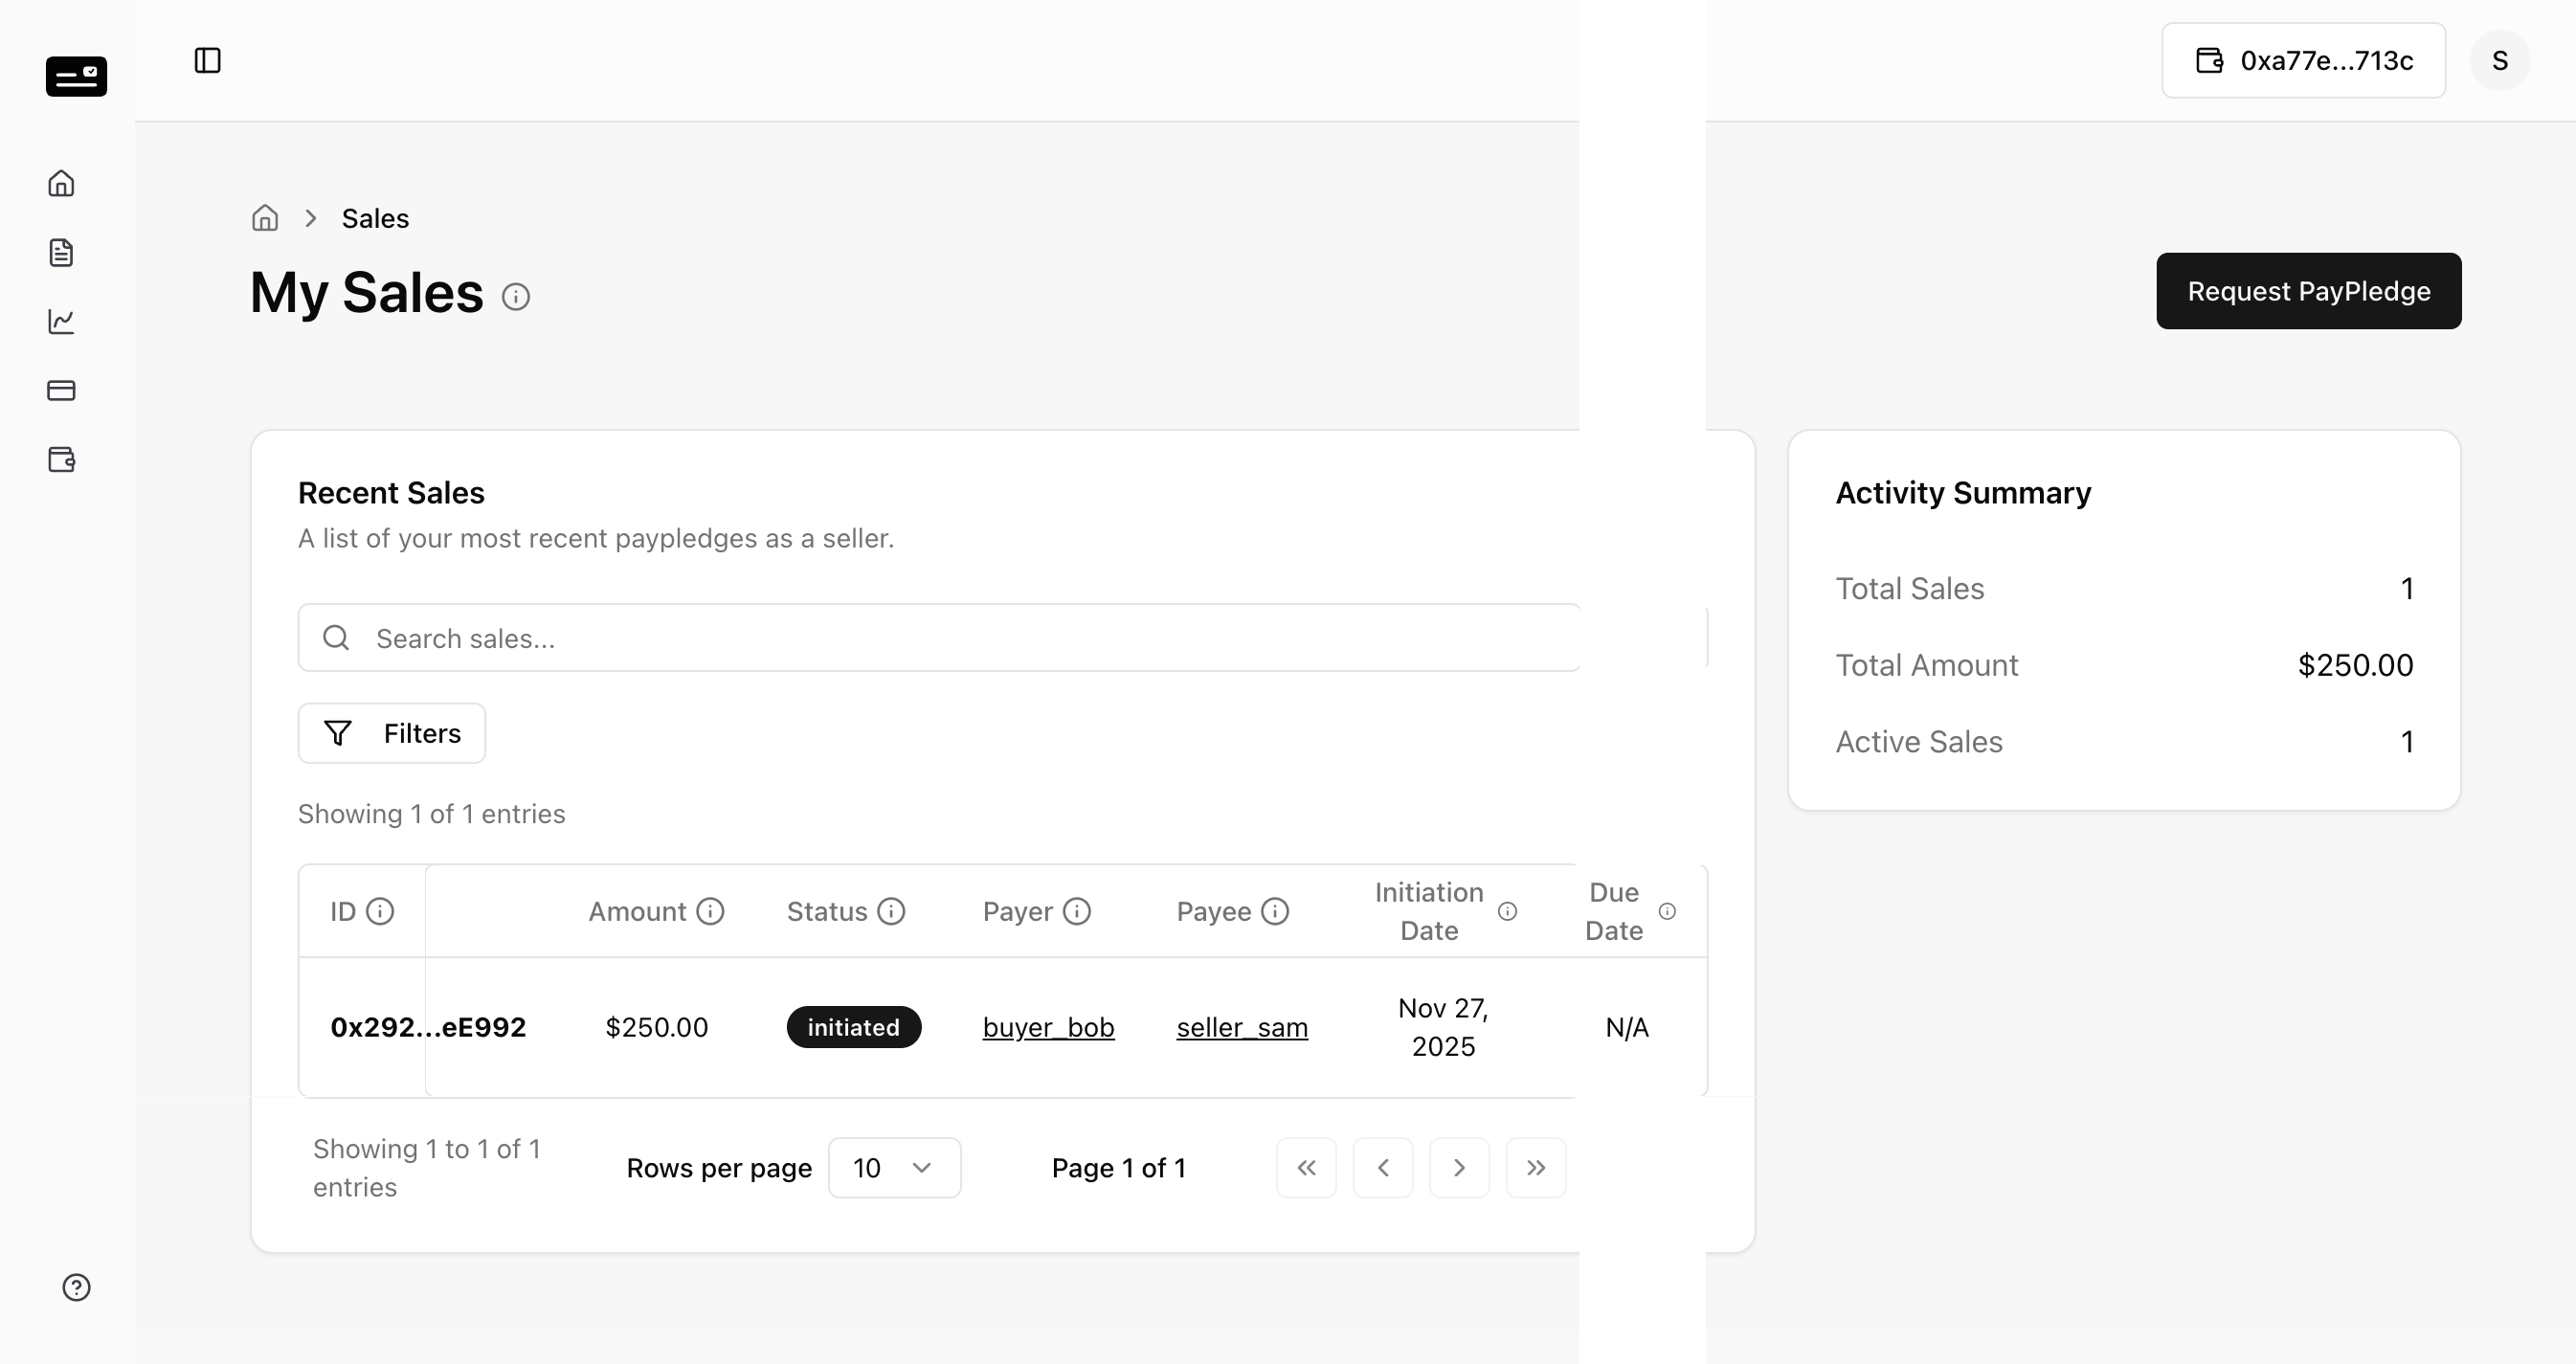
Step 2: The Seller opens the PayPledge details to review the locked terms. 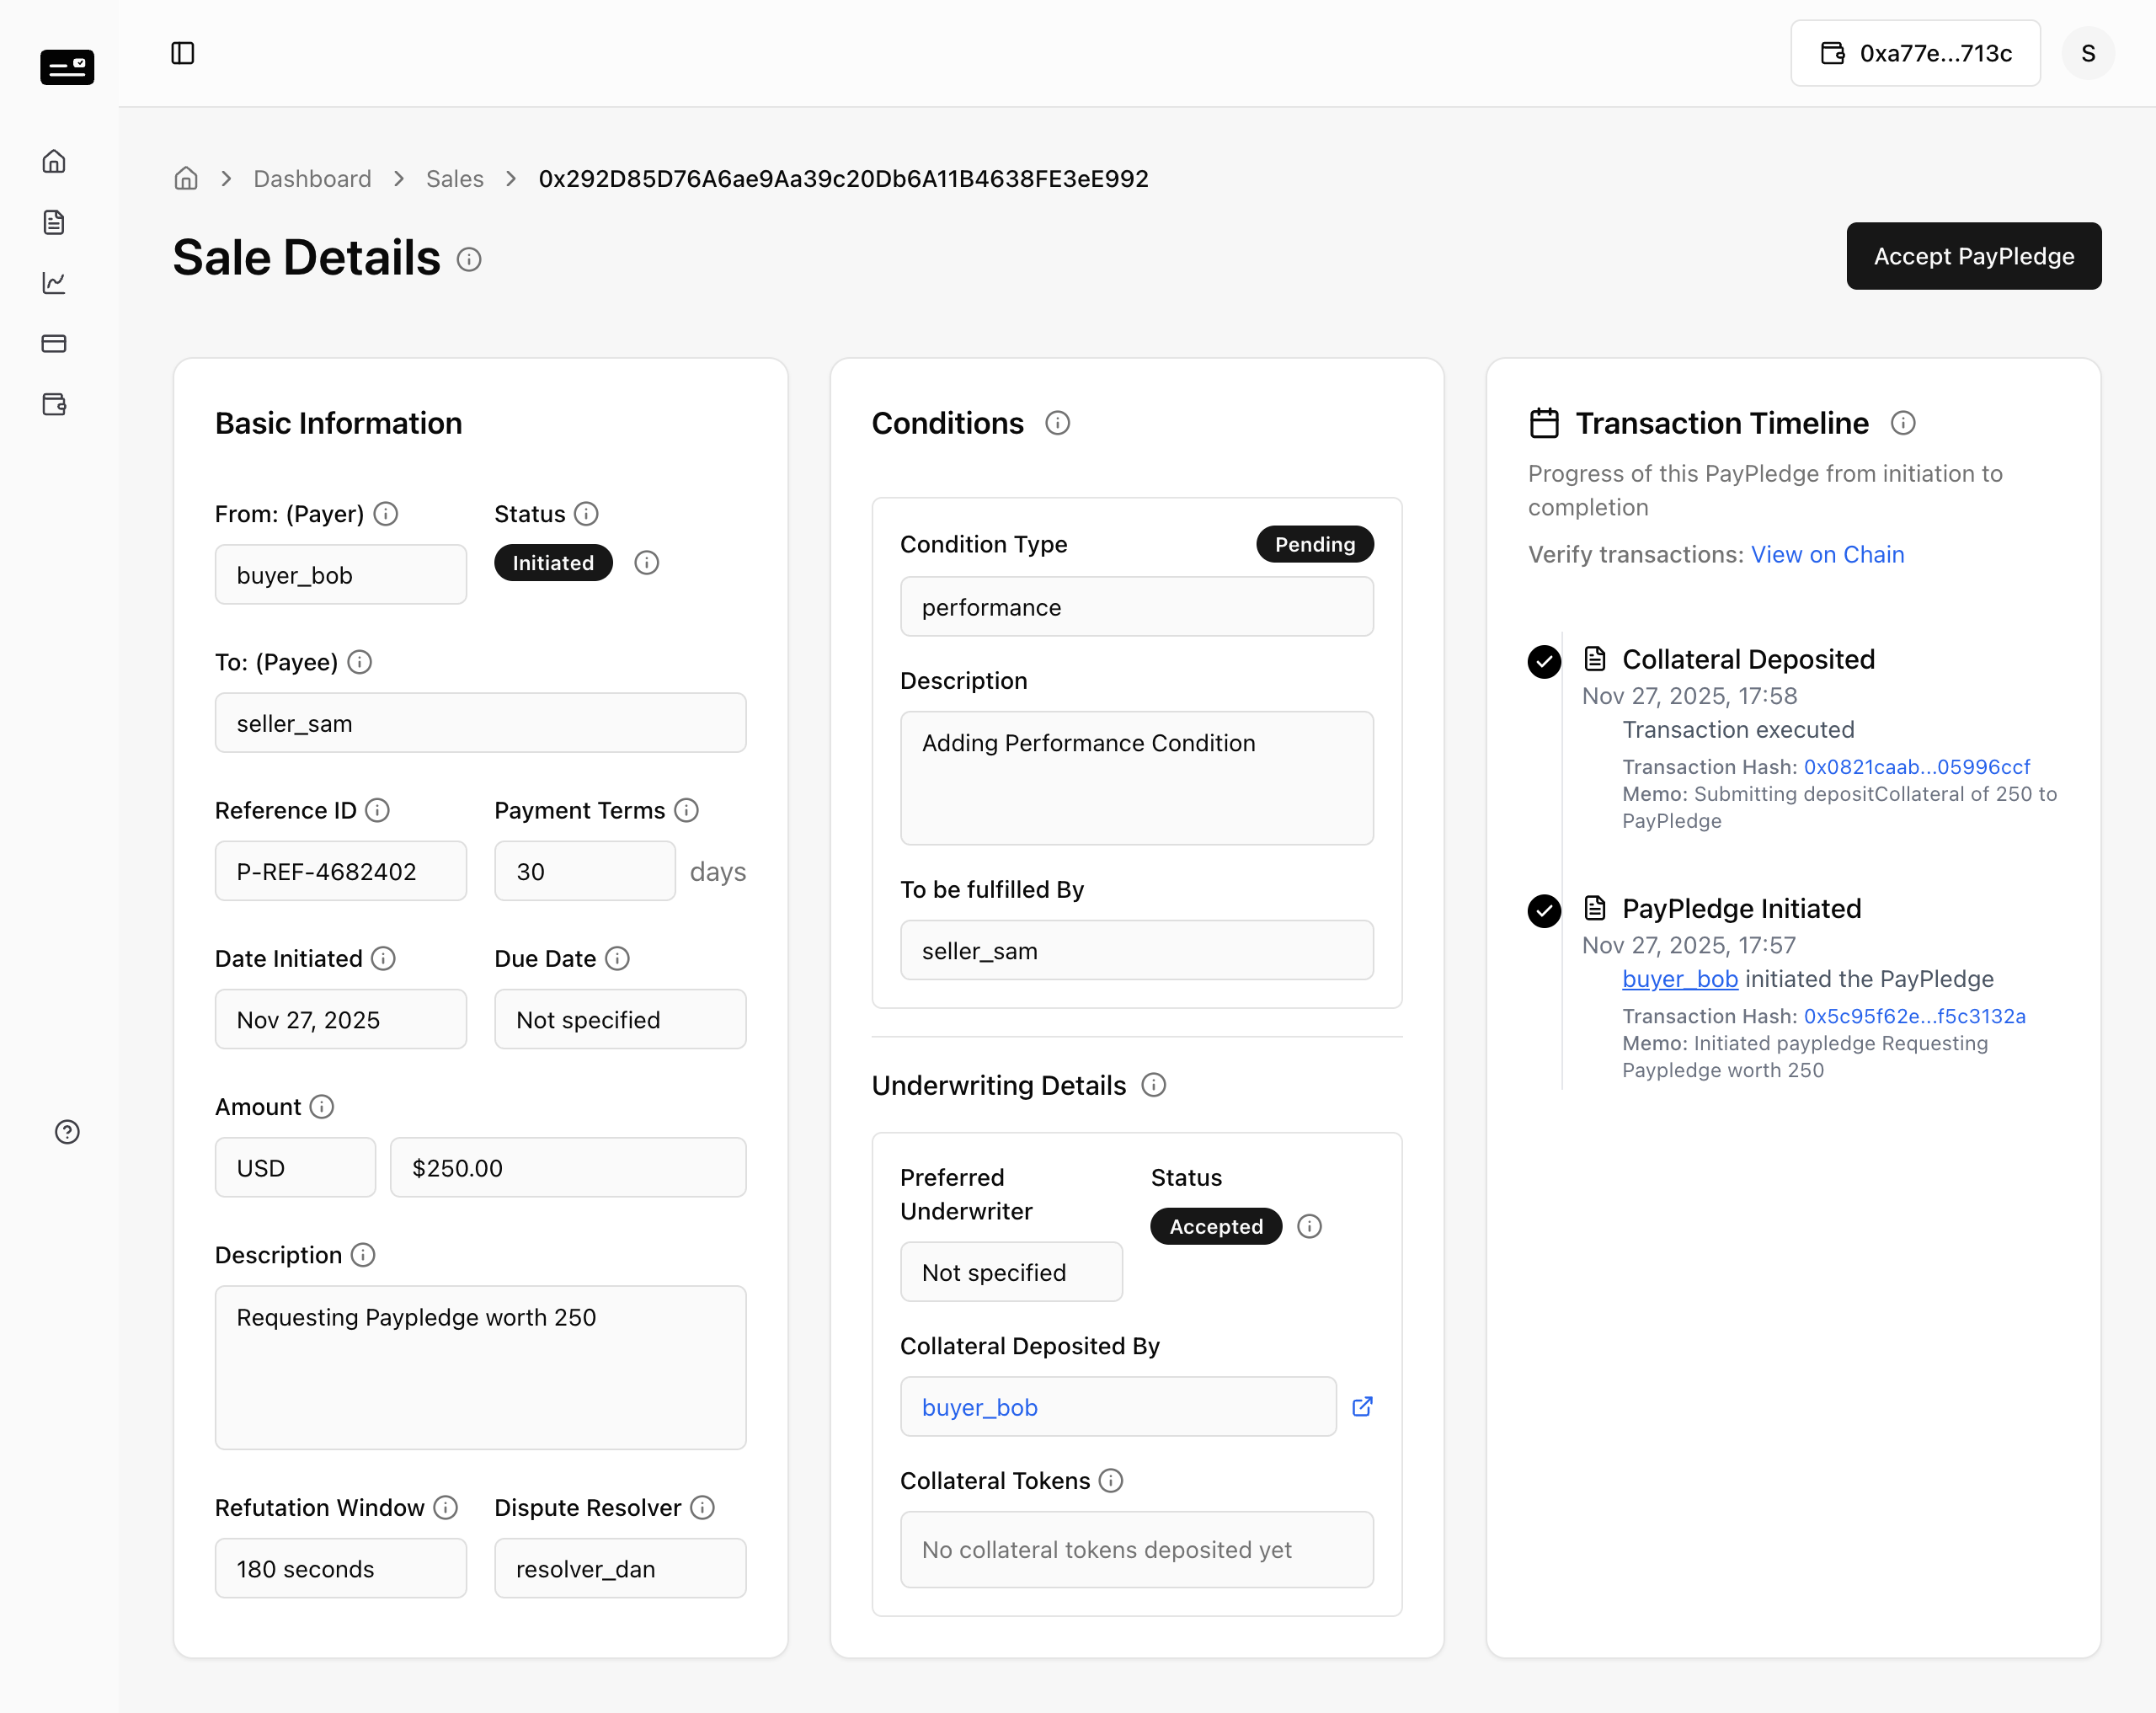
Step 3: Click "Accept" to formally bind the agreement. 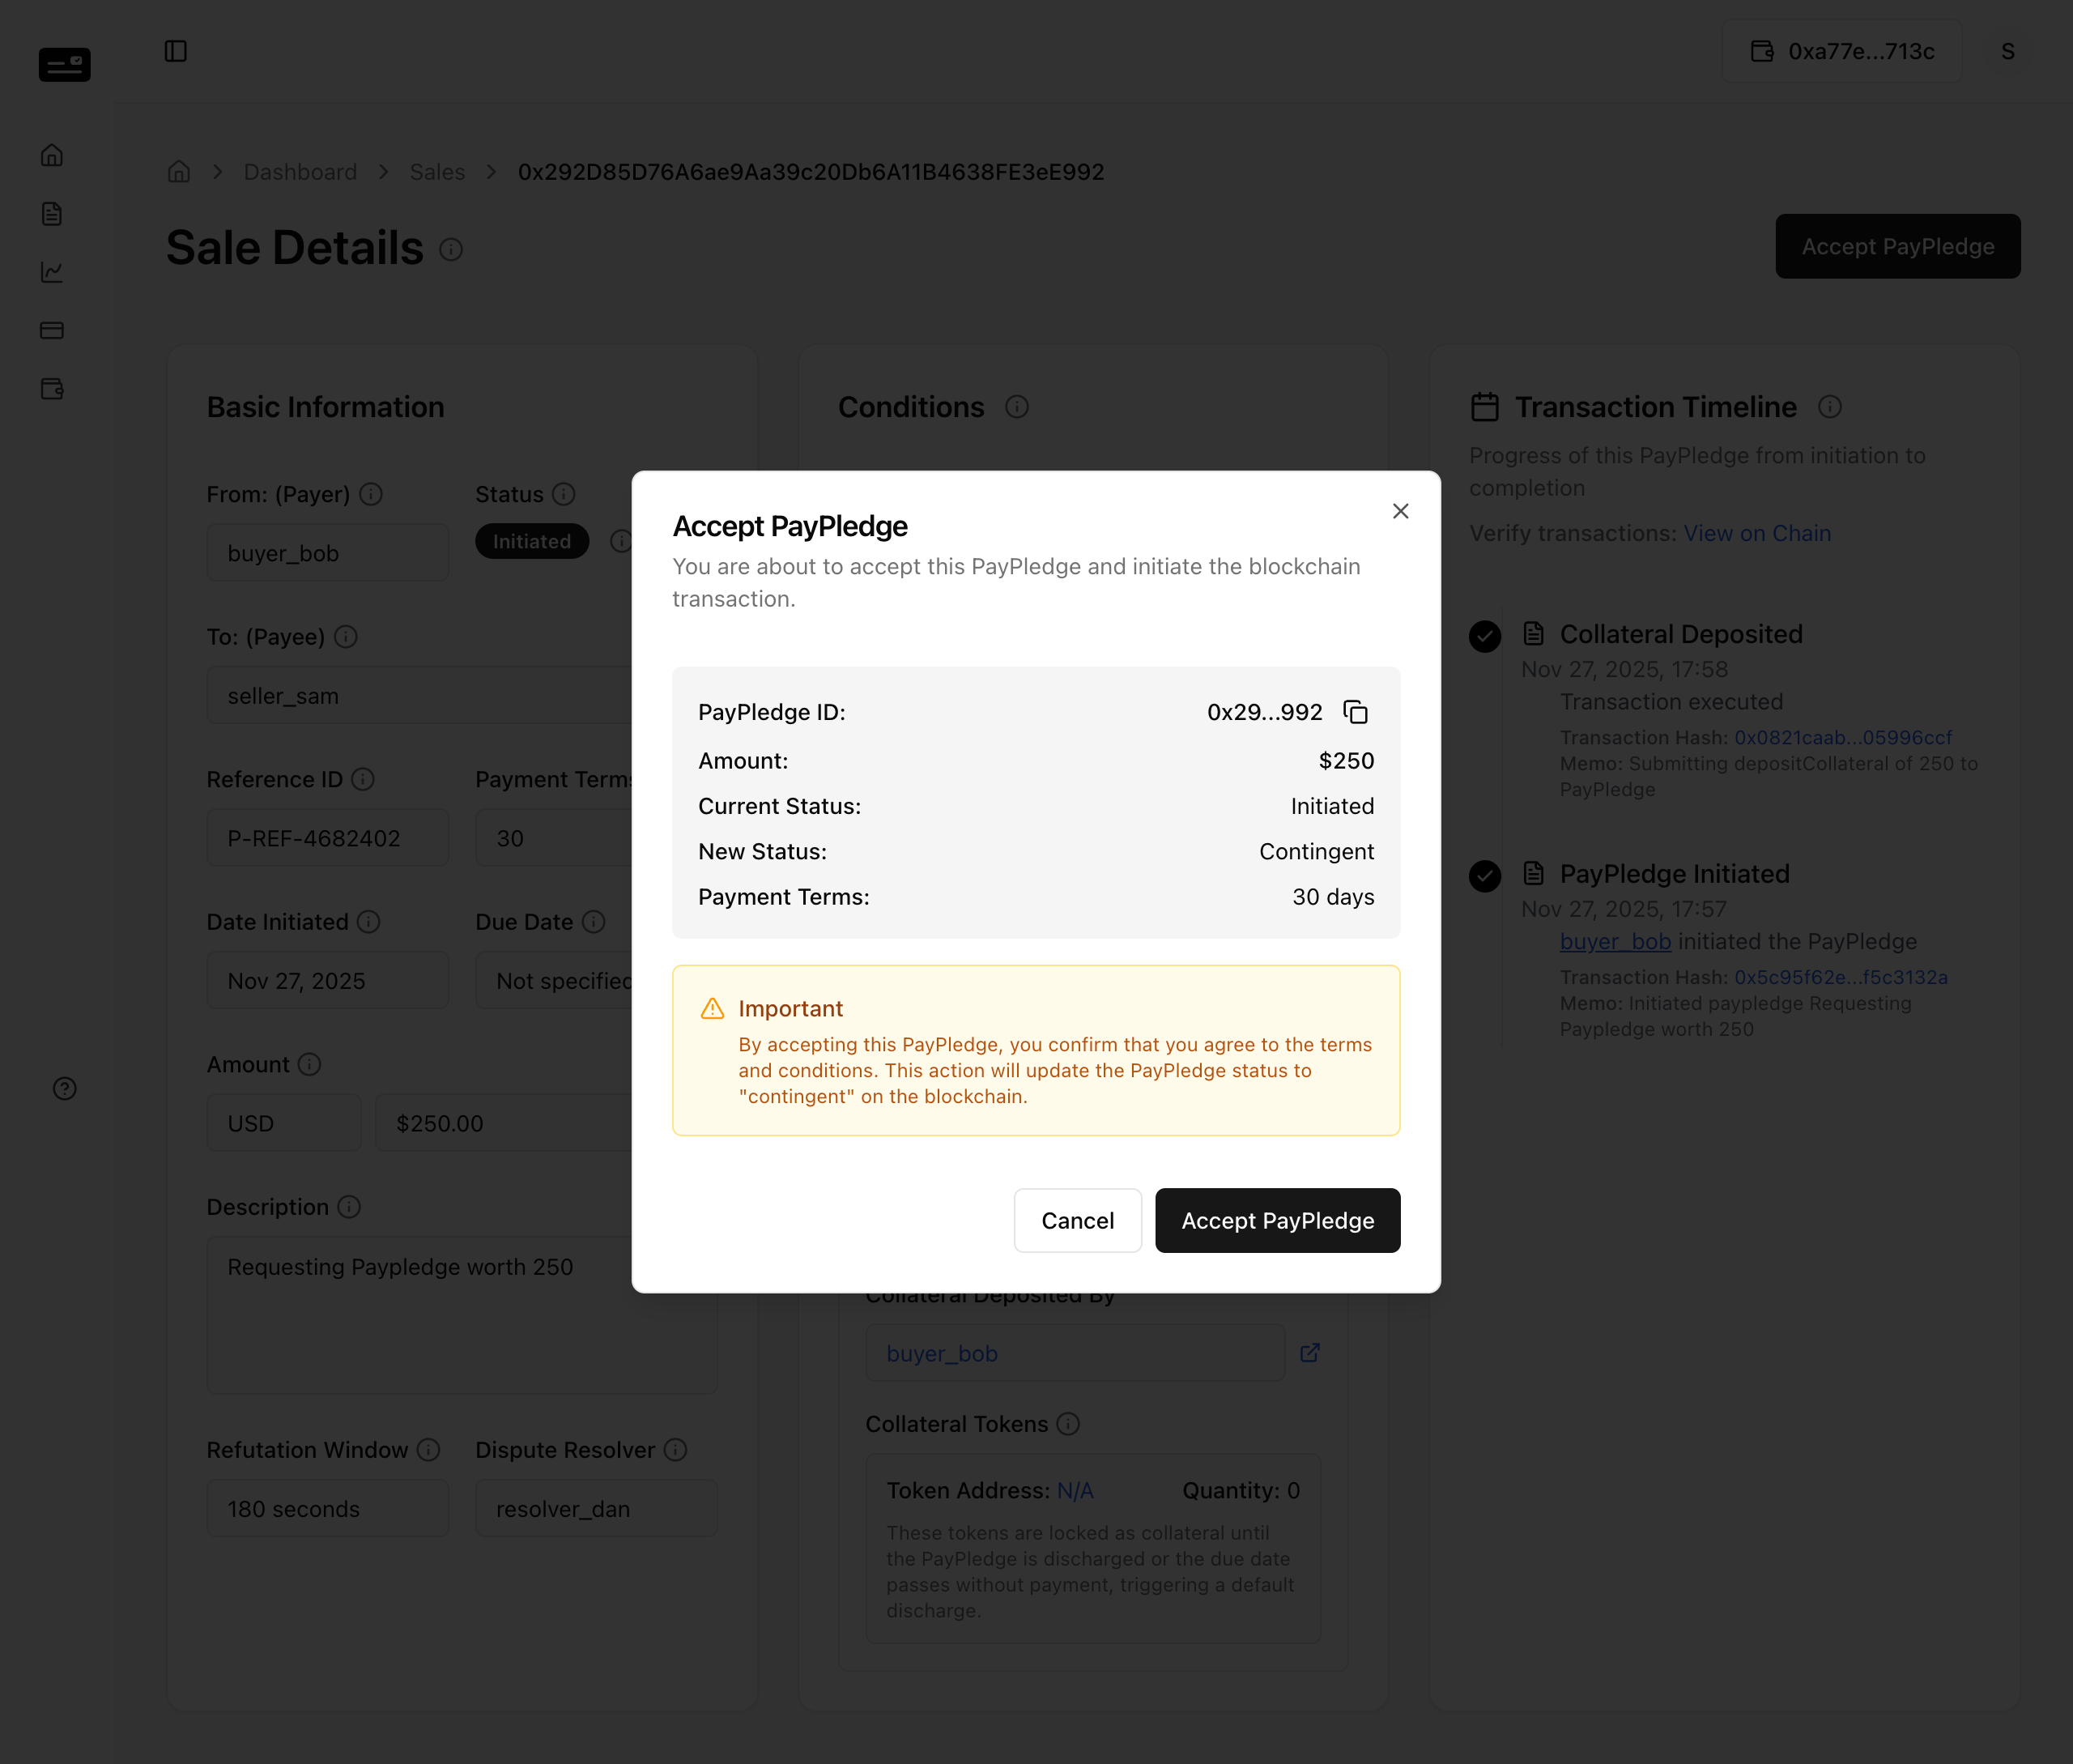
Step 4: Upon successful transaction execution, the PayPledge enters the Contingent state. 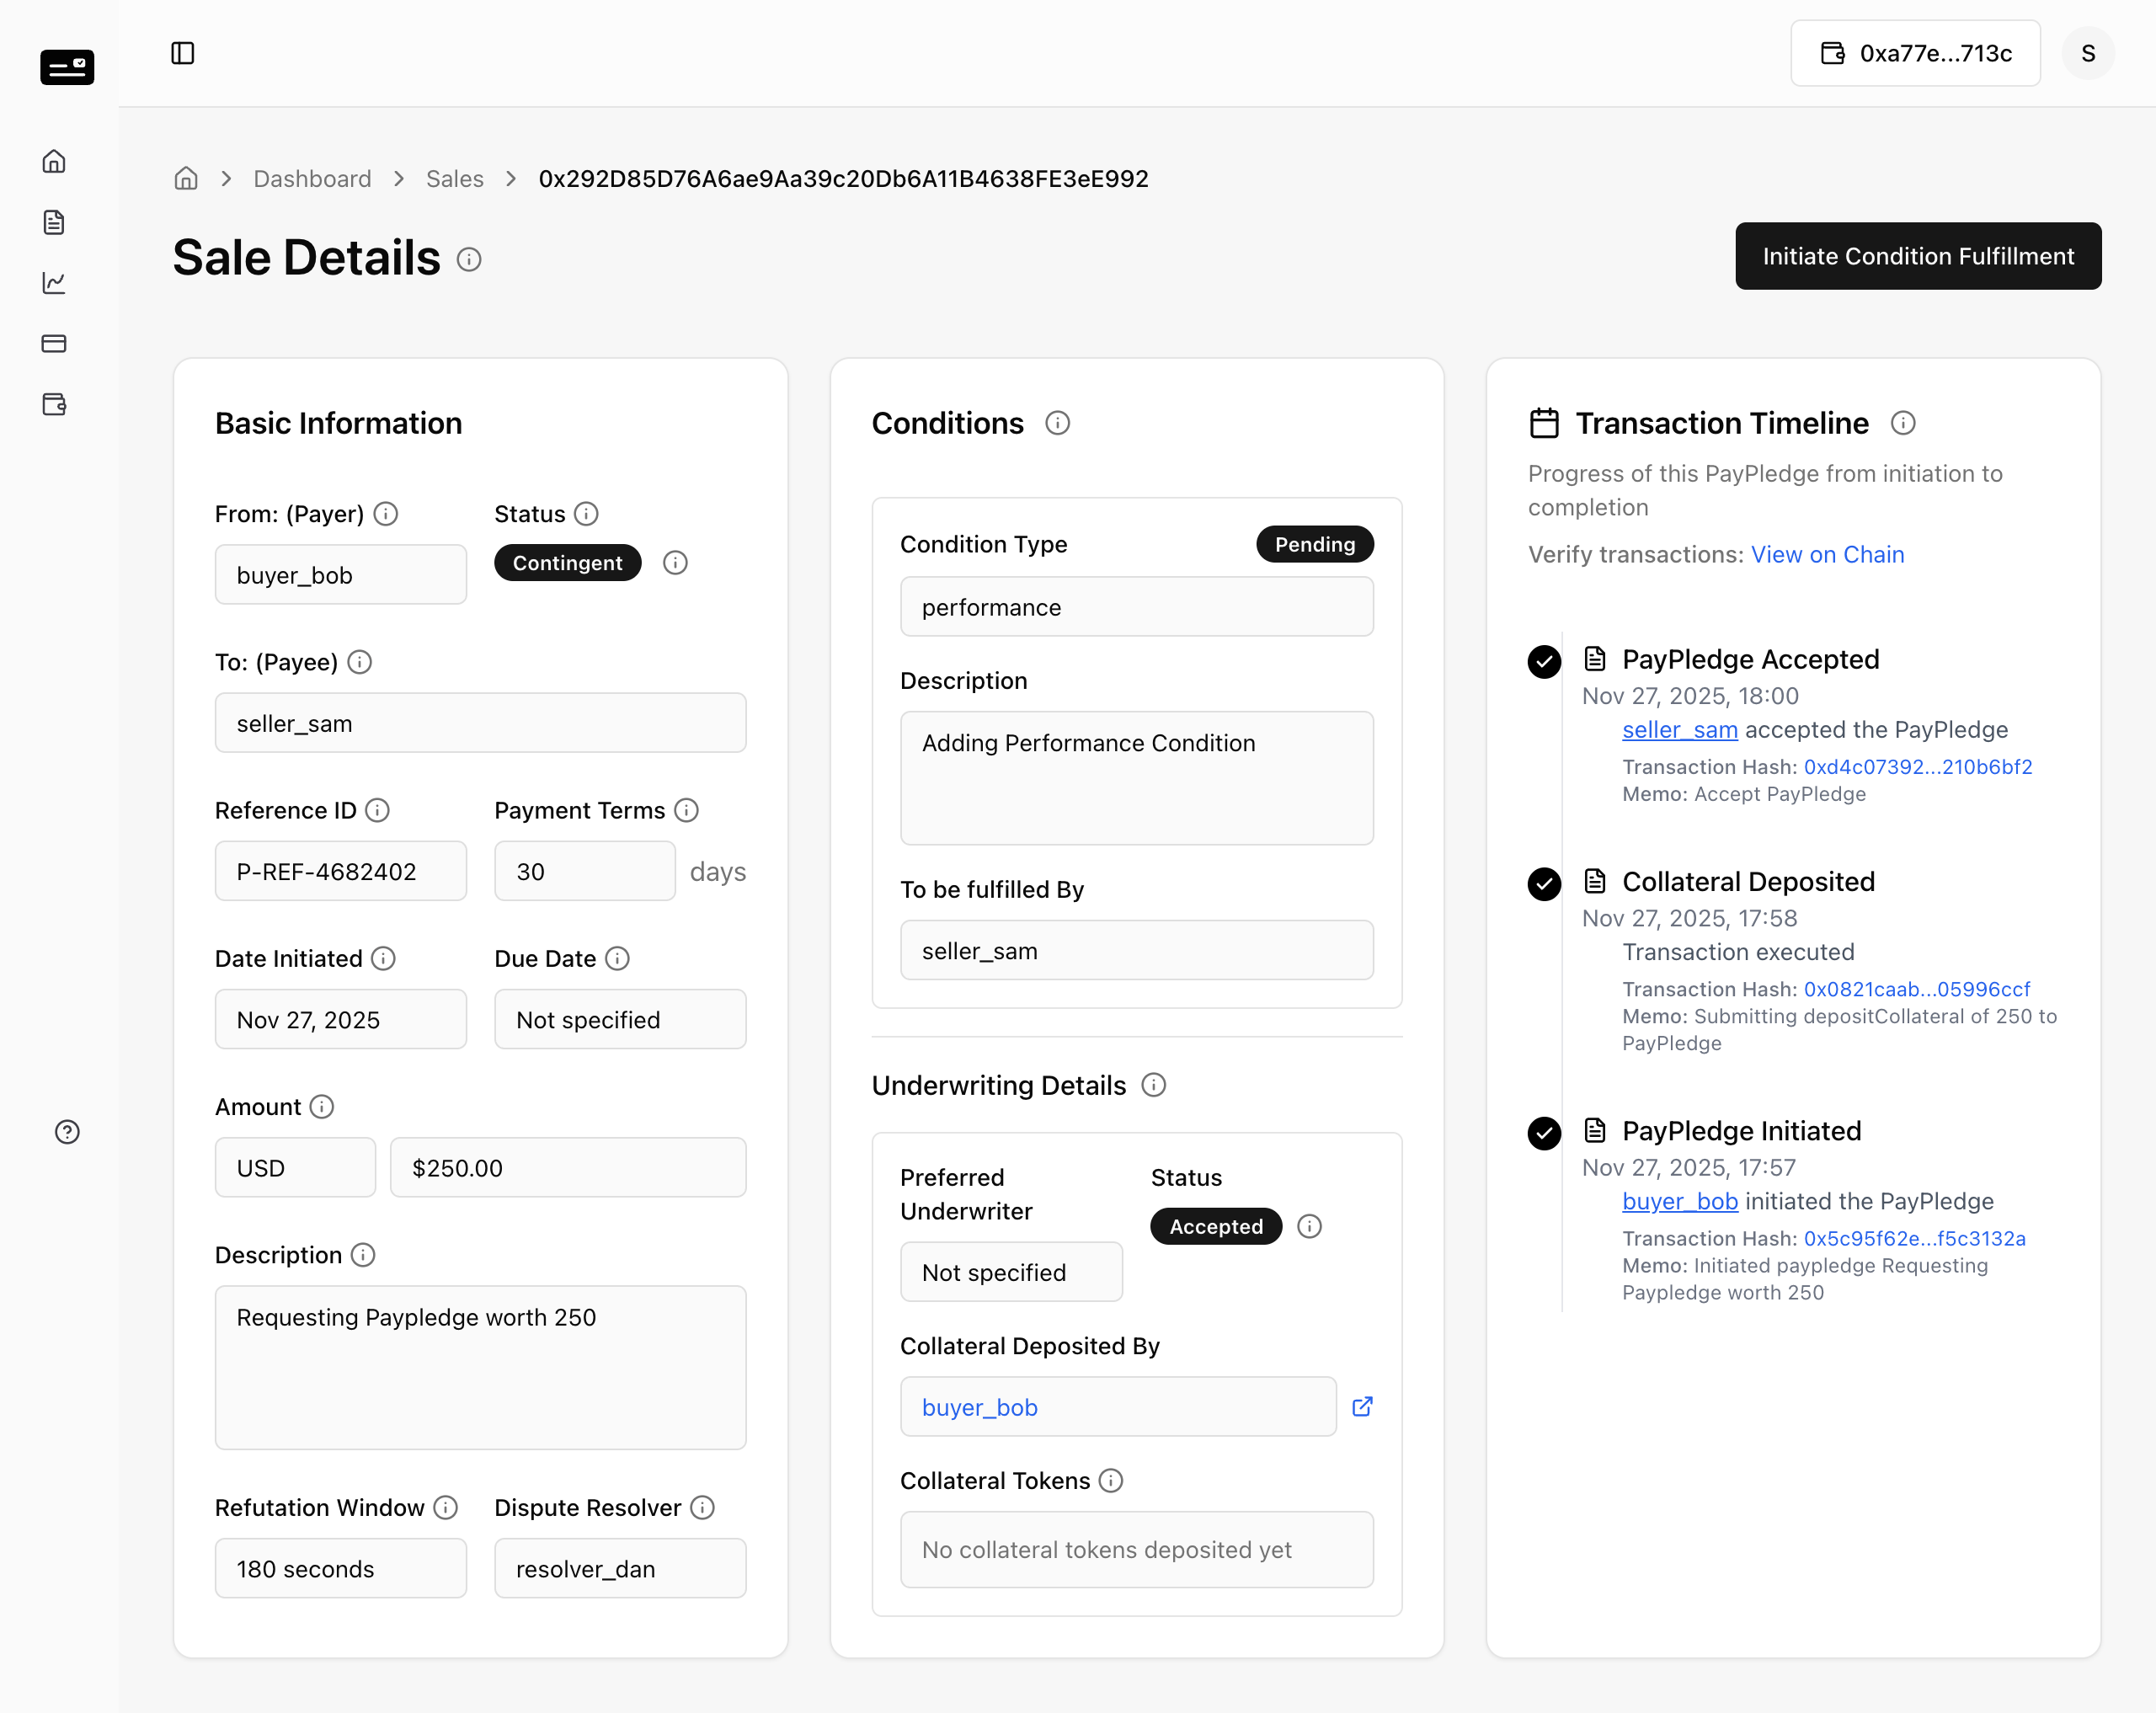
4.2 Condition Fulfillment (Seller)
The Seller demonstrates that they have met the trade obligations (e.g., shipping goods).
Step 1: In the PayPledge details, click "Initiate Condition Fulfillment". 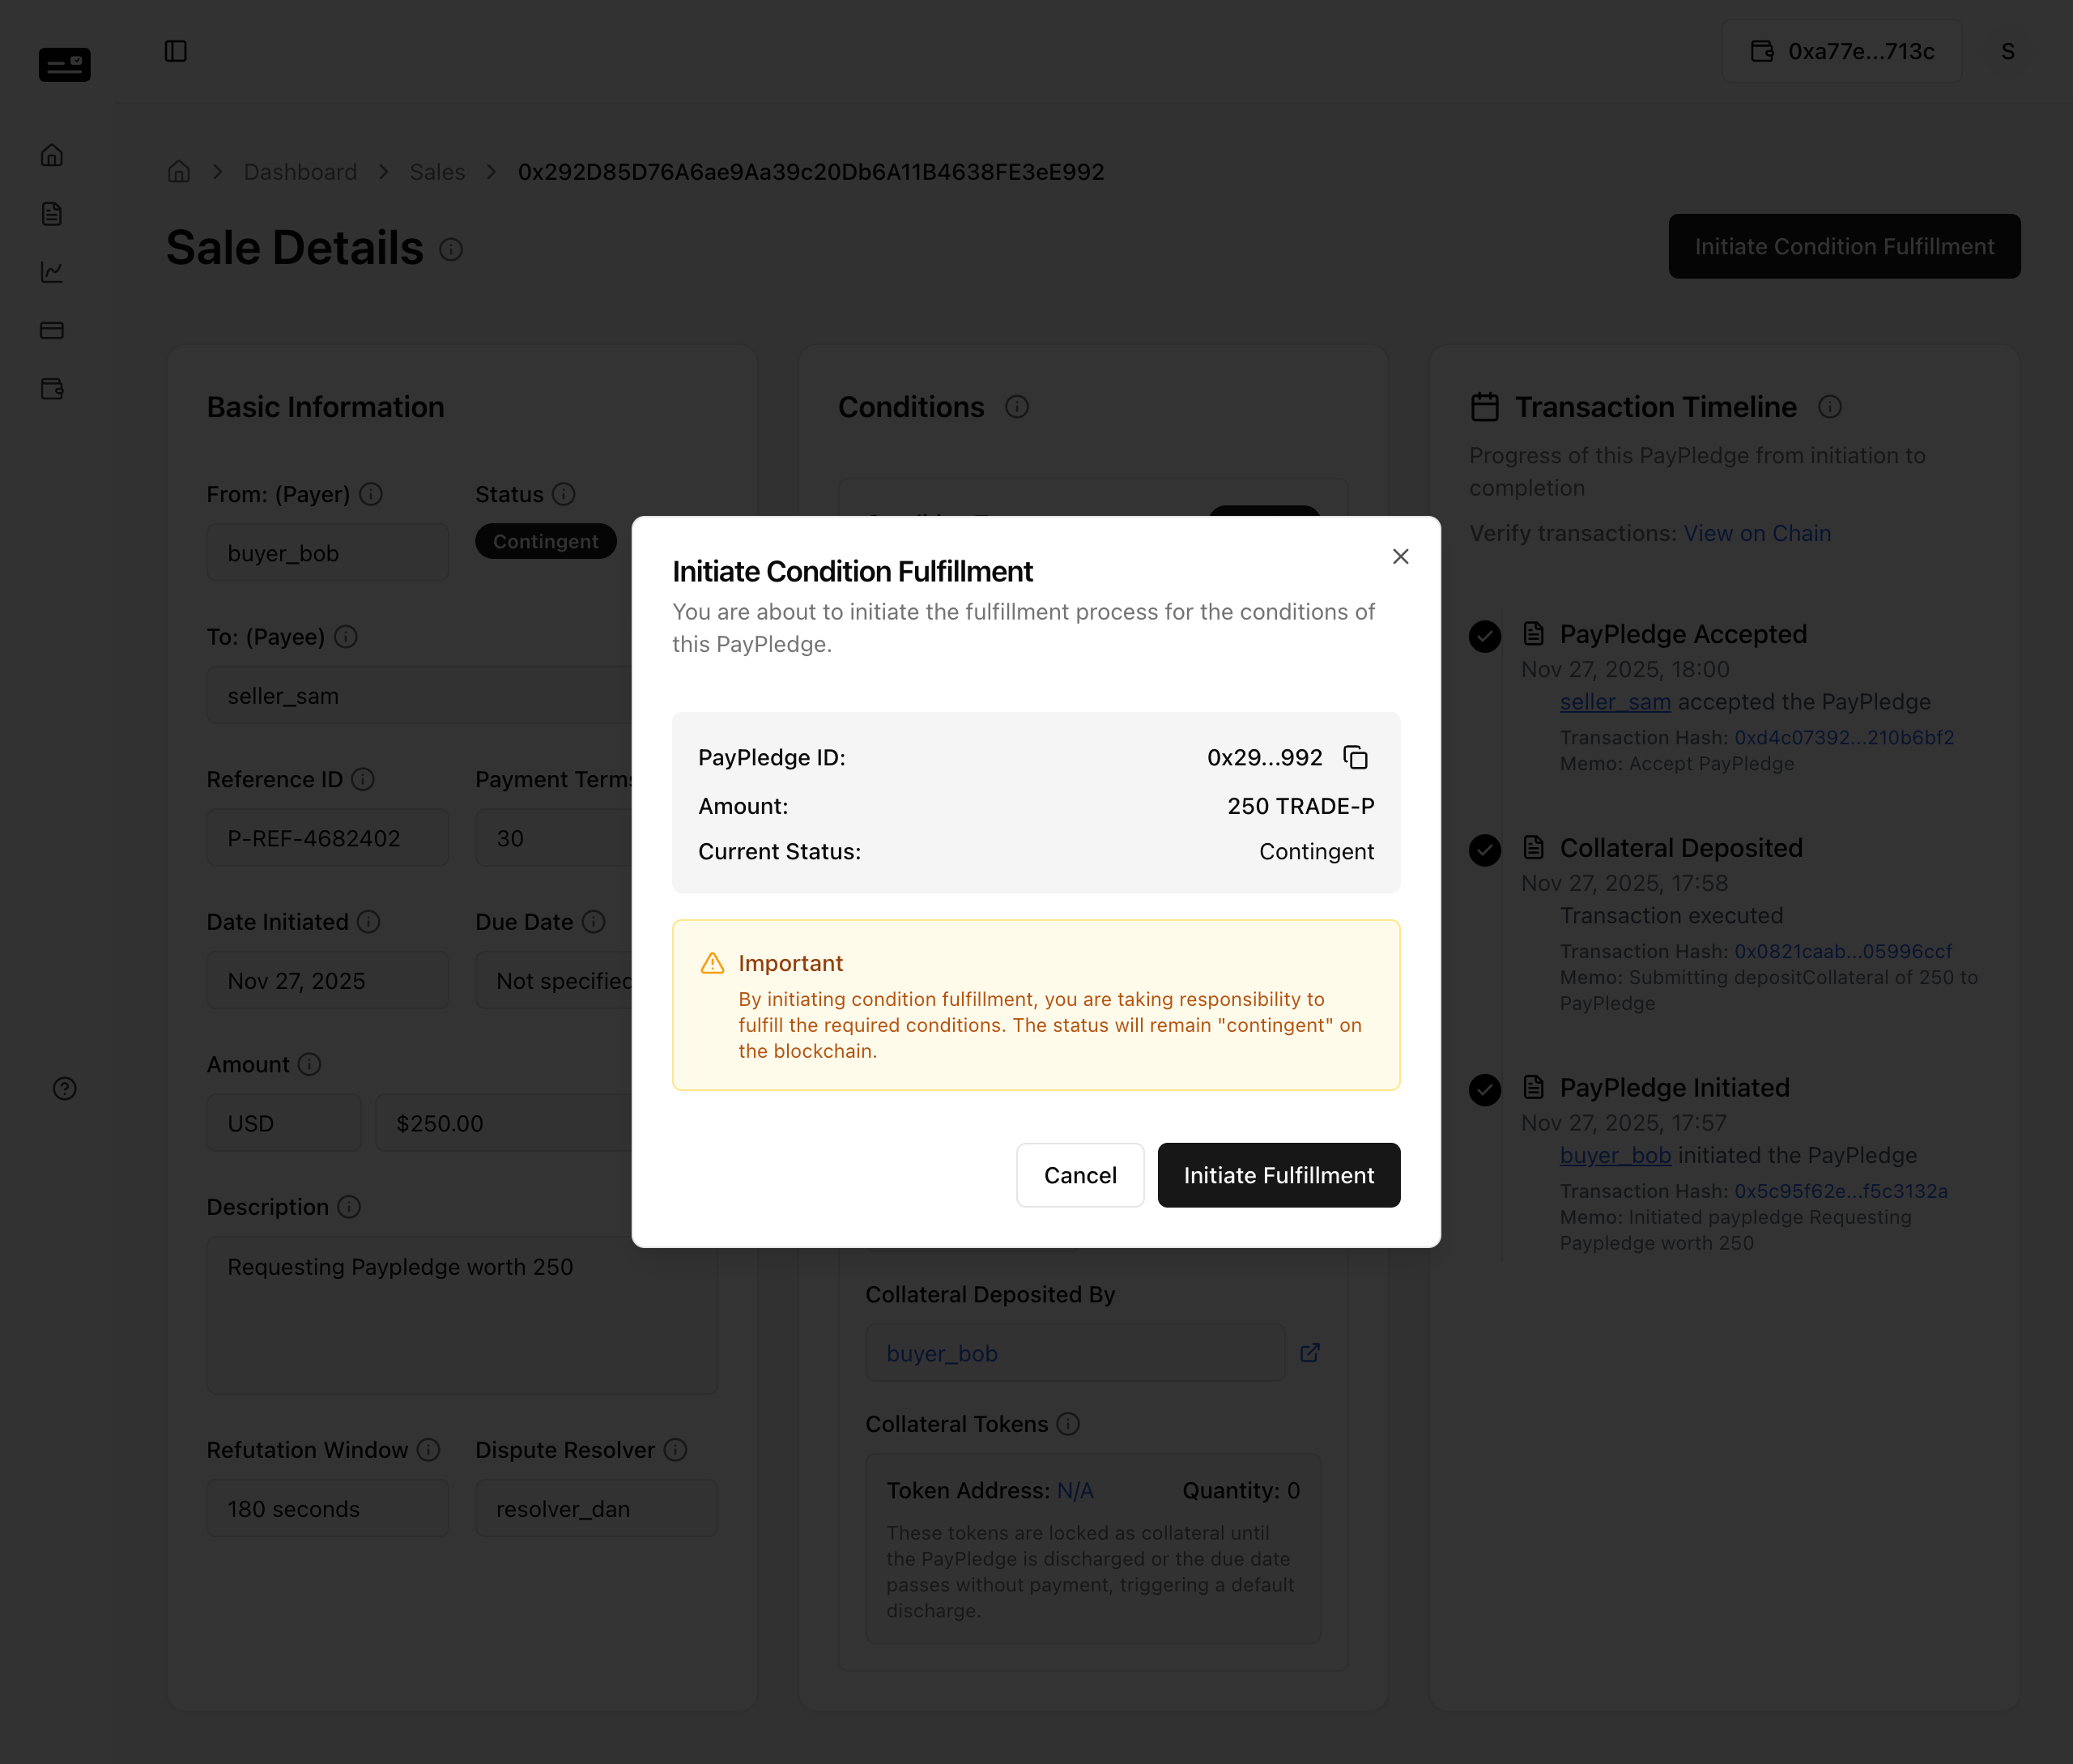
Step 2: Submit the proof/request. The system processes the transaction.
Step 3: The PayPledge status updates, awaiting Buyer verification. 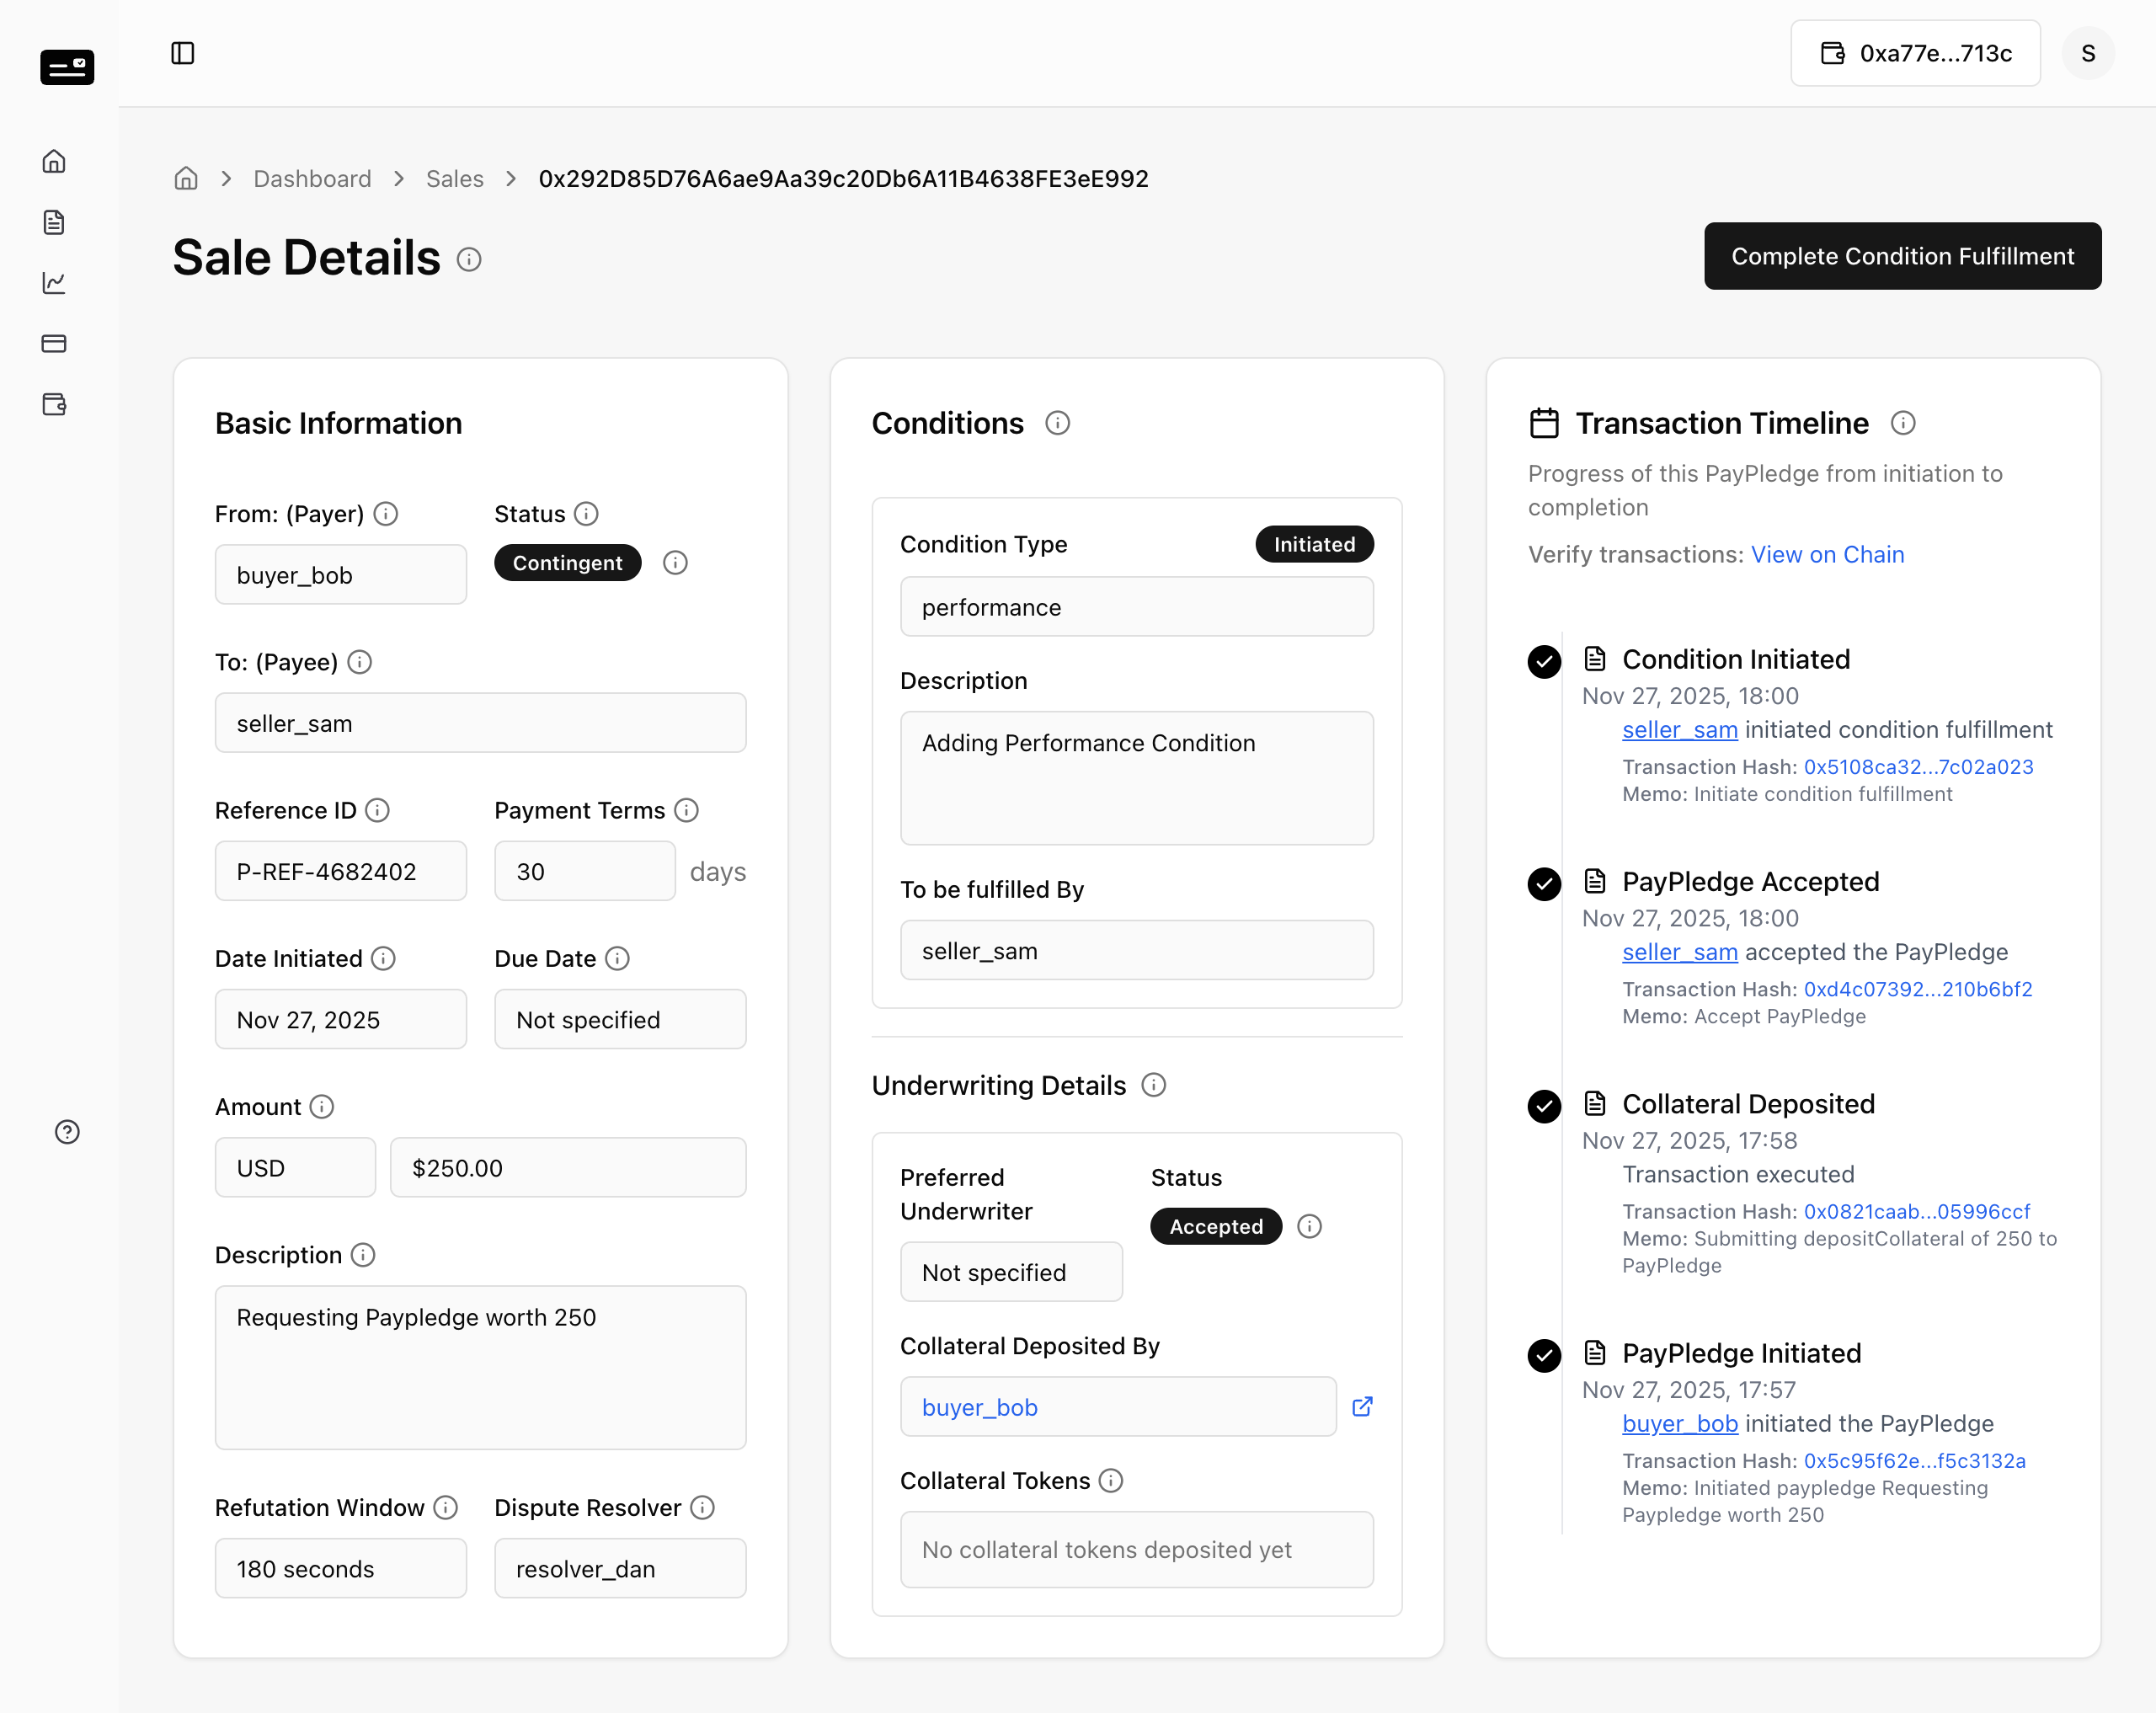
Phase 5: Dispute Resolution (Condition Fulfillment)
Actors: Buyer, Resolver
Disputes may arise if the Buyer believes the conditions were not met.
5.1 Buyer Refutation
Step 1: The Buyer views the Contingent PayPledge. 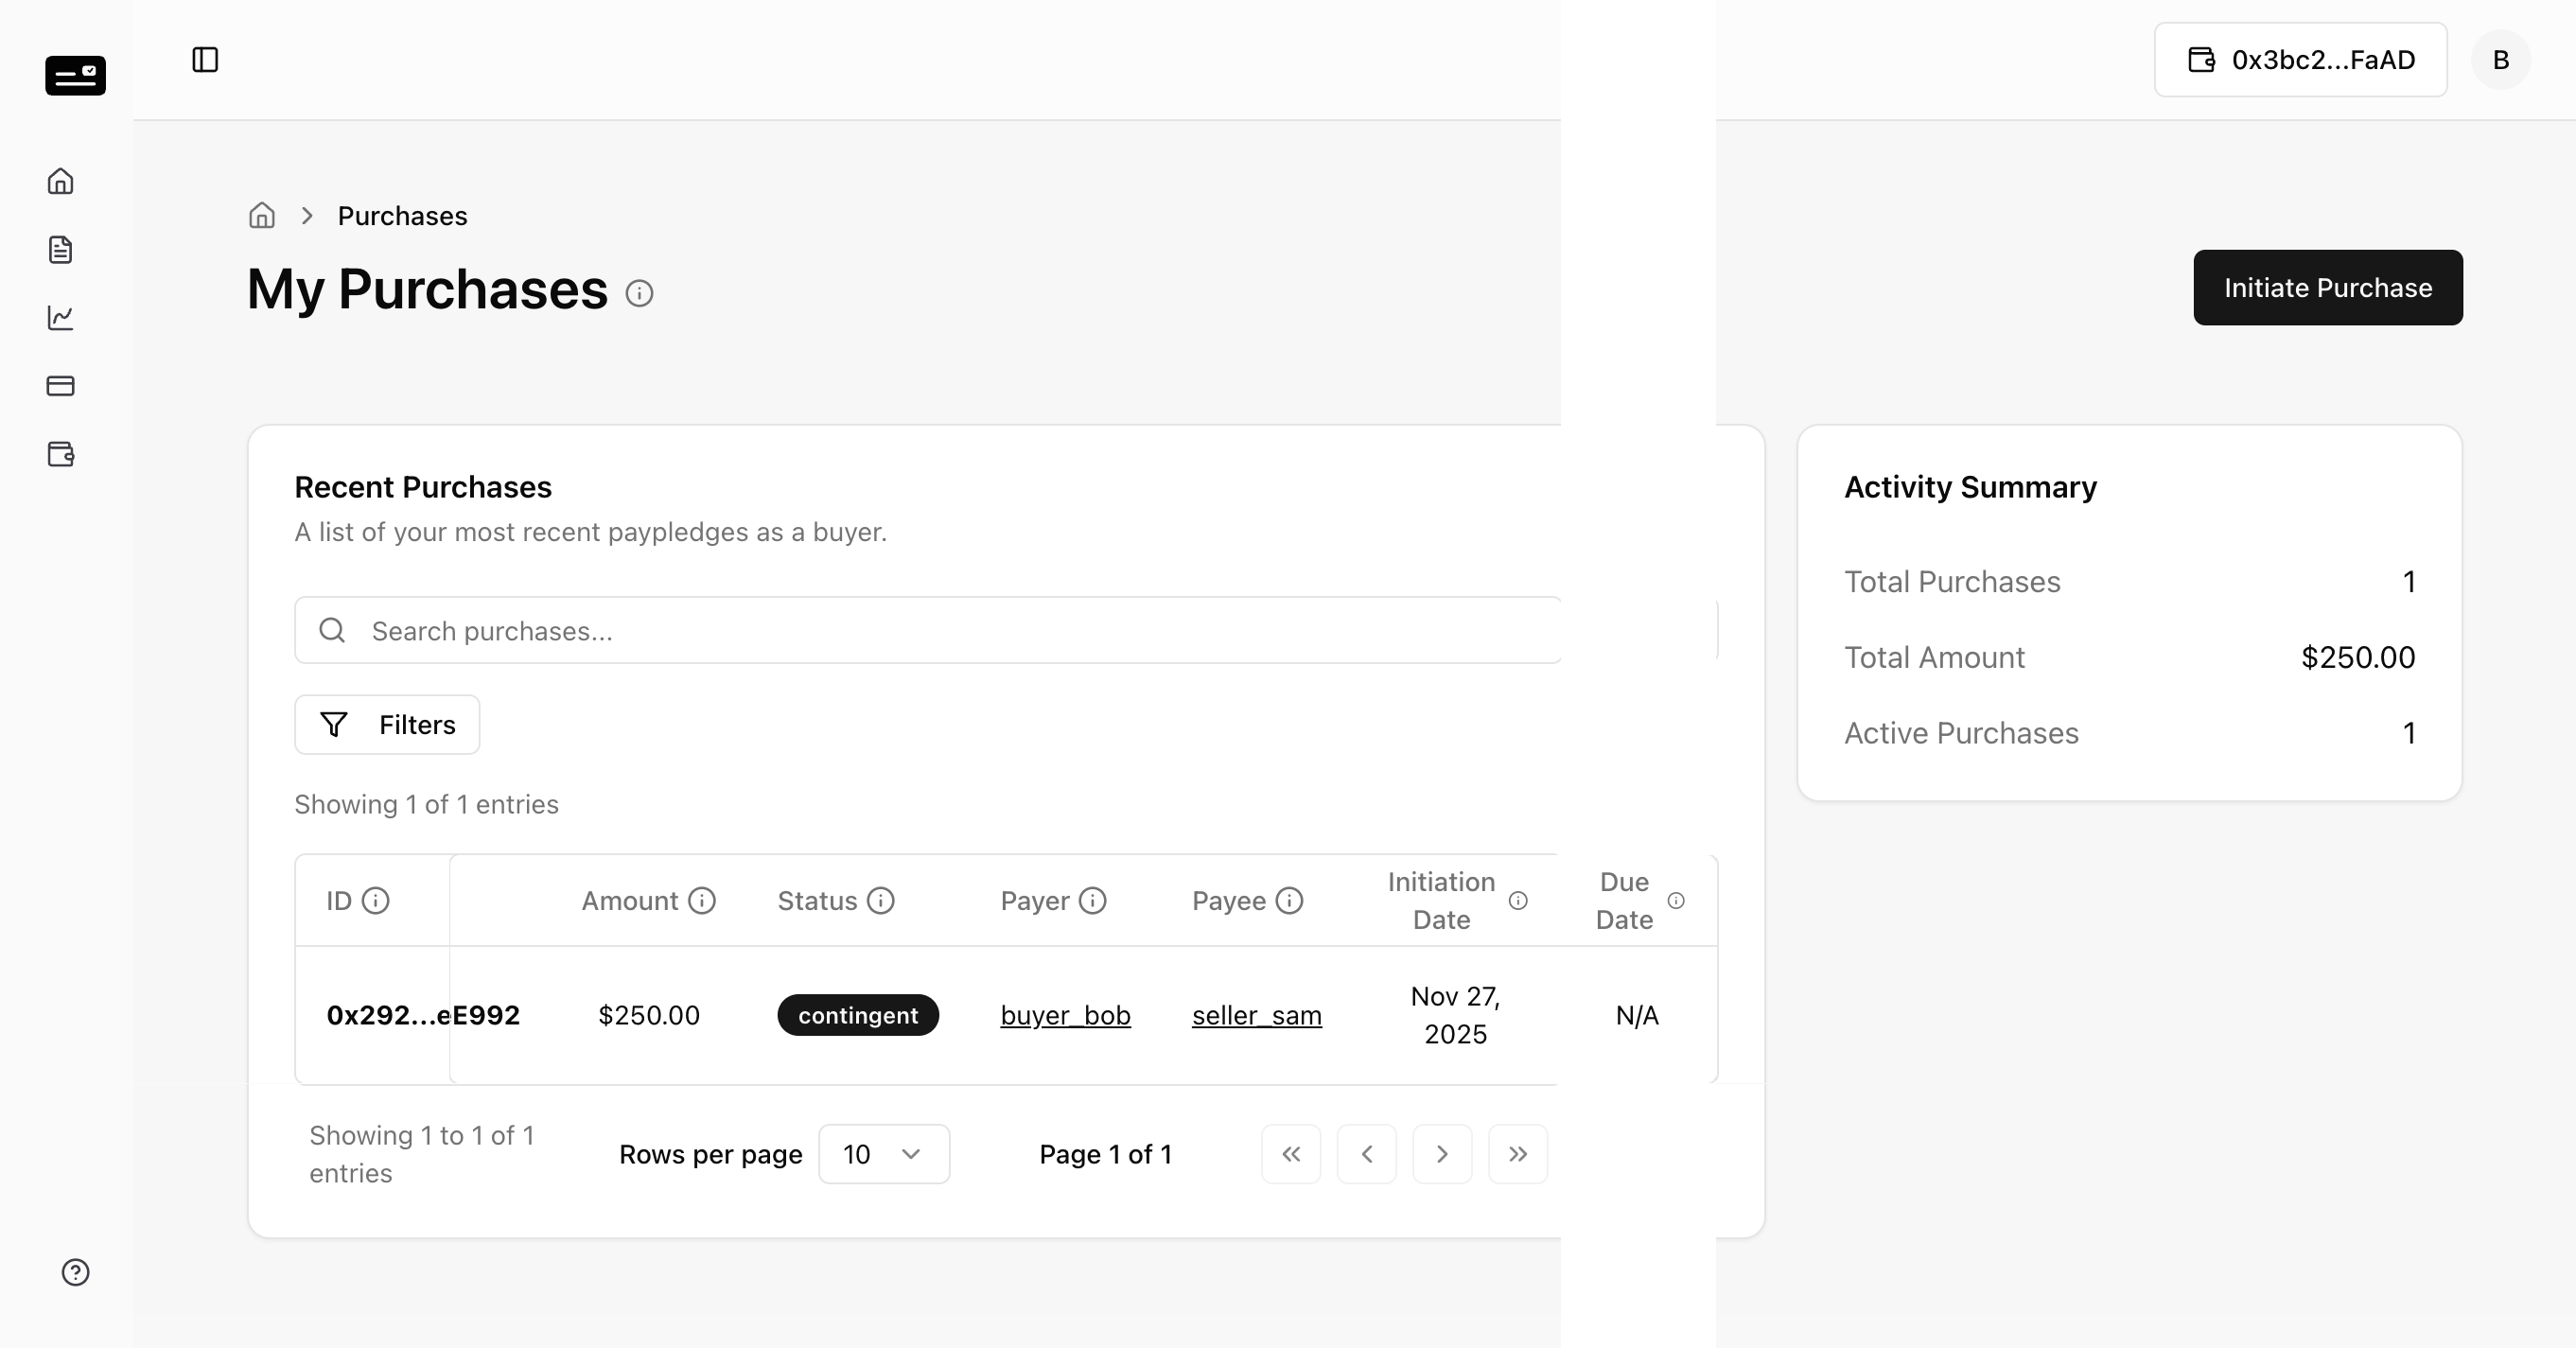
Step 2: If unsatisfied, the Buyer clicks "Refute Condition Fulfillment". 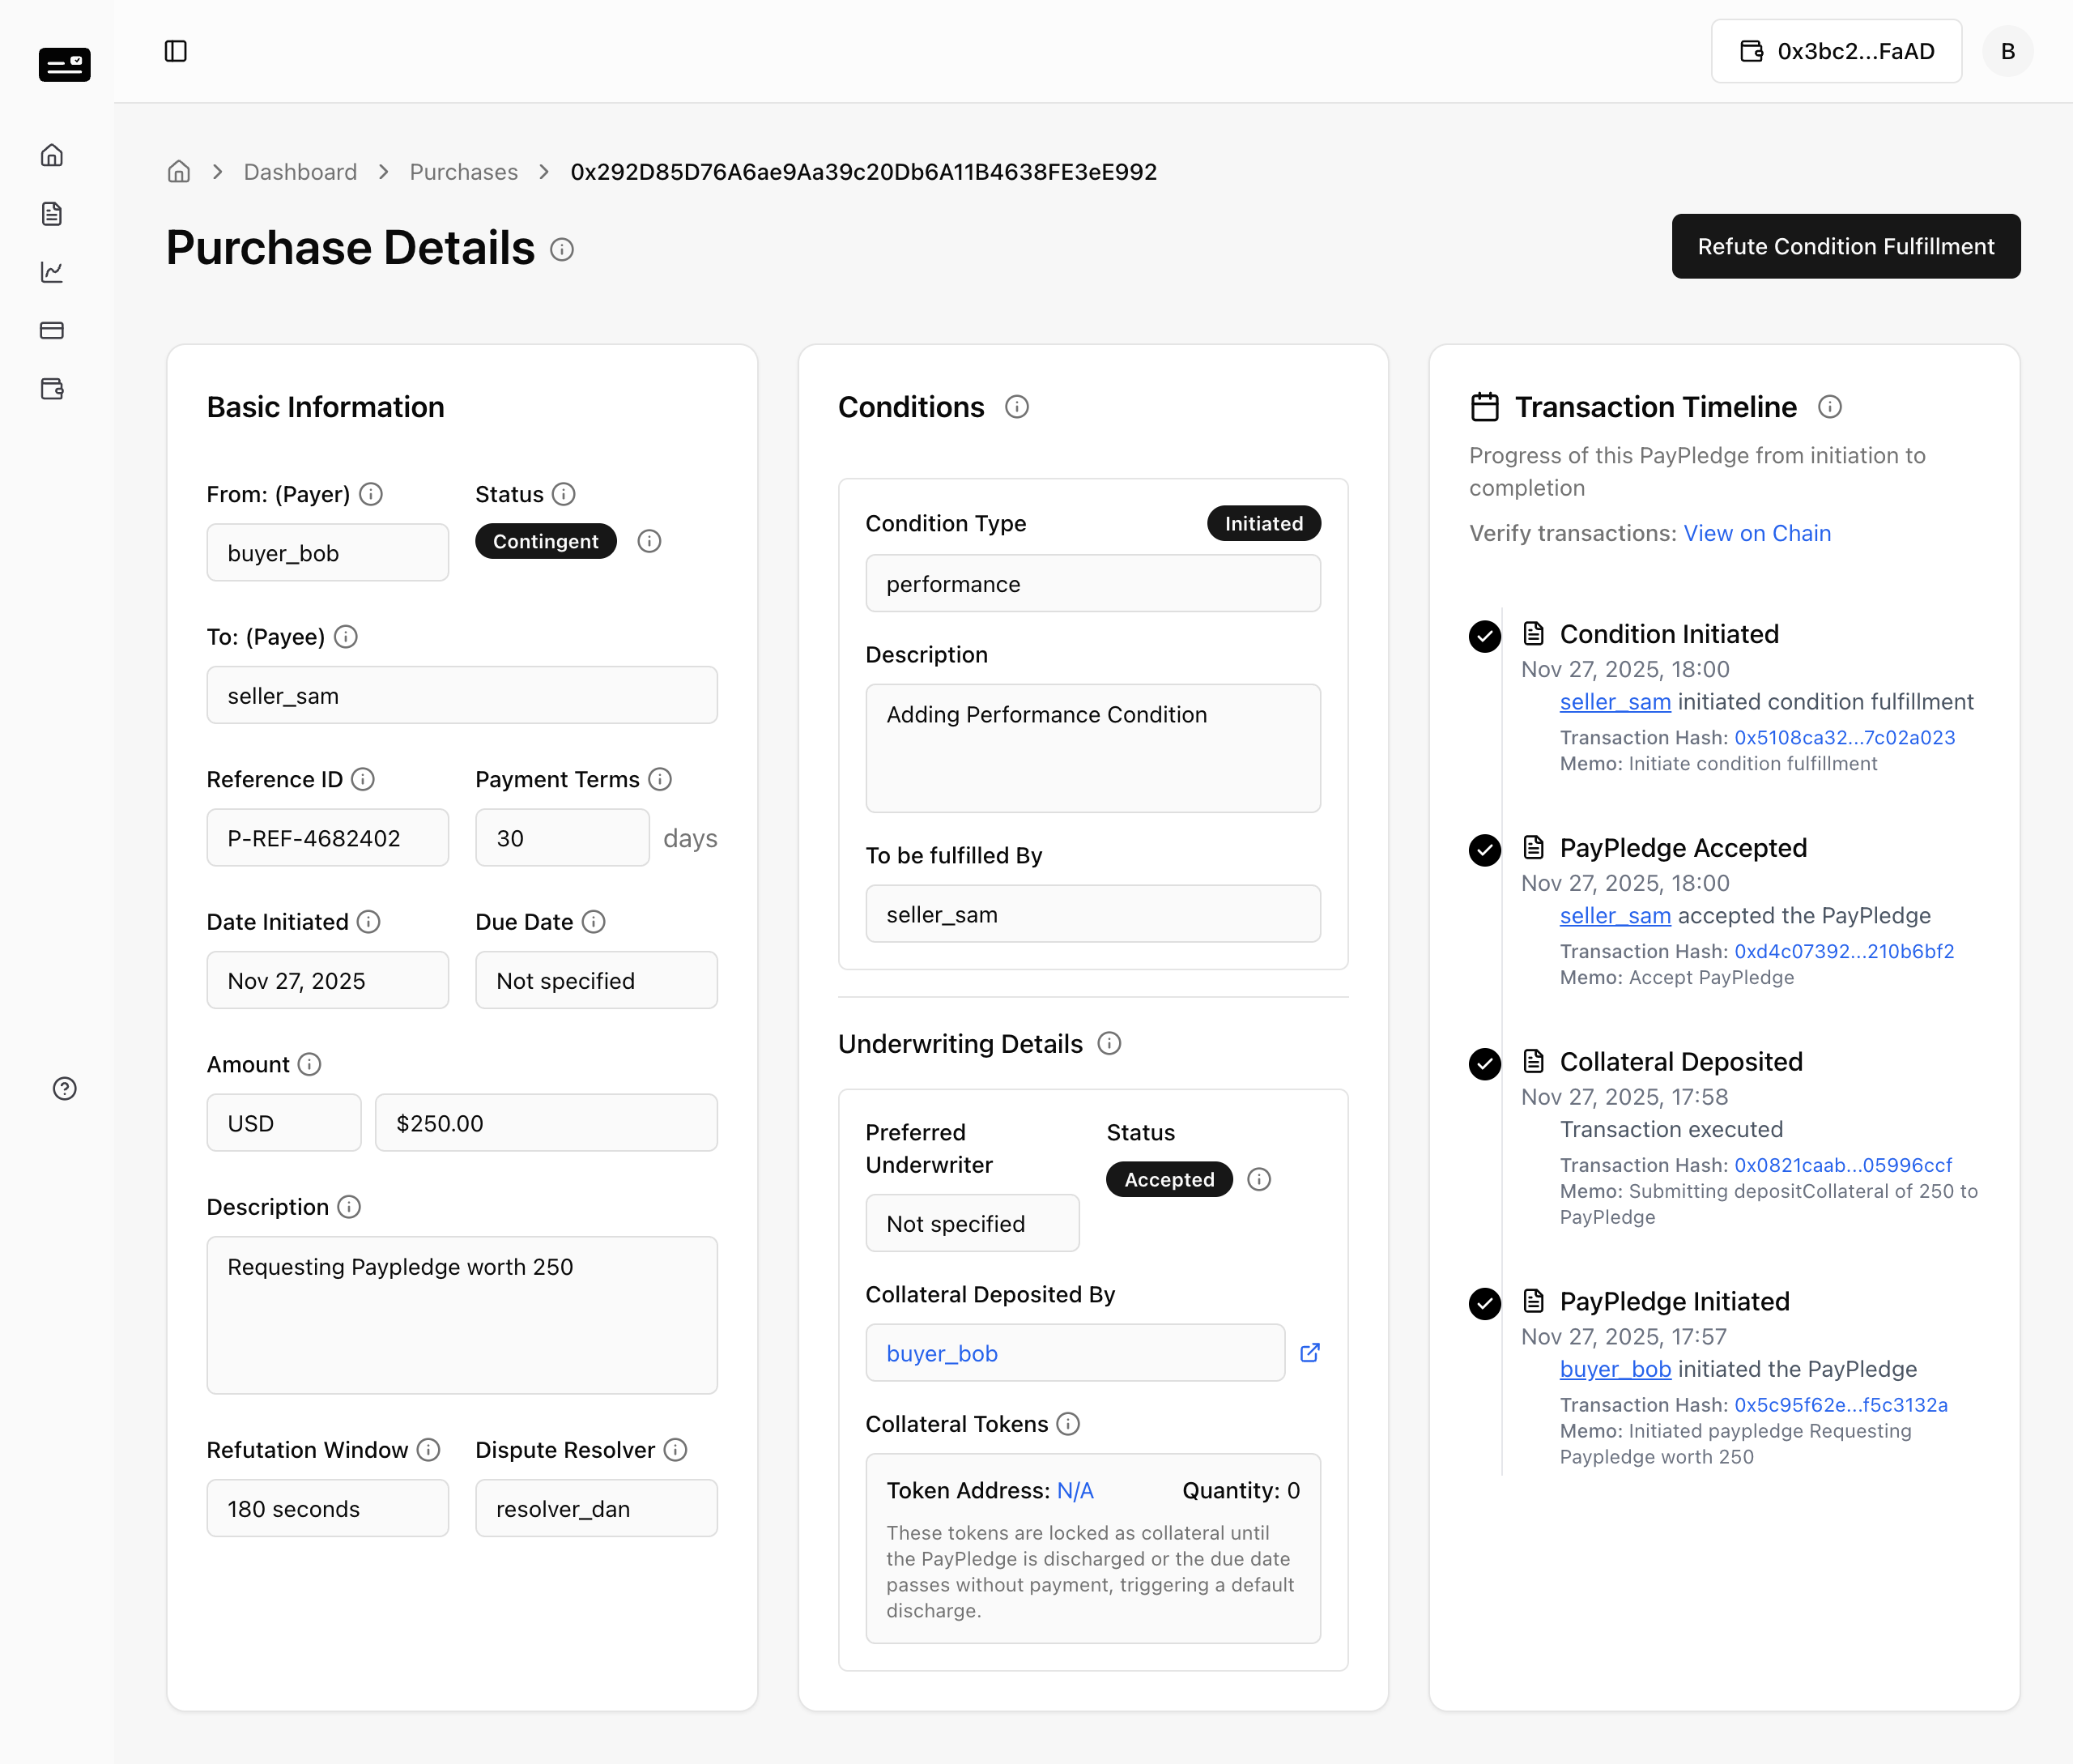
Step 3: The Buyer provides a reason and submits the dispute. 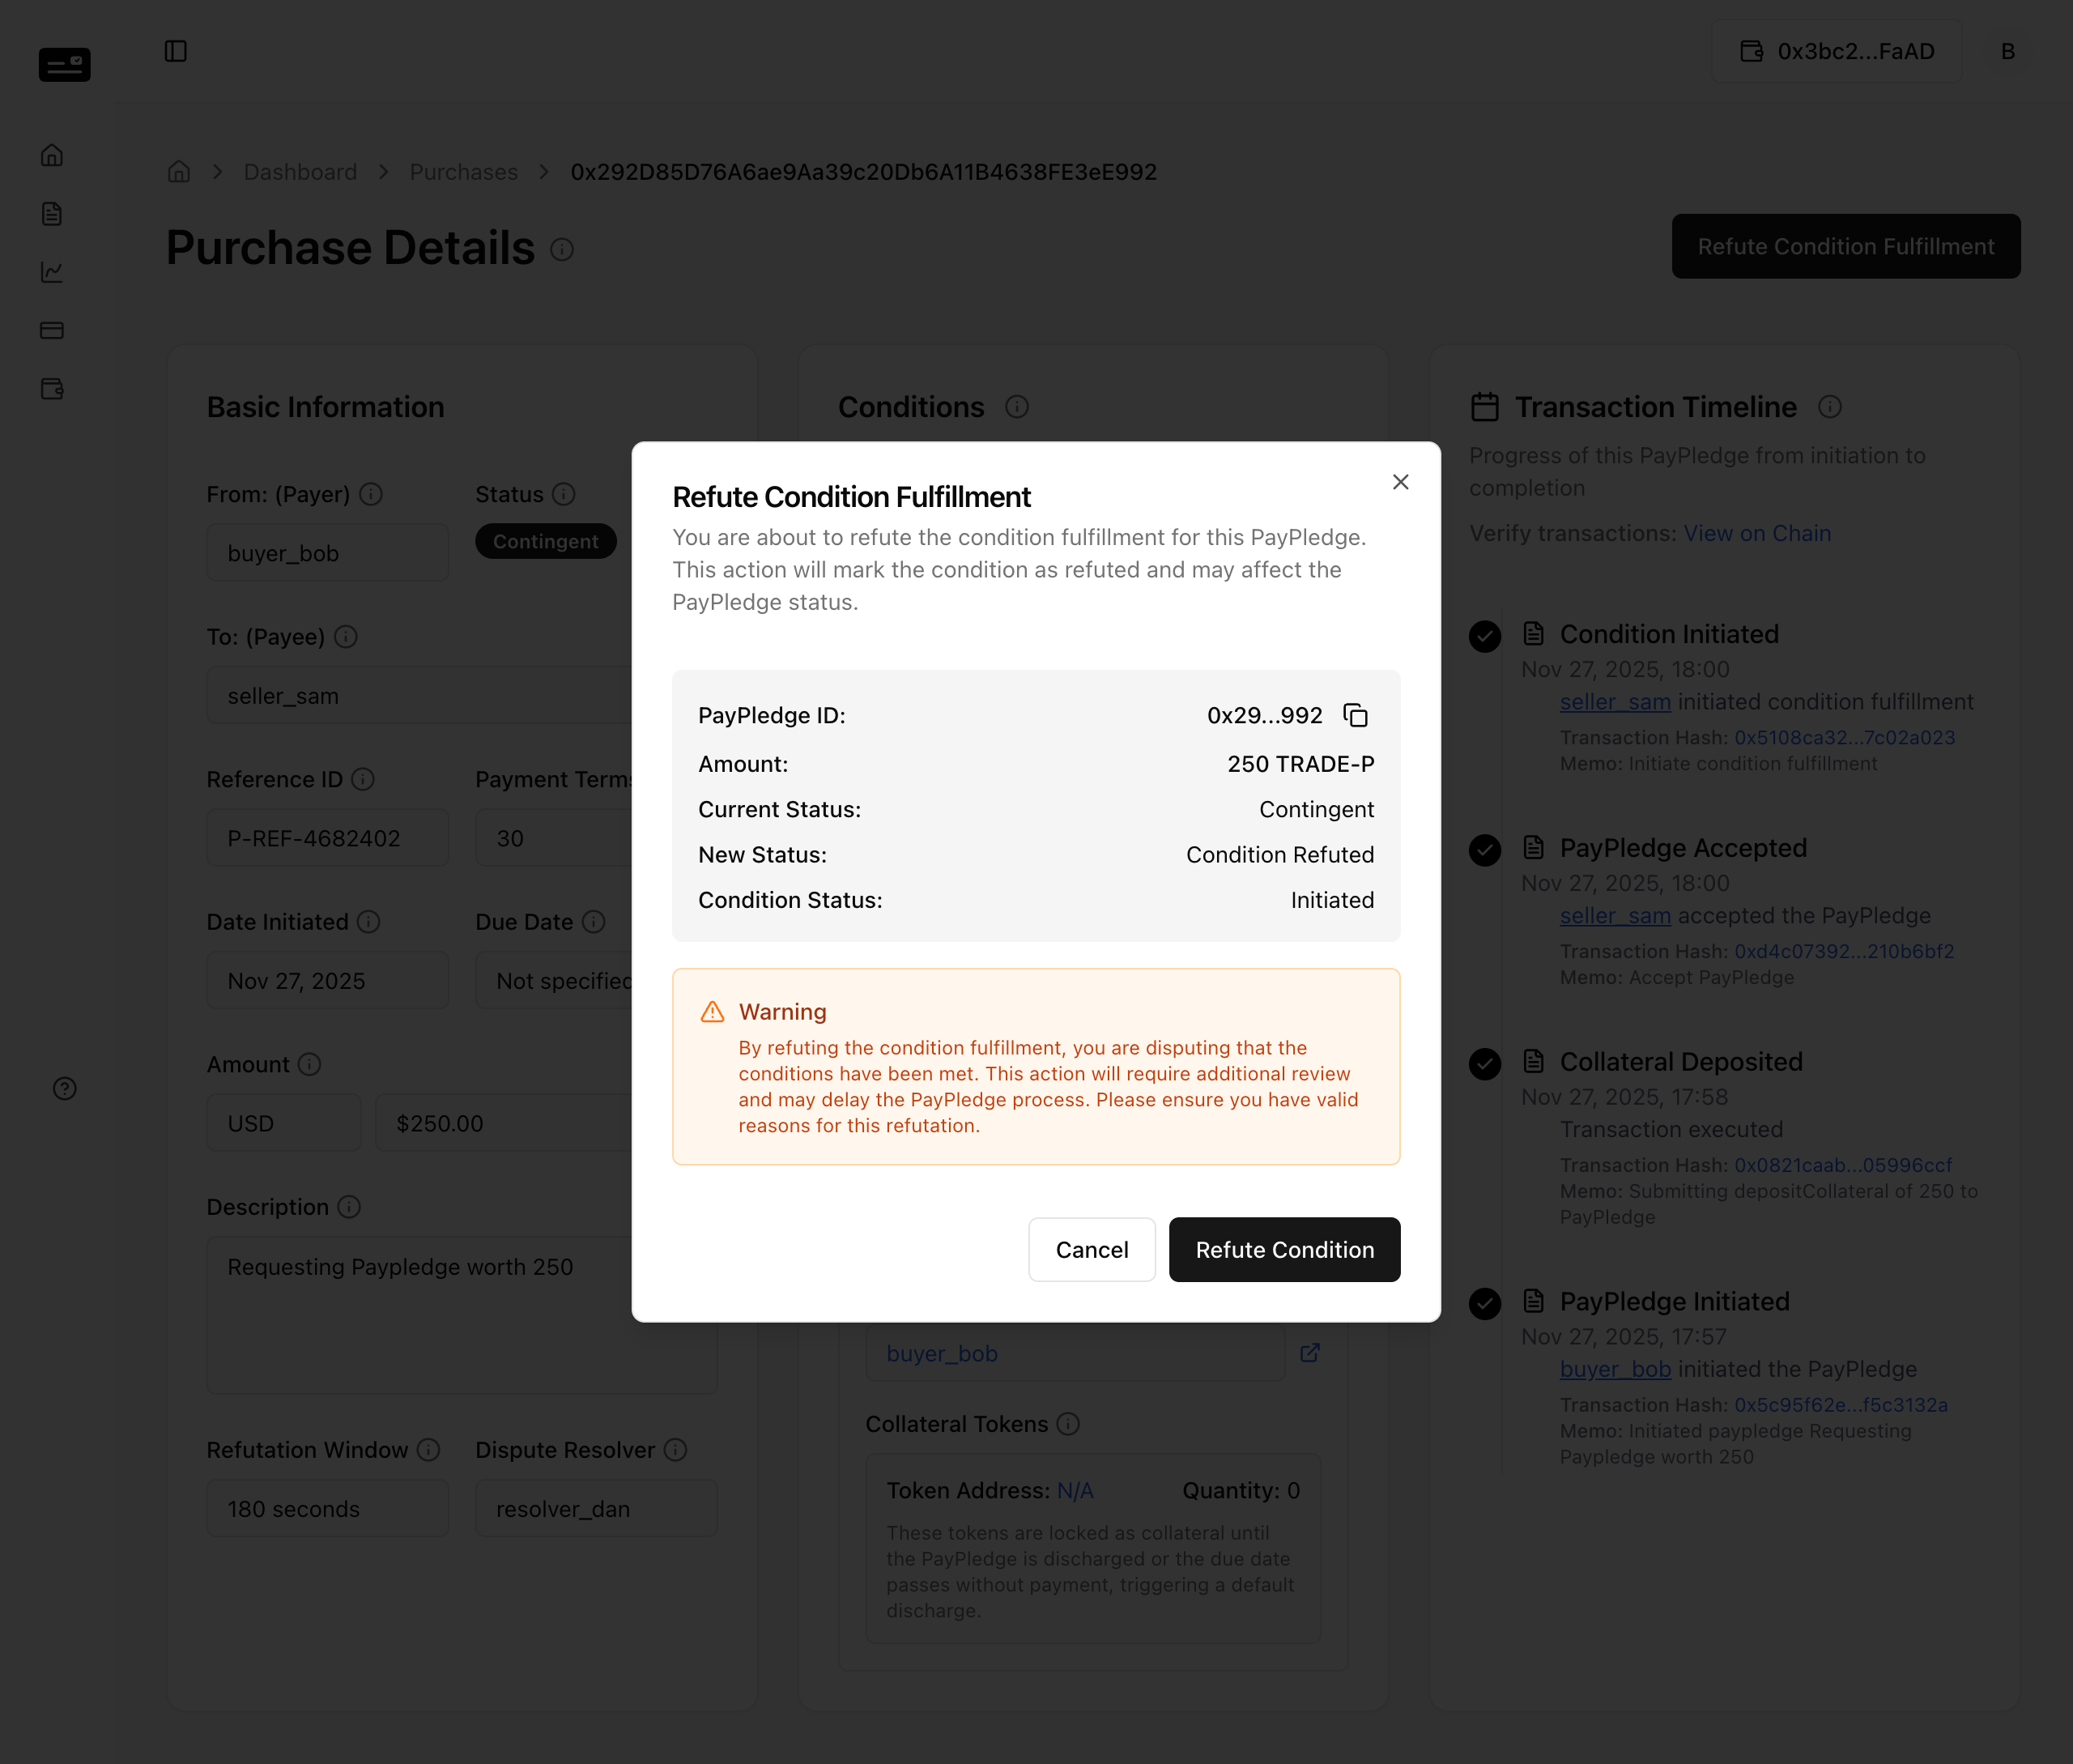
Step 4: The dispute is recorded on-chain. 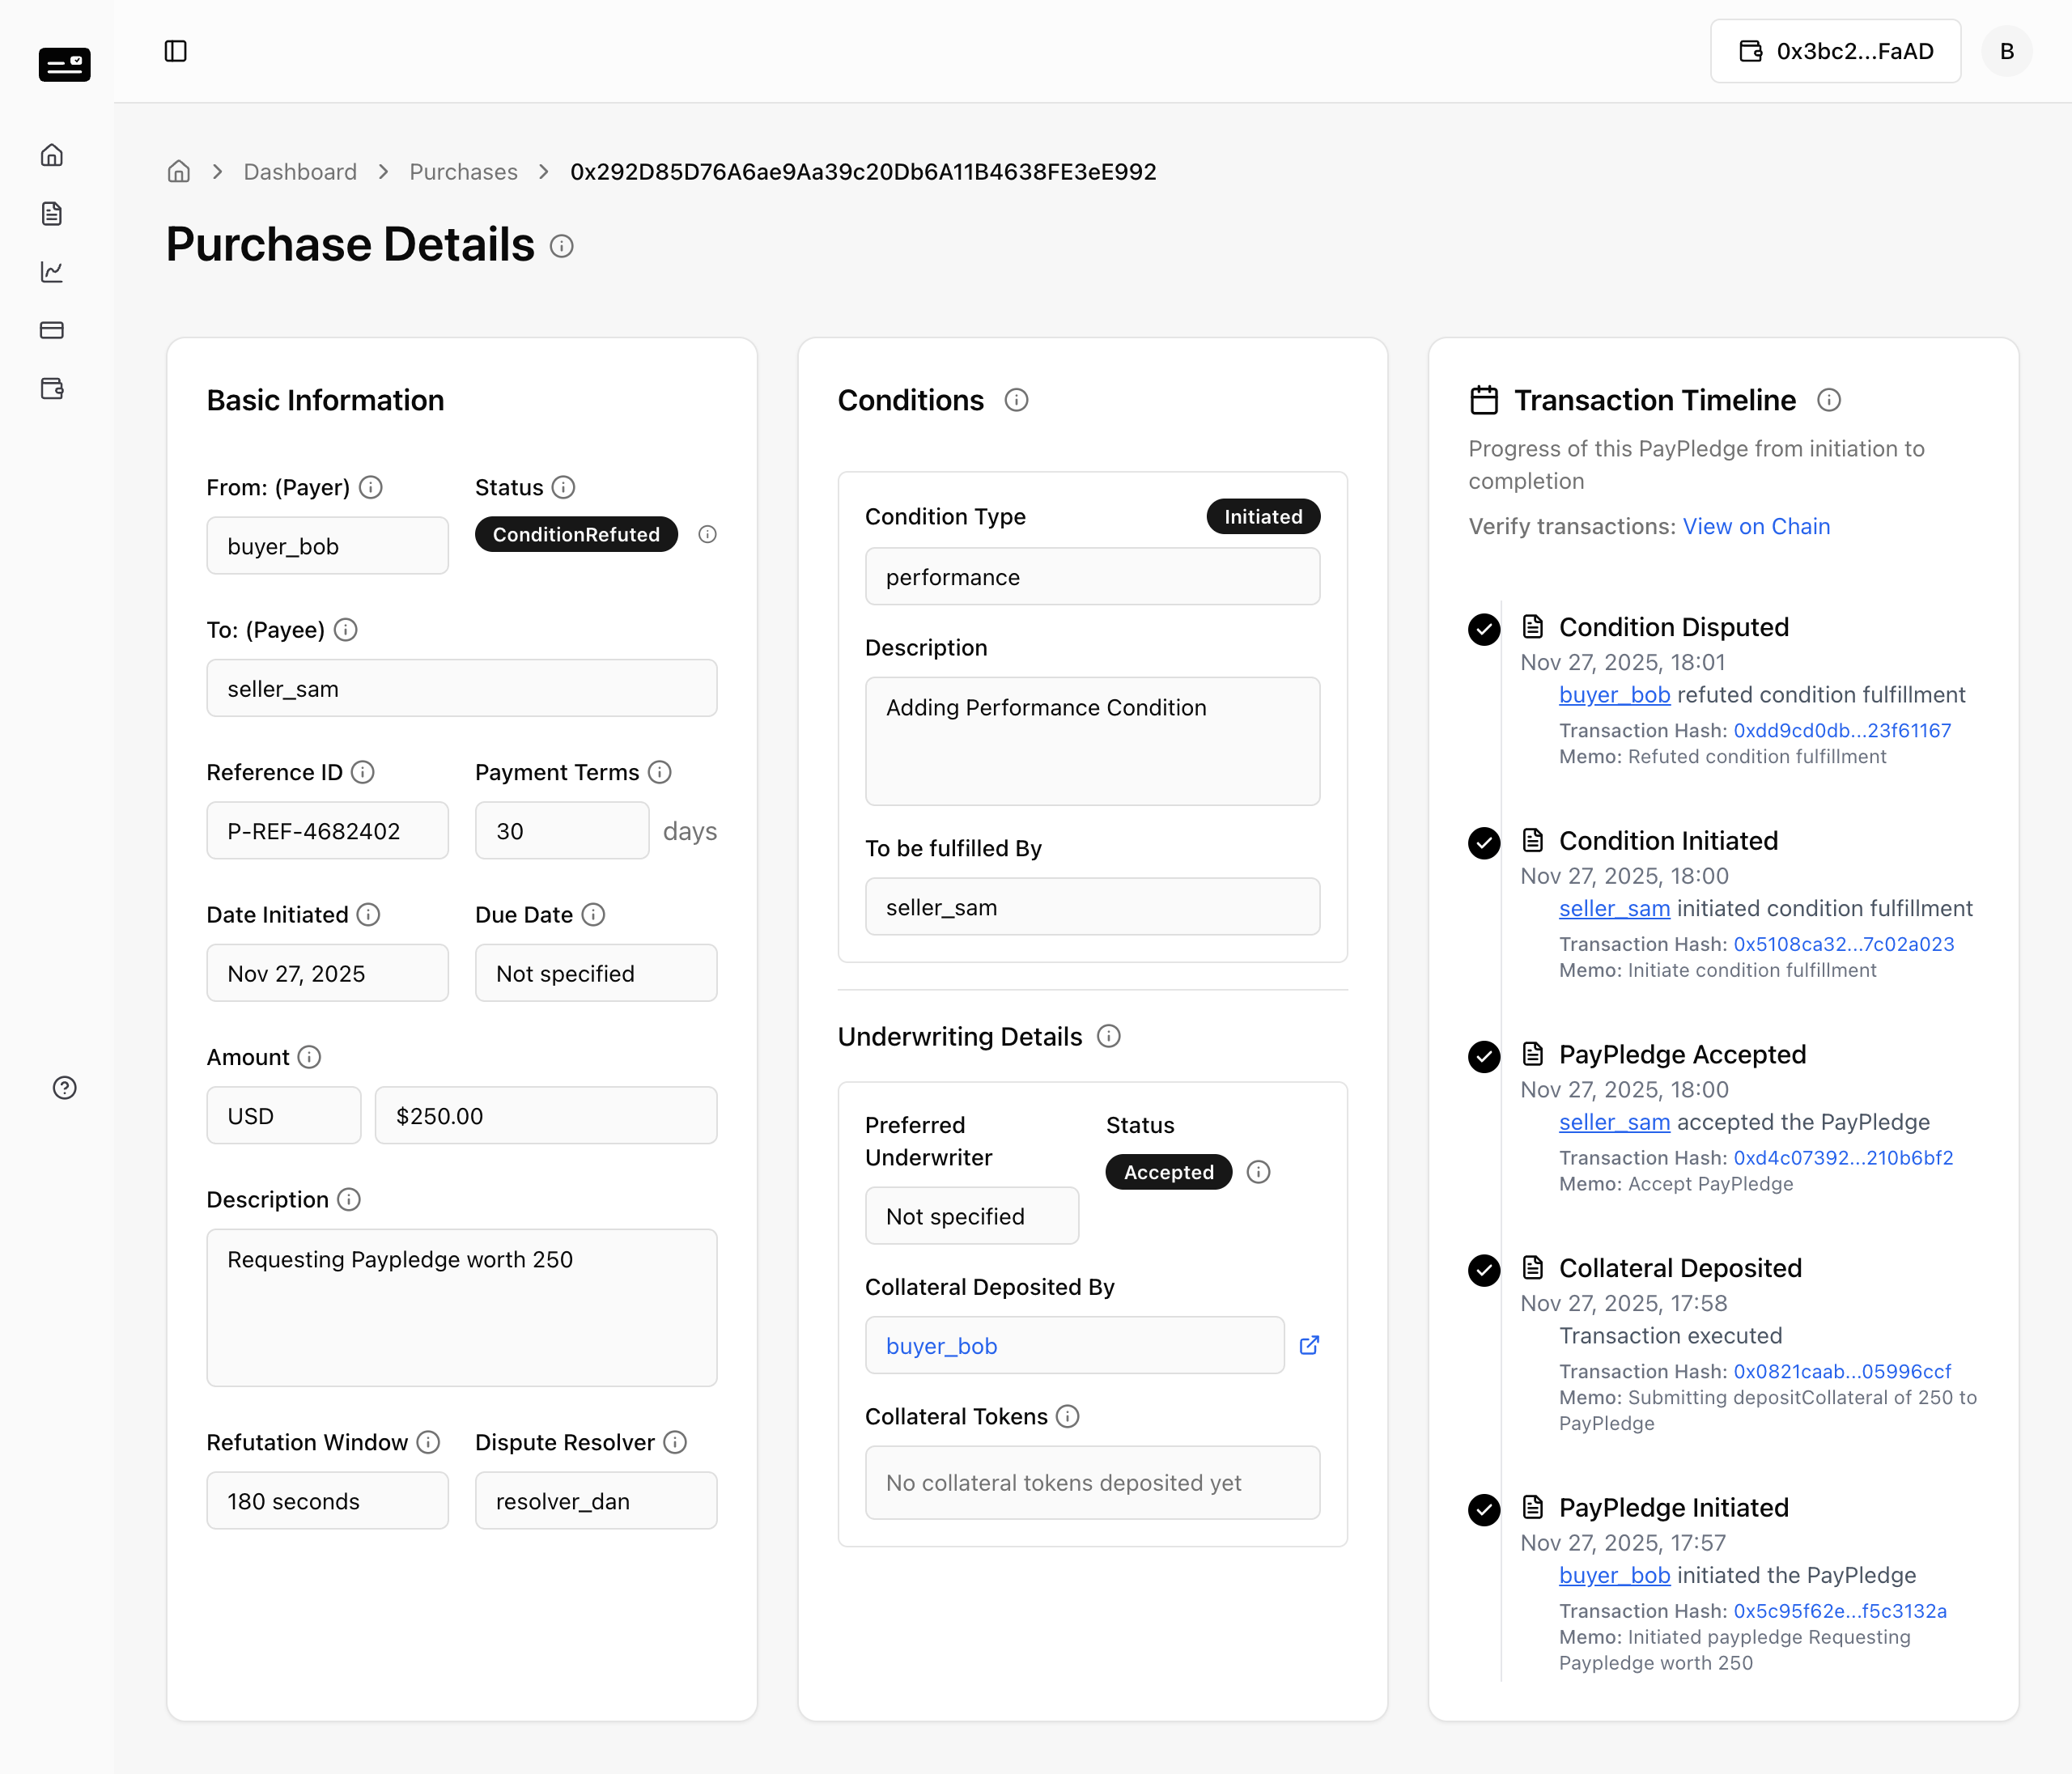
5.2 Resolver Intervention
The Resolver (Arbitrator) steps in to adjudicate.
Step 1: The Resolver views the dispute on their Dashboard. 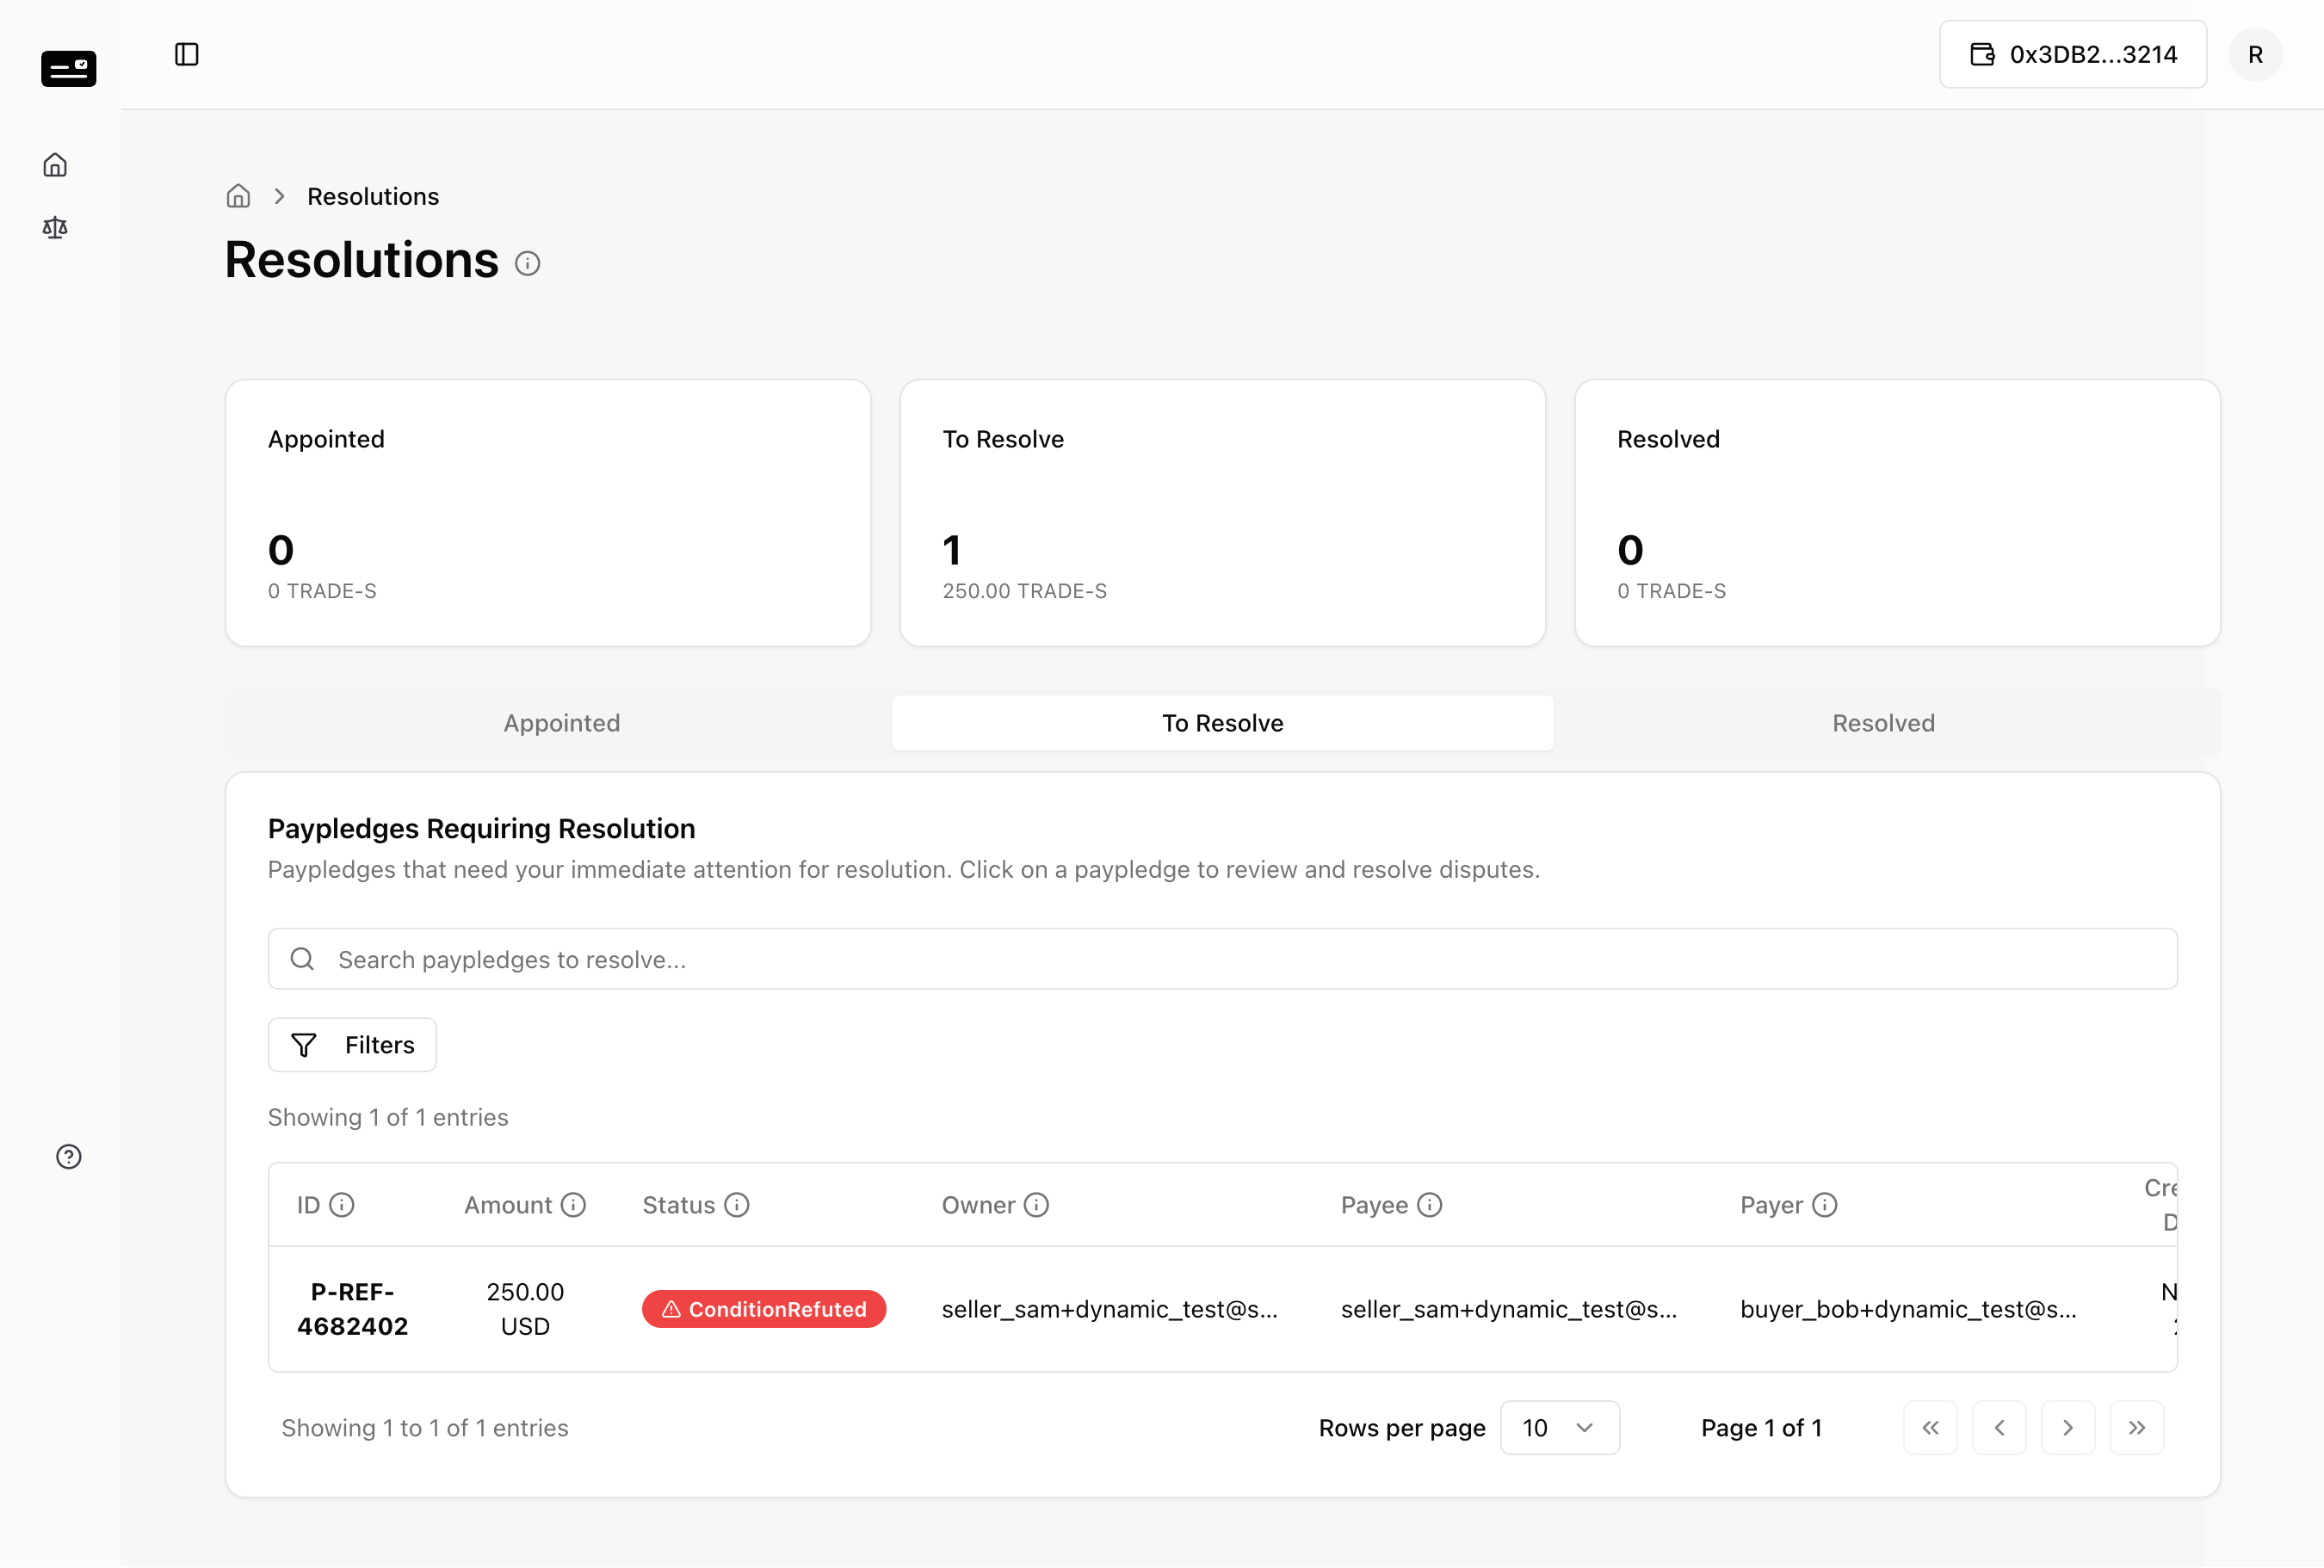
Step 2: The Resolver reviews the evidence and decides to Complete Condition Fulfillment (ruling in favor of the Seller). 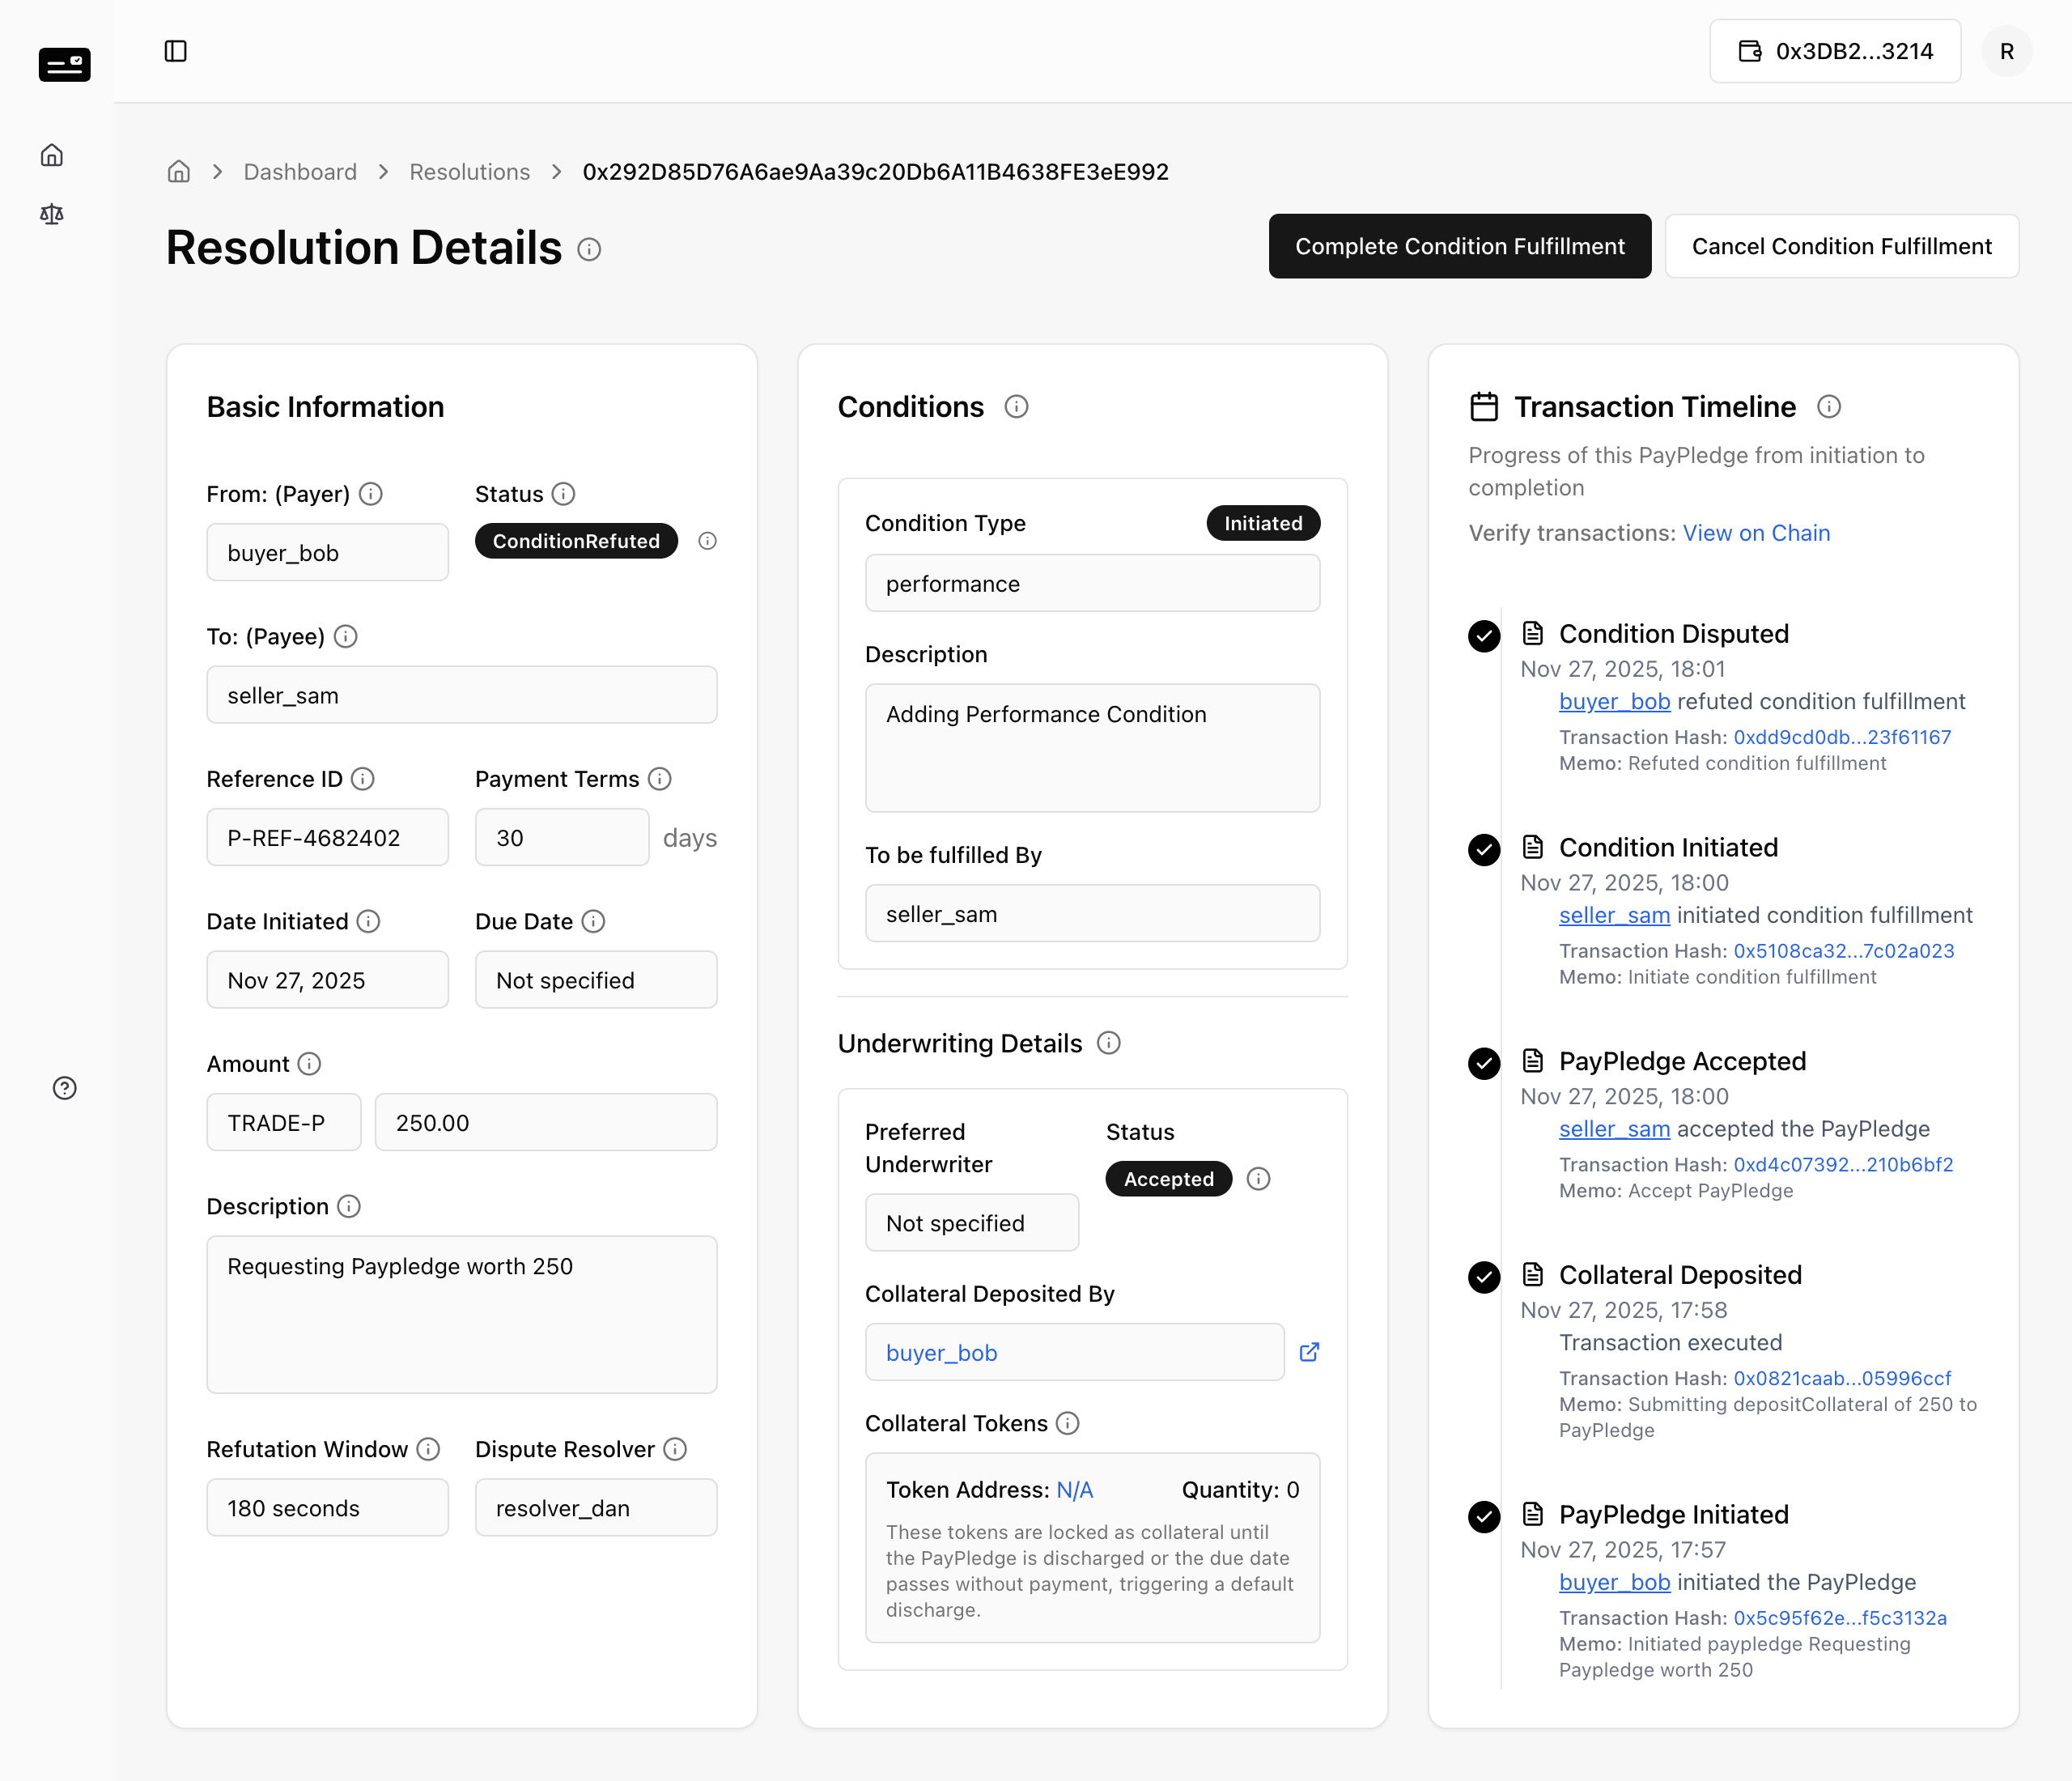
Step 3: The Resolver submits the resolution transaction. 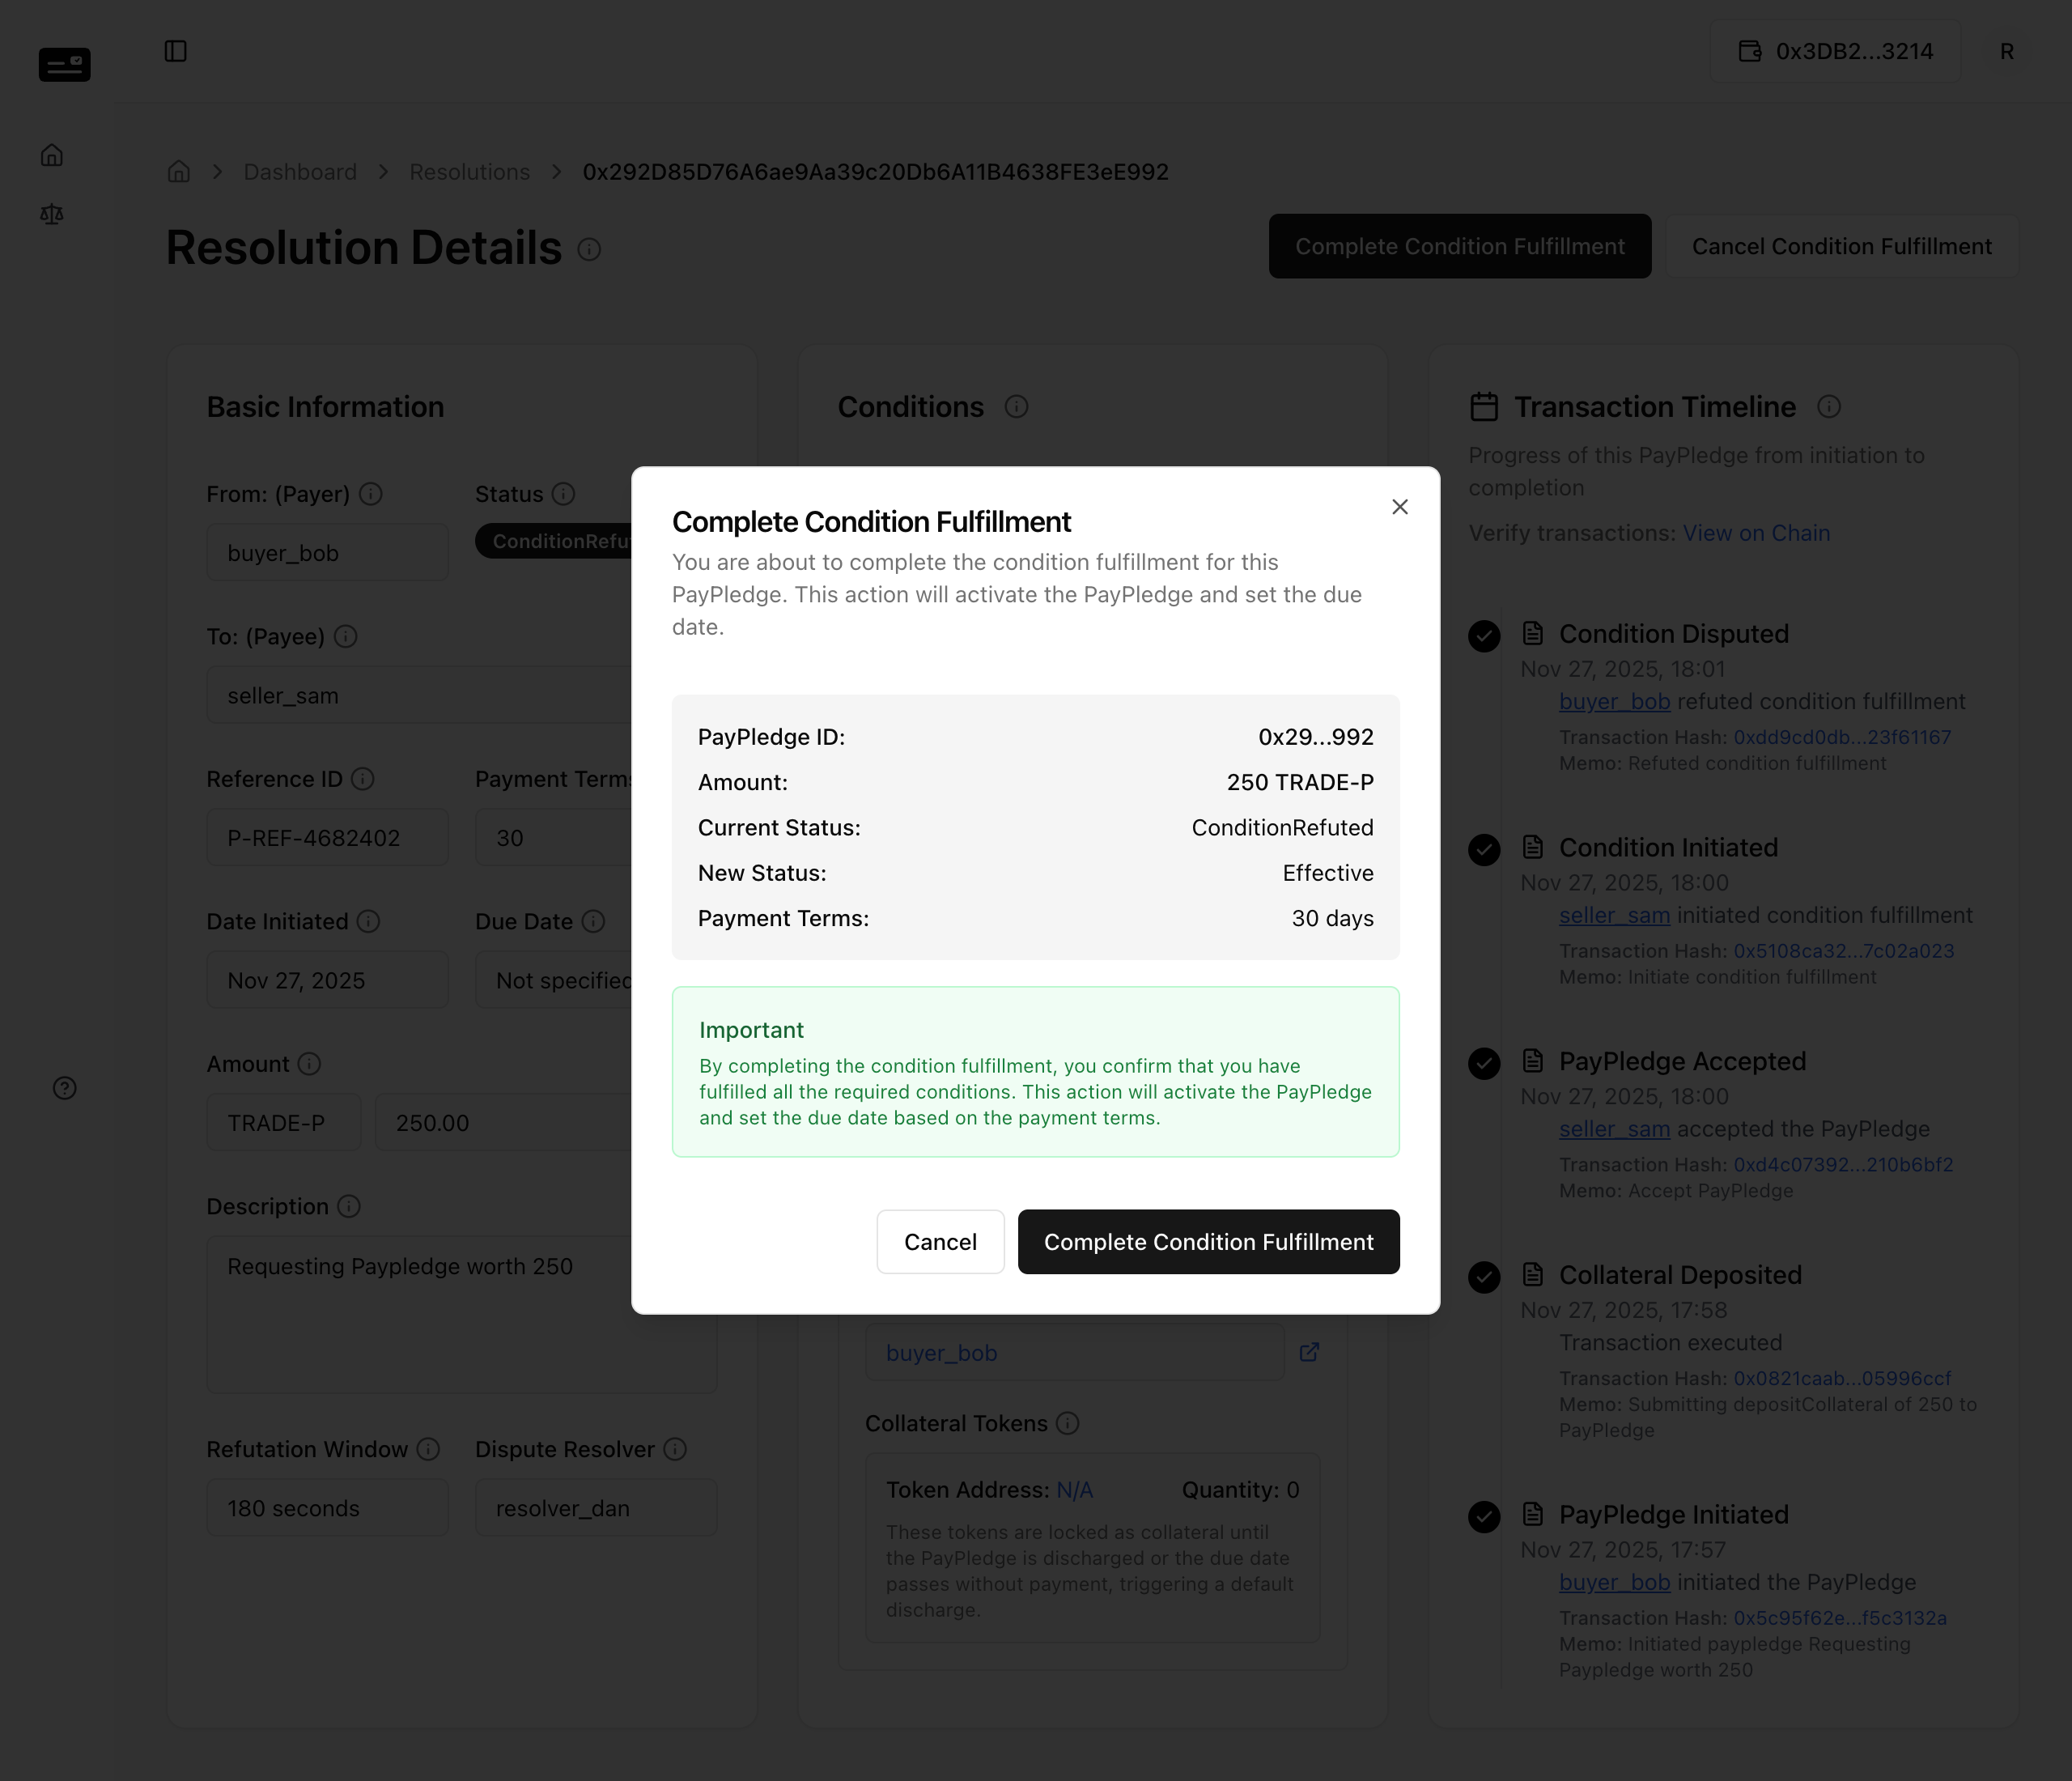
Step 4: The PayPledge transitions to Effective. 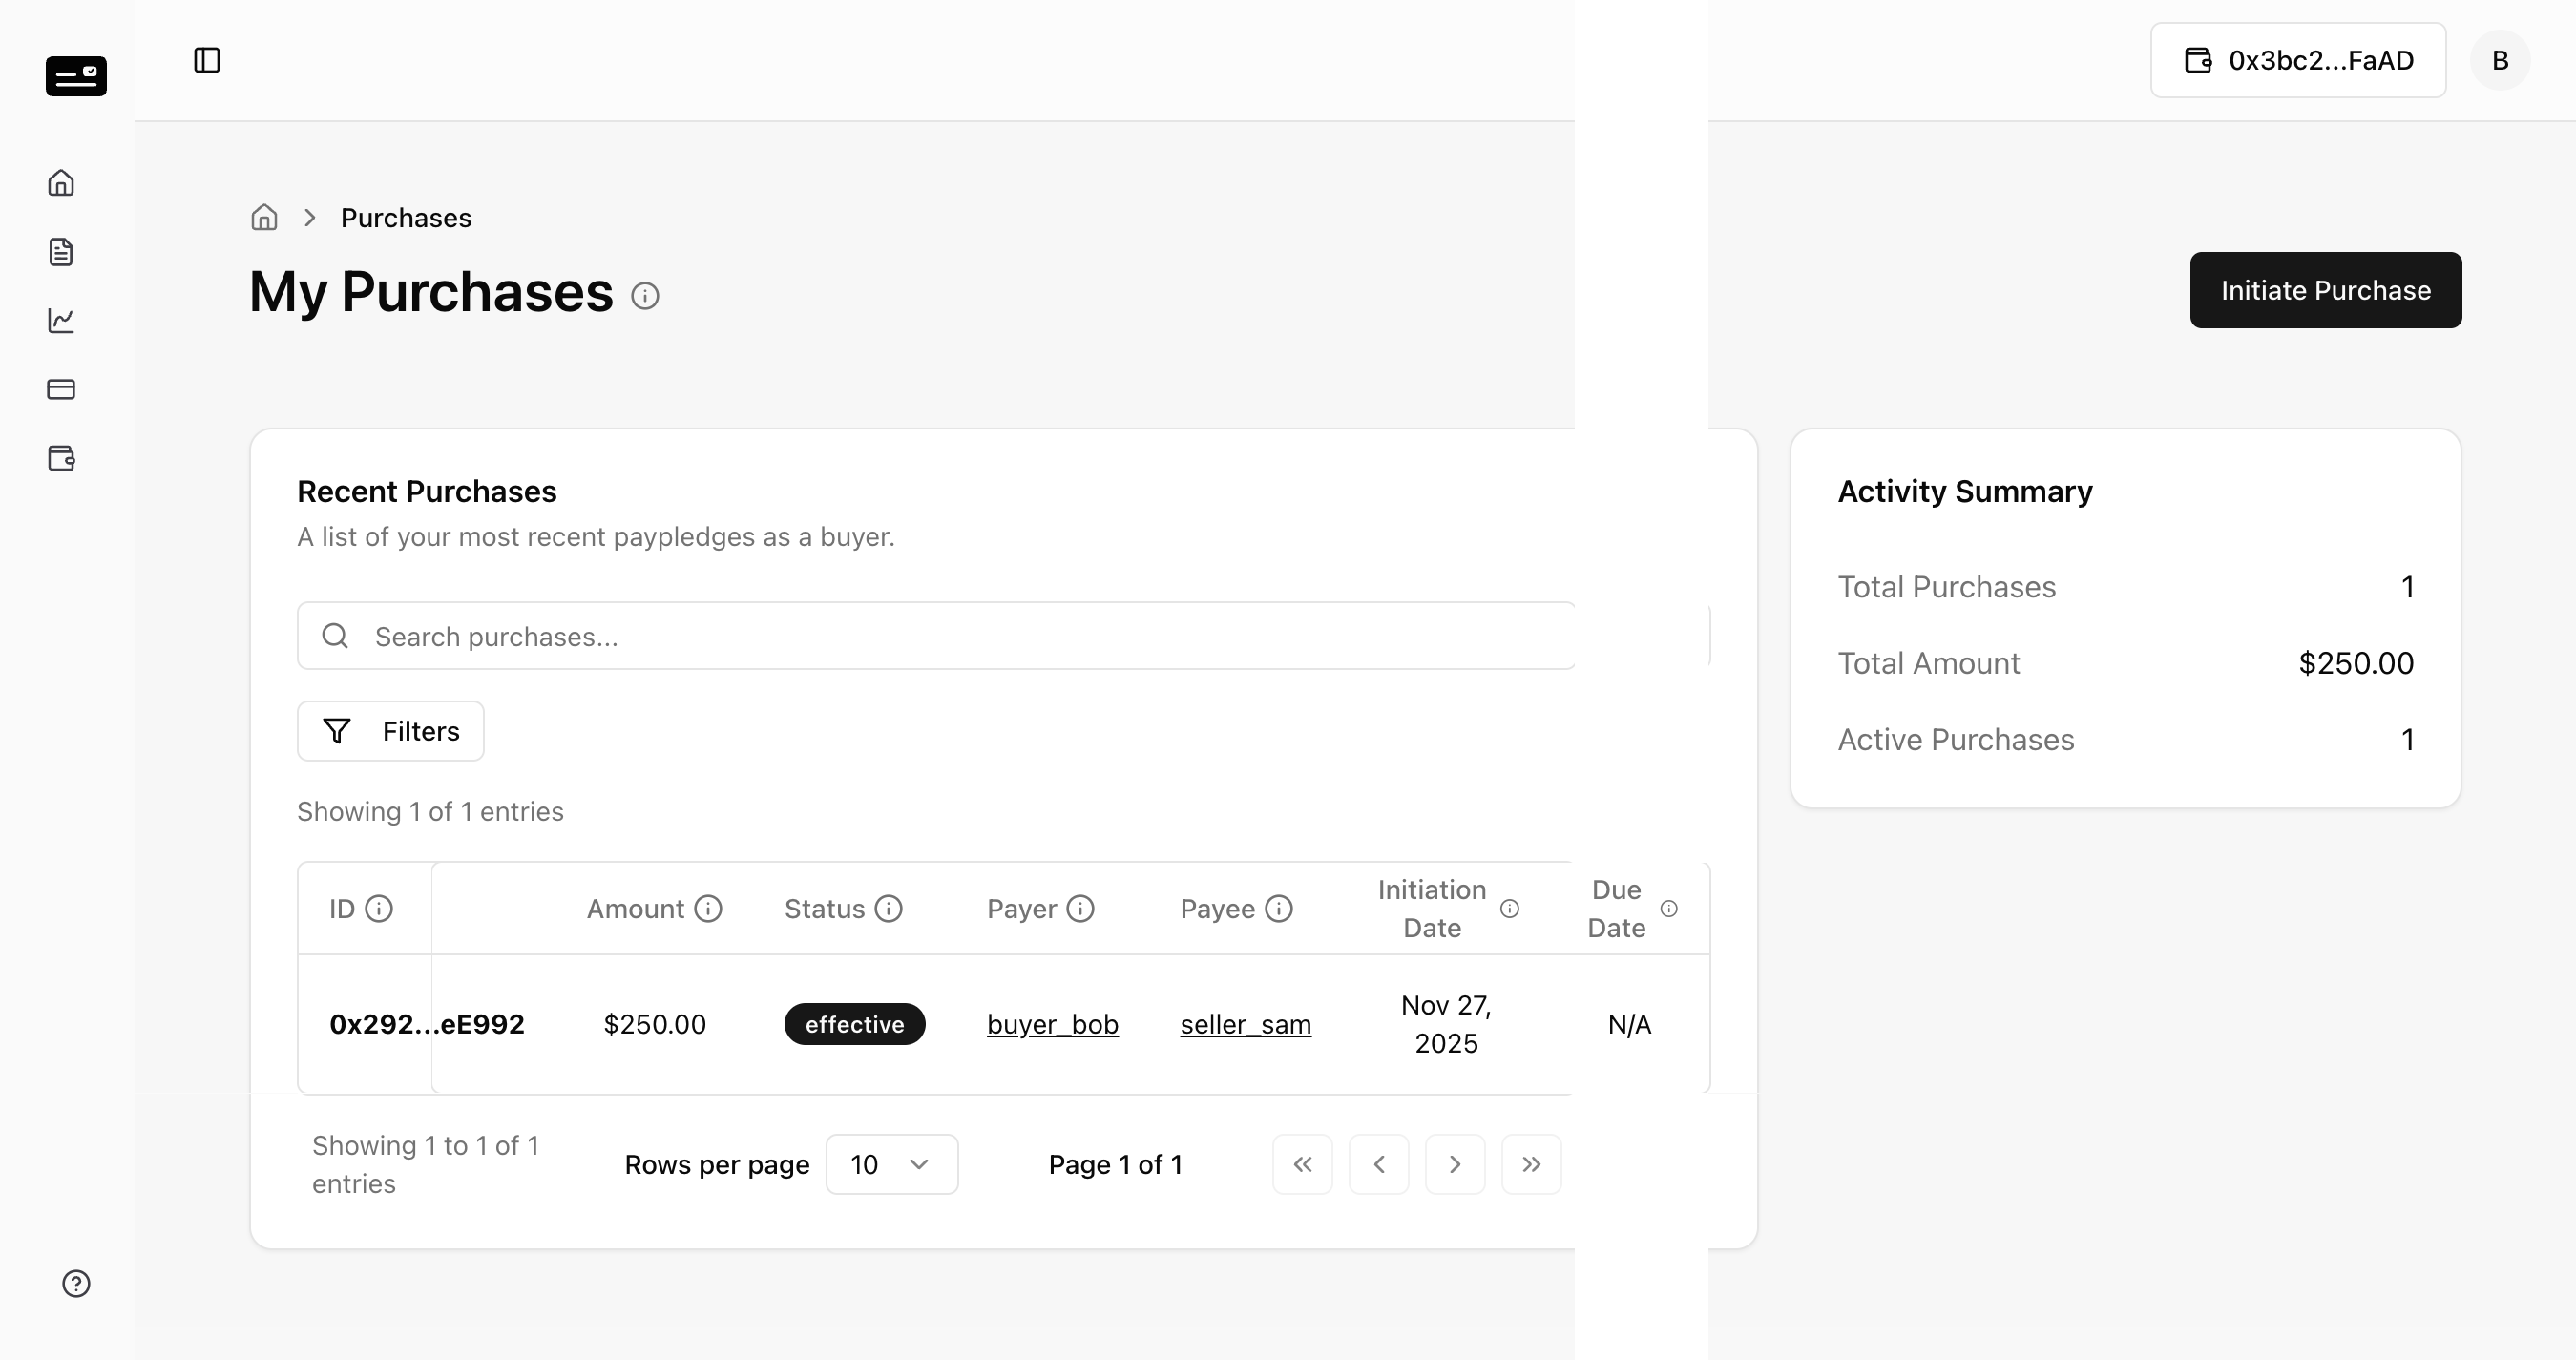
Phase 6: Discharge & Final Settlement
Actors: Buyer, Seller, Resolver
The final phase involves settling the financial obligation (Discharge).
6.1 Discharge Initiation (Buyer)
Step 1: The Buyer initiates the discharge process to pay the Seller. 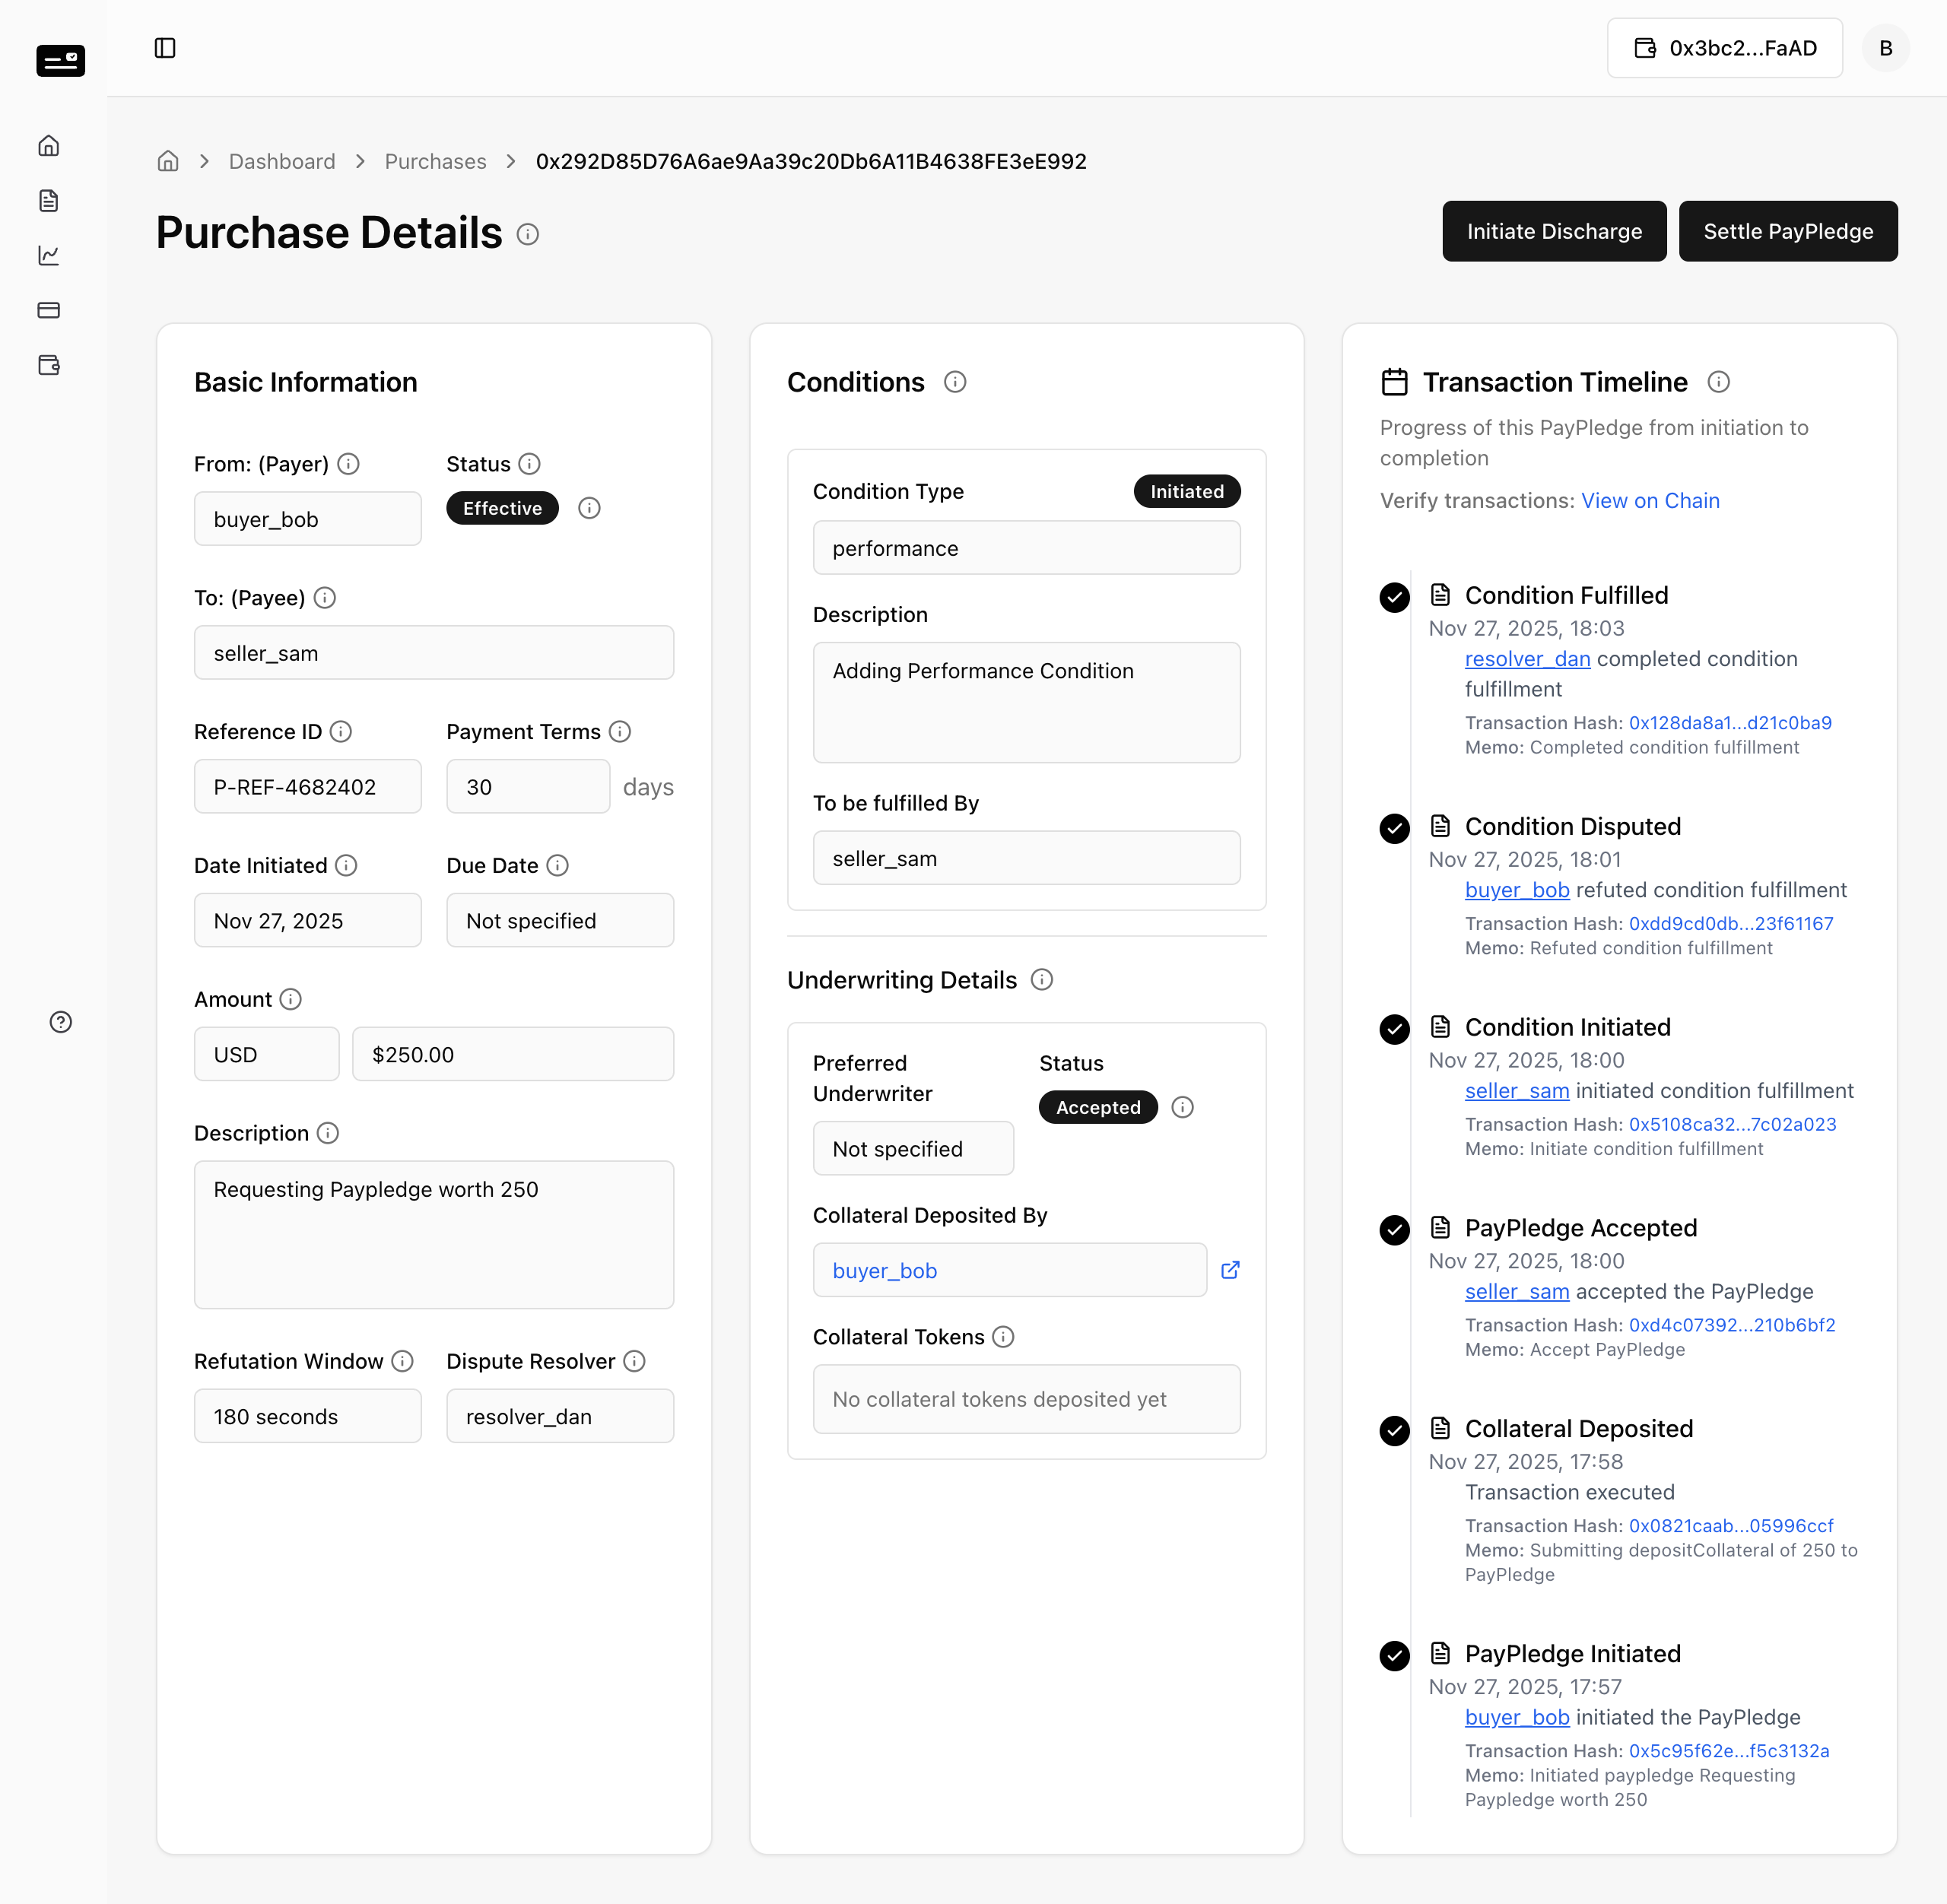
Step 2: Confirm the payment details and submit. 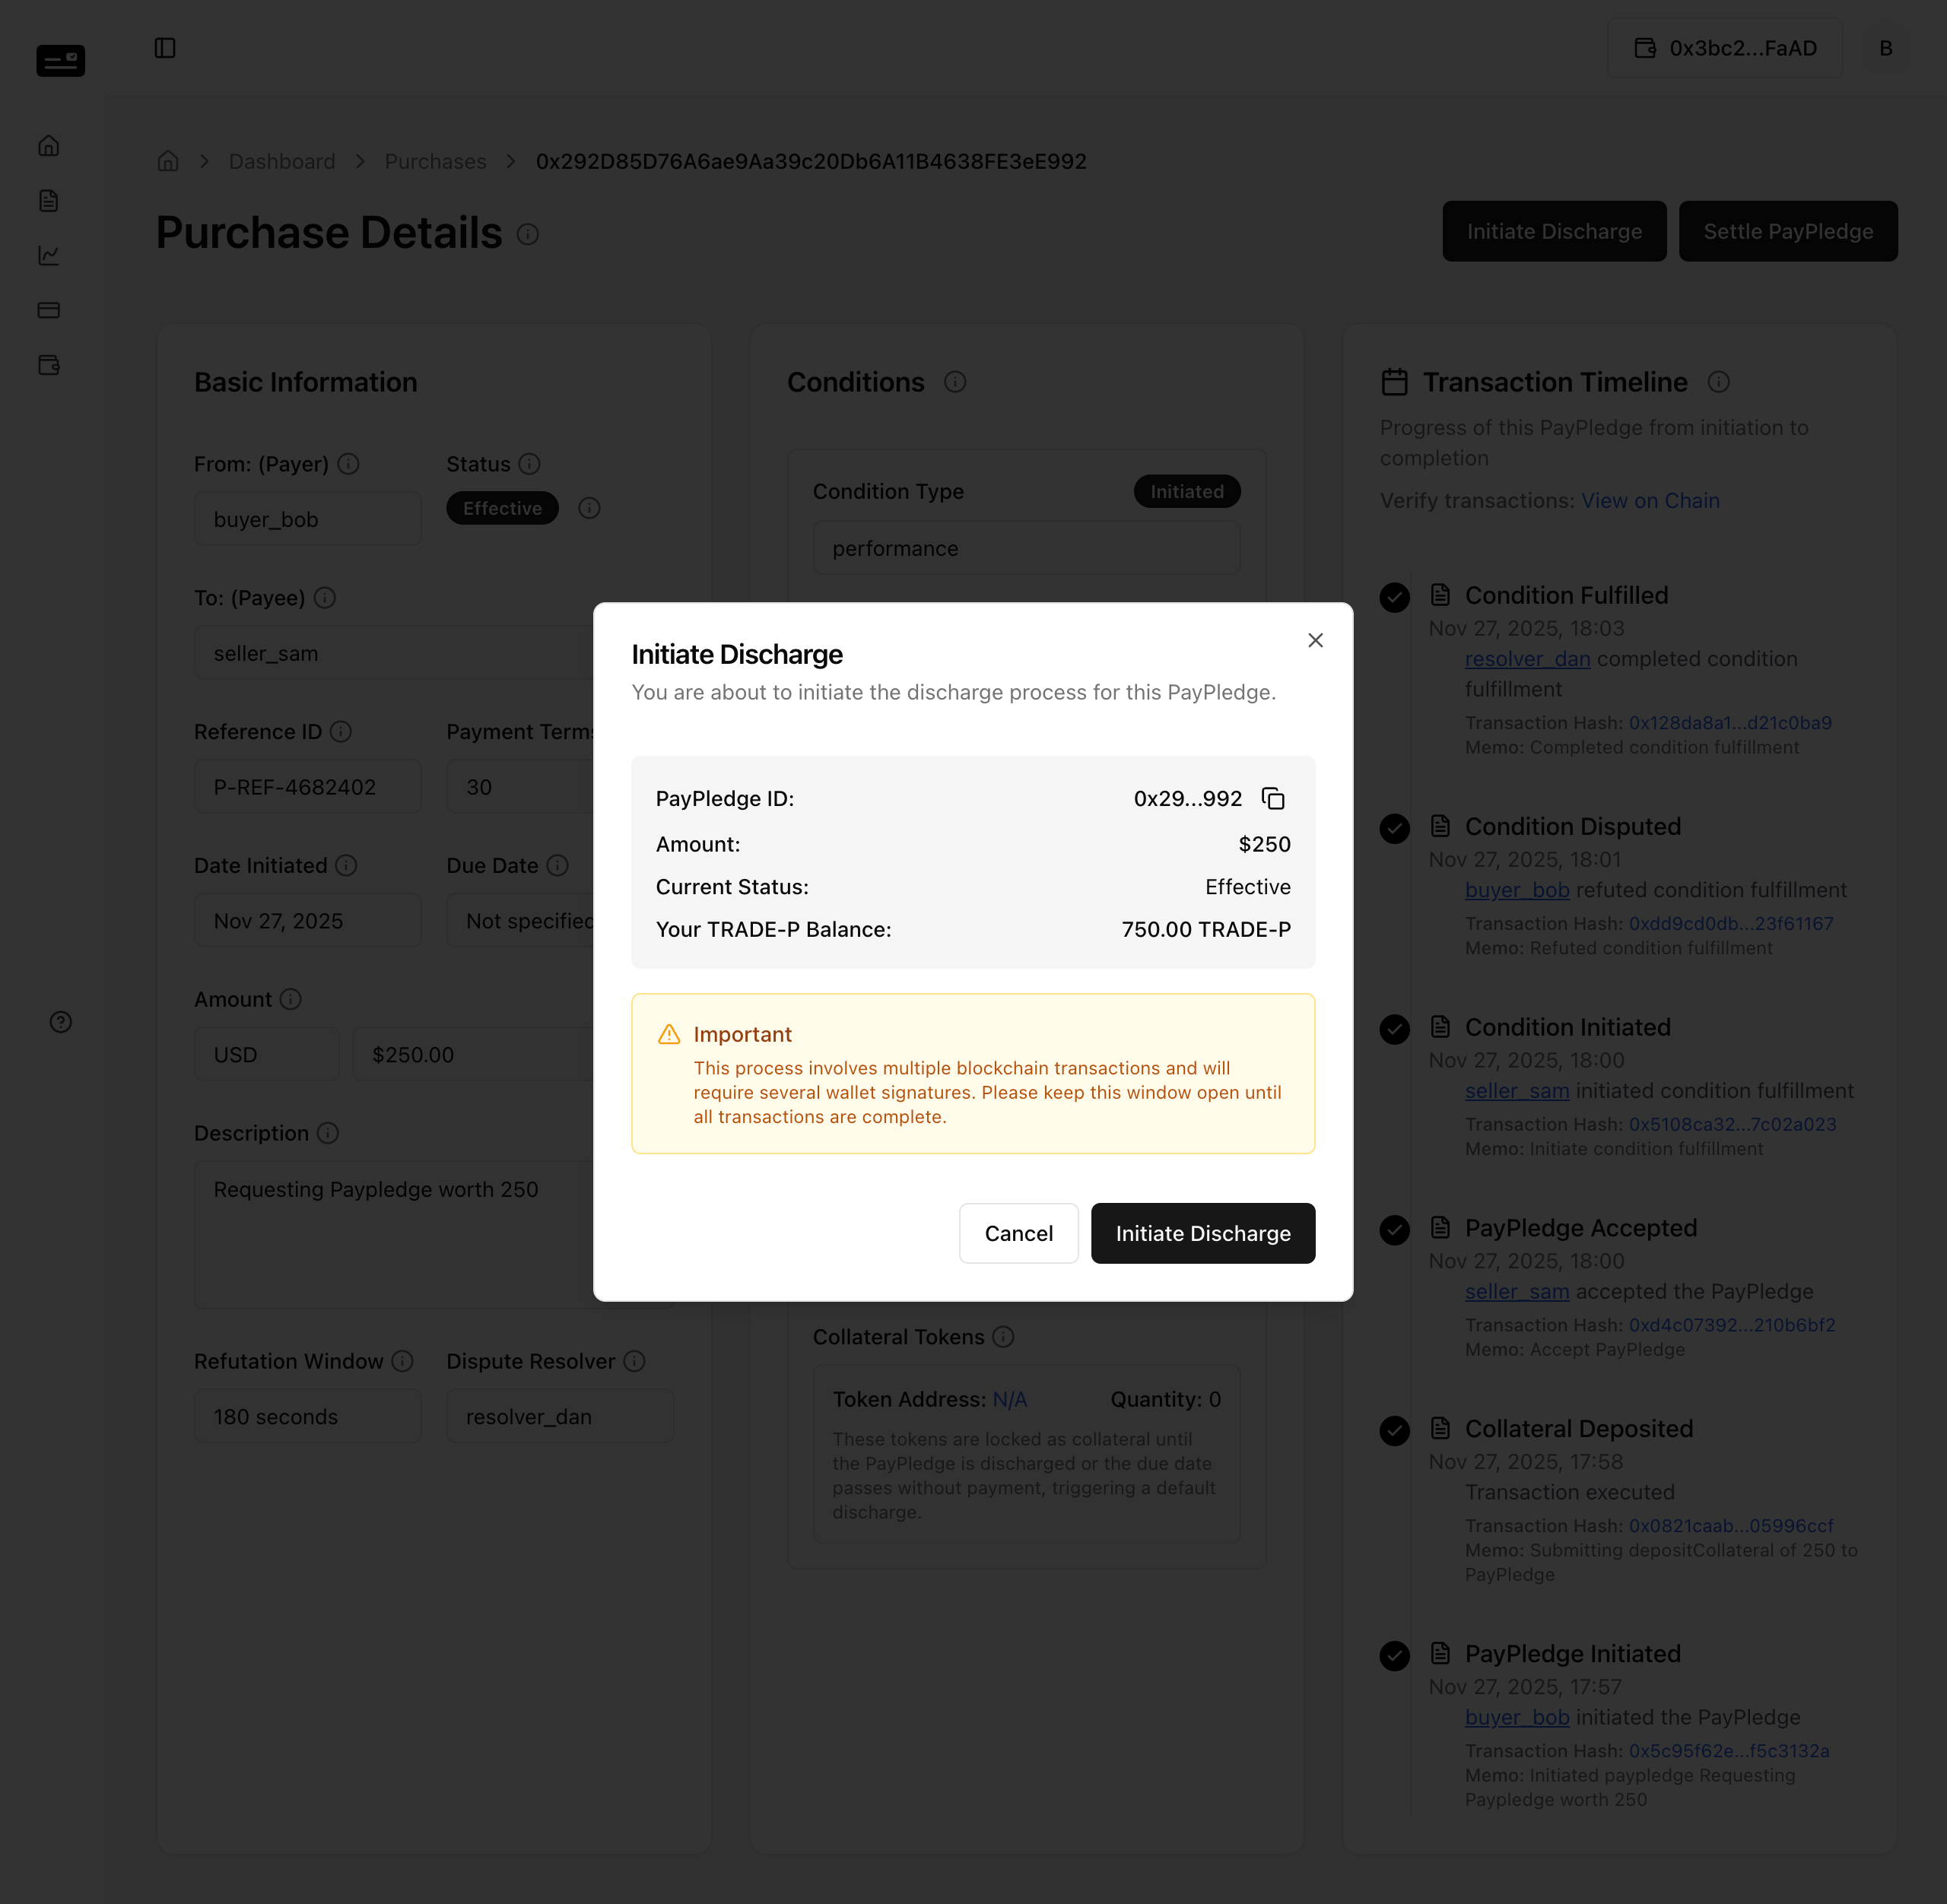
Step 3: The PayPledge enters the Discharging state. 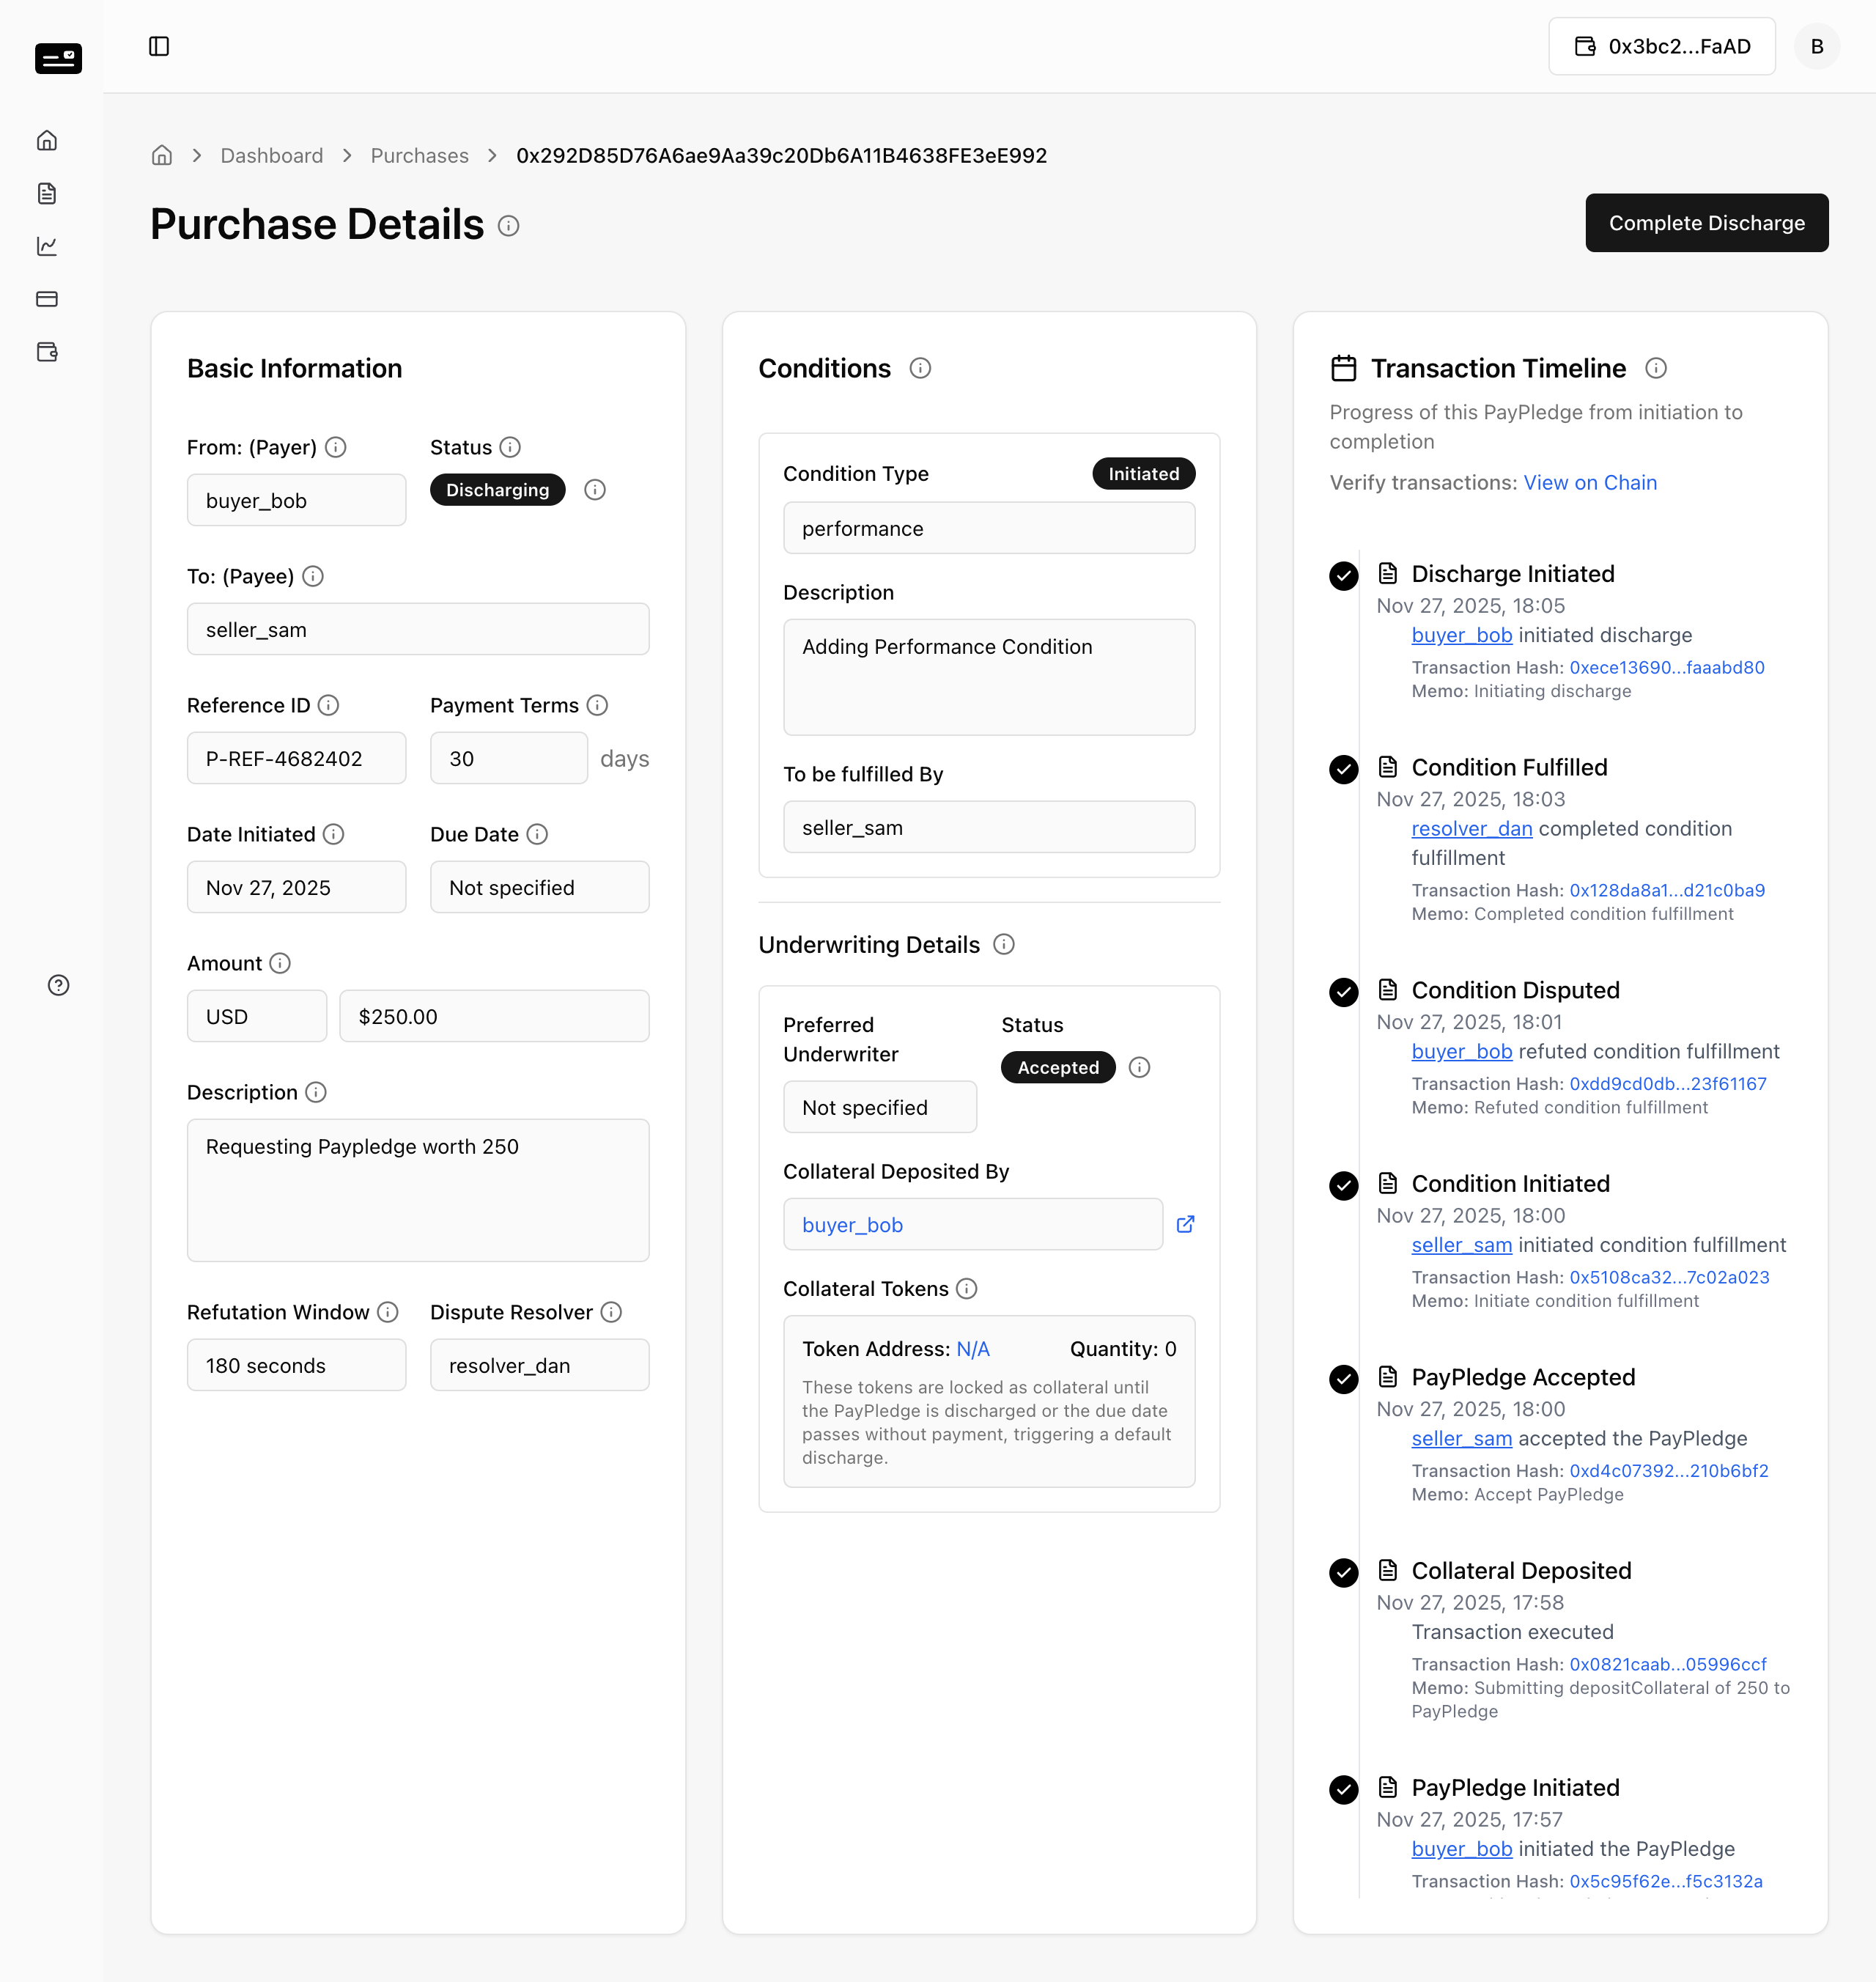
6.2 Discharge Refutation (Seller)
If the payment is insufficient or incorrect, the Seller can dispute.
Step 1: The Seller views the Discharging PayPledge. 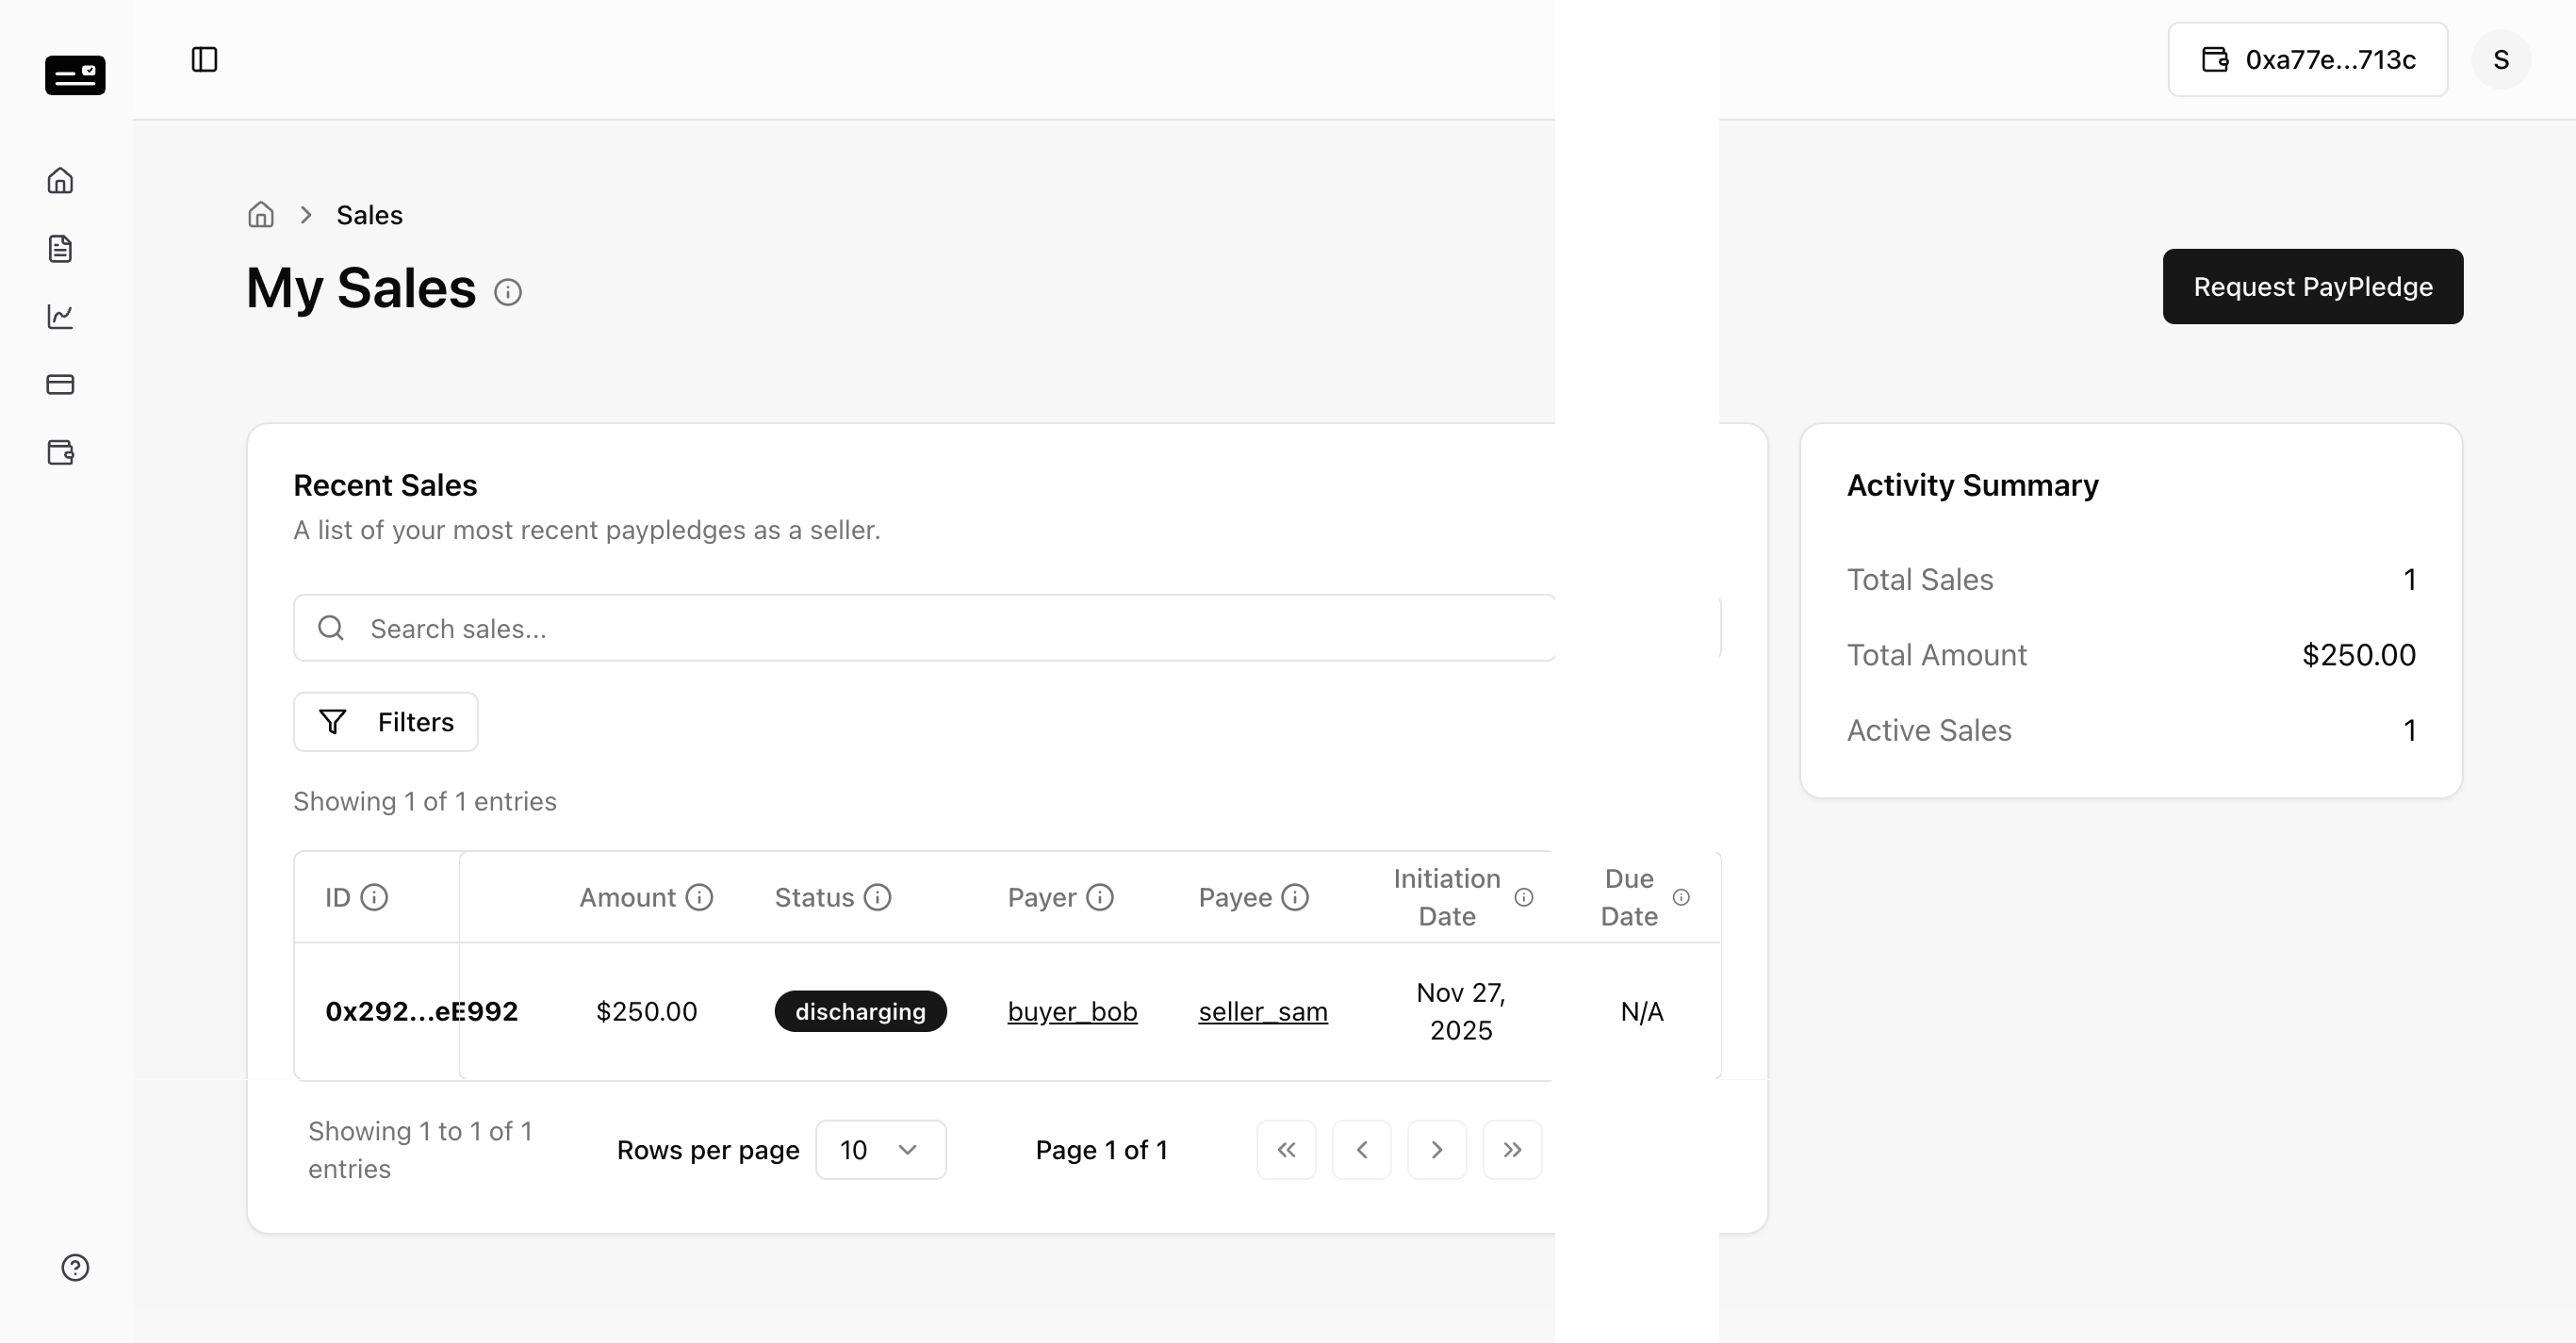
Step 2: The Seller clicks "Refute Discharge". 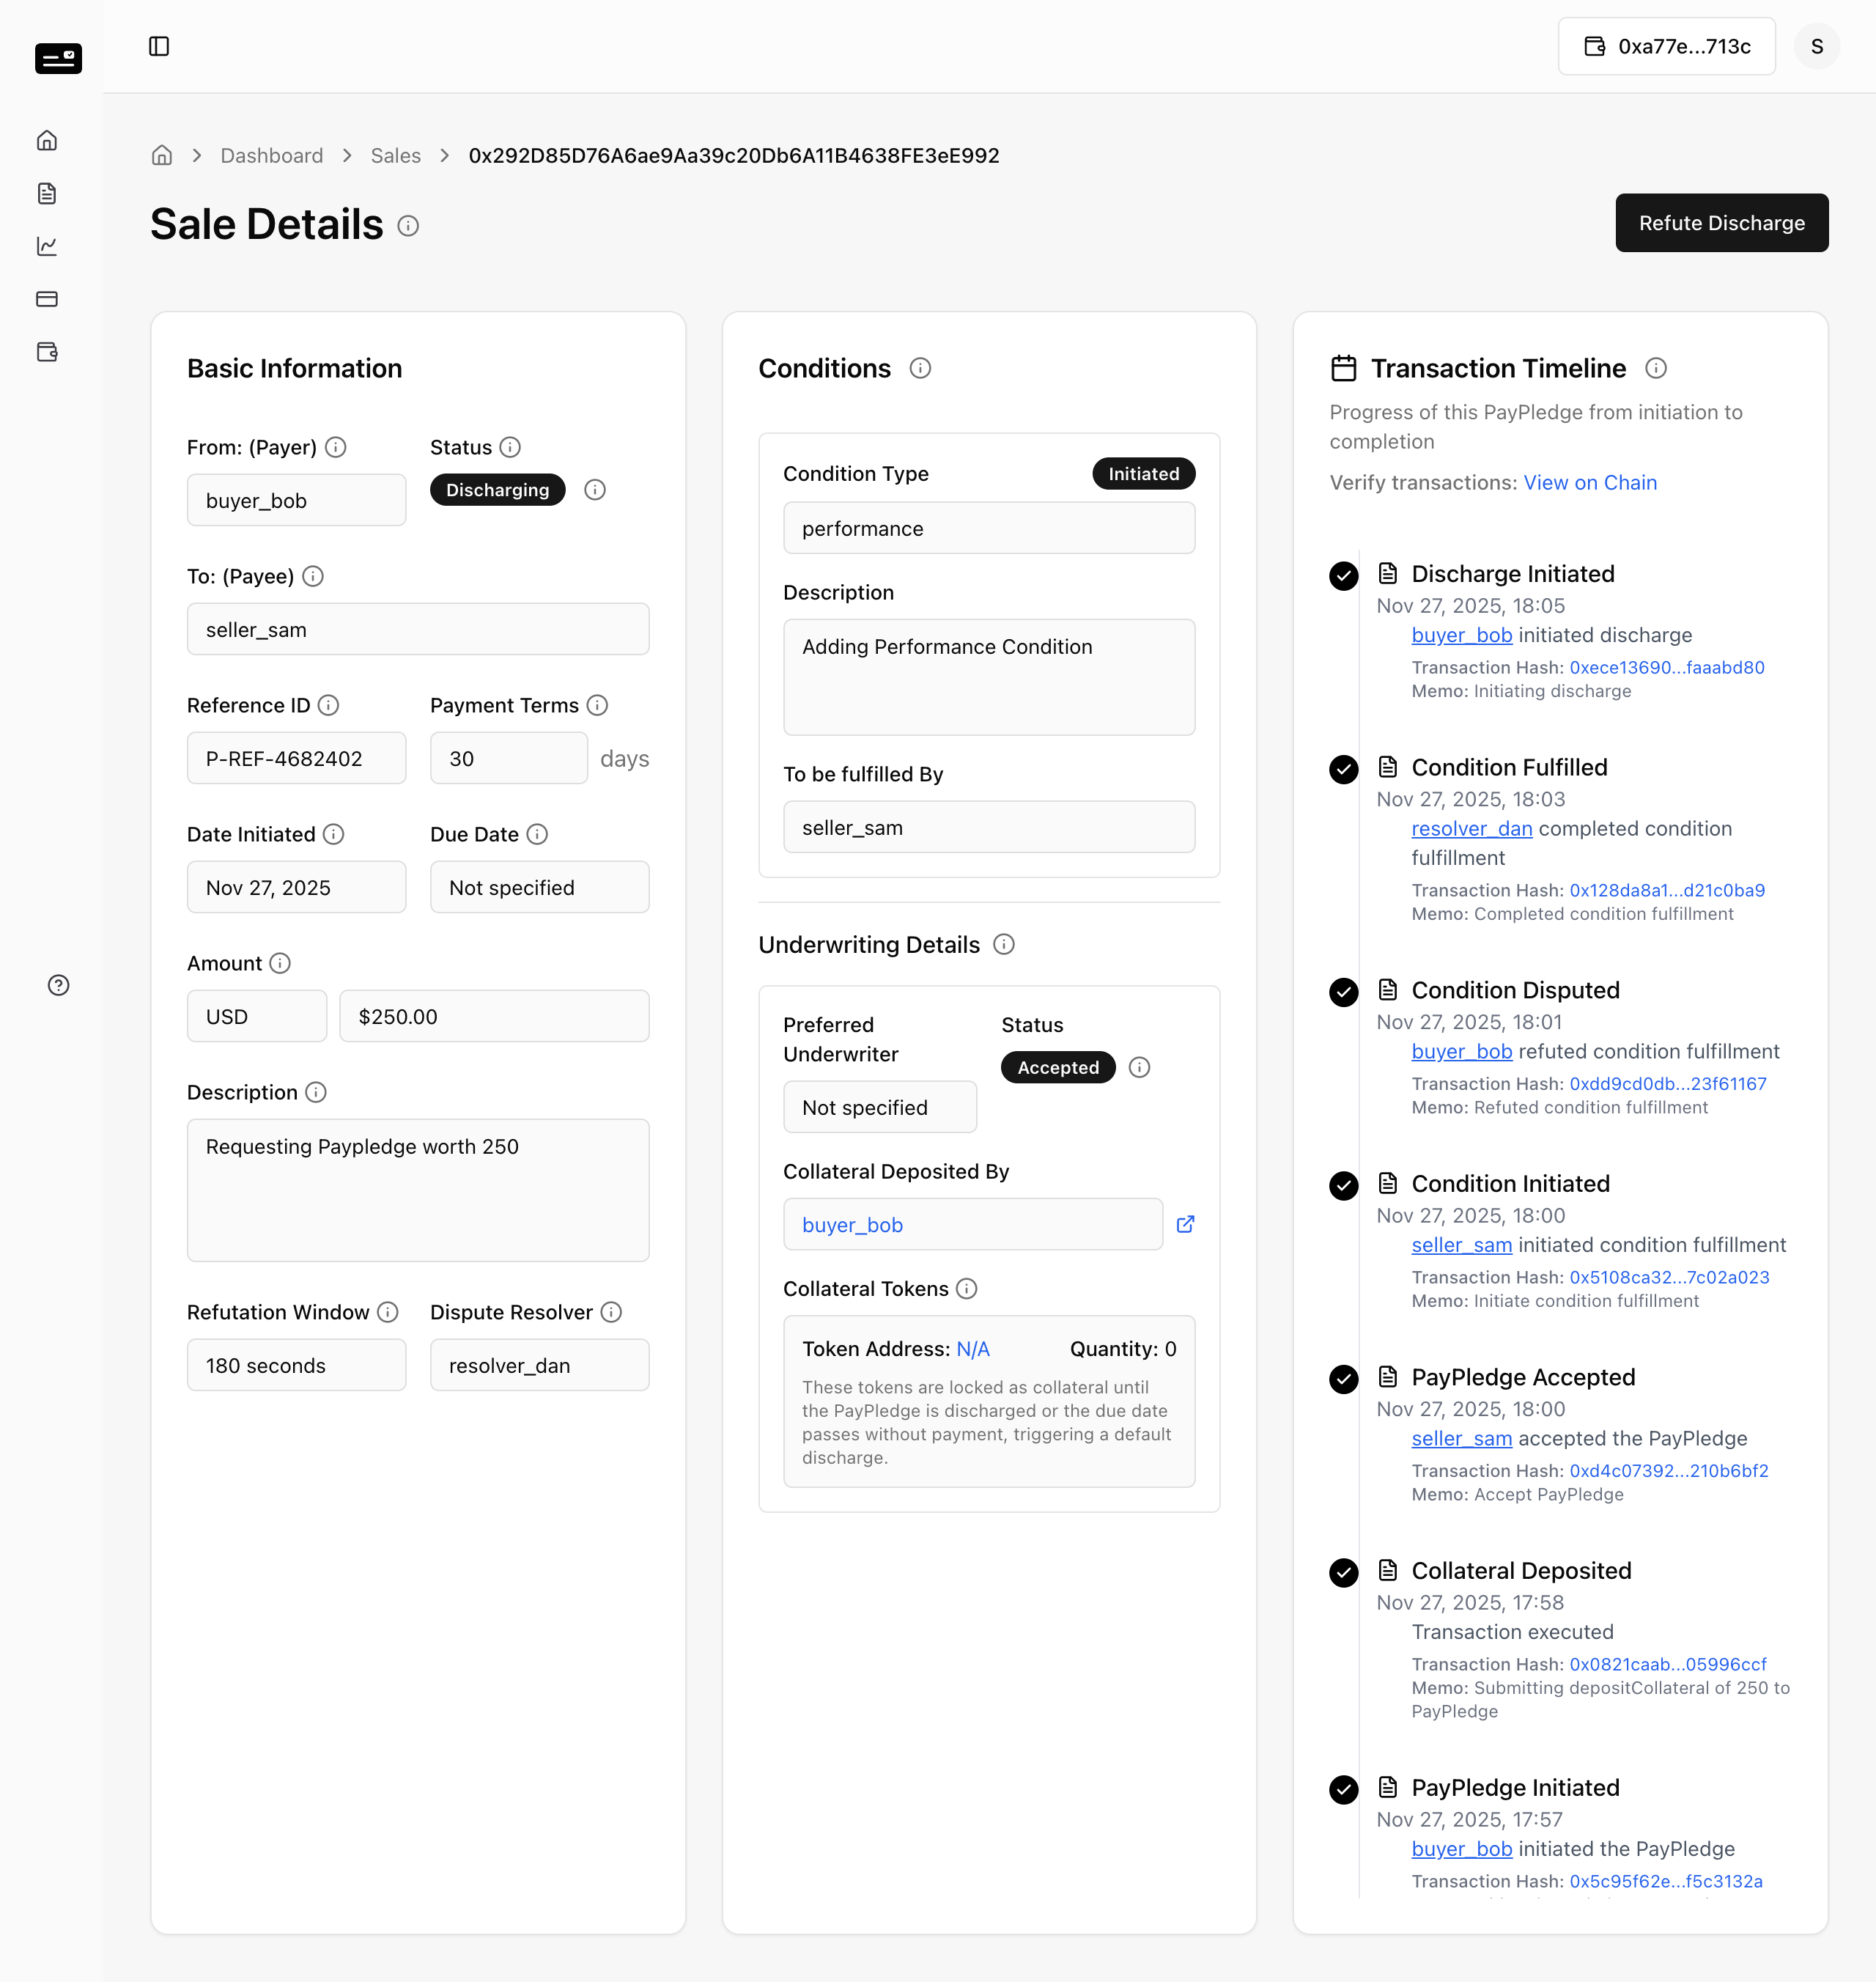
Step 3: Submit the refutation. 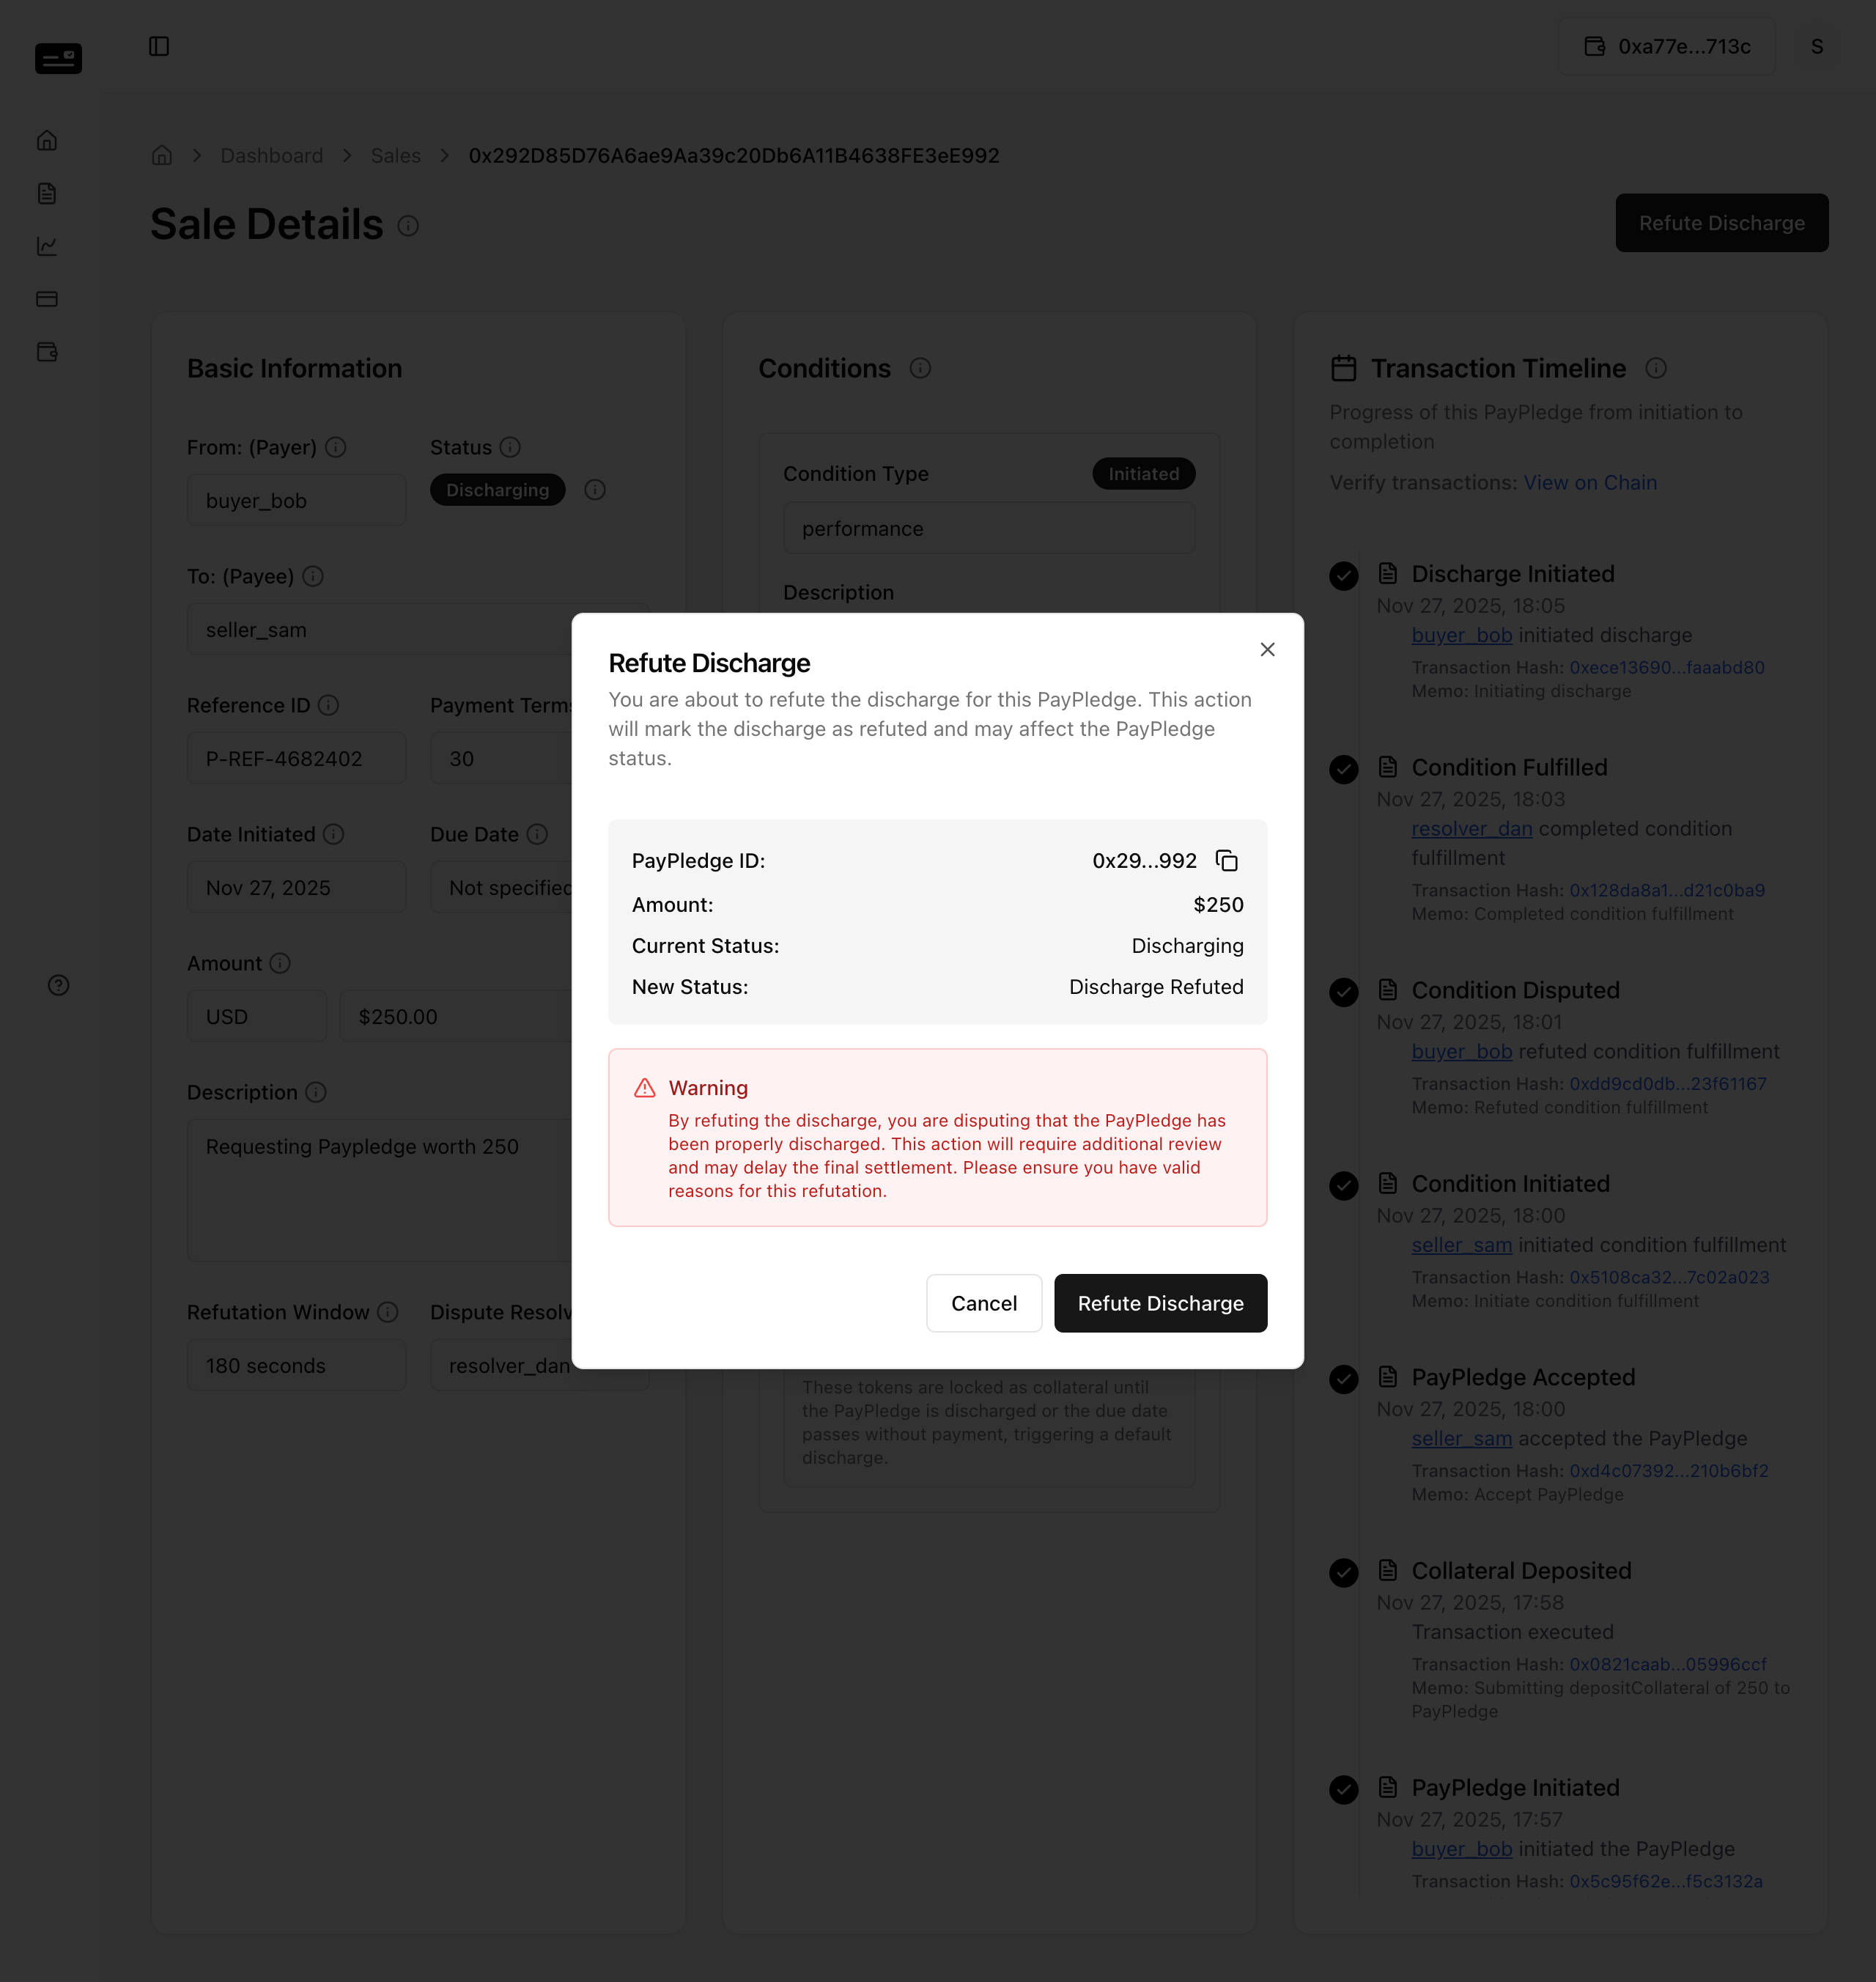
Step 4: The dispute is logged. 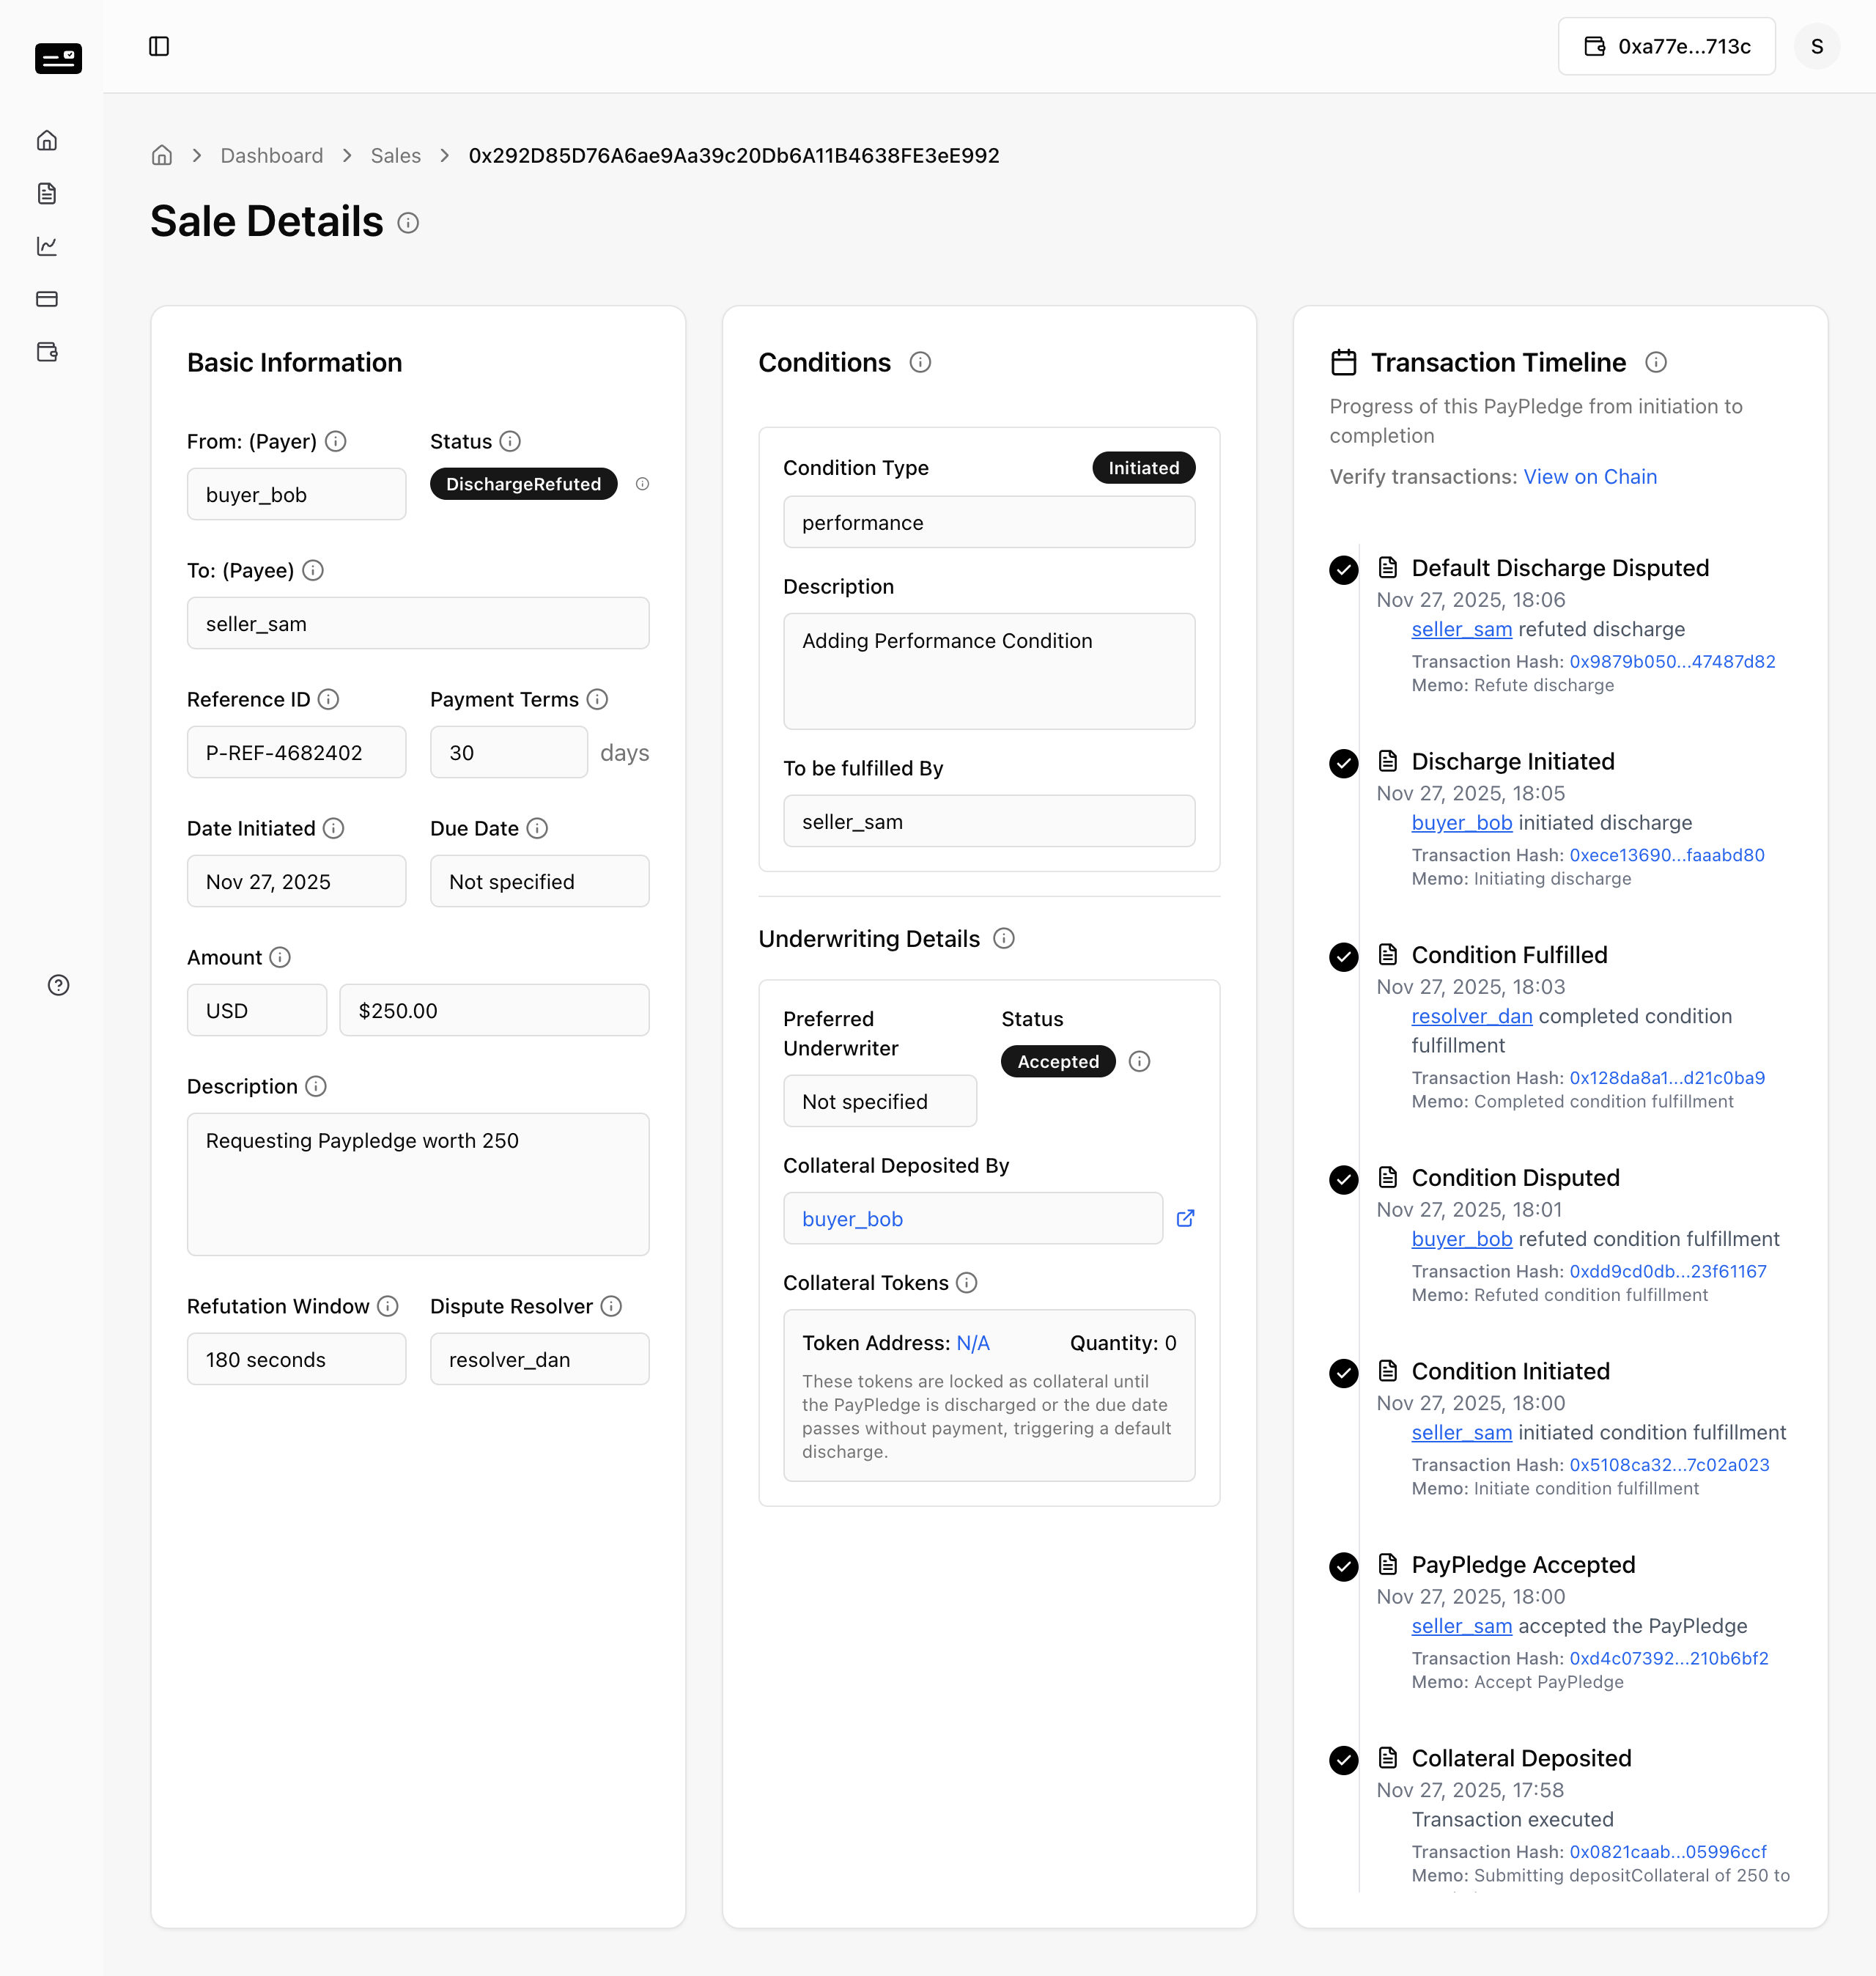
6.3 Resolver Final Adjudication
Step 1: The Resolver views the new dispute. 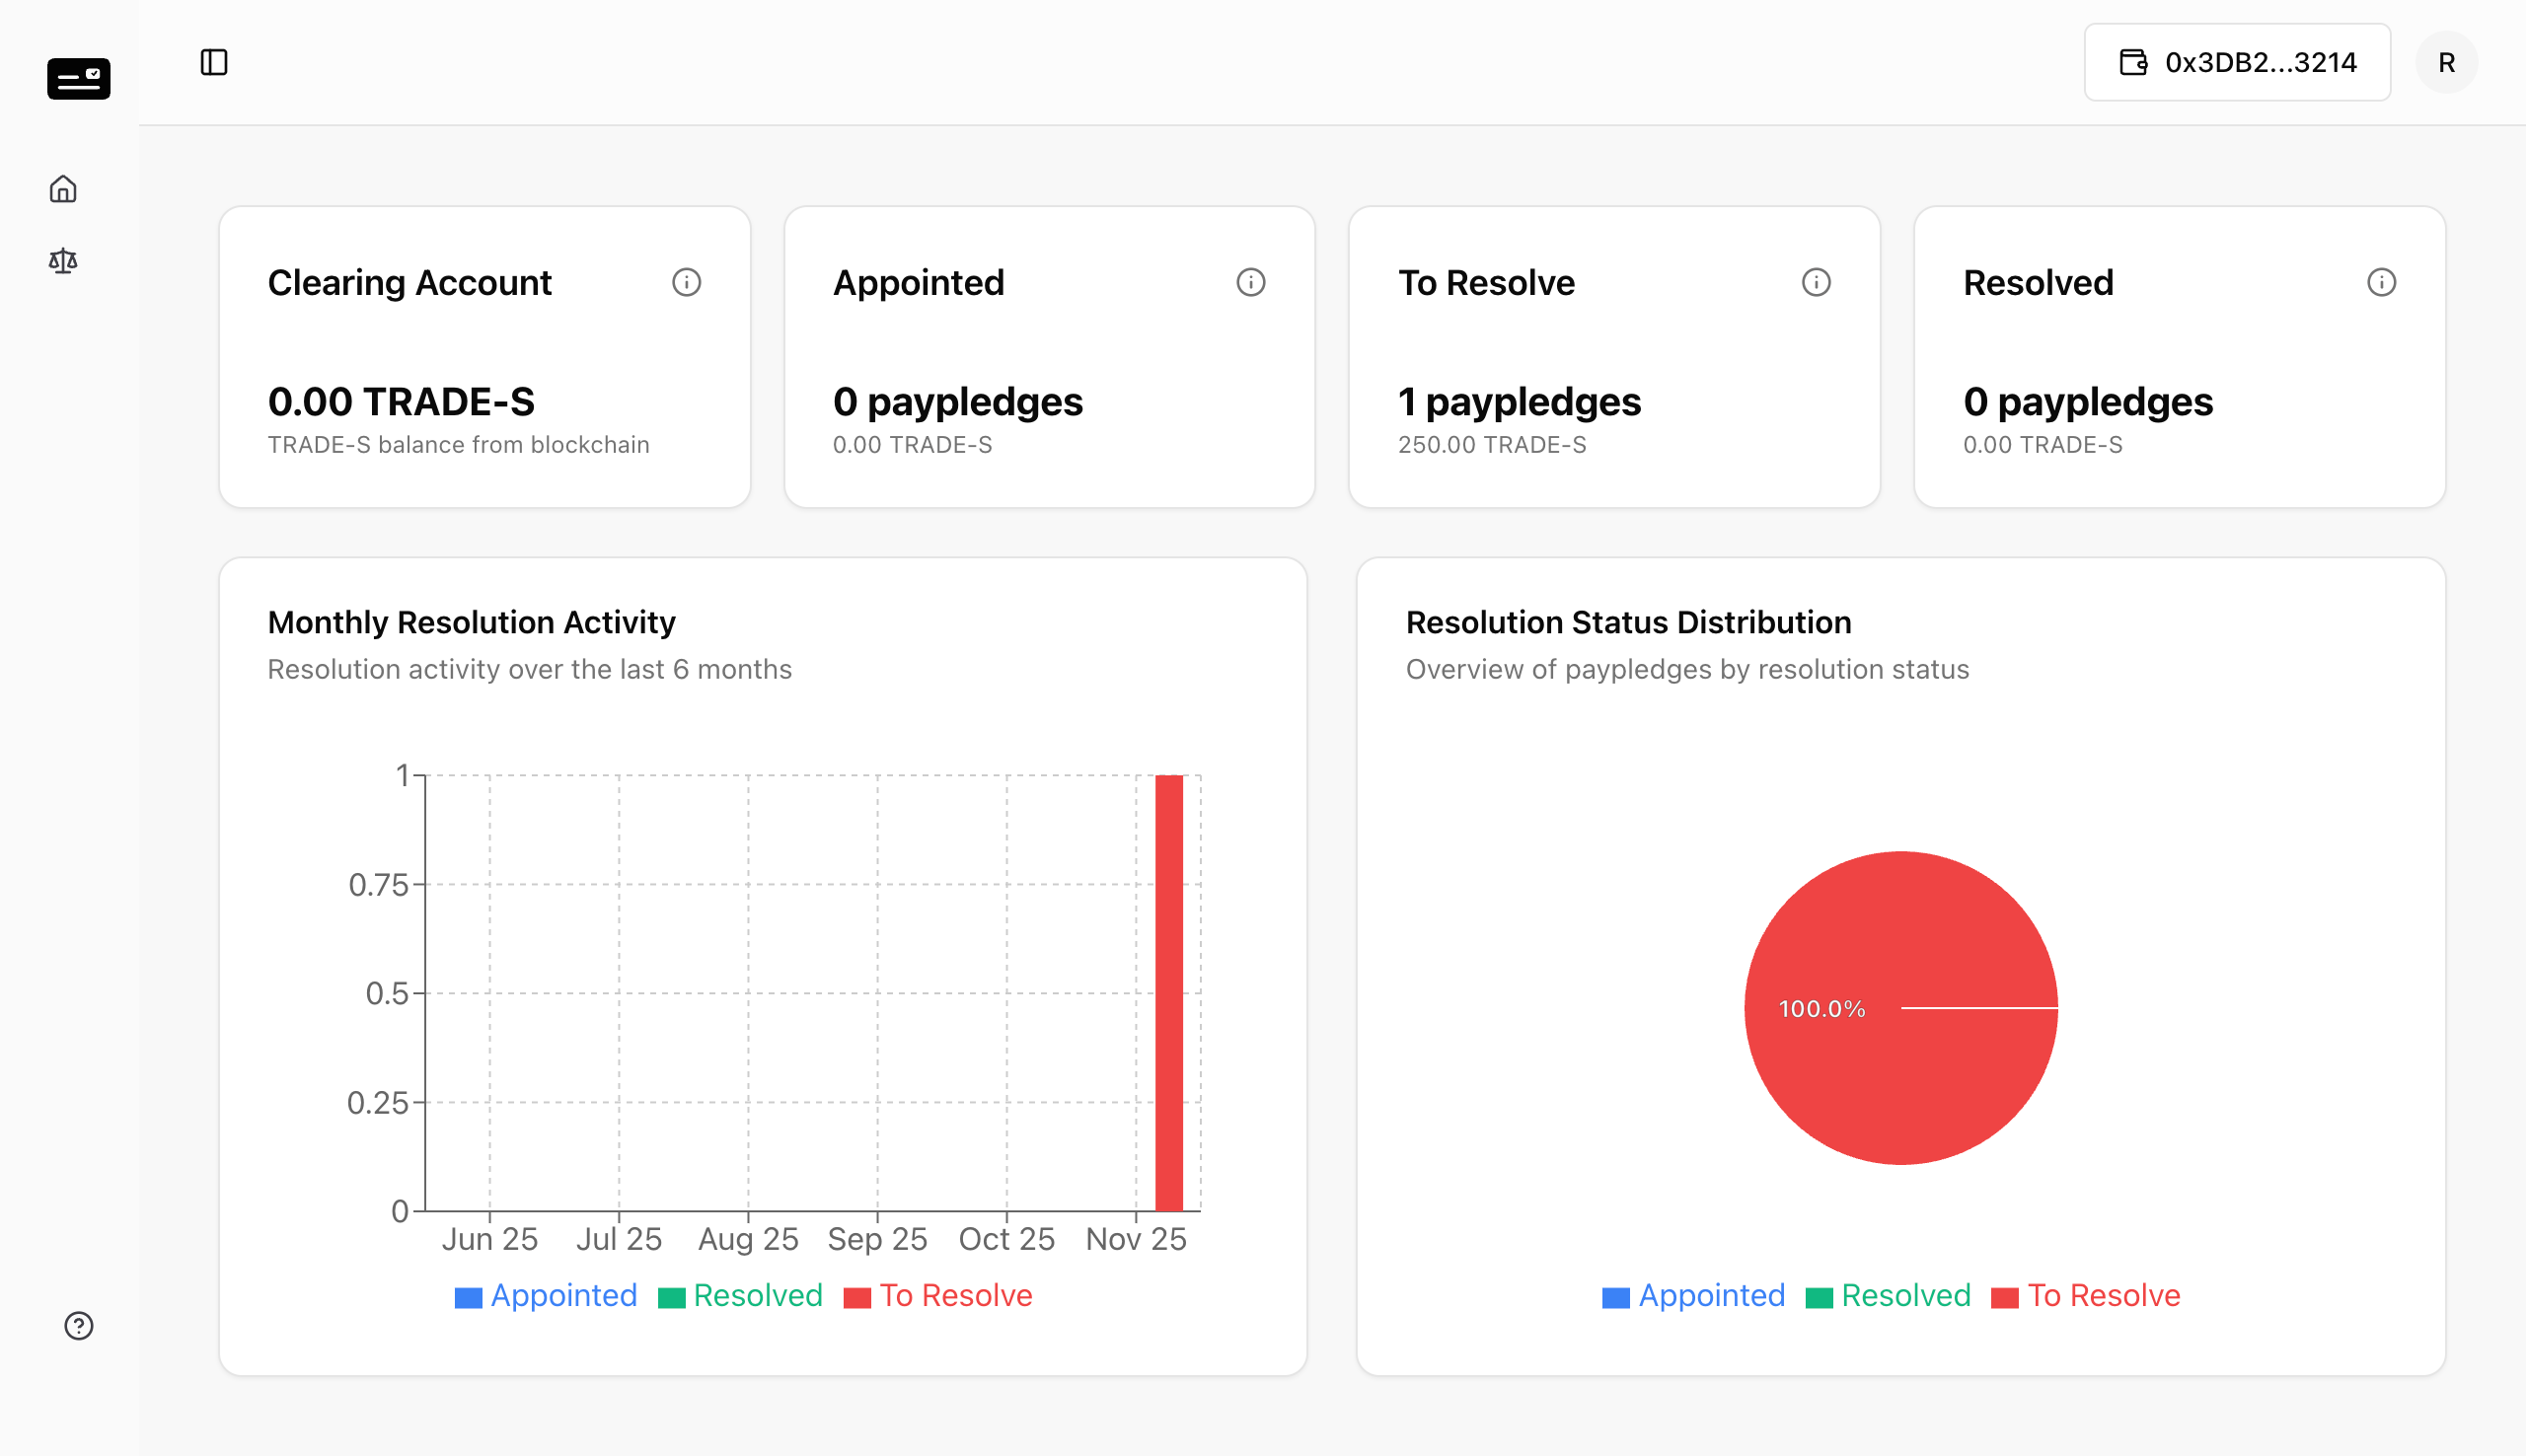
Step 2: The Resolver reviews and decides to Complete Discharge (resolving the dispute). 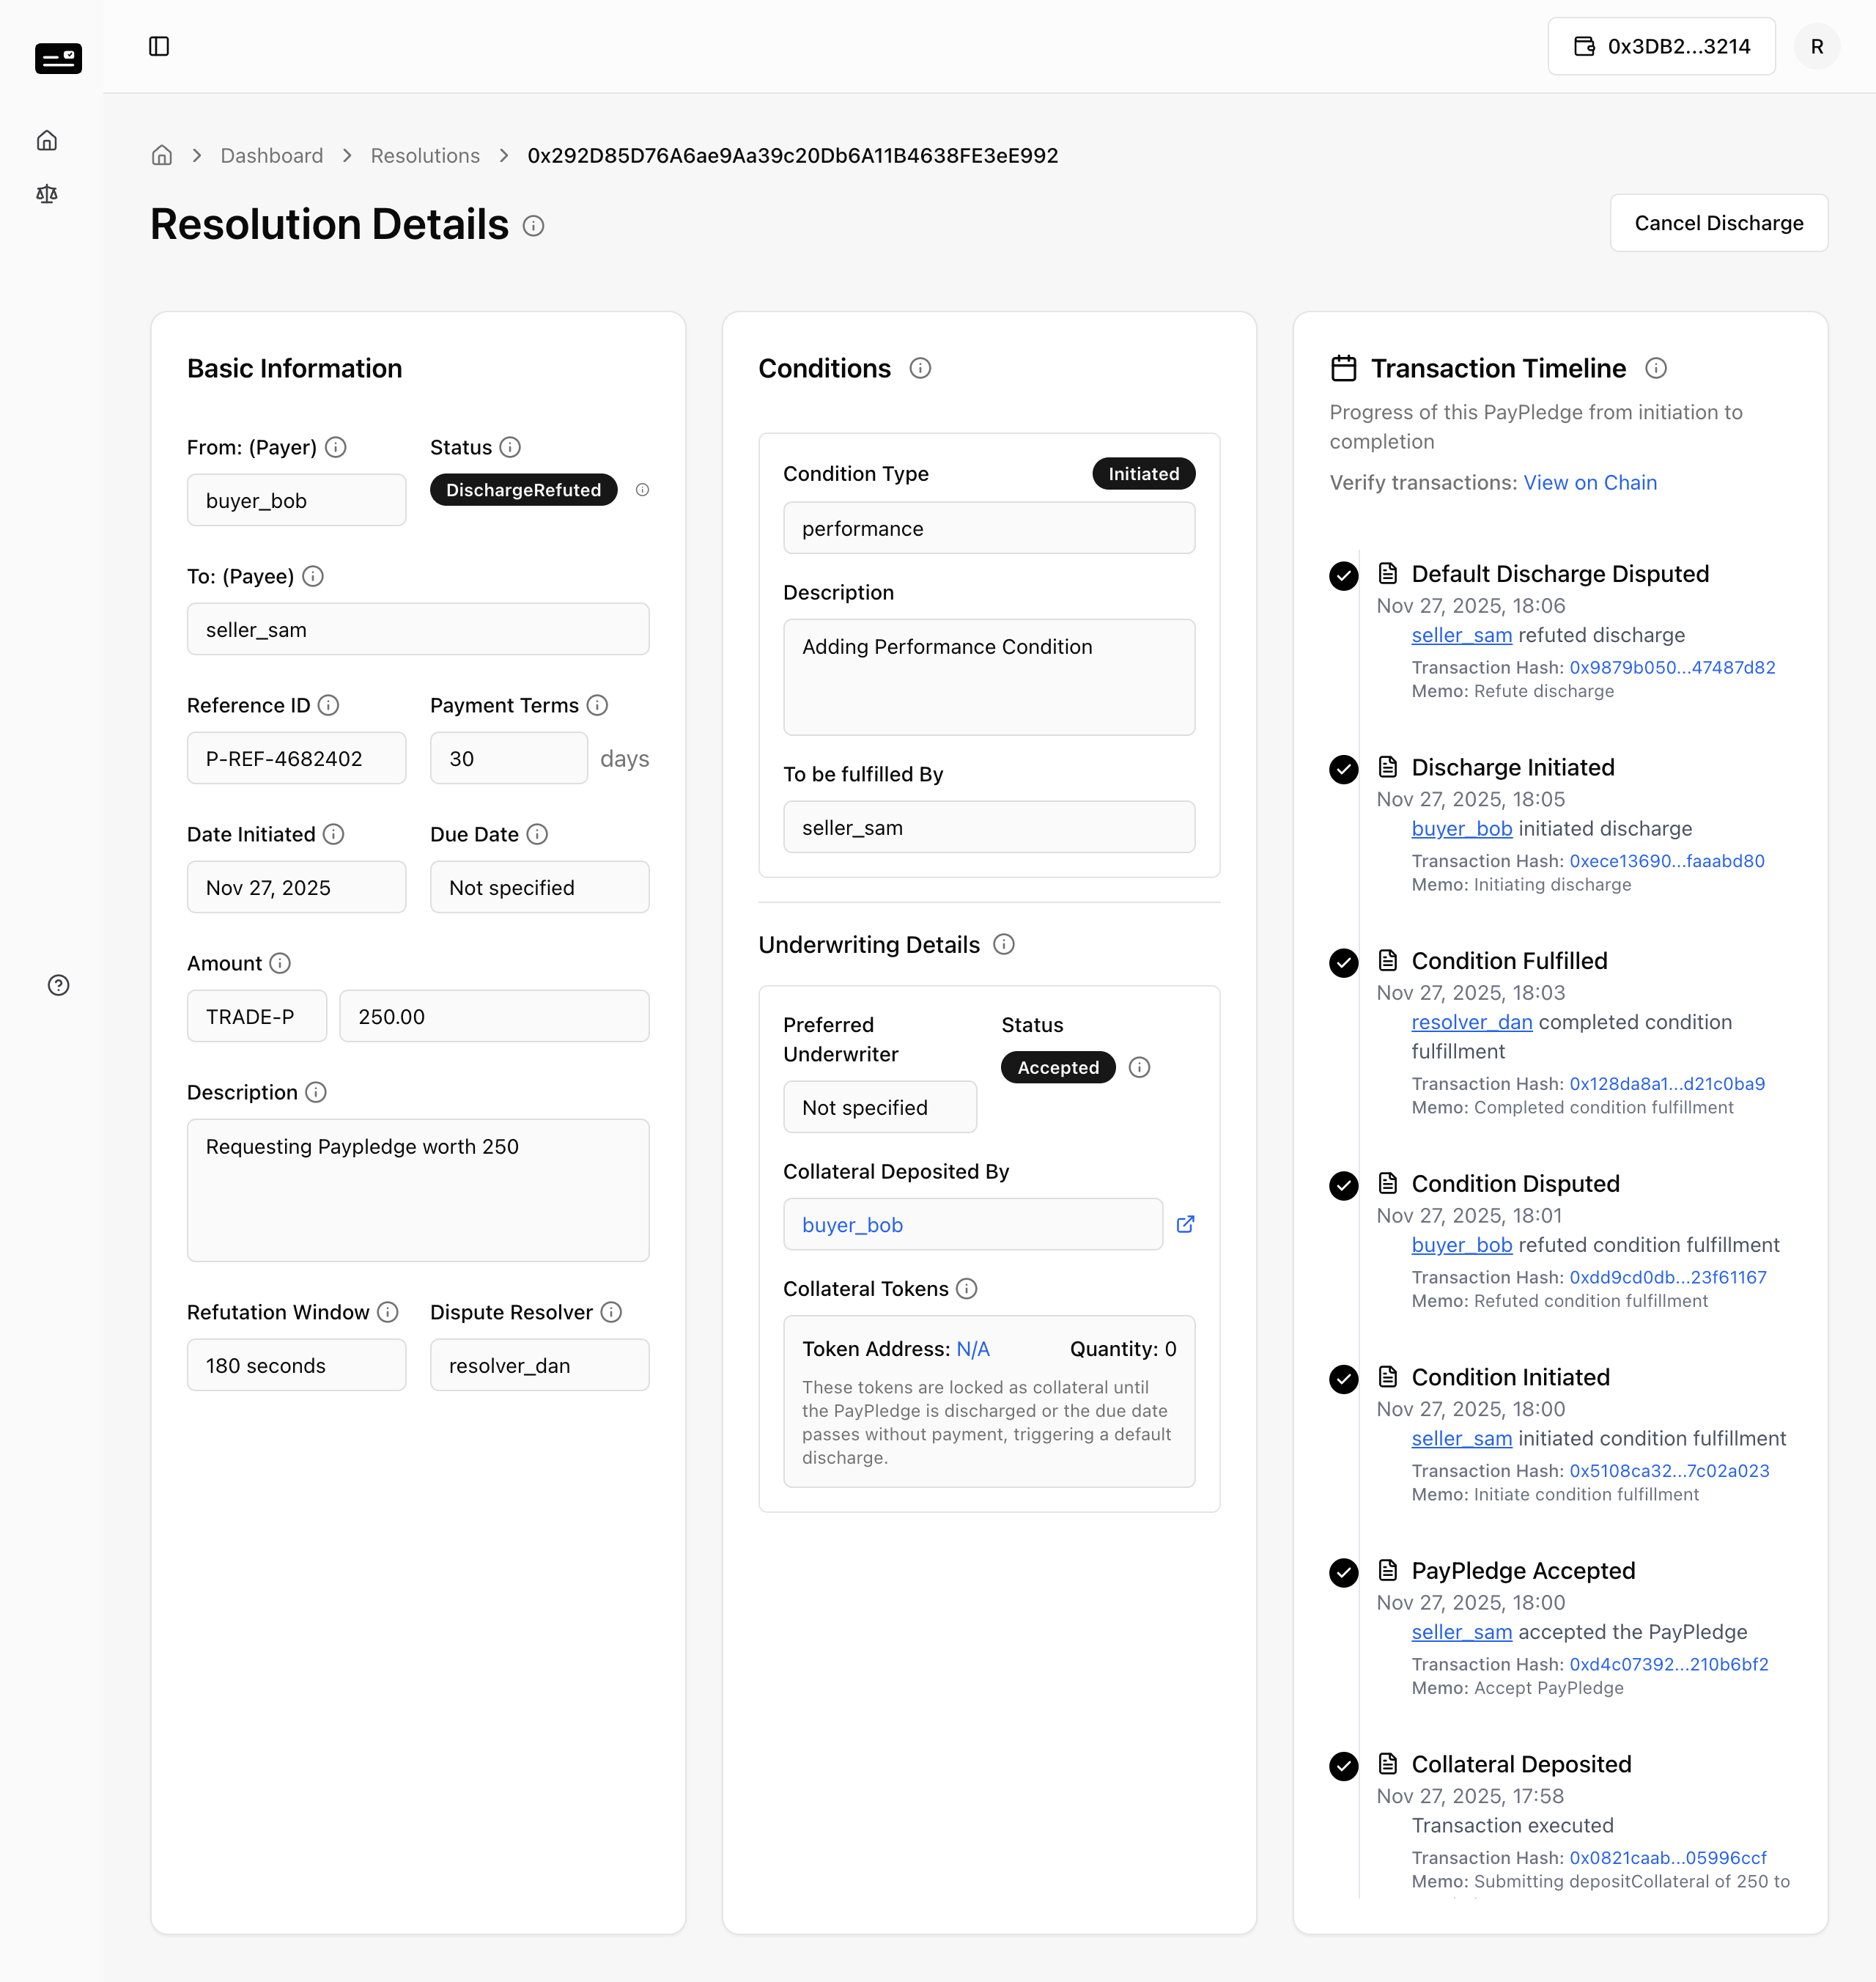
Step 3: Submit the resolution. 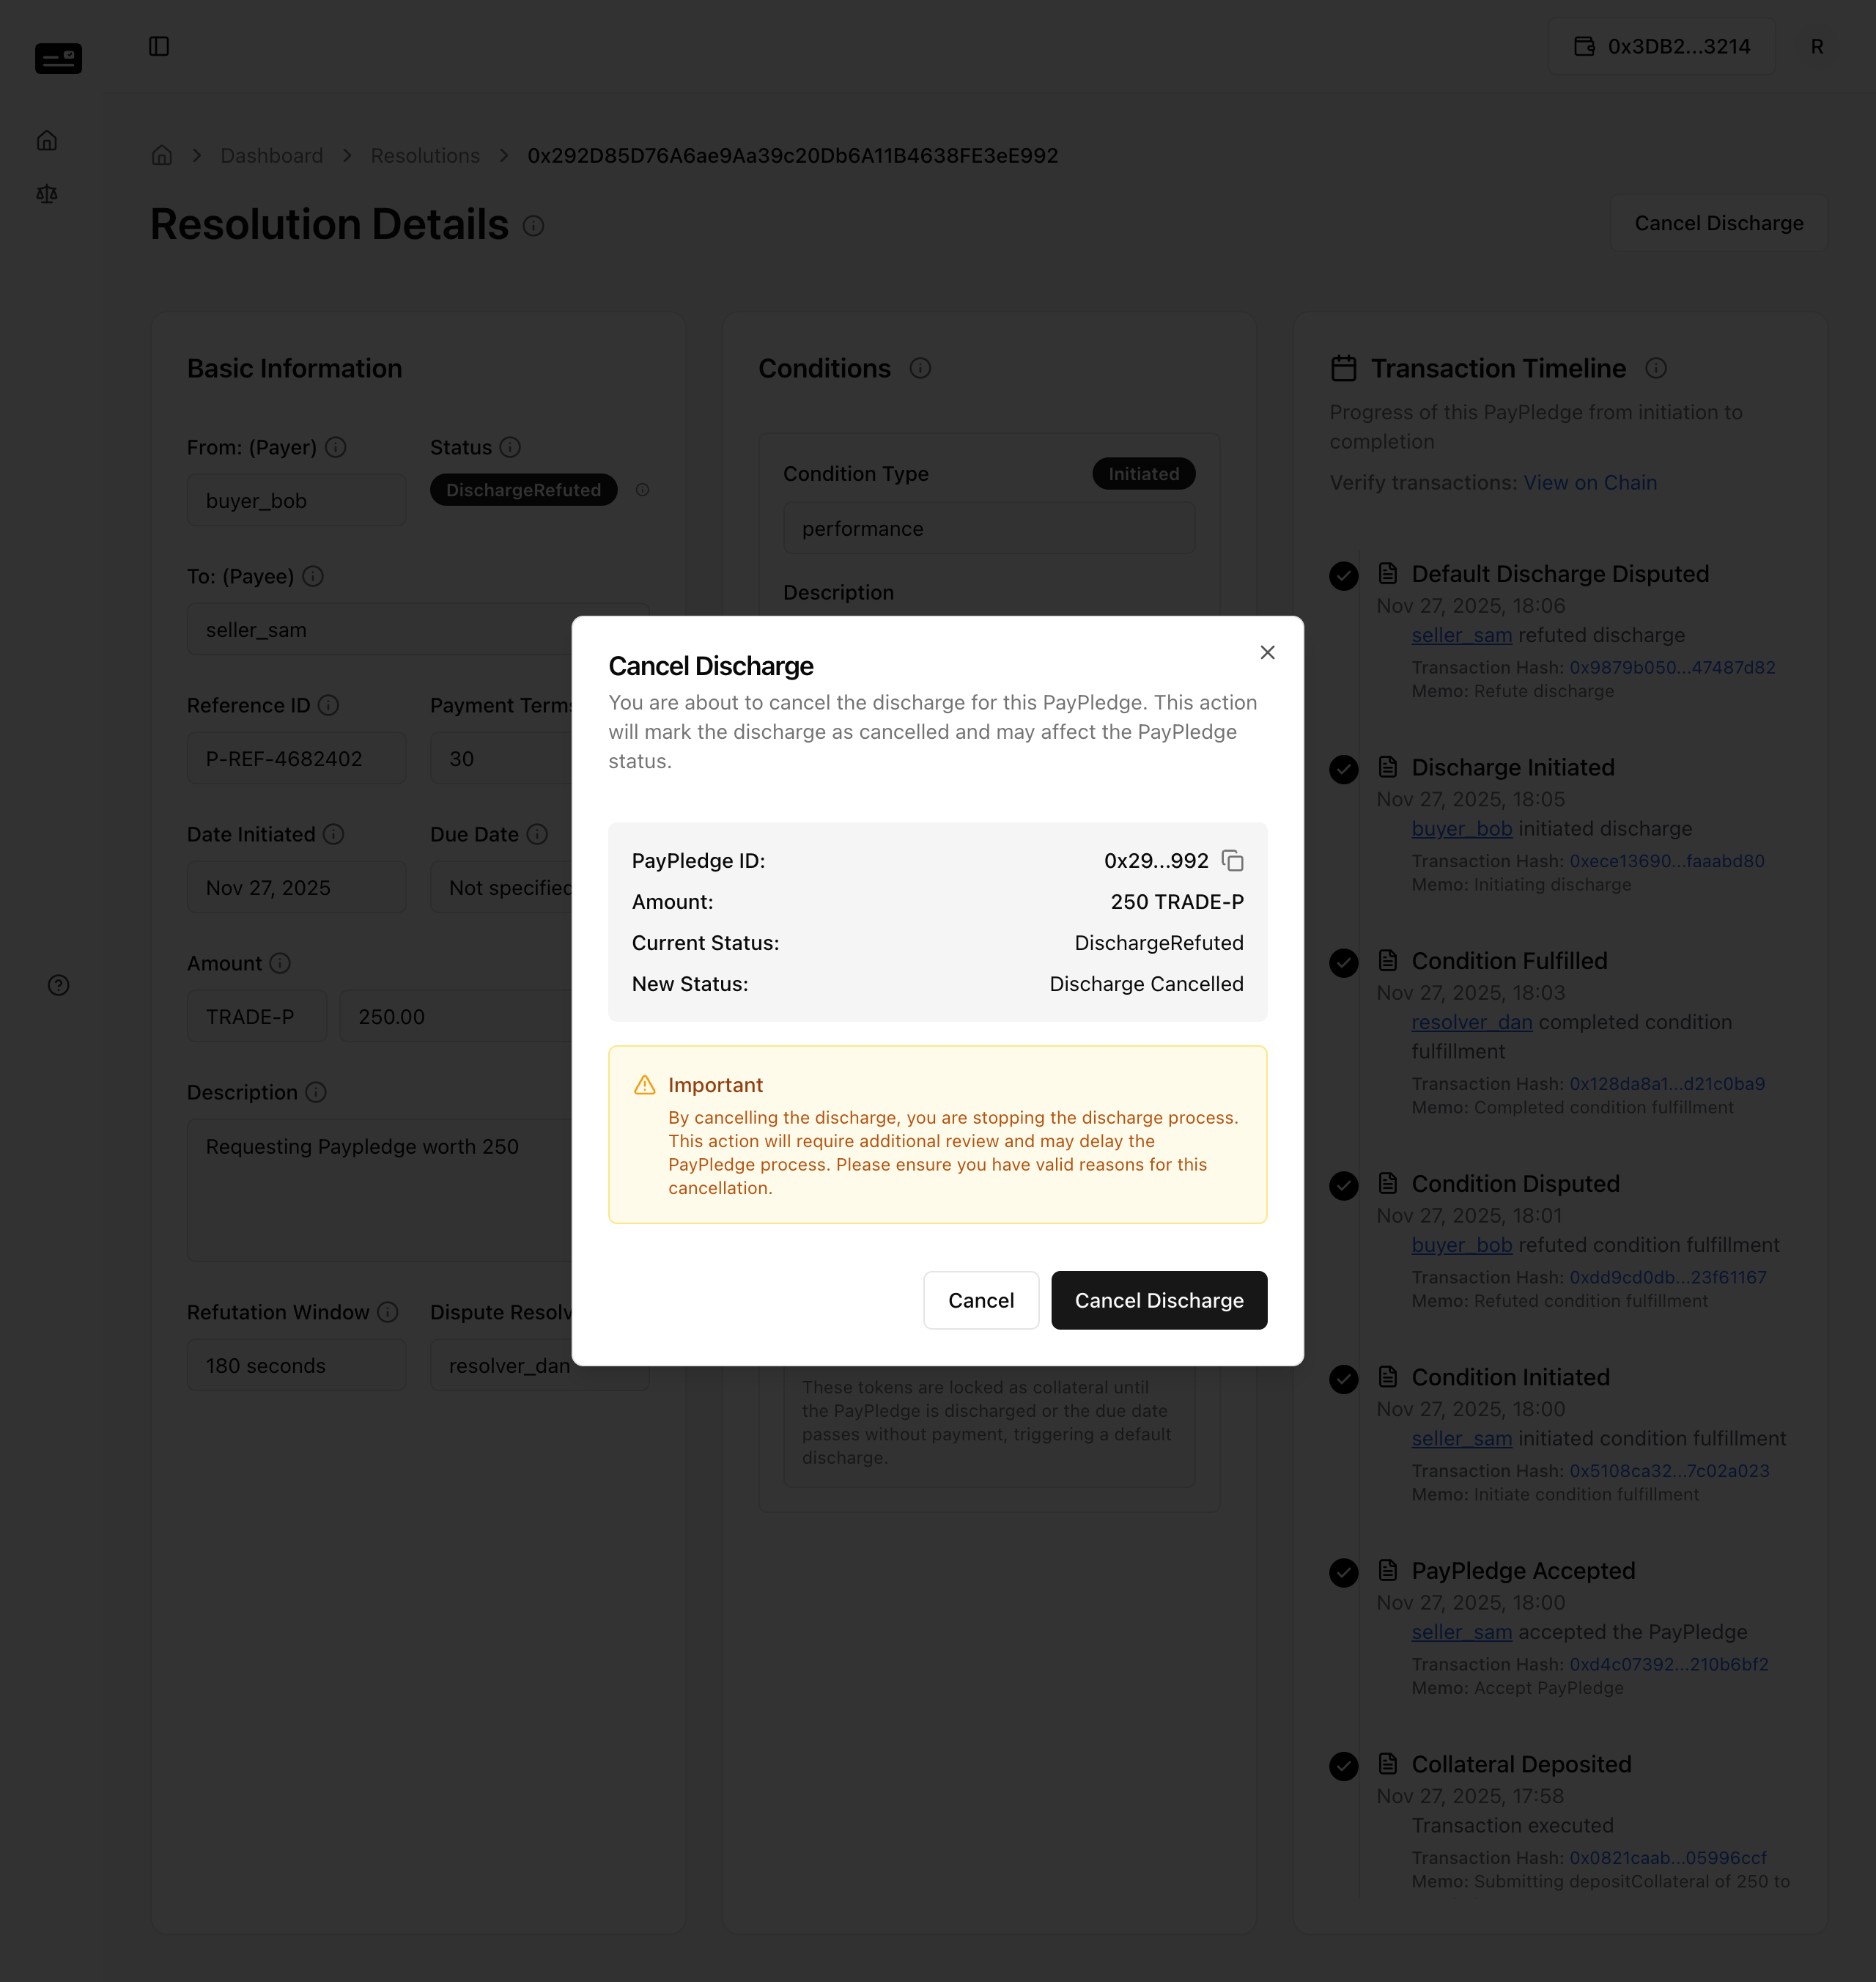
Step 4: The PayPledge status may revert or update based on the resolution (e.g., Discharge Cancelled). 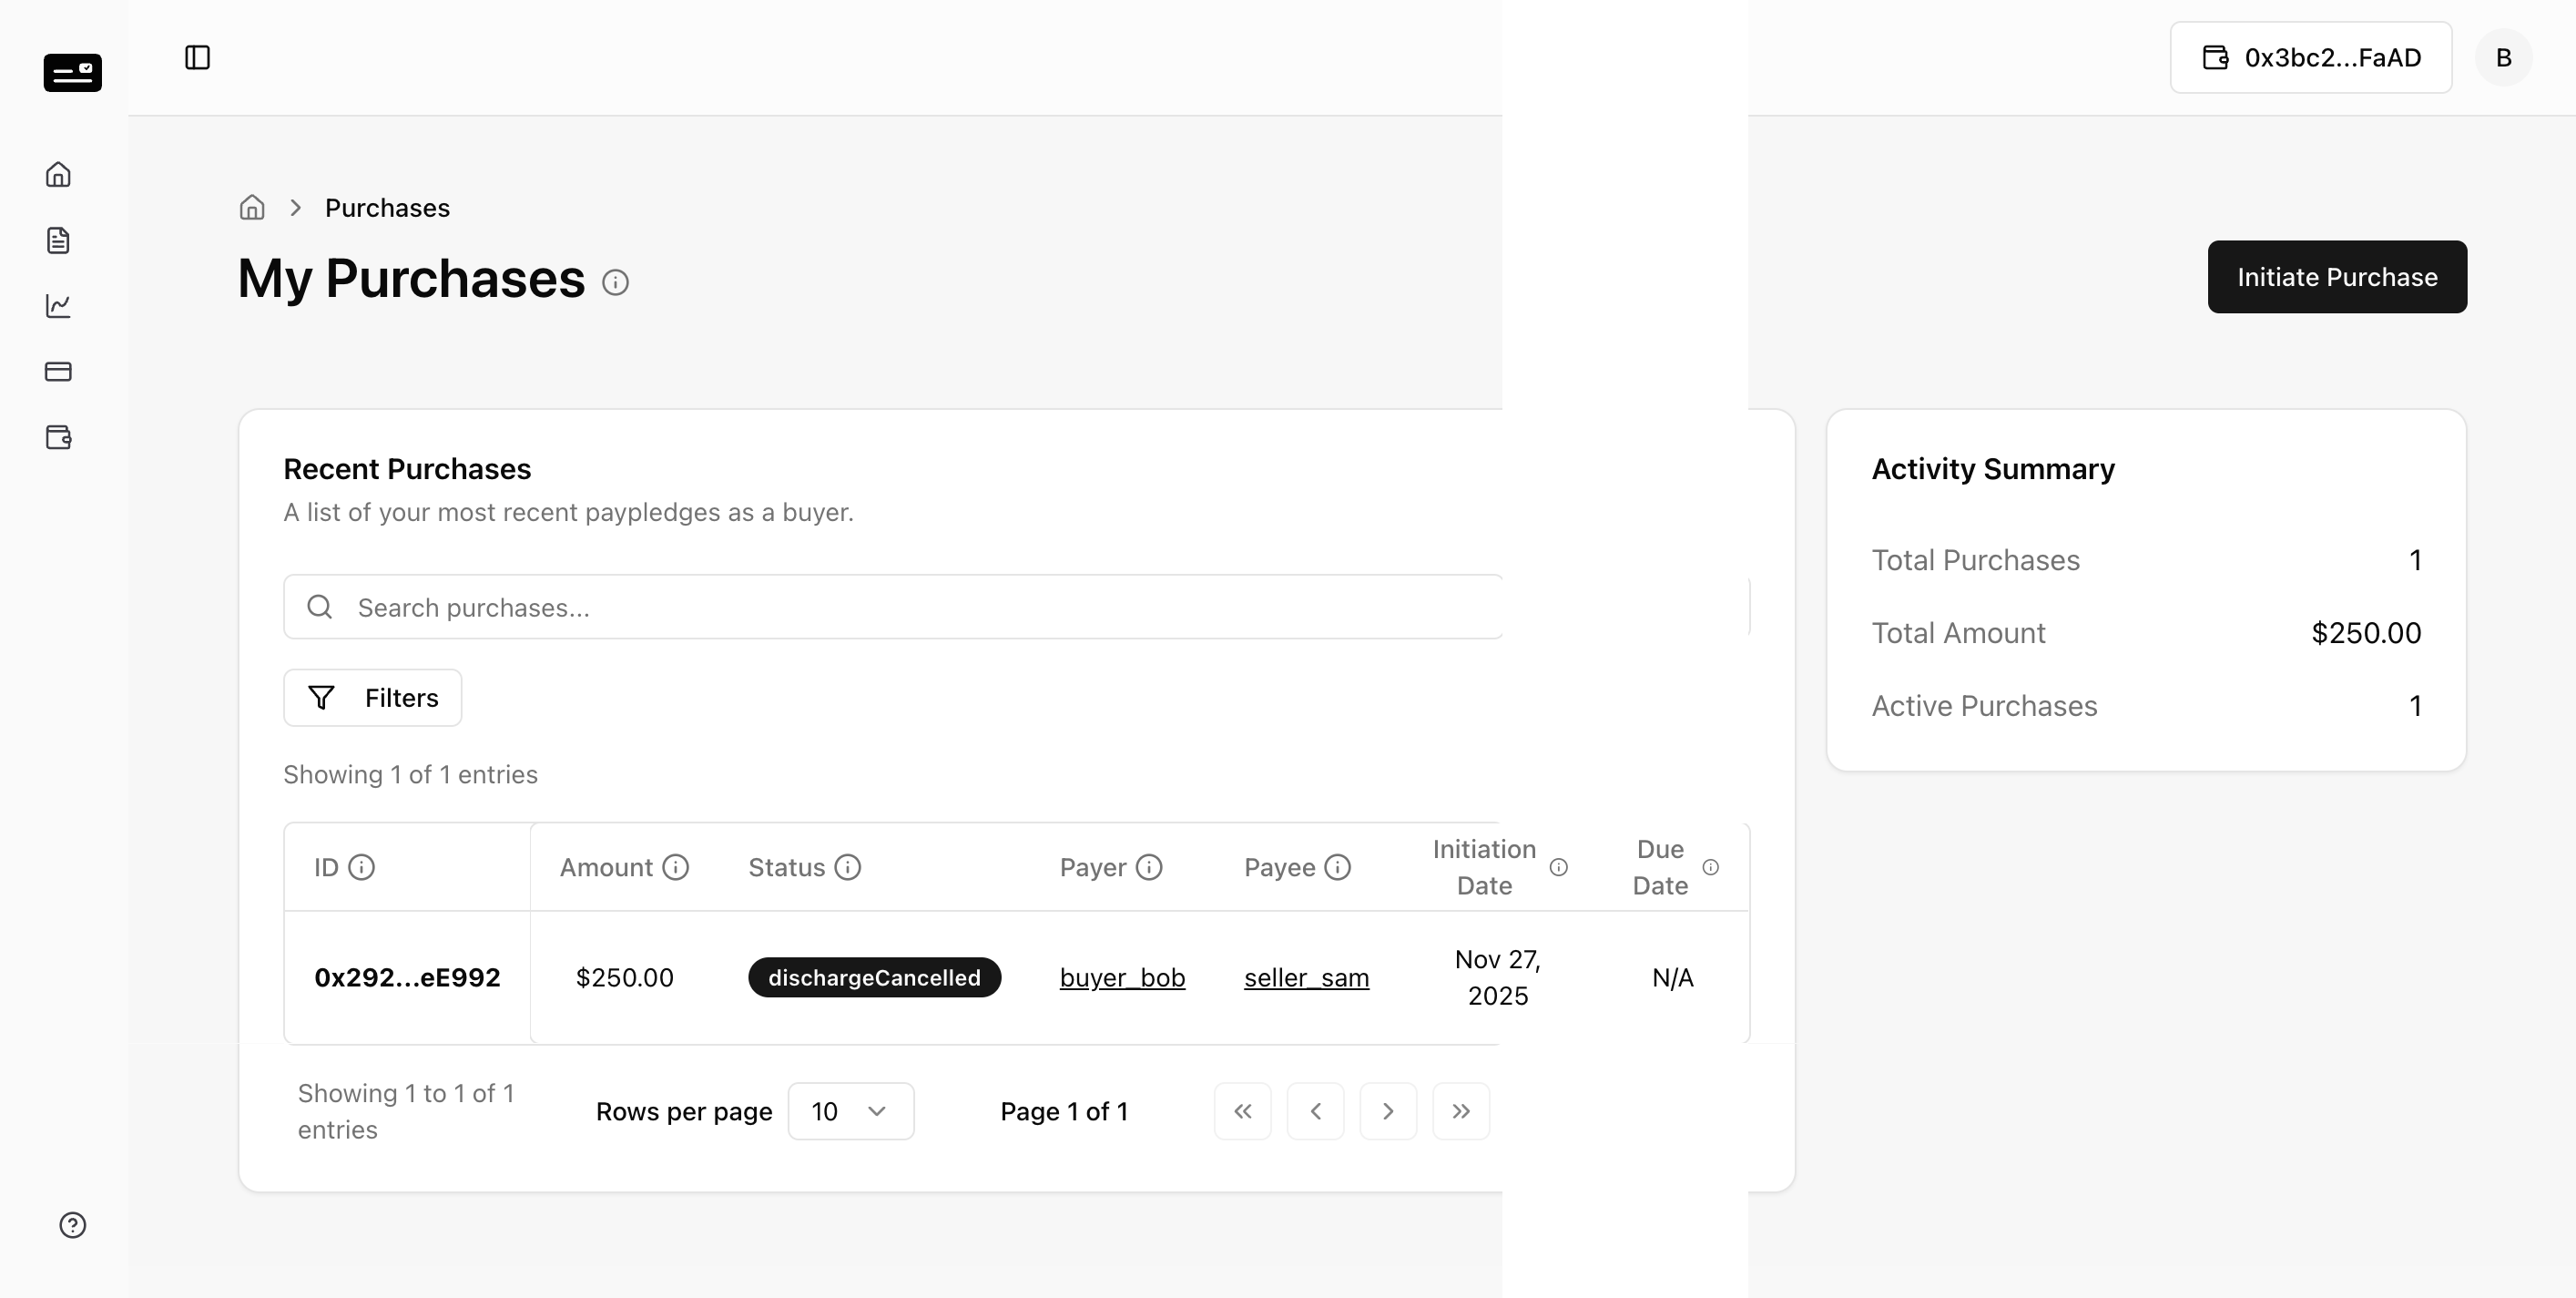
6.4 Final Successful Discharge
Step 1: The Buyer re-initiates the discharge (if cancelled) or completes the final step. 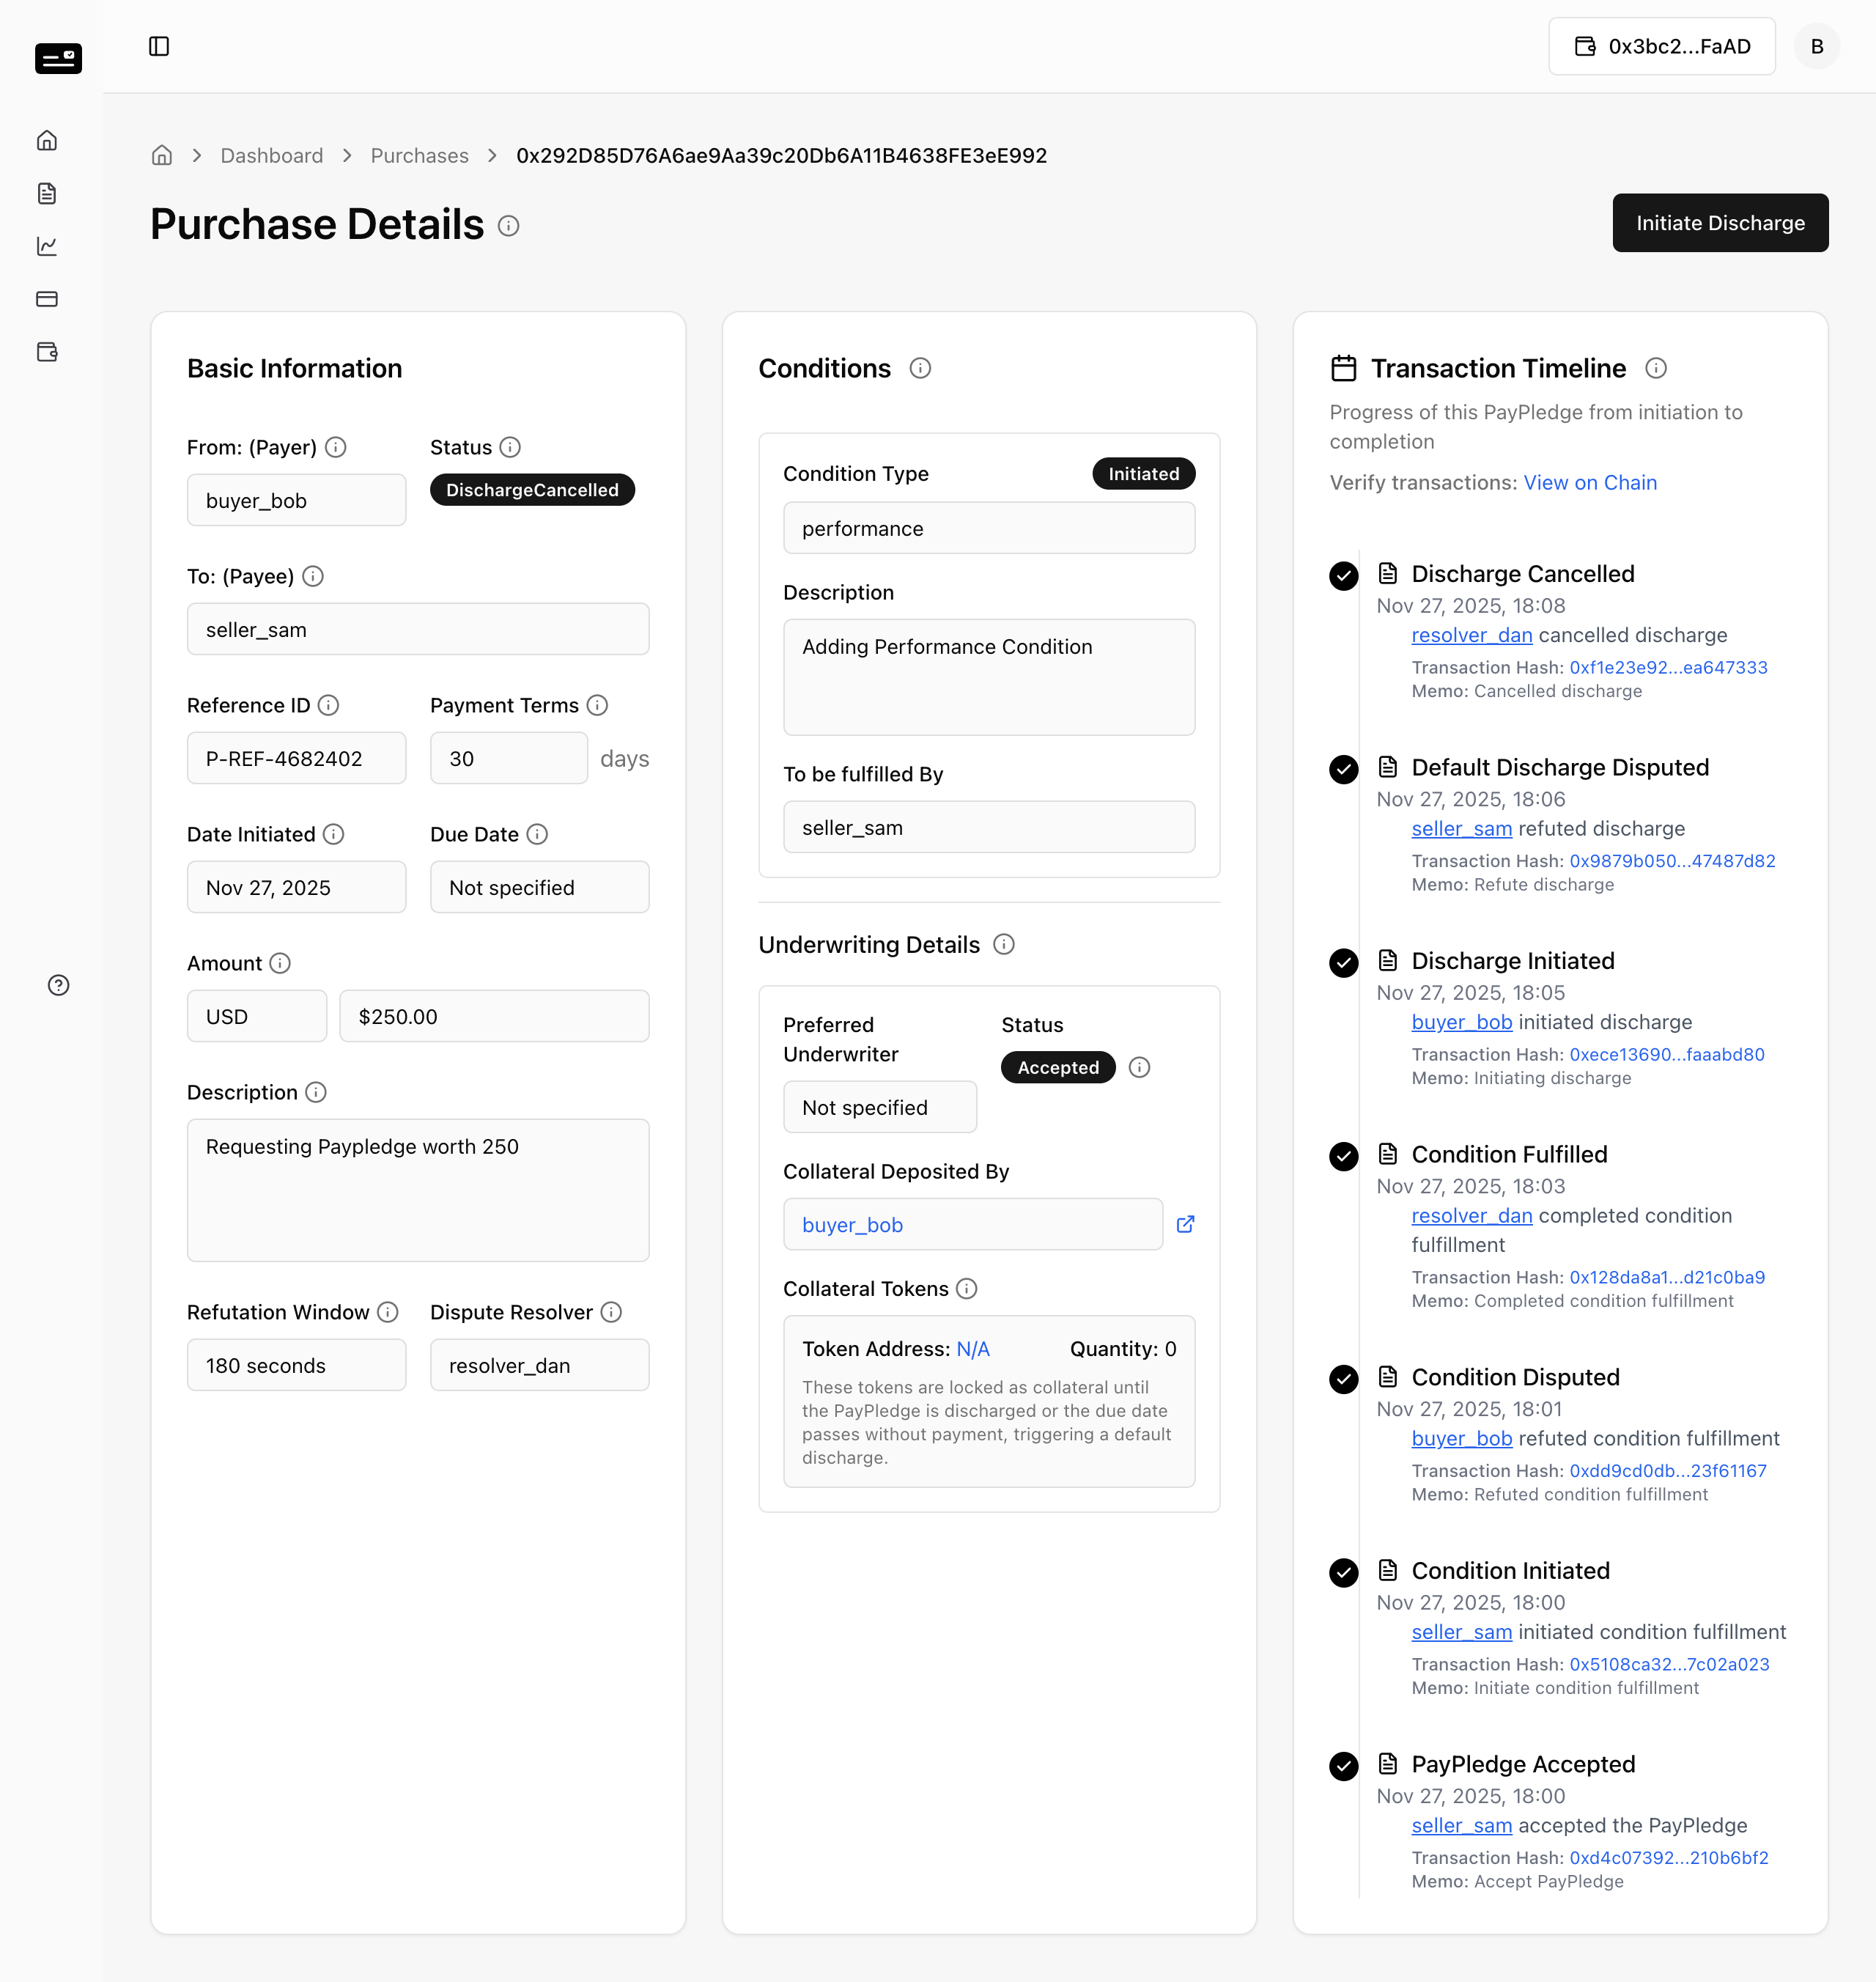
Step 2: Submit the discharge transaction. 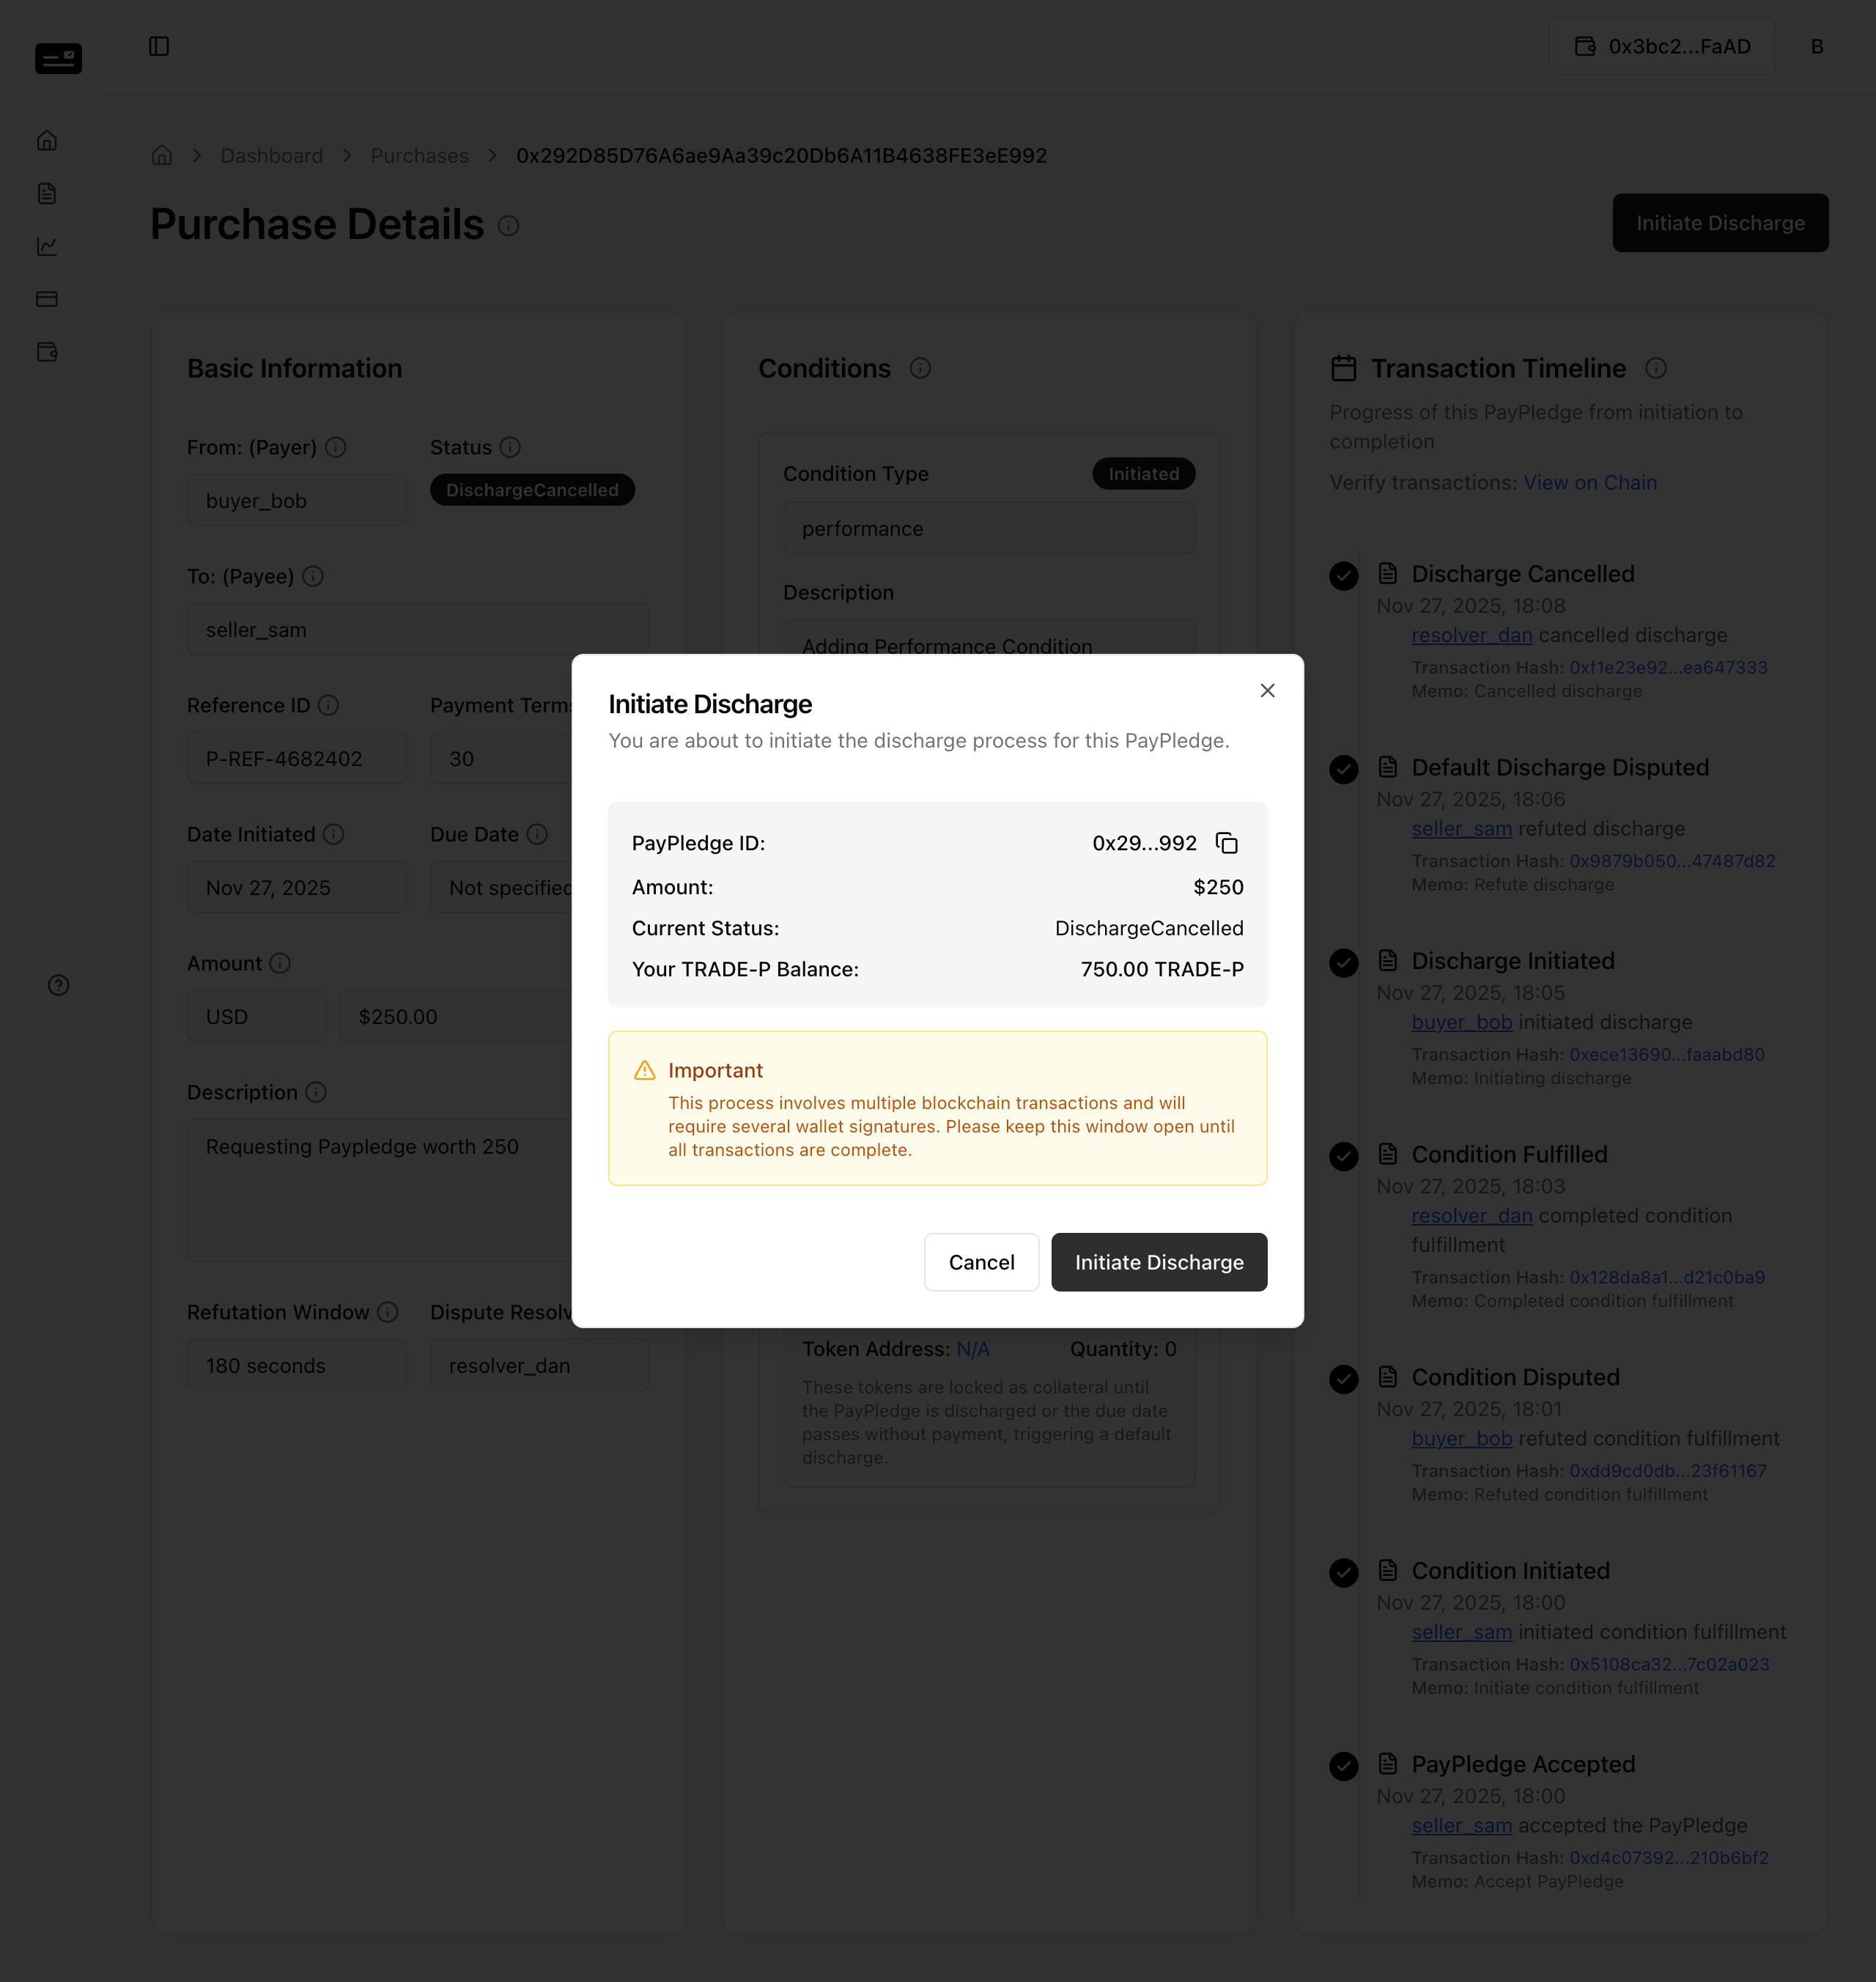
Step 3: The Buyer finalizes the discharge, transferring funds to the Seller. 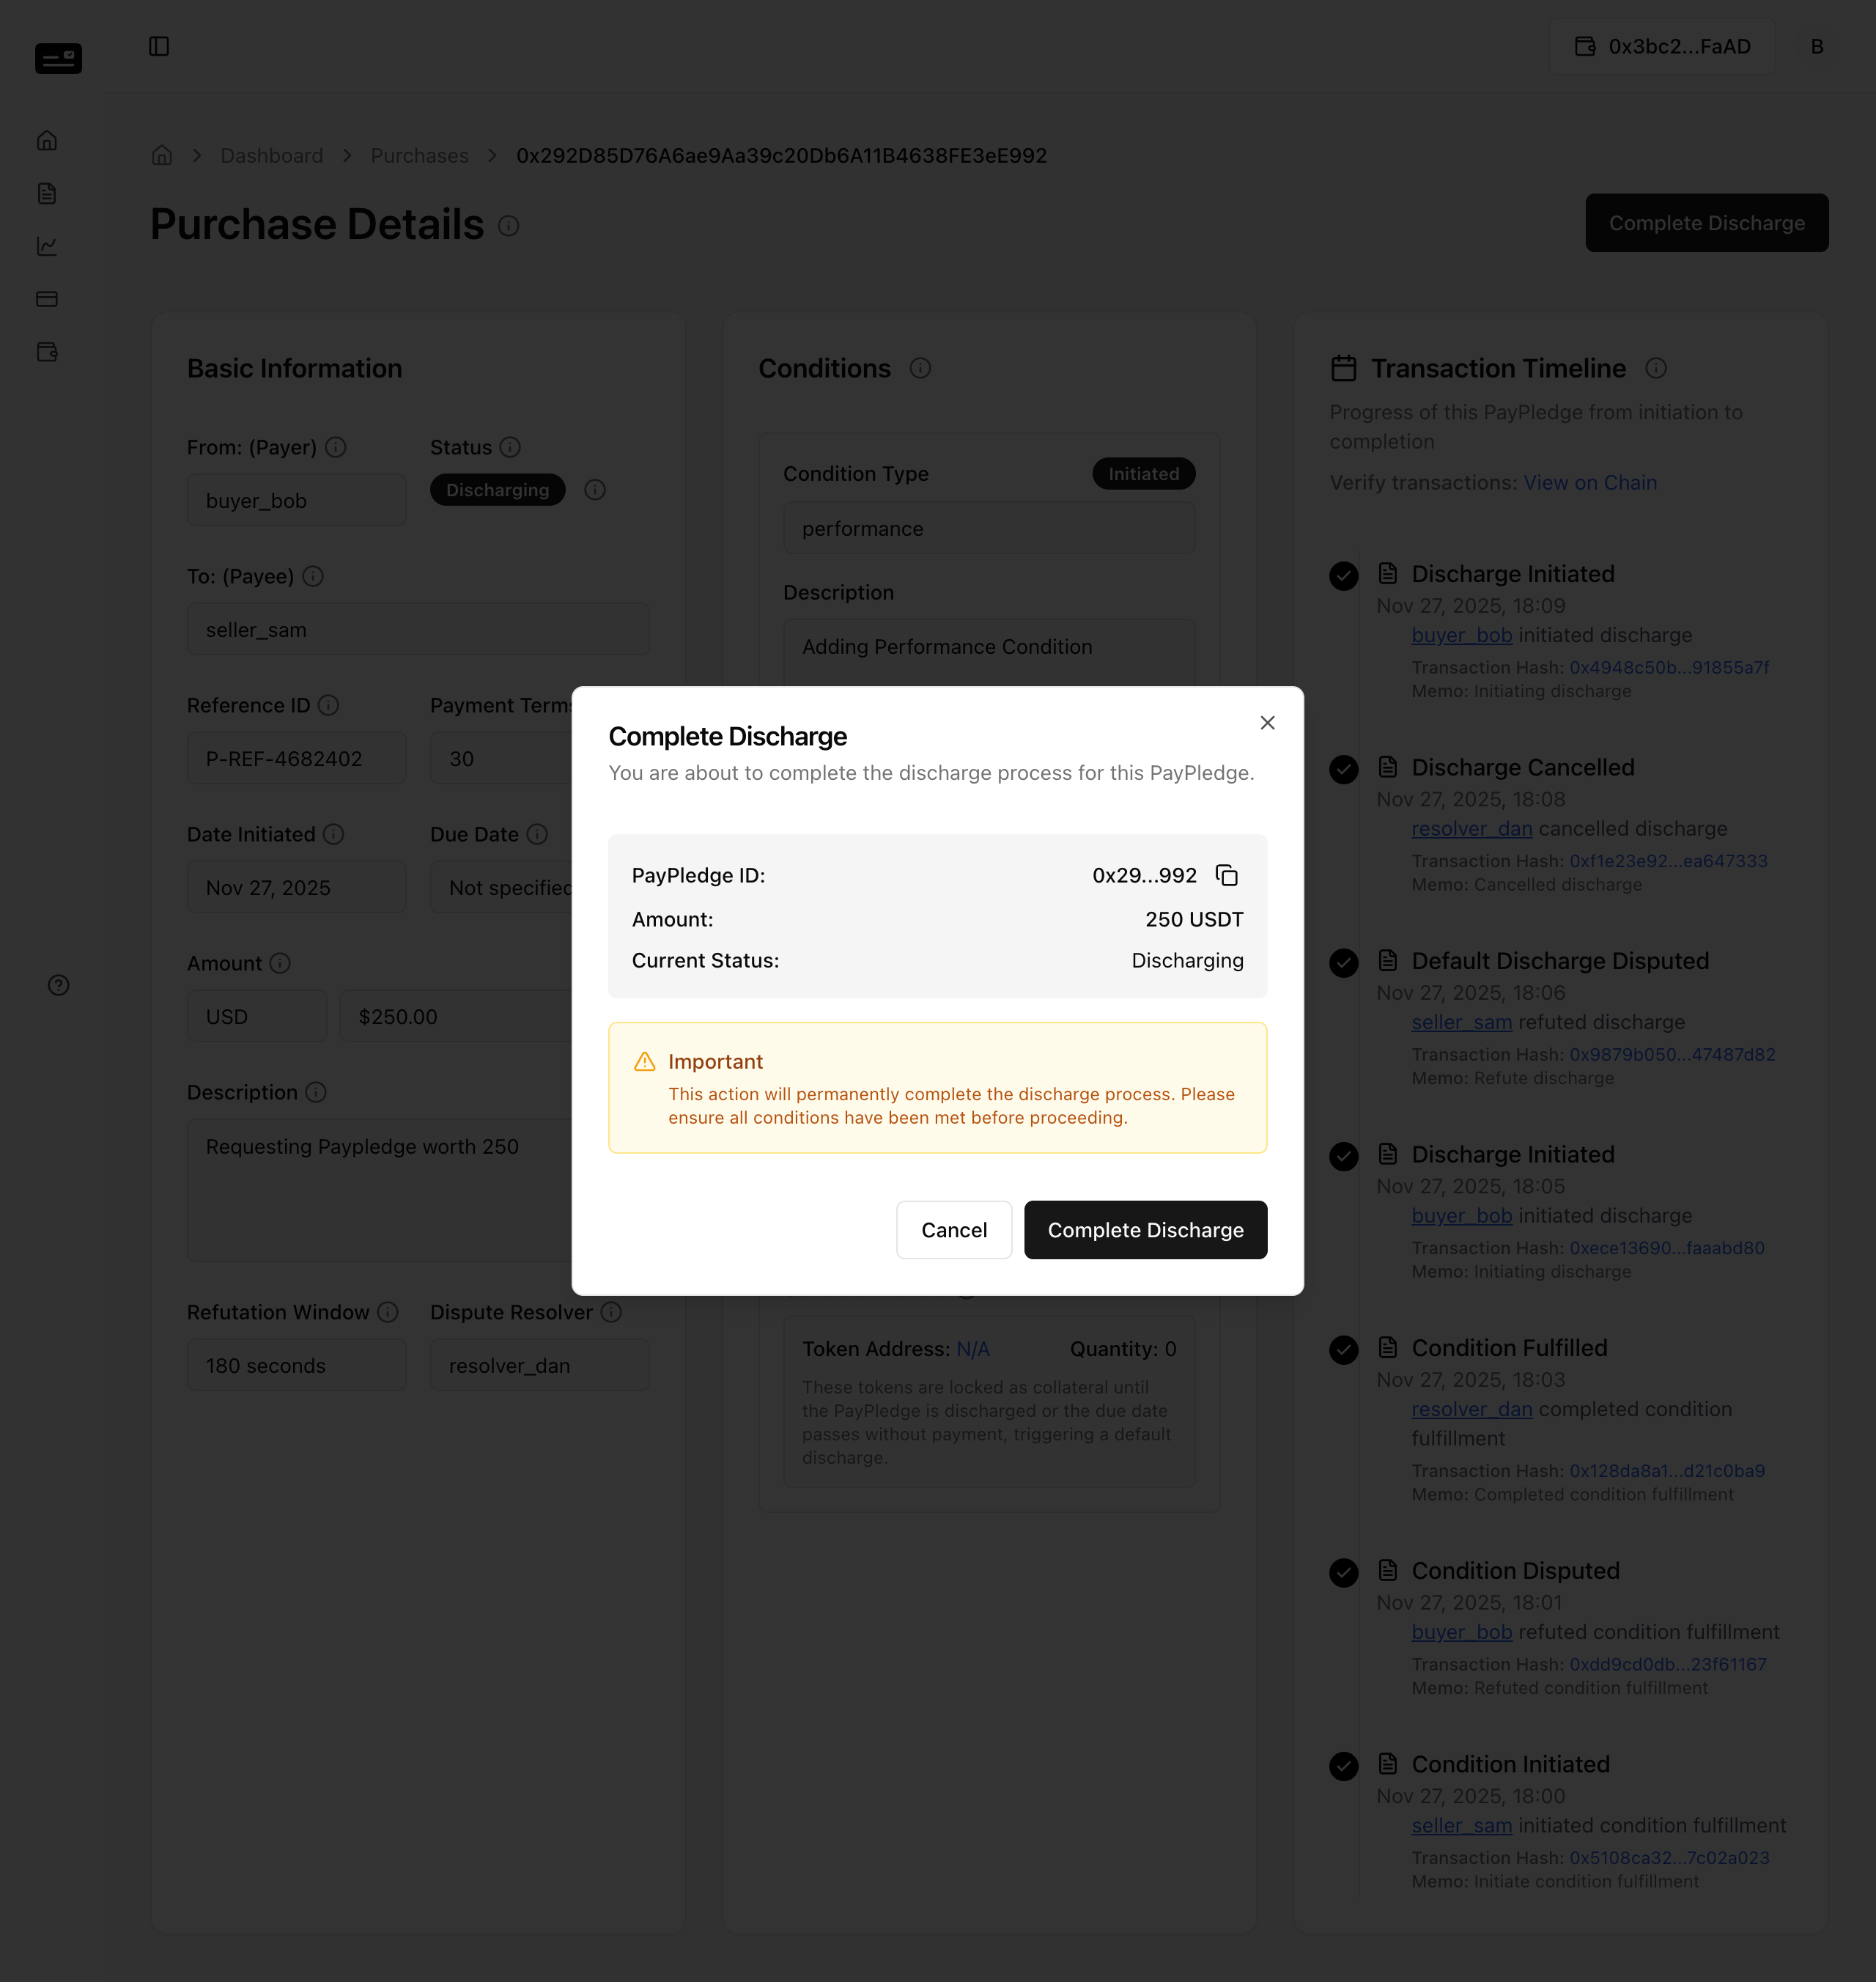
Step 4: The PayPledge is fully Discharged.