Appearance
Base Scenario: PayPledge Flow (Without Resolver)
This document describes the standard PayPledge flow without resolver involvement - a smooth transaction from trader onboarding to final settlement. This scenario demonstrates the ideal case where no disputes arise and the transaction completes smoothly.
📹 Video Demonstrations: For complete video walkthroughs of all PayPledge functionality, see our Complete Workflow Videos. Each step below includes relevant video links for enhanced understanding.
Workflow Overview
This base scenario follows the complete PayPledge lifecycle through five phases:
Phase-by-Phase Breakdown
Phase 1: Setup & Onboarding
Steps 1-7: Foundation Setup
- Admin wallet creation and funding
- User onboarding (Buyer, Seller, Resolver, Underwriter)
- Account setup and authentication
- Initial balance verification
Phase 2: Credit Management
Steps 8-9: Credit Line Establishment
- Credit request submission
- Underwriter review and approval
- Credit line activation
Phase 3: PayPledge Creation
Steps 10-14: Transaction Initiation
- PayPledge request creation
- Terms and conditions definition
- Buyer review and acceptance
- PayPledge activation
Phase 4: Transaction Execution
Steps 15-16: Performance & Fulfillment
- Condition fulfillment initiation
- Performance tracking
- Evidence submission
- Progress monitoring
Phase 5: Settlement & Resolution
Steps 17-18: Completion & Settlement
- Discharge initiation
- Settlement processing
- Final token withdrawal
Detailed Step-by-Step Flow
Phase 1: Setup & Onboarding (Steps 1-7)
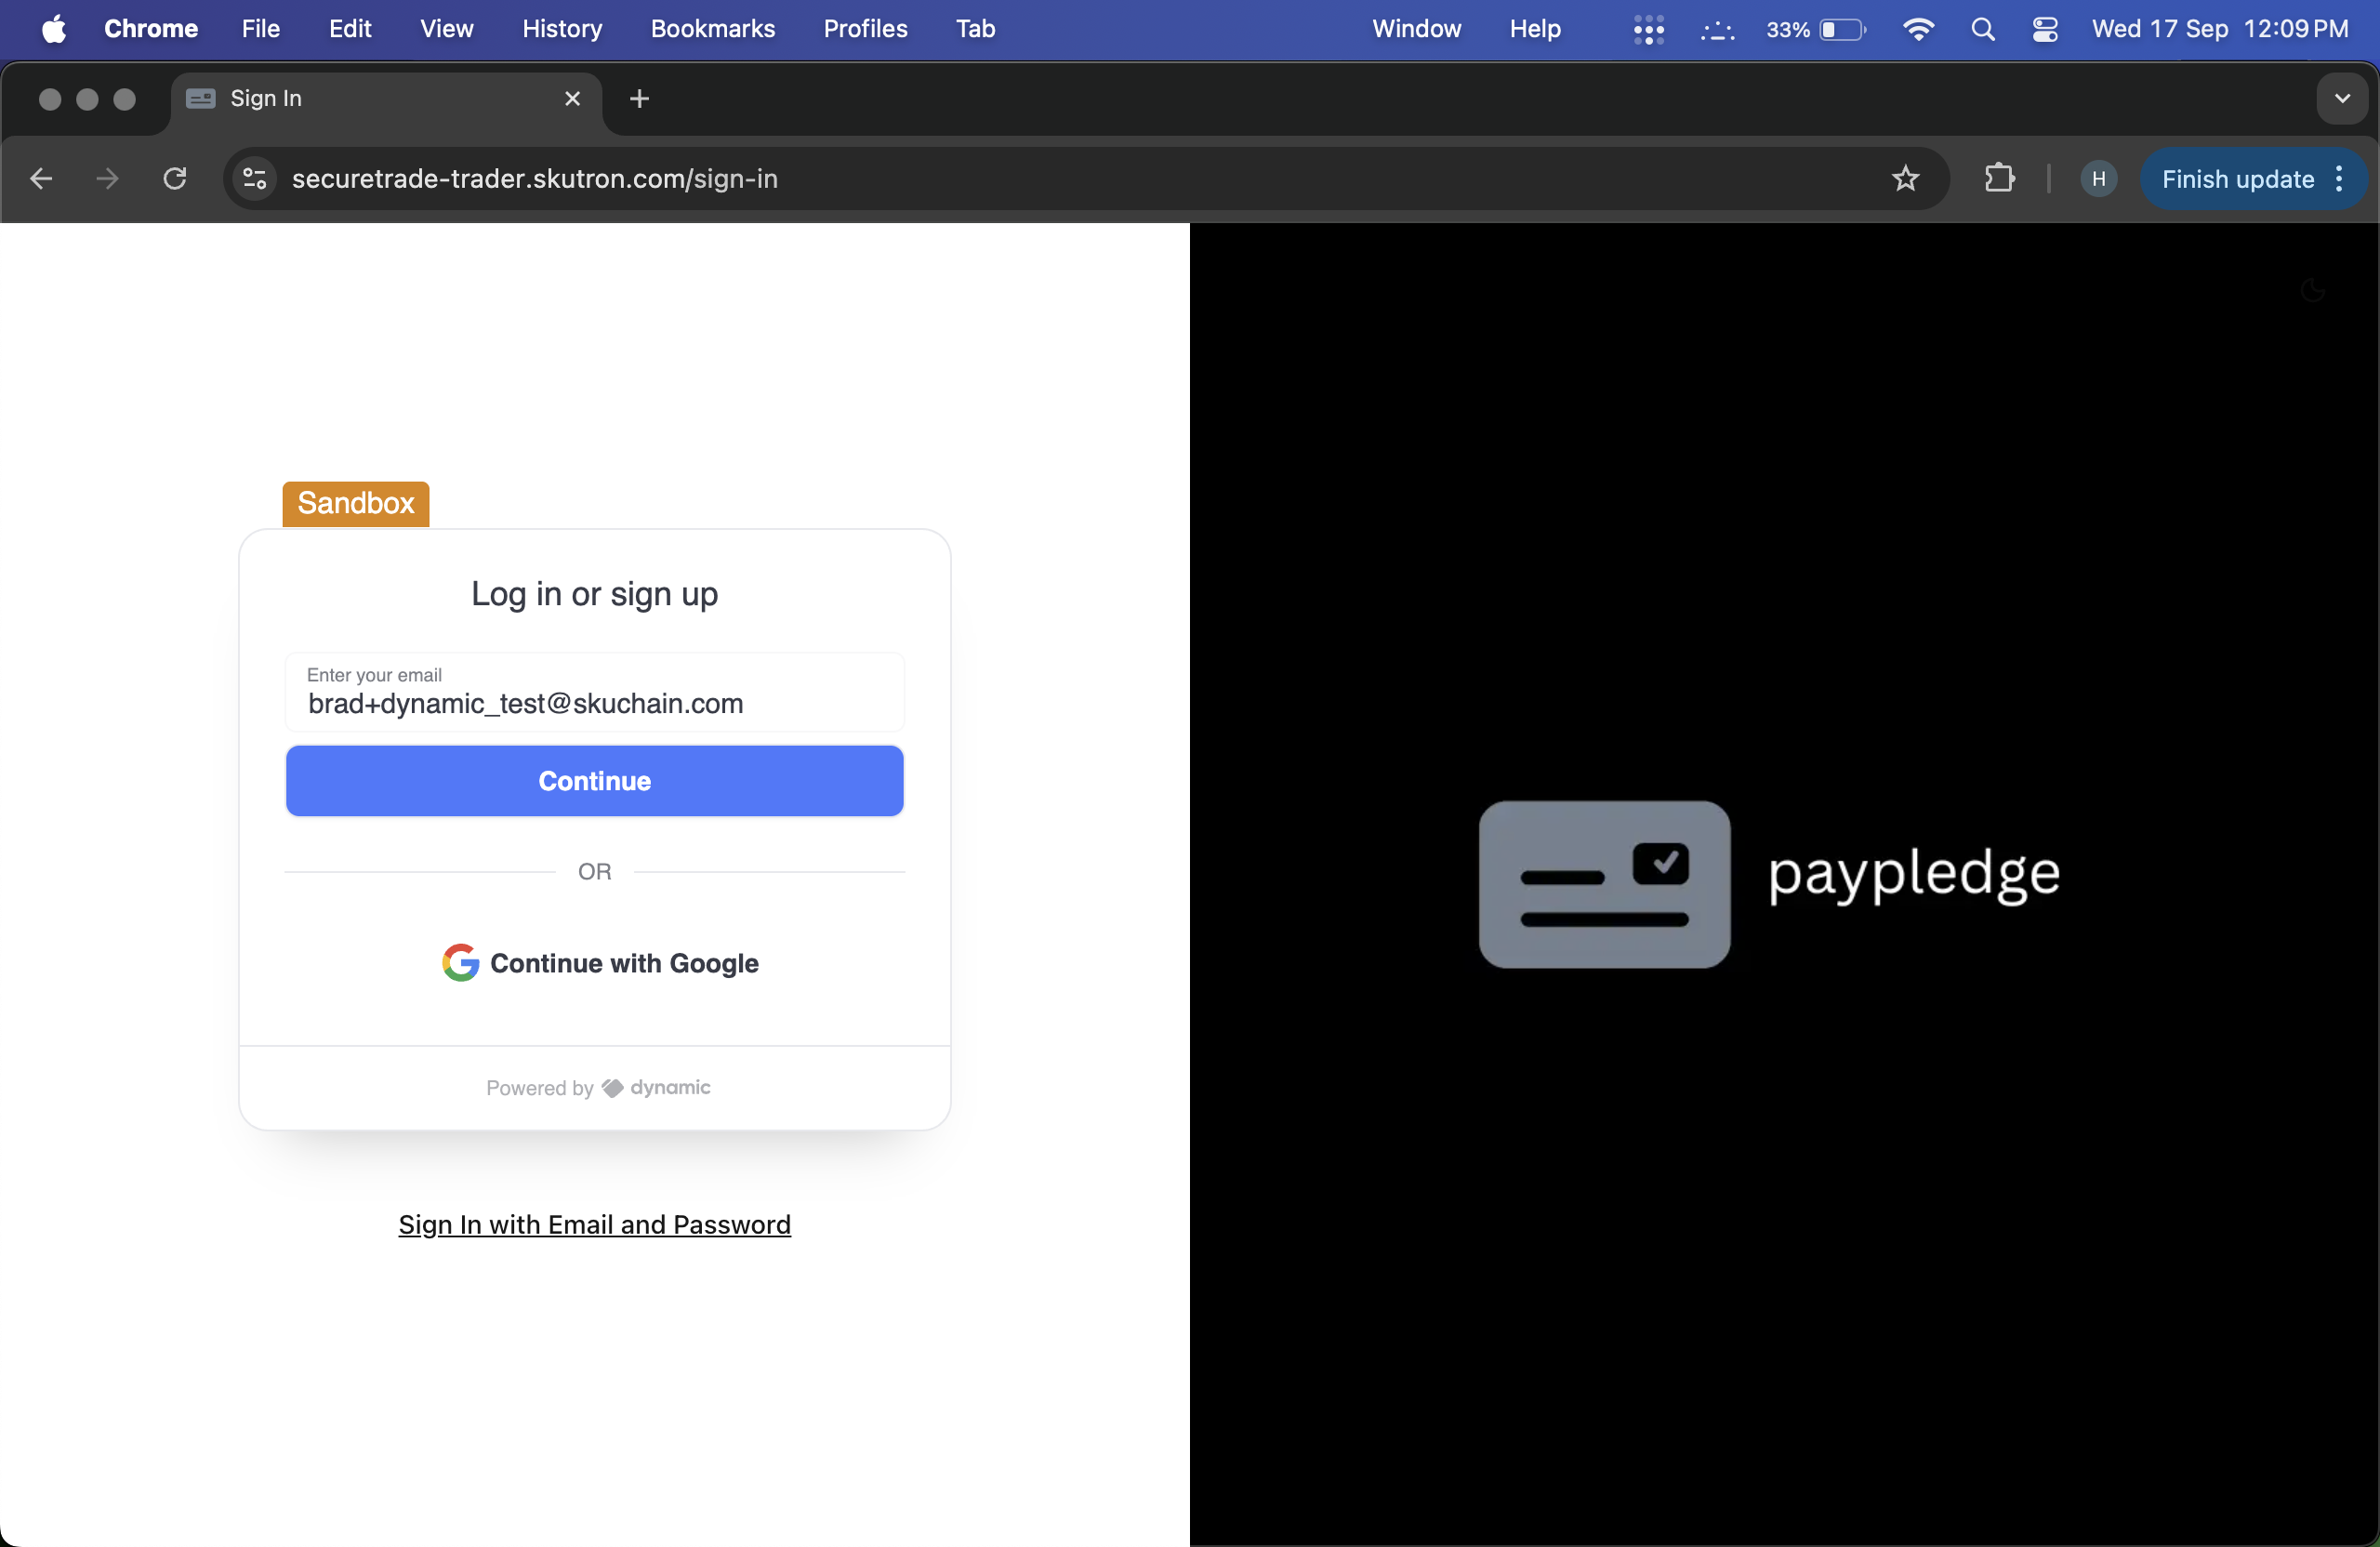
Step 1: Trader Signs In
- Action: Trader accesses the SecureTrade Trader interface
- System Response: Login successful, redirect to dashboard
- Screenshot:
- Video: Buyer Onboarding and Balance Check
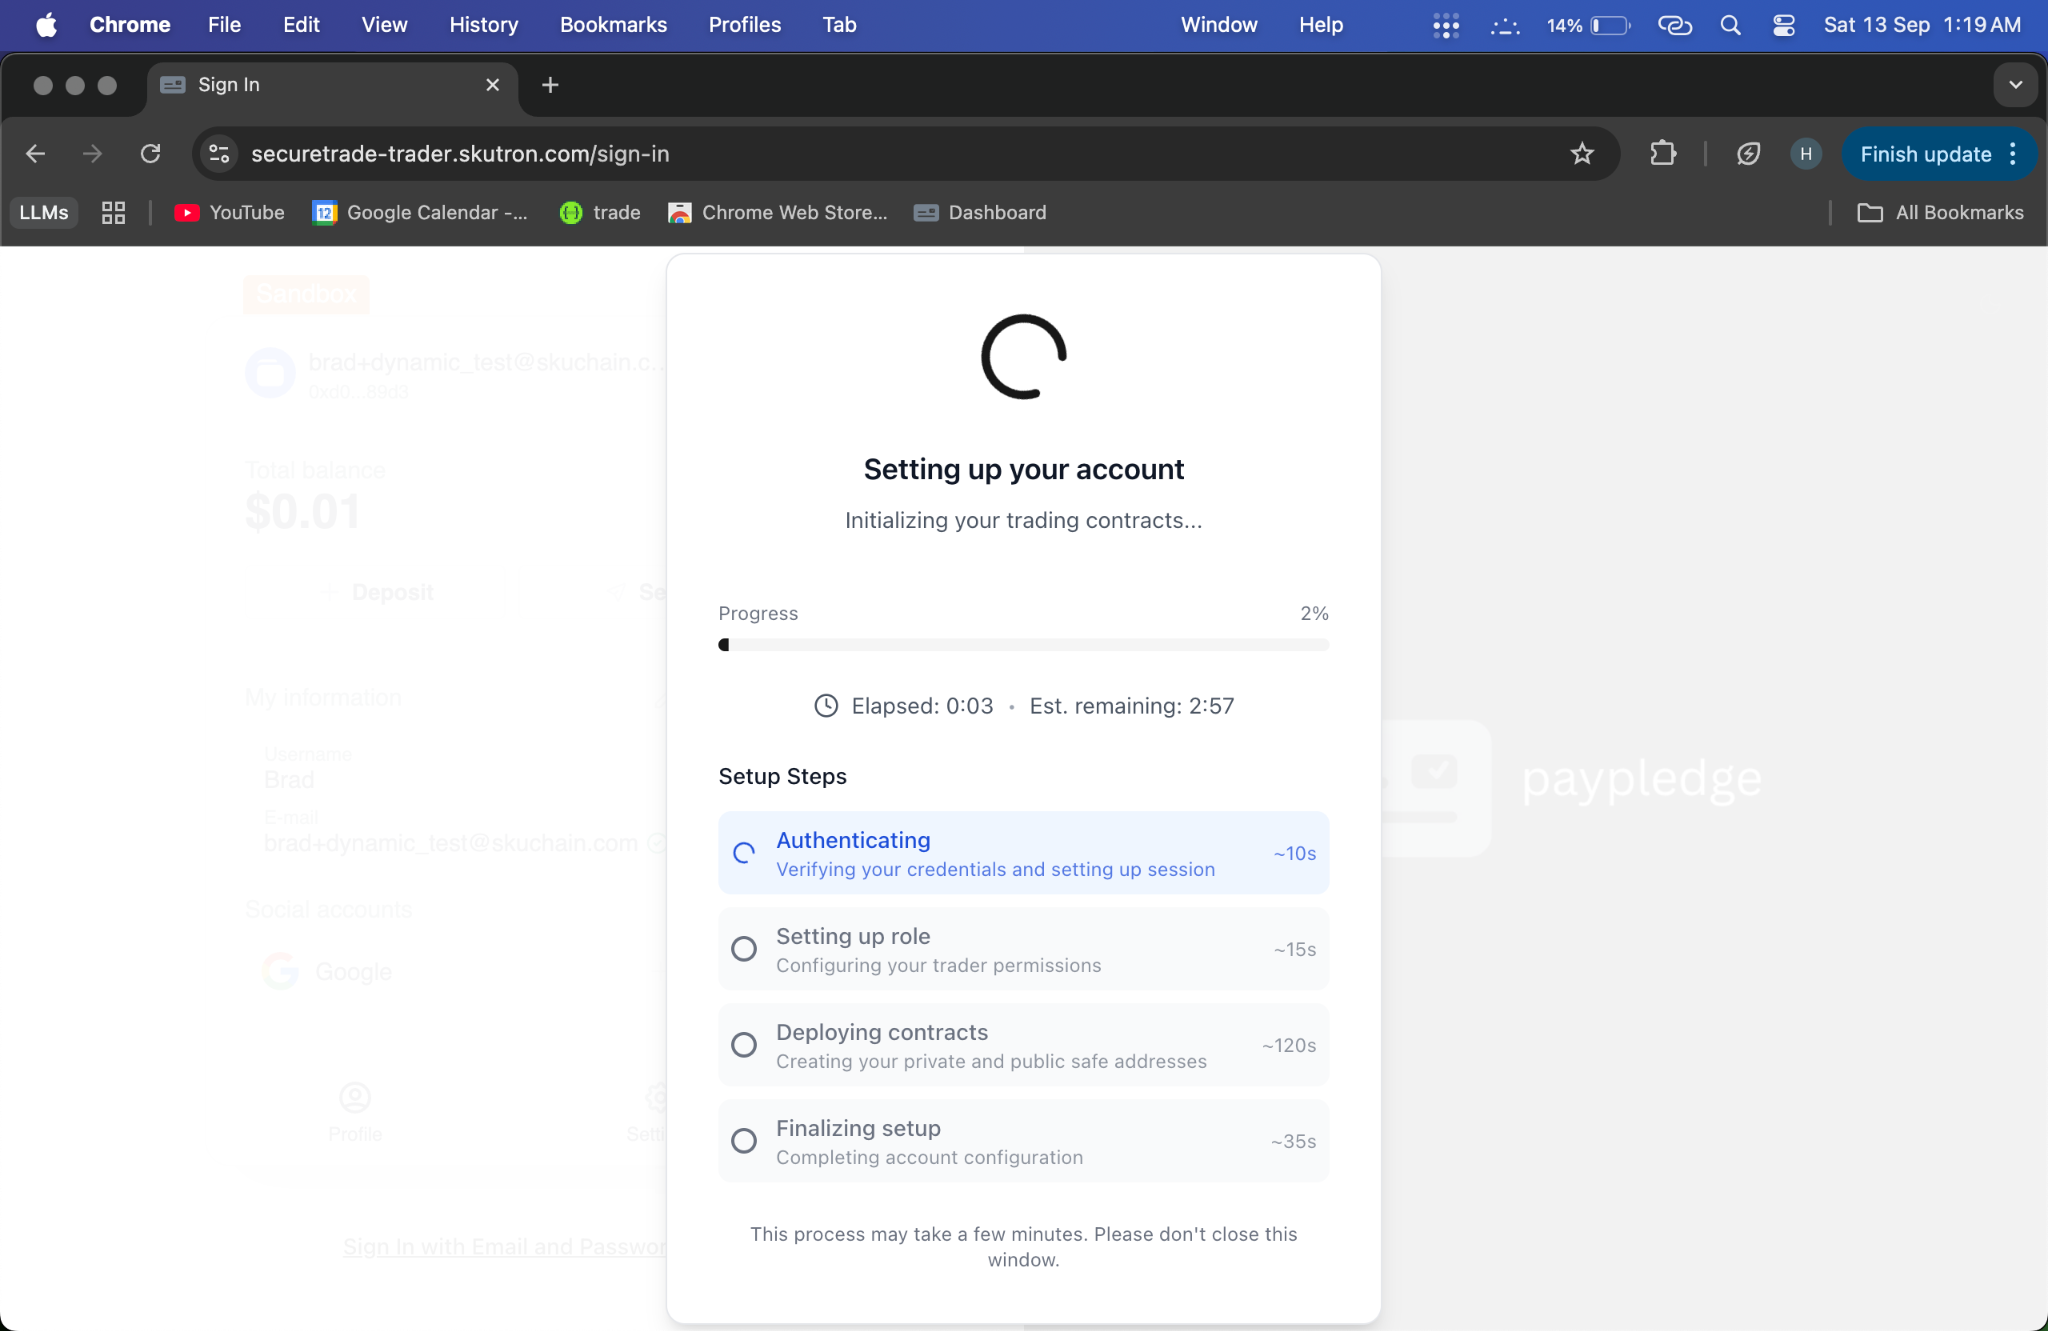
Step 2: Trader Onboards
- Action: Trader completes onboarding process and wallet setup
- System Response: Wallet pre-generation and account setup complete
- Screenshot:
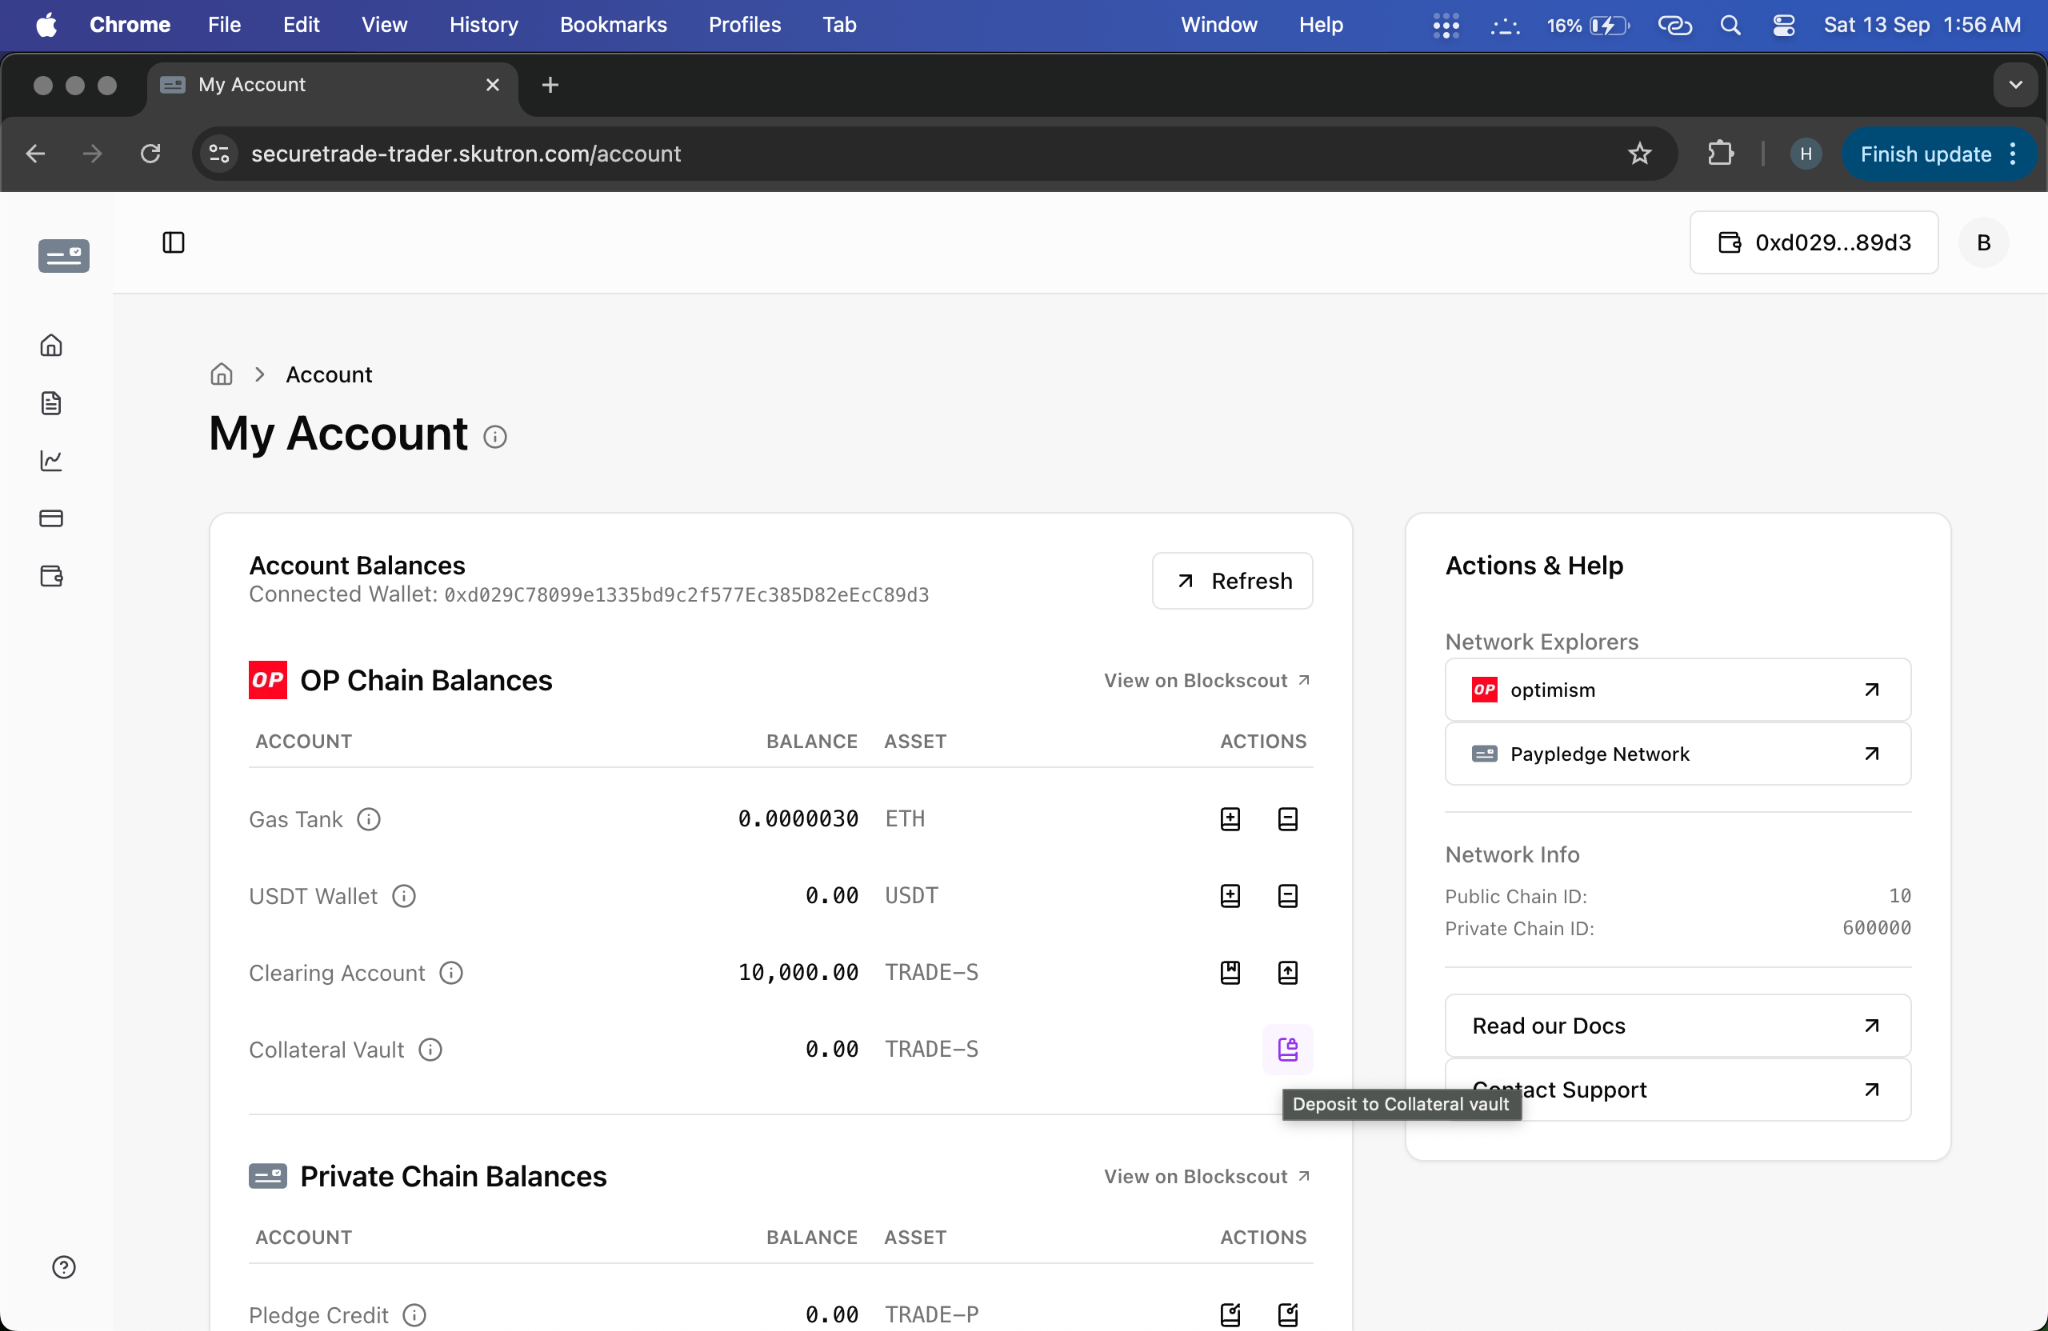
Step 3: Trader Checks ETH and Clearing Account Balance
- Action: Trader reviews wallet balances in dashboard
- System Response: Displays ETH balance and collateral clearing account balance
- Screenshot:
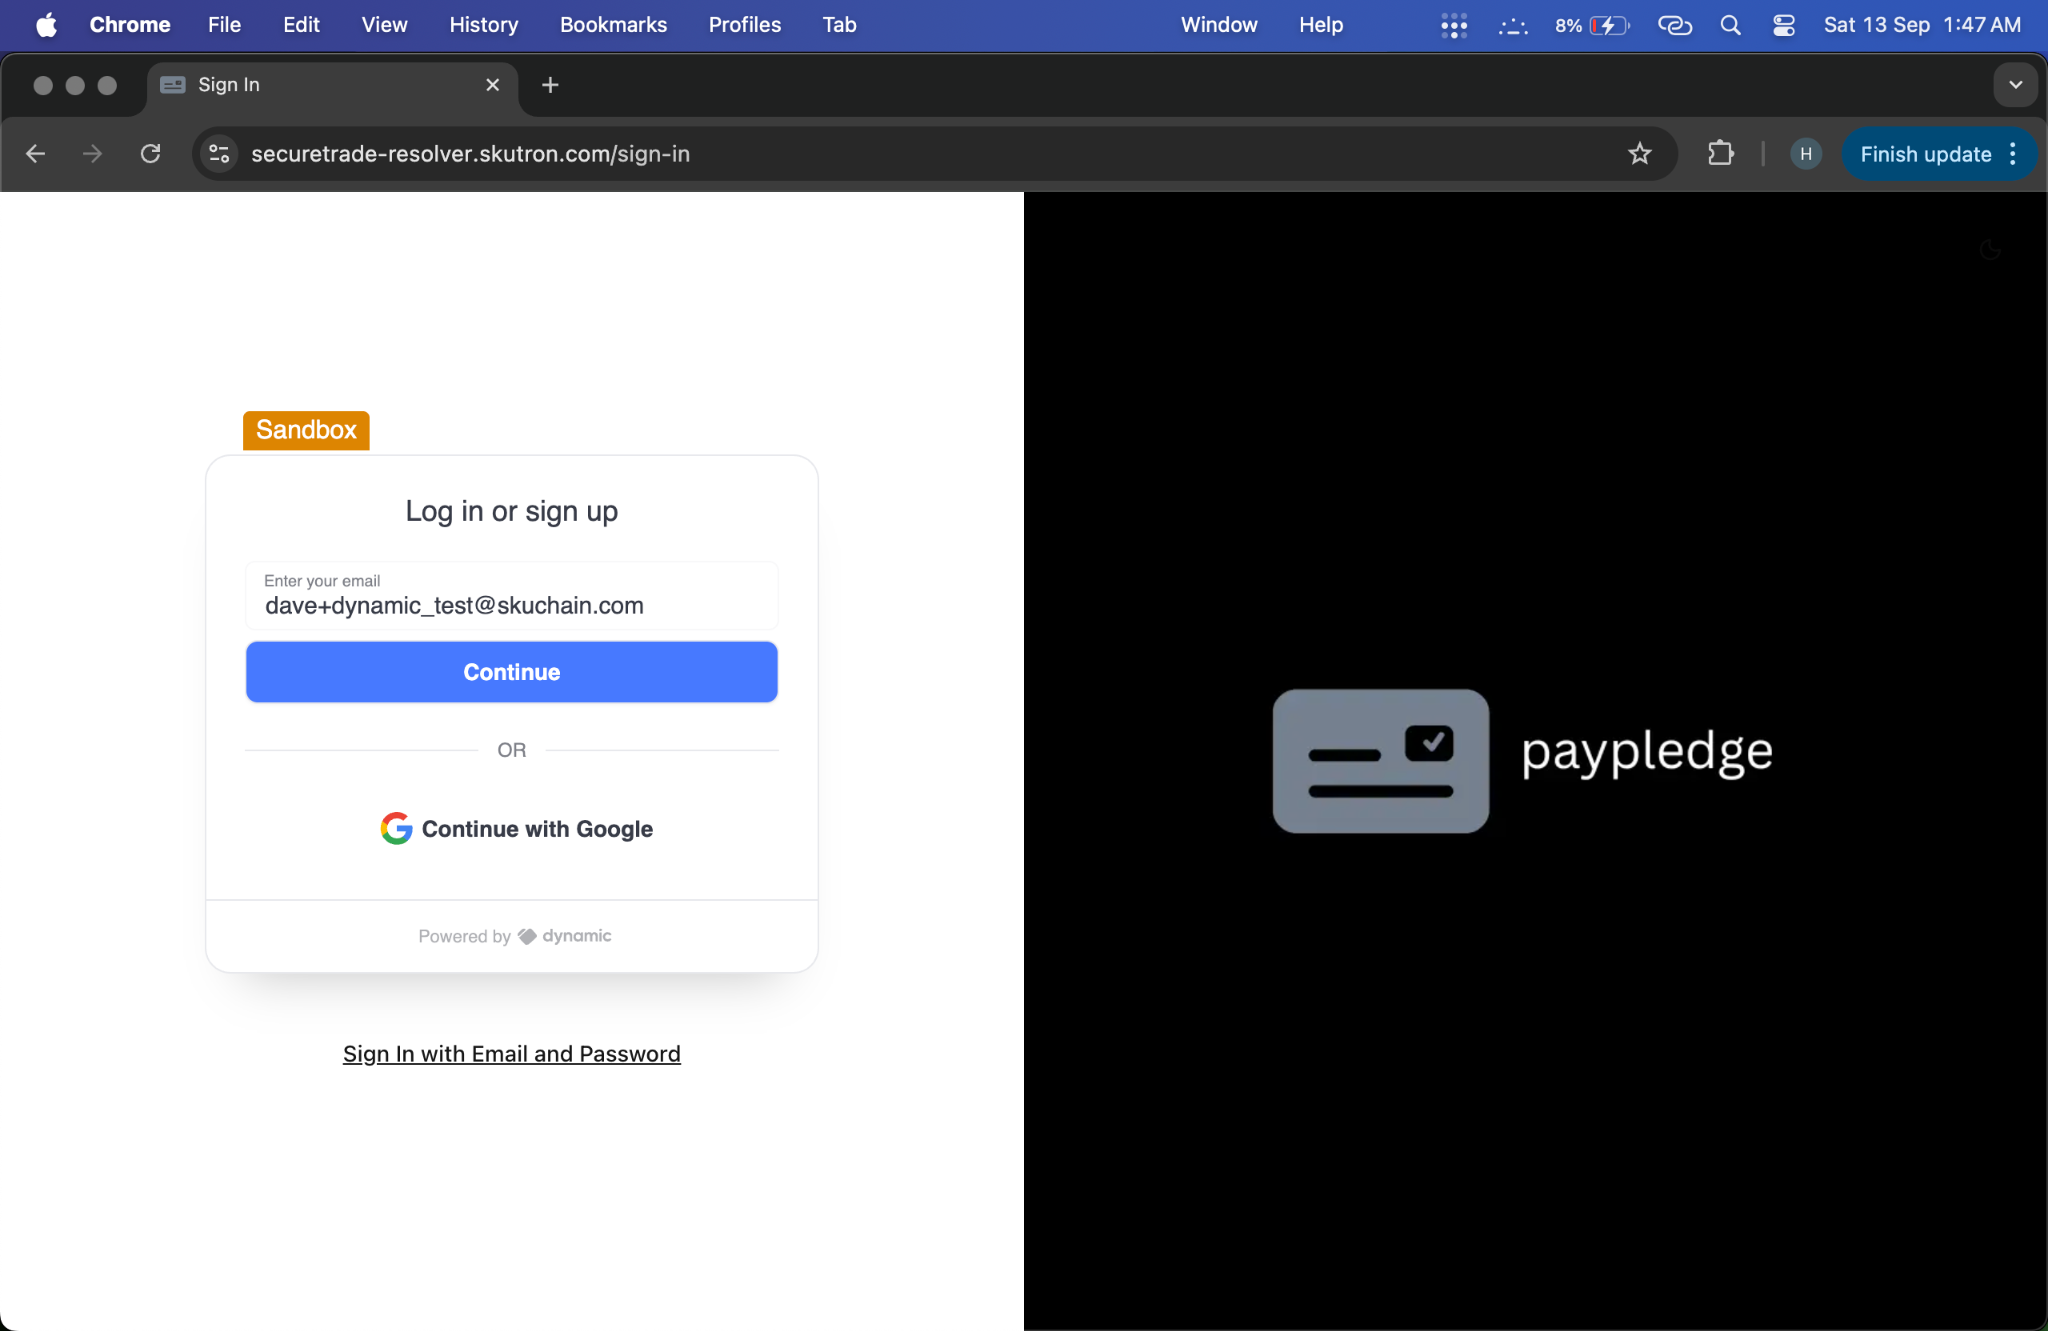
Step 4: Resolver Signs In
- Action: Resolver accesses the SecureTrade Resolver interface
- System Response: Login successful, redirect to resolver dashboard
- Screenshot:
- Video: Resolver Onboarding
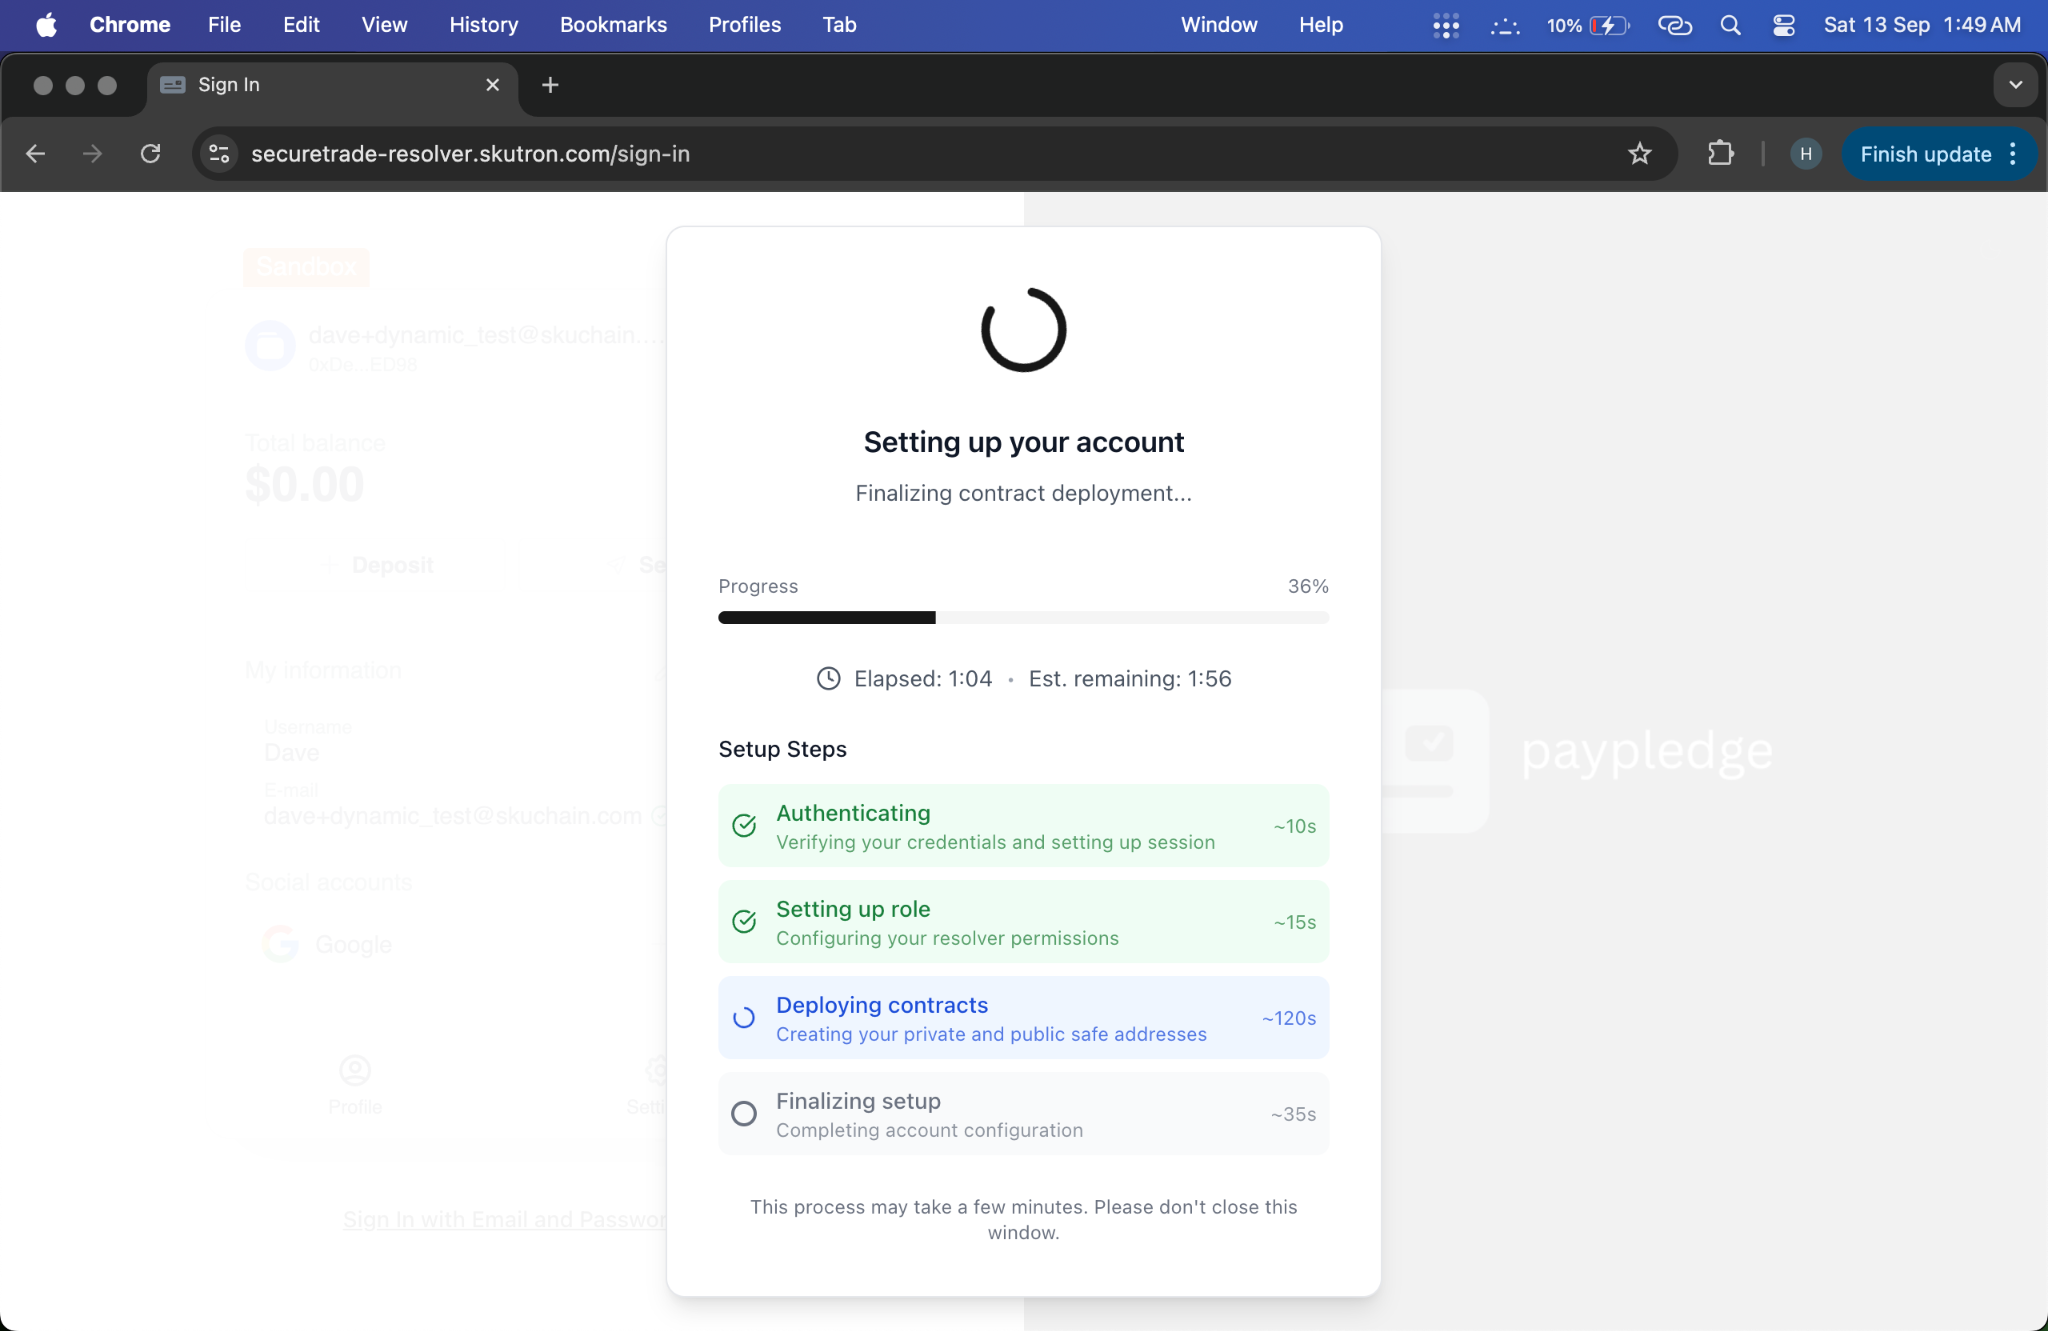
Step 5: Resolver Onboards
- Action: Resolver completes onboarding and account setup
- System Response: Resolver account activated and ready for dispute resolution
- Screenshot:
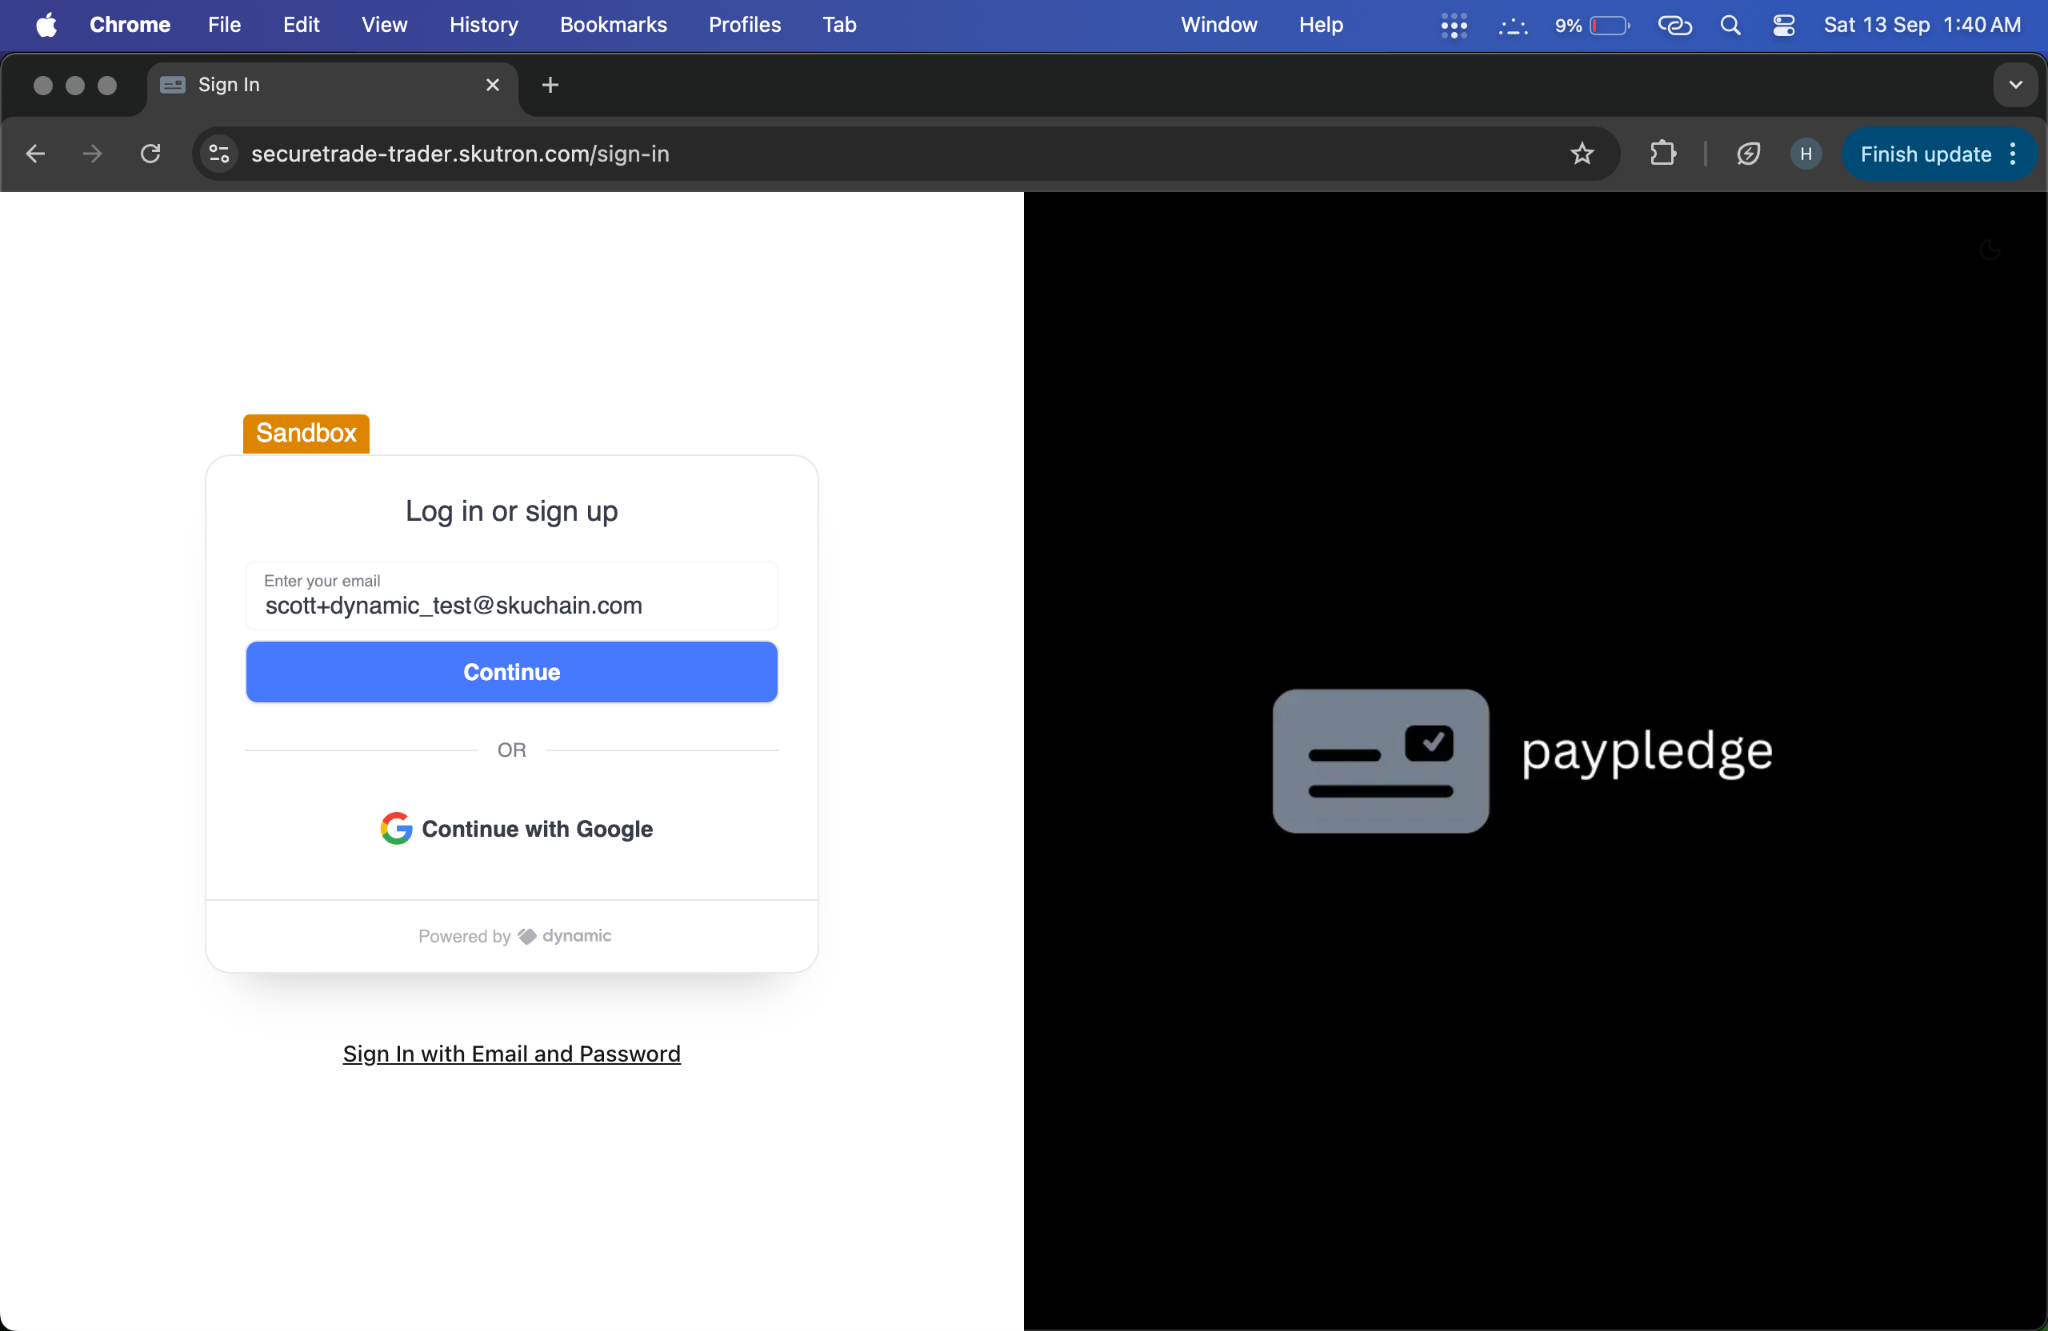
Step 6: Trader Signs In as Seller
- Action: Trader accesses the SecureTrade Trader interface as a seller
- System Response: Login successful, redirect to trader dashboard
- Screenshot:
- Video: Seller Onboarding
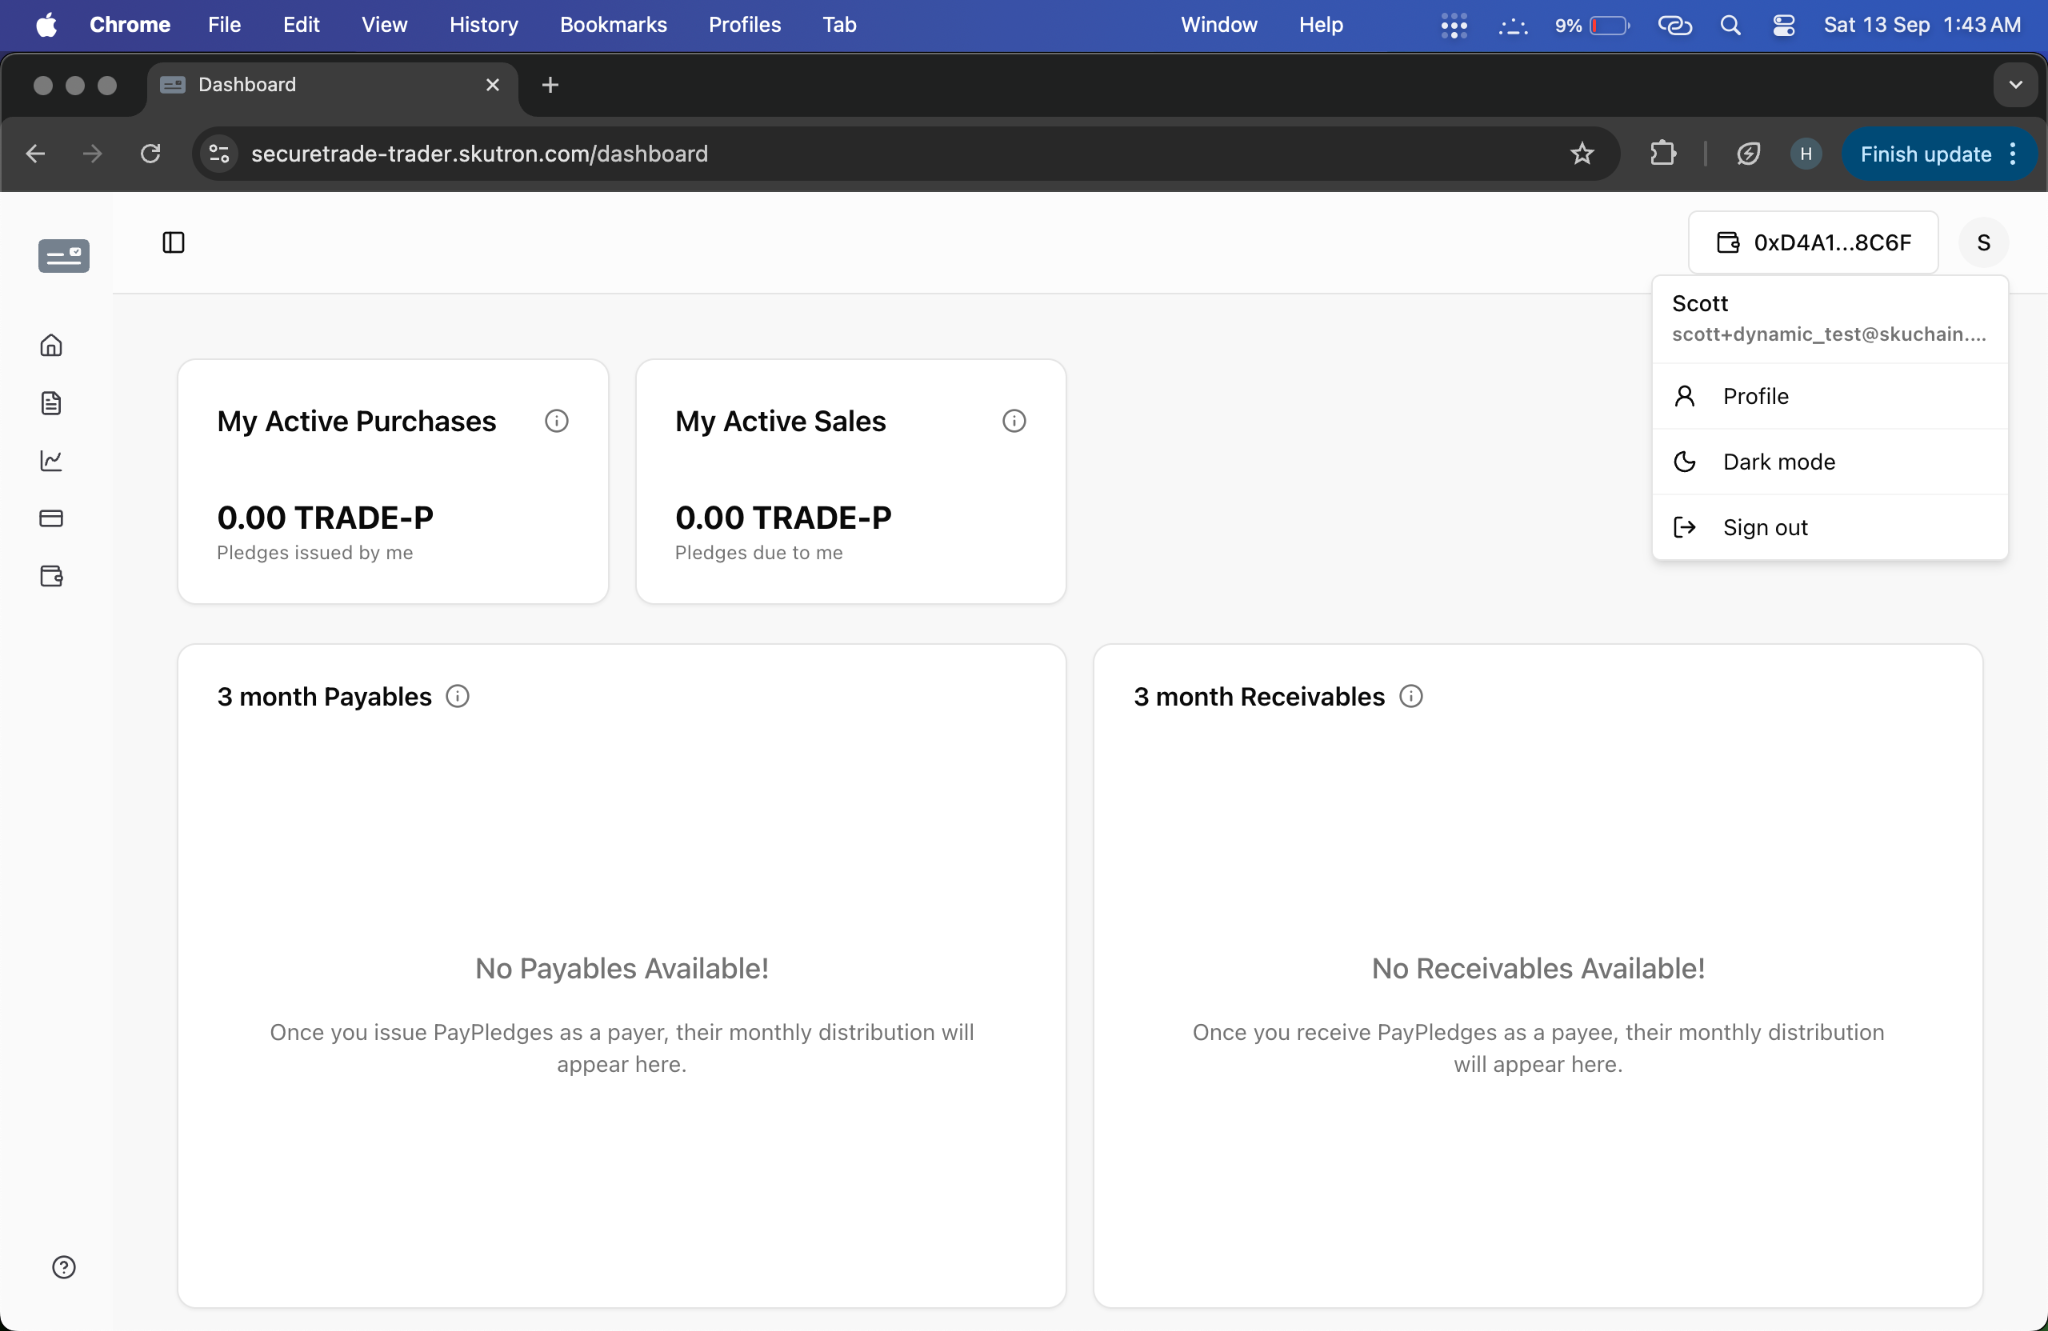
Step 7: Trader Onboards as Seller
- Action: Trader completes onboarding process and account setup as a seller
- System Response: Trader account activated and ready for PayPledge requests
- Screenshot:
Phase 2: Credit Management (Steps 8-9)
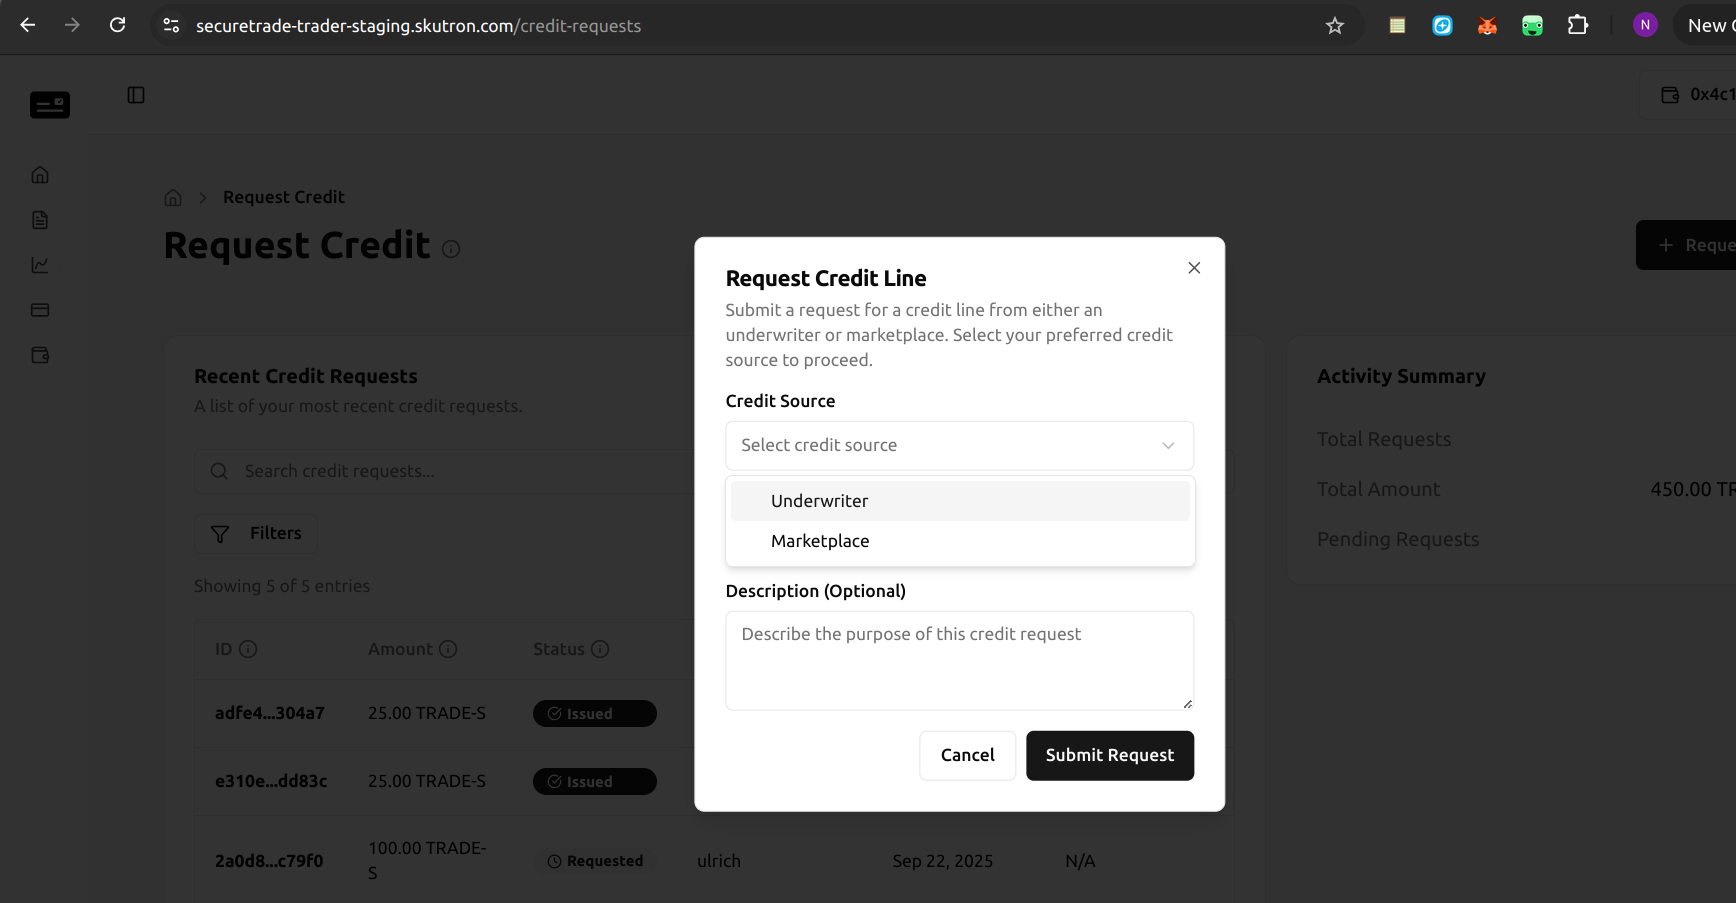
Step 8: Credit Request Process
- Action: Buyer requests credit line from underwriter
- System Response: Credit request submitted for review
- Screenshot:
- Video: Credit Request Process
Step 9: Credit Approval
- Action: Underwriter approves credit request
- System Response: Credit line activated and available
- Video: Credit Approval
Phase 3: PayPledge Creation (Steps 10-14)
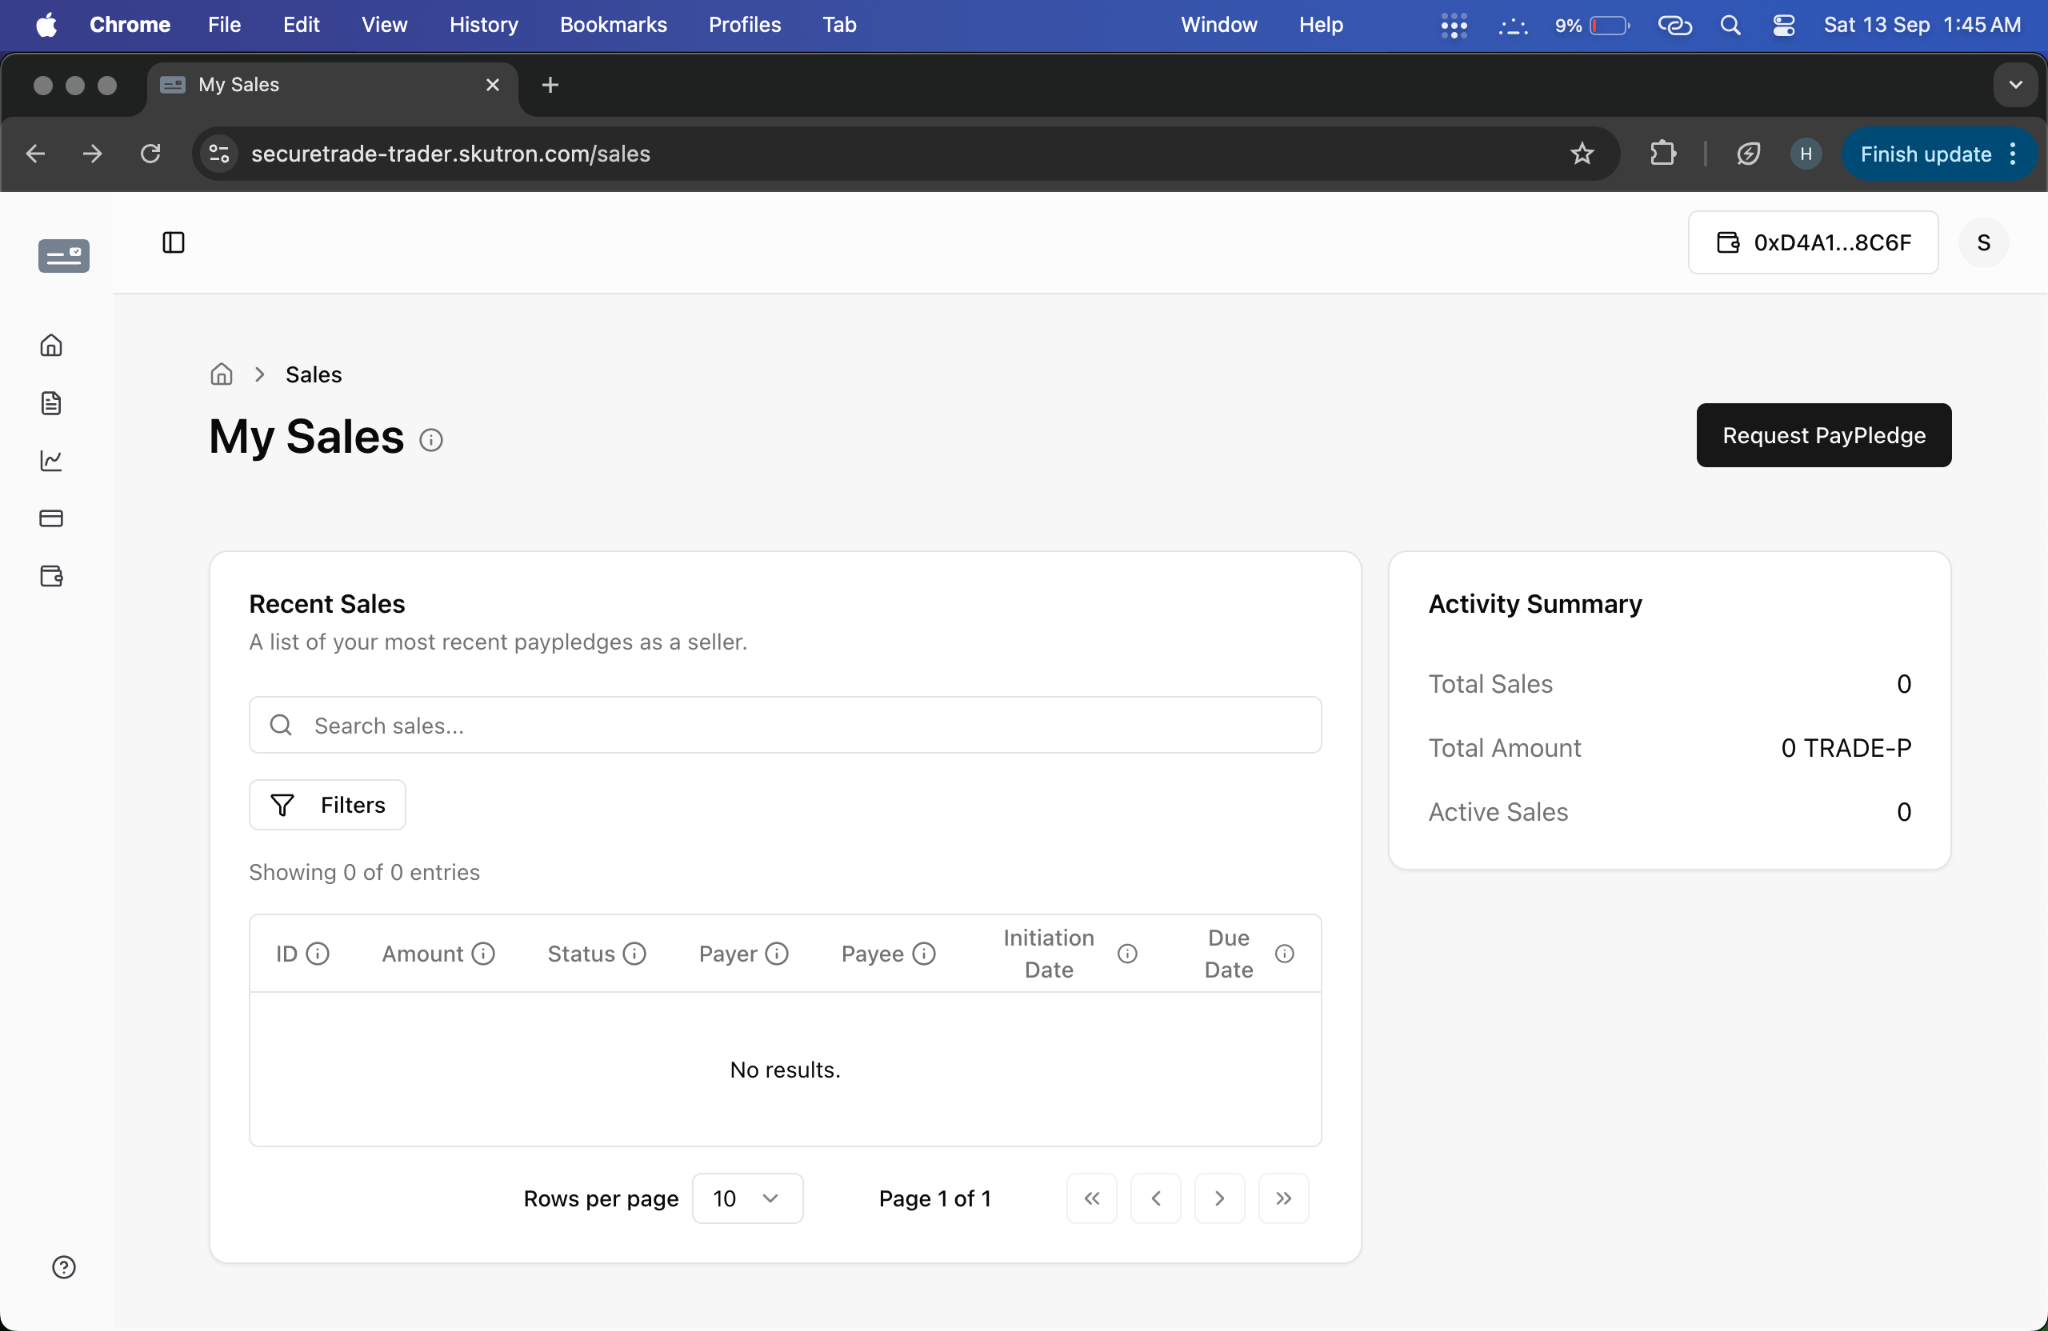
Step 10: Trader Requests PayPledge as Seller
- Action: Trader creates a PayPledge request from the sales section
- System Response: PayPledge request created and sent to buyer trader
- Screenshot:
- Video: PayPledge Request
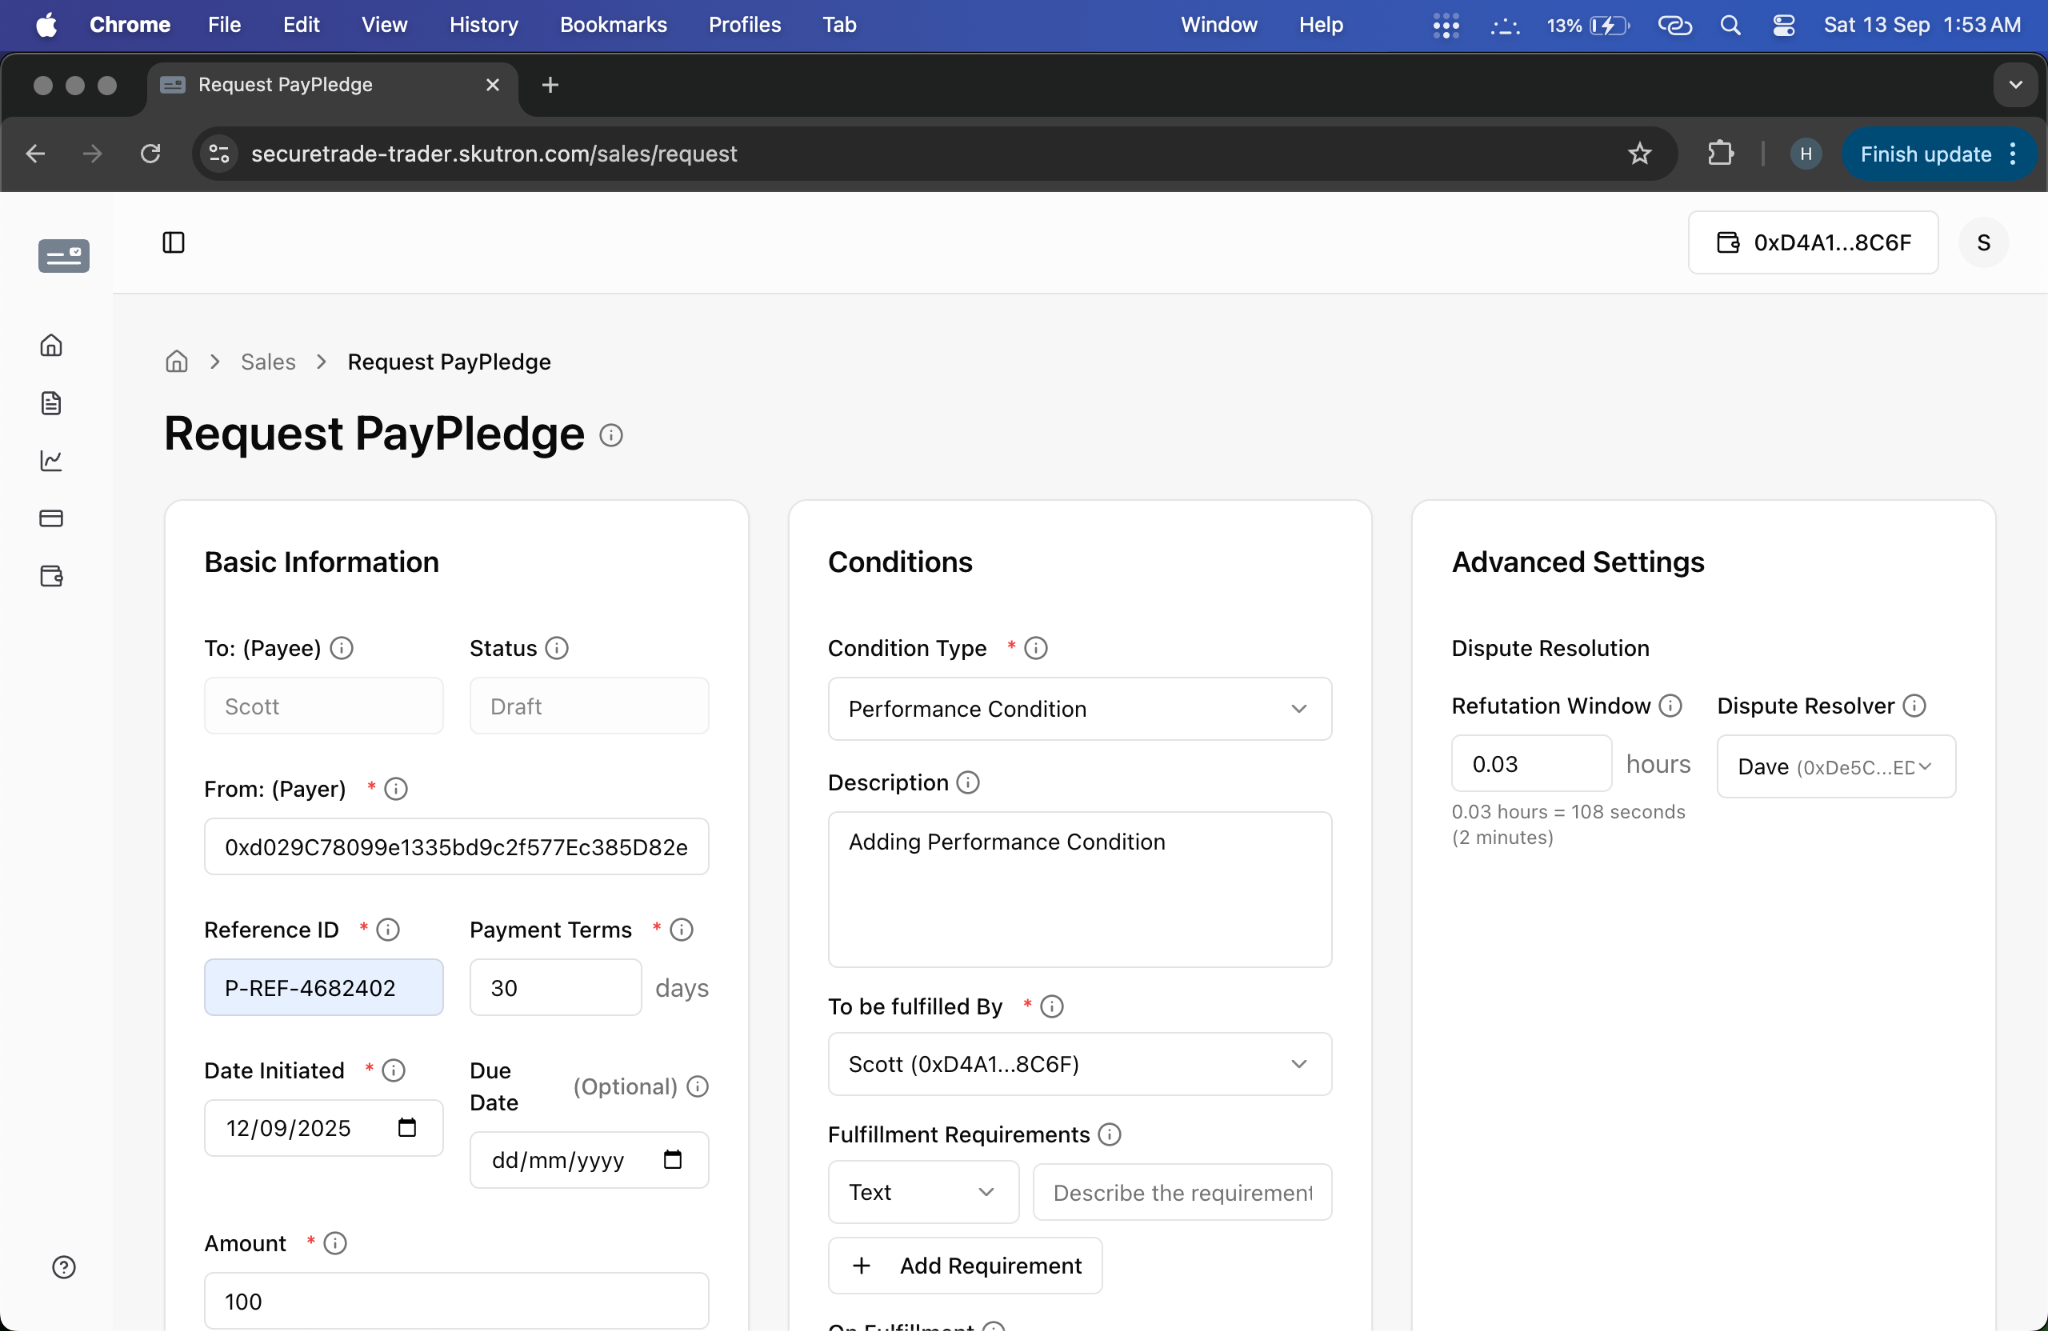
Step 11: Trader Fills PayPledge Details
- Action: Trader fills out detailed PayPledge request form with terms, conditions, and collateral requirements
- System Response: Form validation and preview of PayPledge terms
- Screenshot:
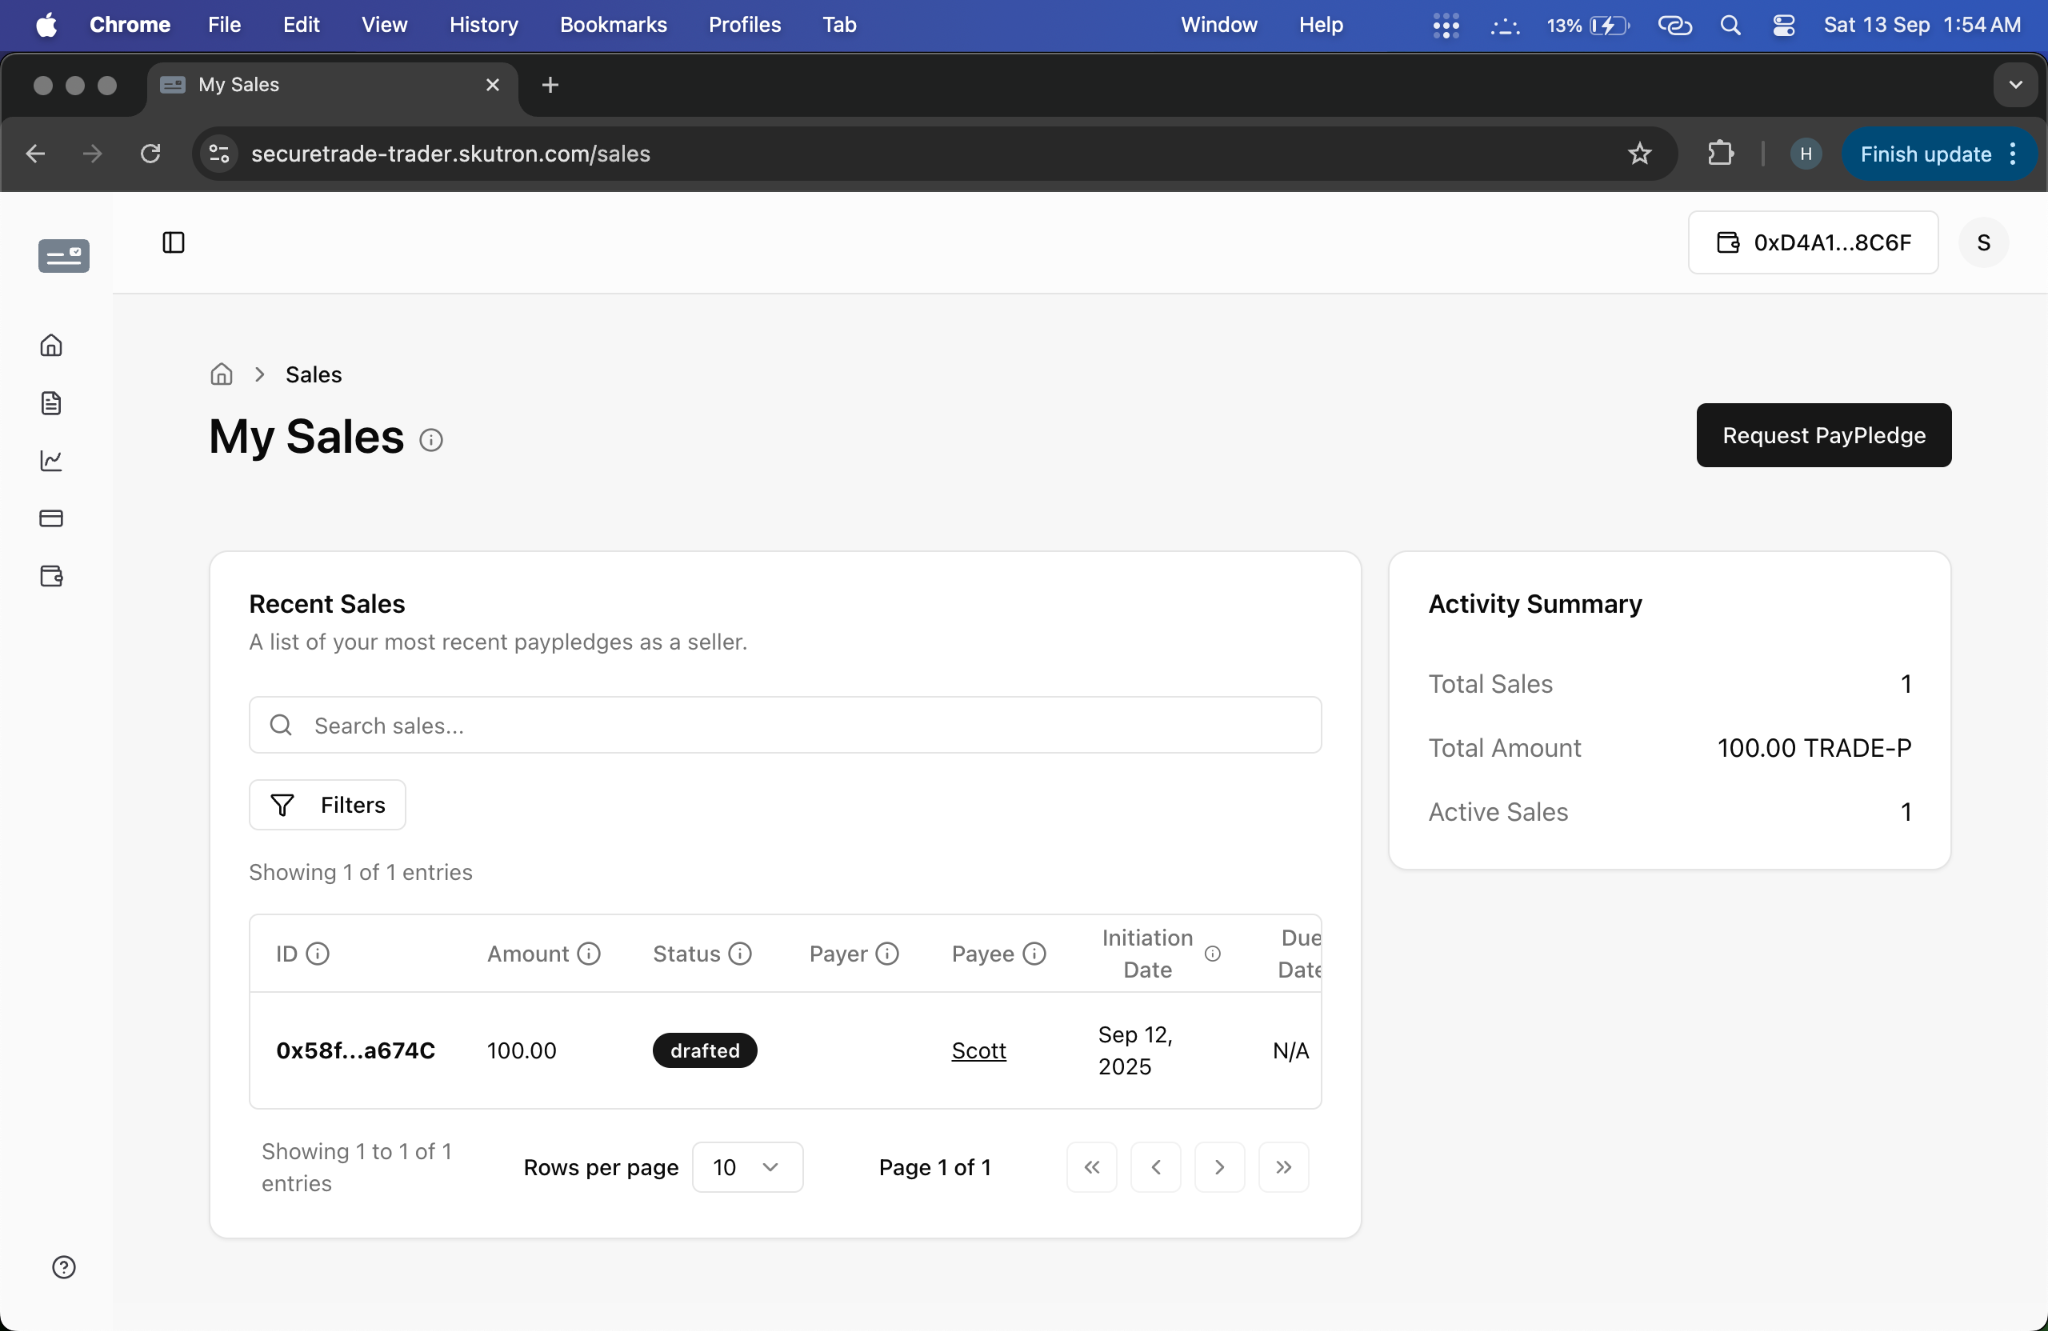
Step 12: Trader Views Drafted PayPledge
- Action: Trader reviews their created PayPledge request with "Drafted" status
- System Response: Displays PayPledge details and status, ready for submission or further editing
- Screenshot:
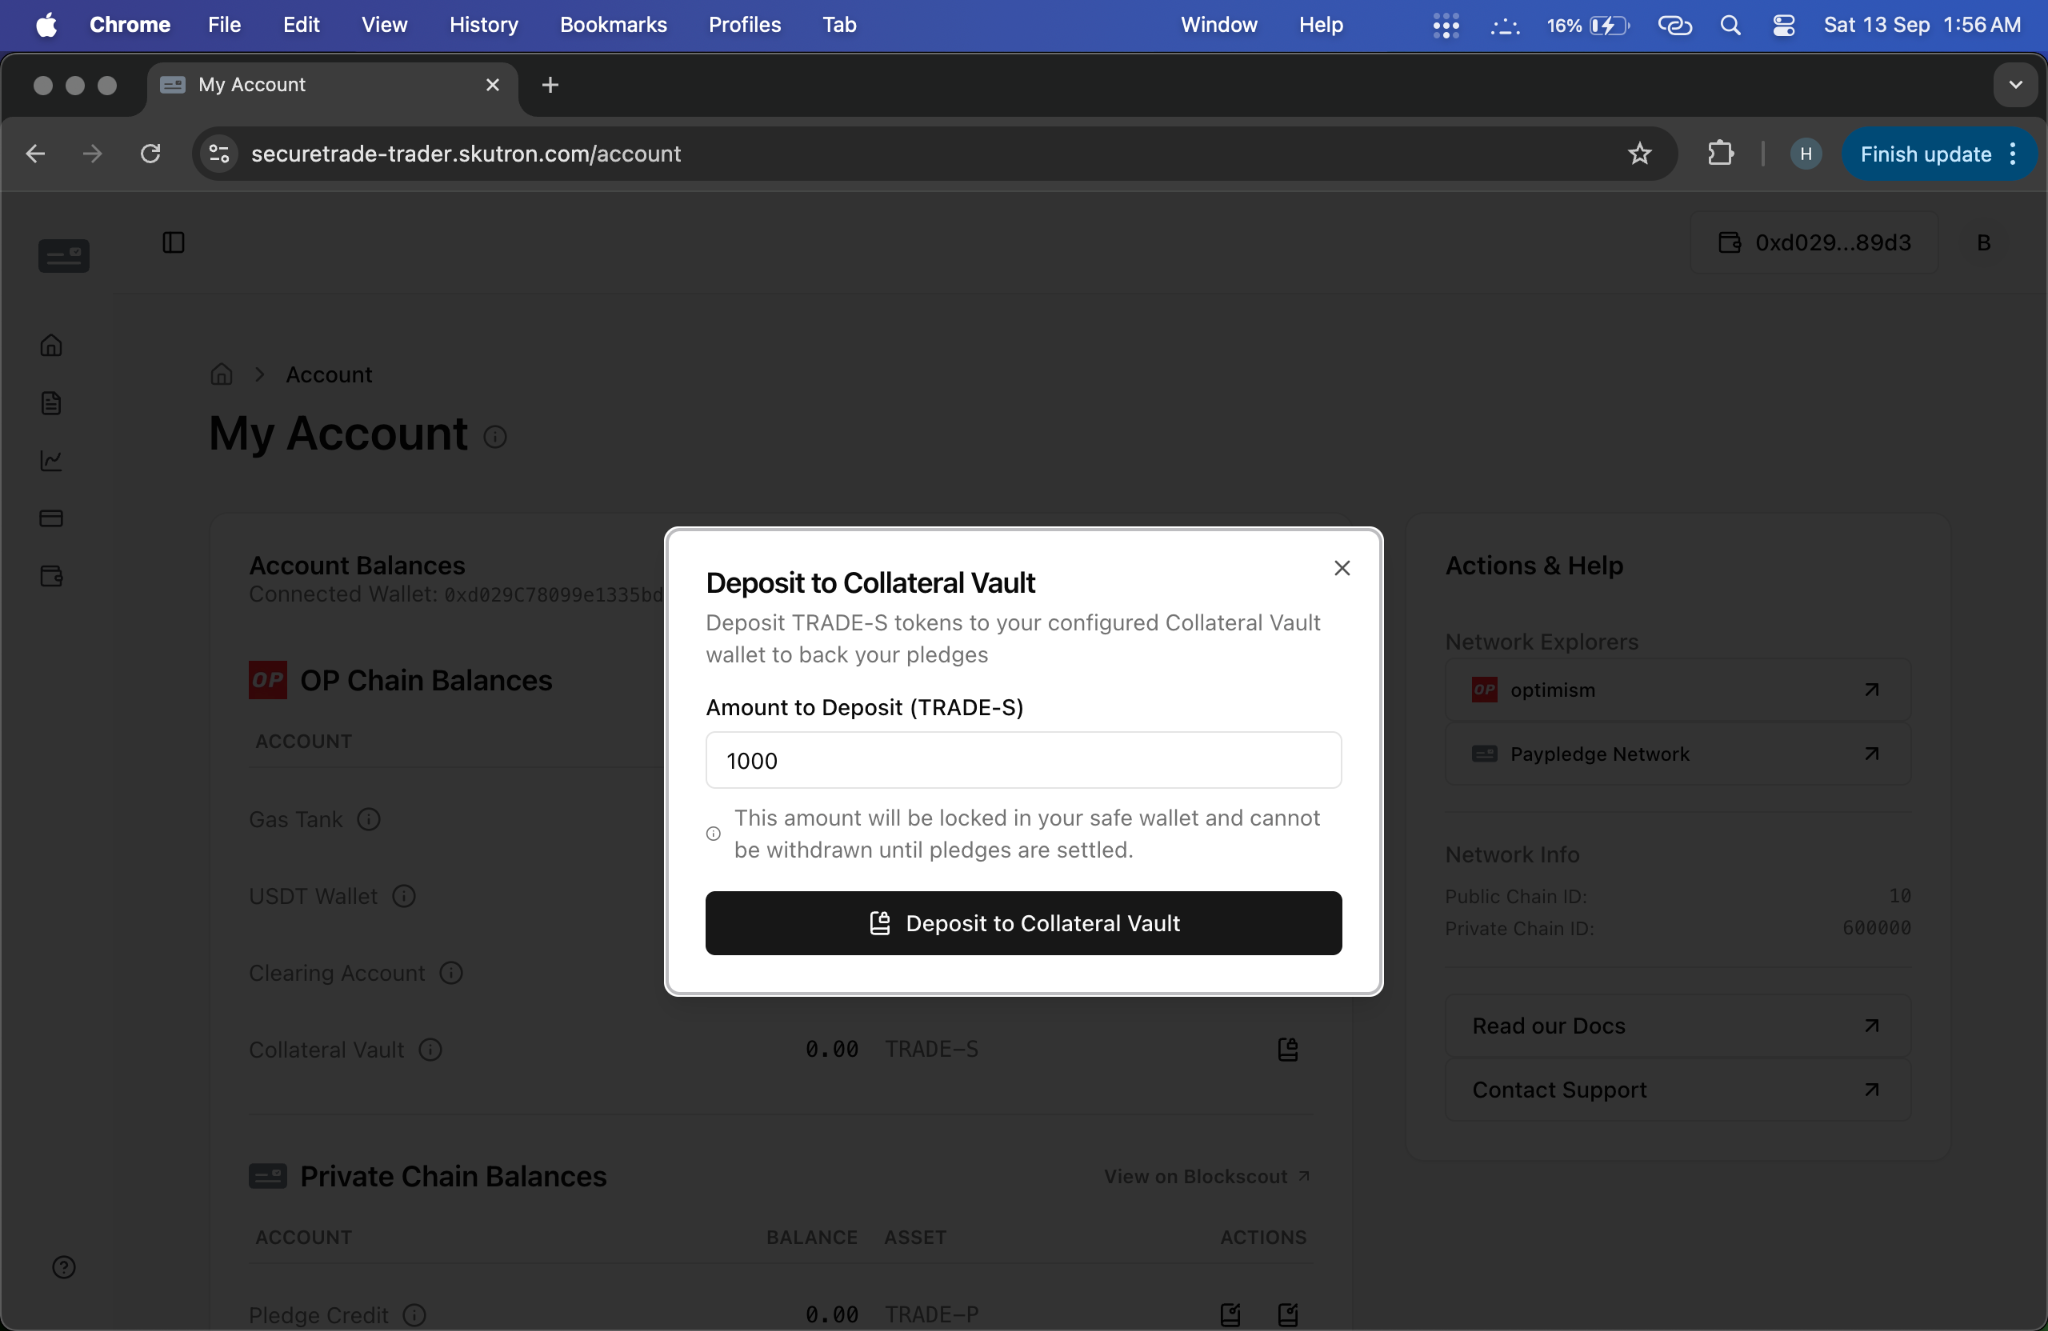
Step 13: Buyer Deposits Collateral
- Action: Buyer navigates to My Account page and clicks "Deposit Collateral" to fund their vault
- System Response: Collateral deposited to vault, equivalent pledge credit added to account balance
- Screenshot:
- Video: Collateral Deposit and PayPledge Initiation
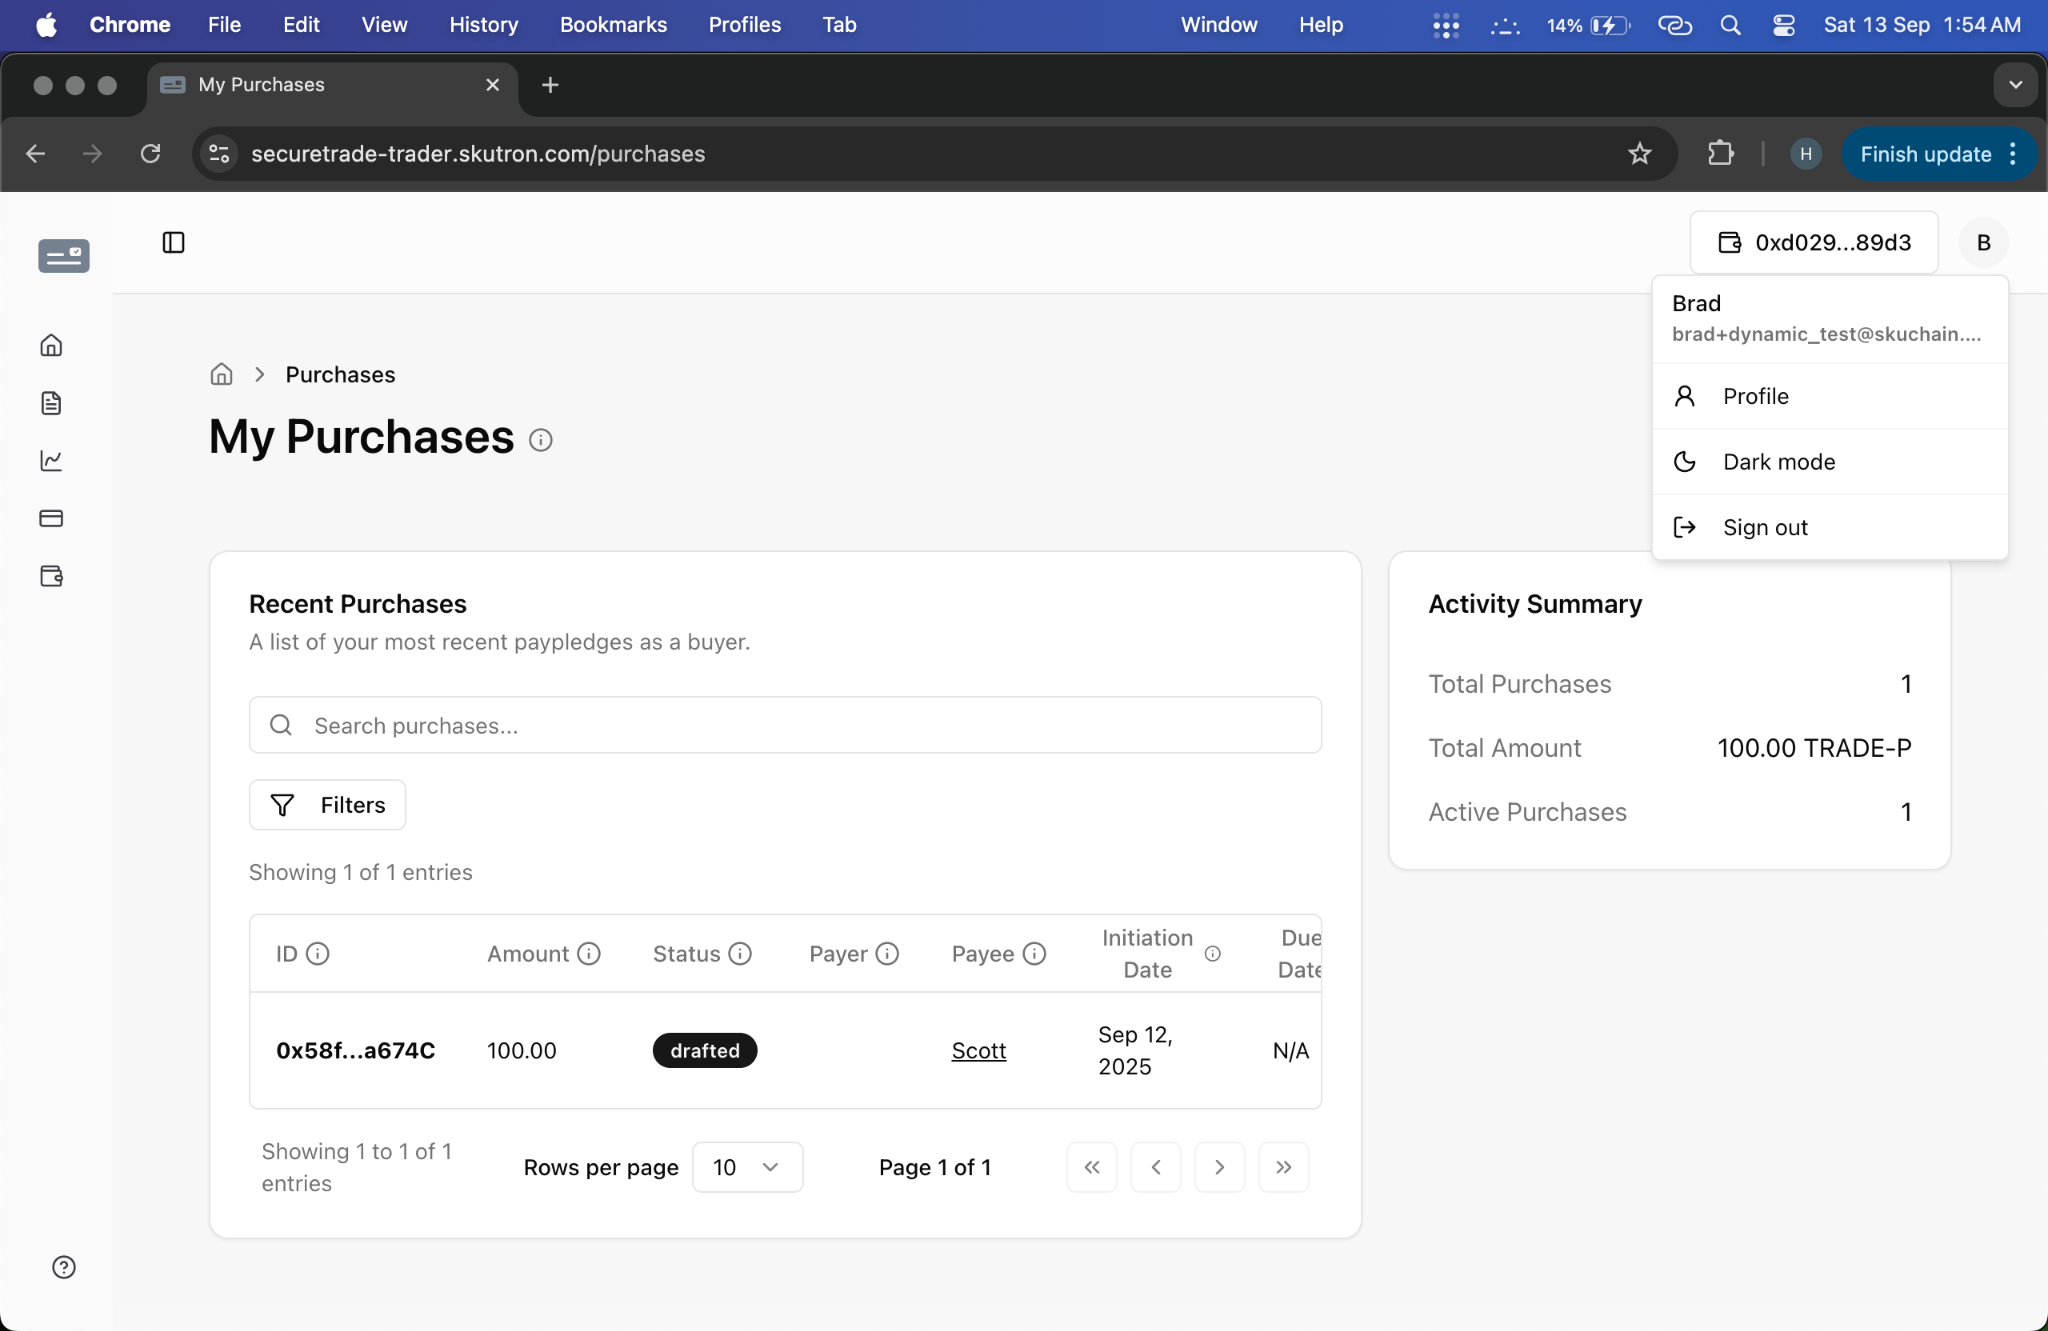
Step 14: Trader Sees Requested PayPledges as Buyer
- Action: Trader navigates to purchases section to view pending requests
- System Response: Displays pending PayPledge requests from seller traders
- Screenshot:
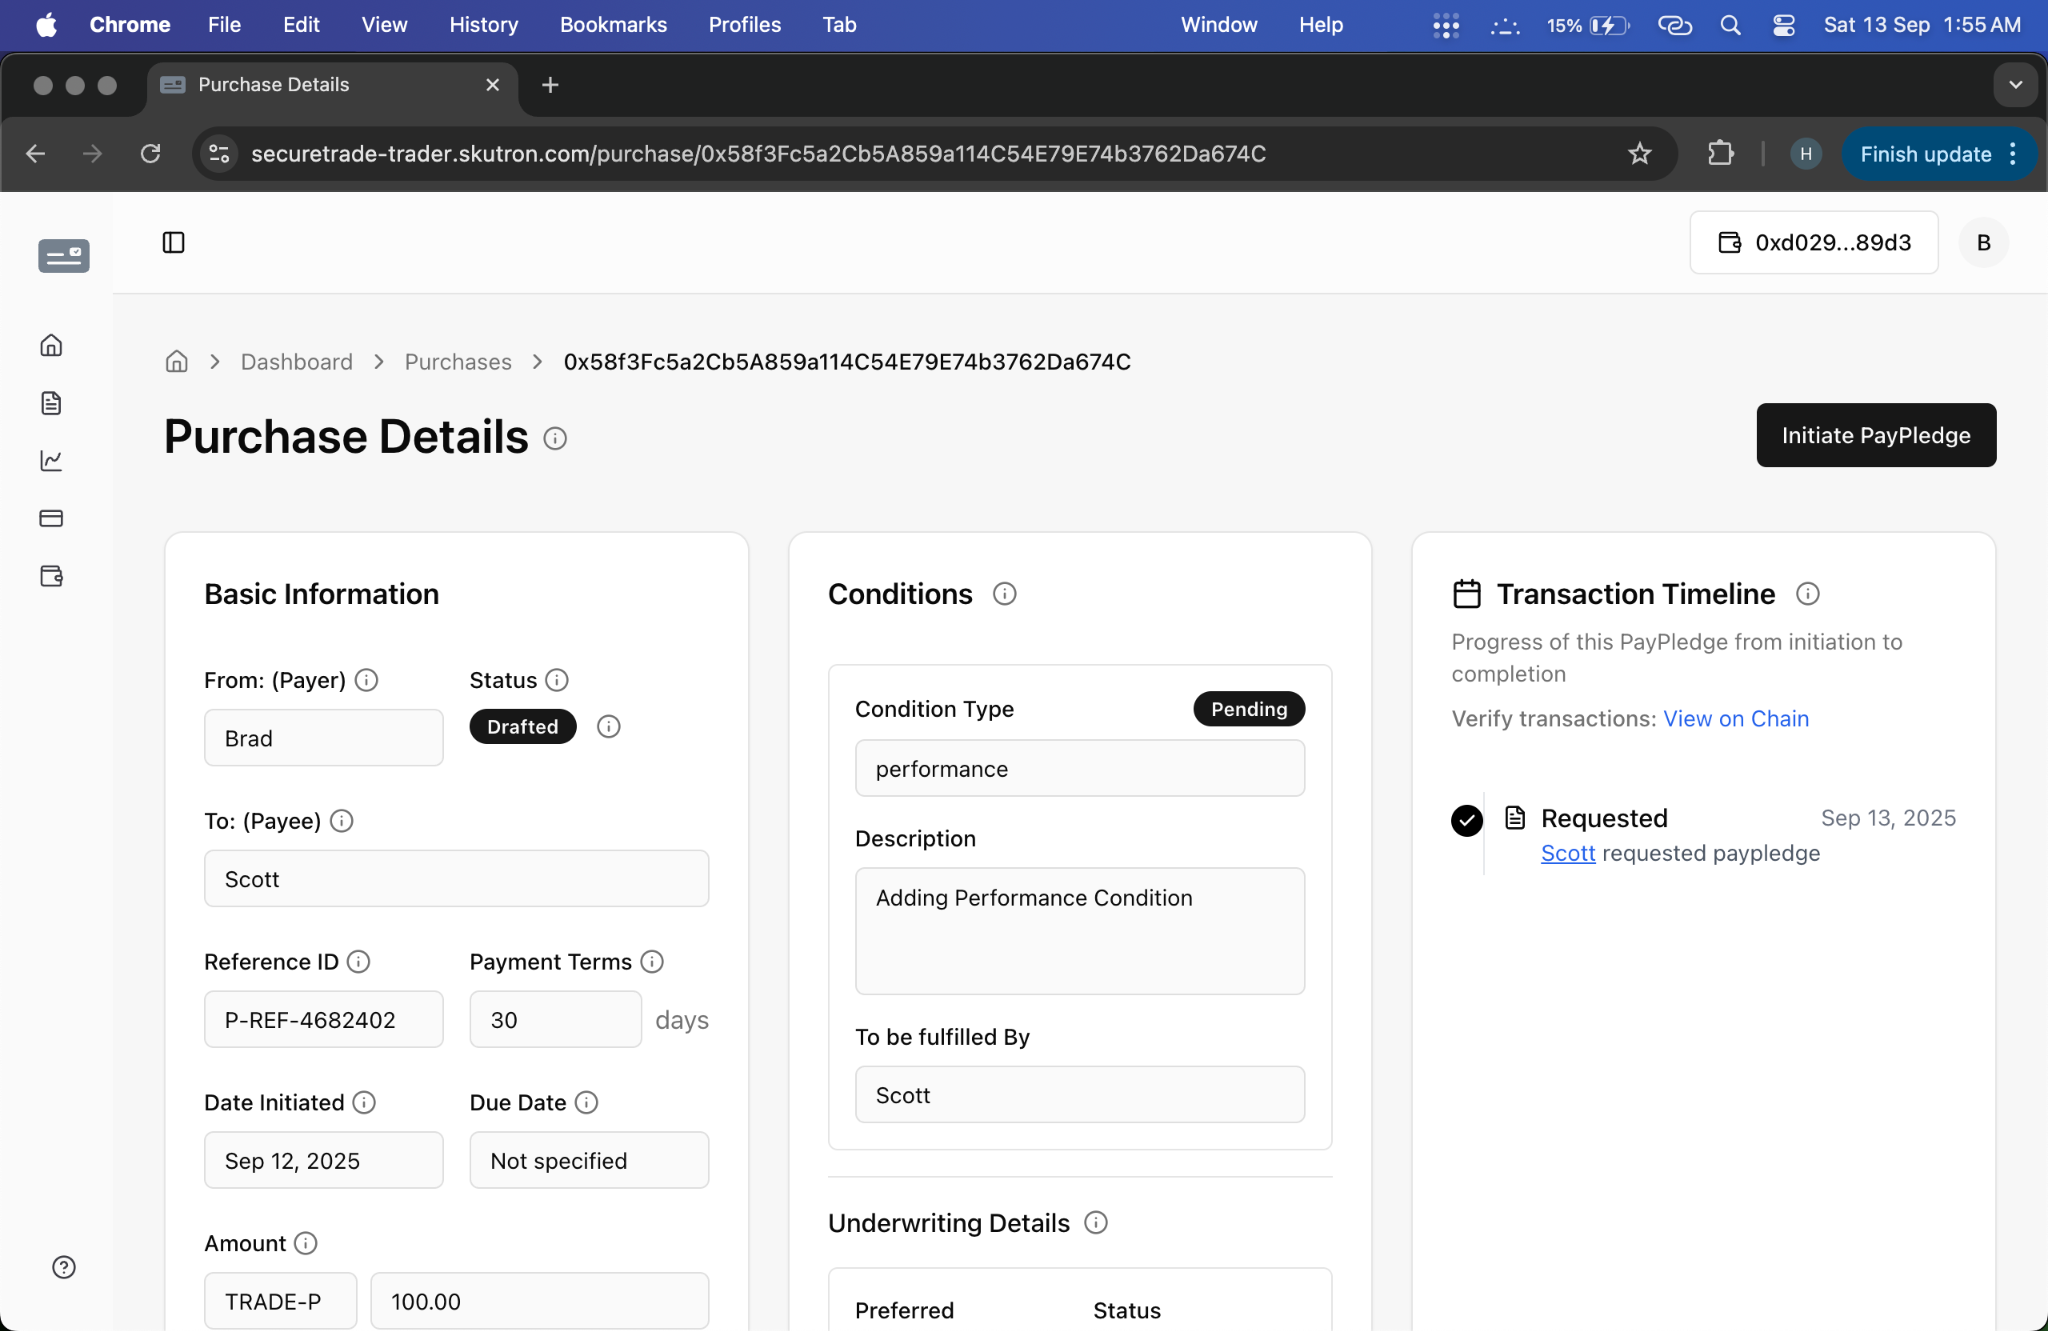
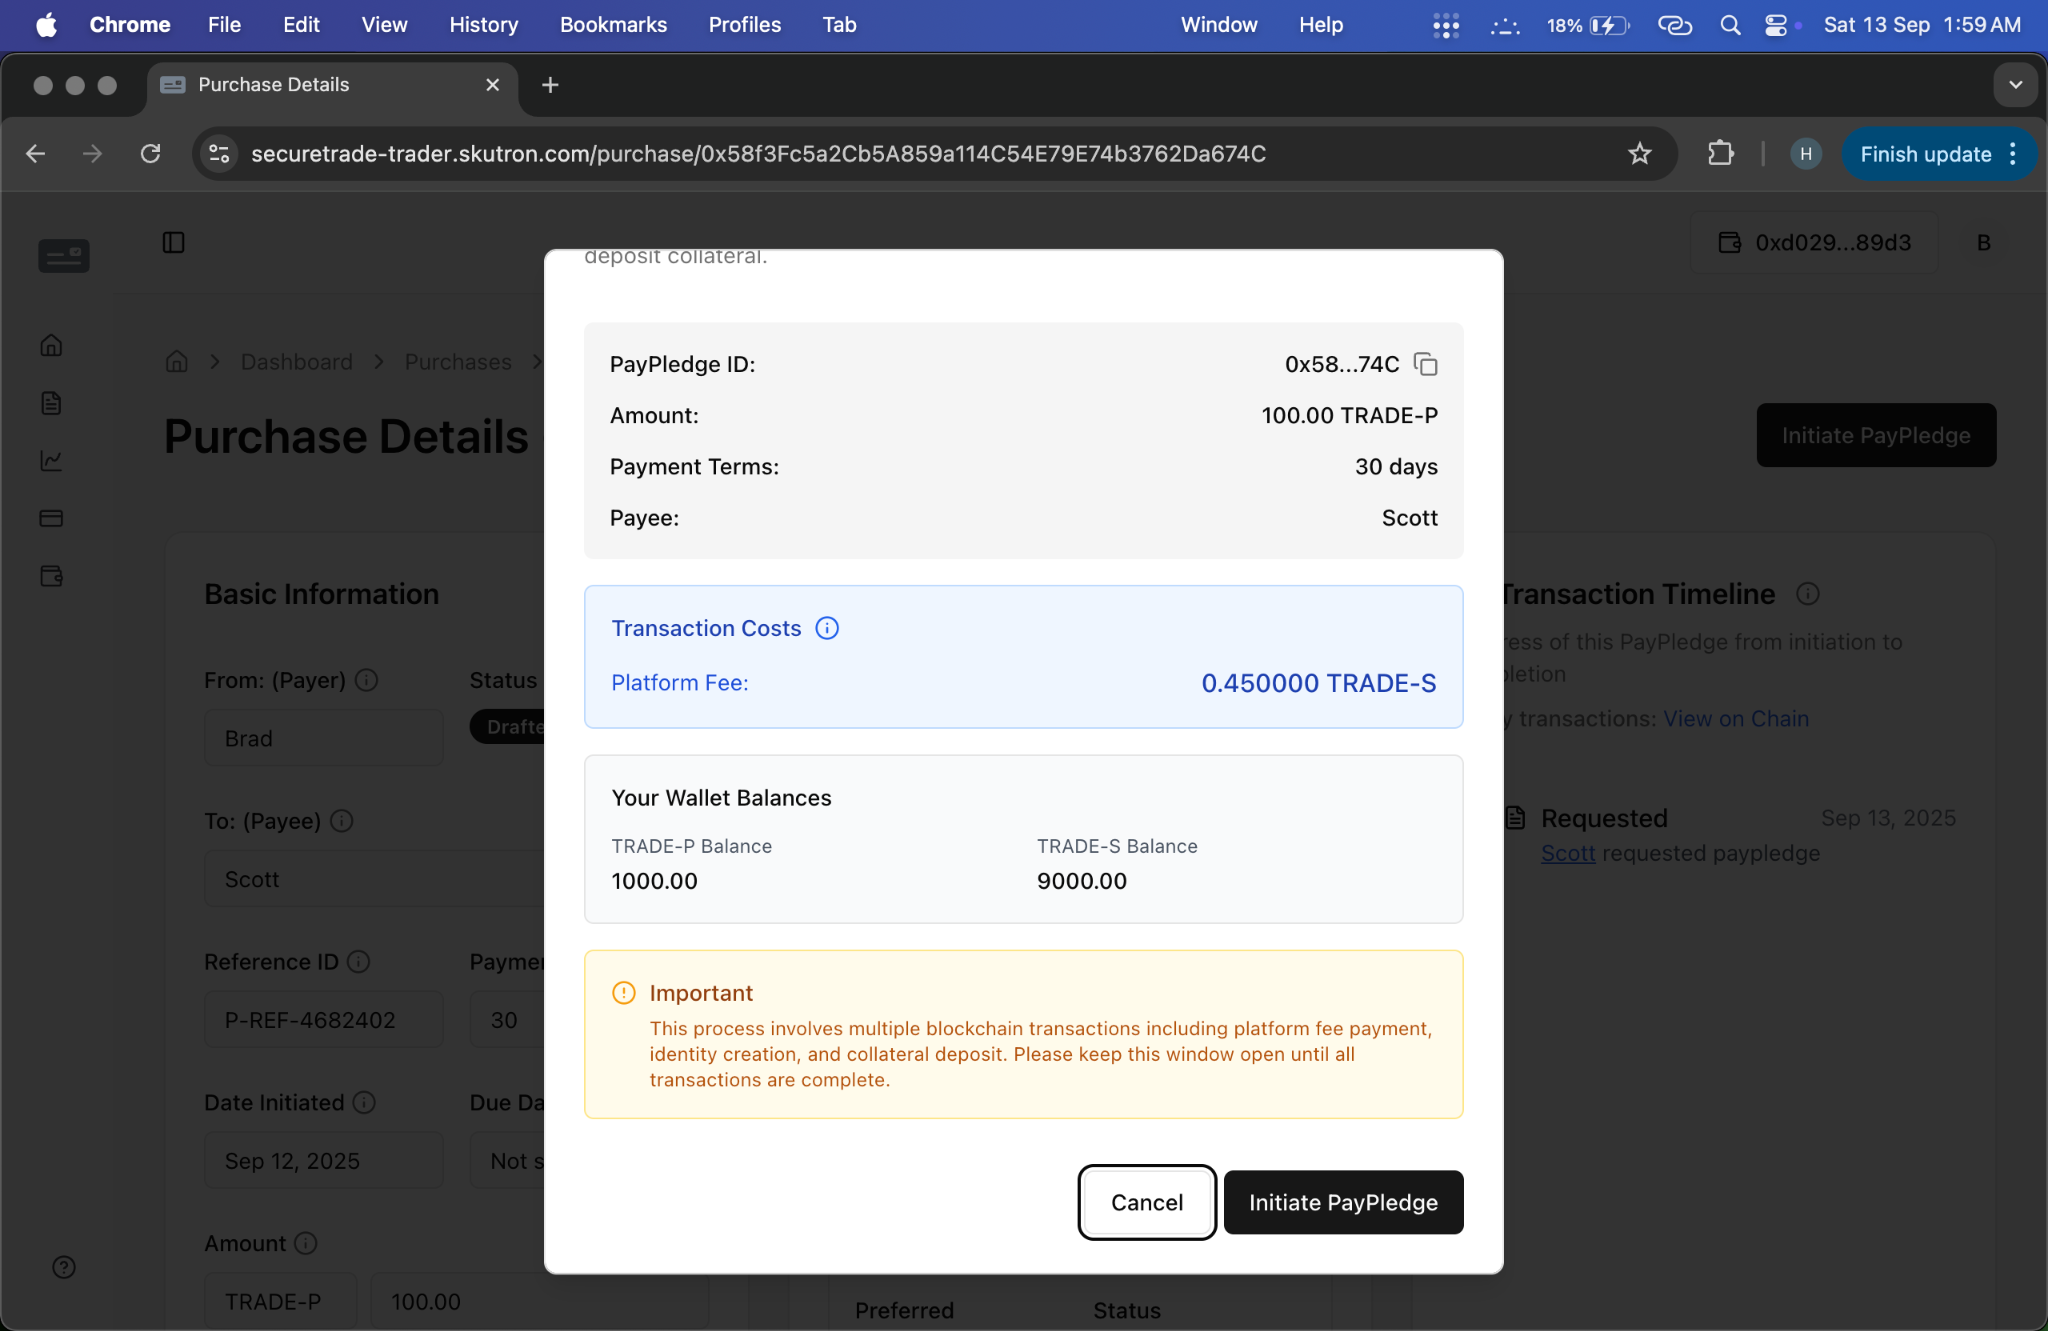
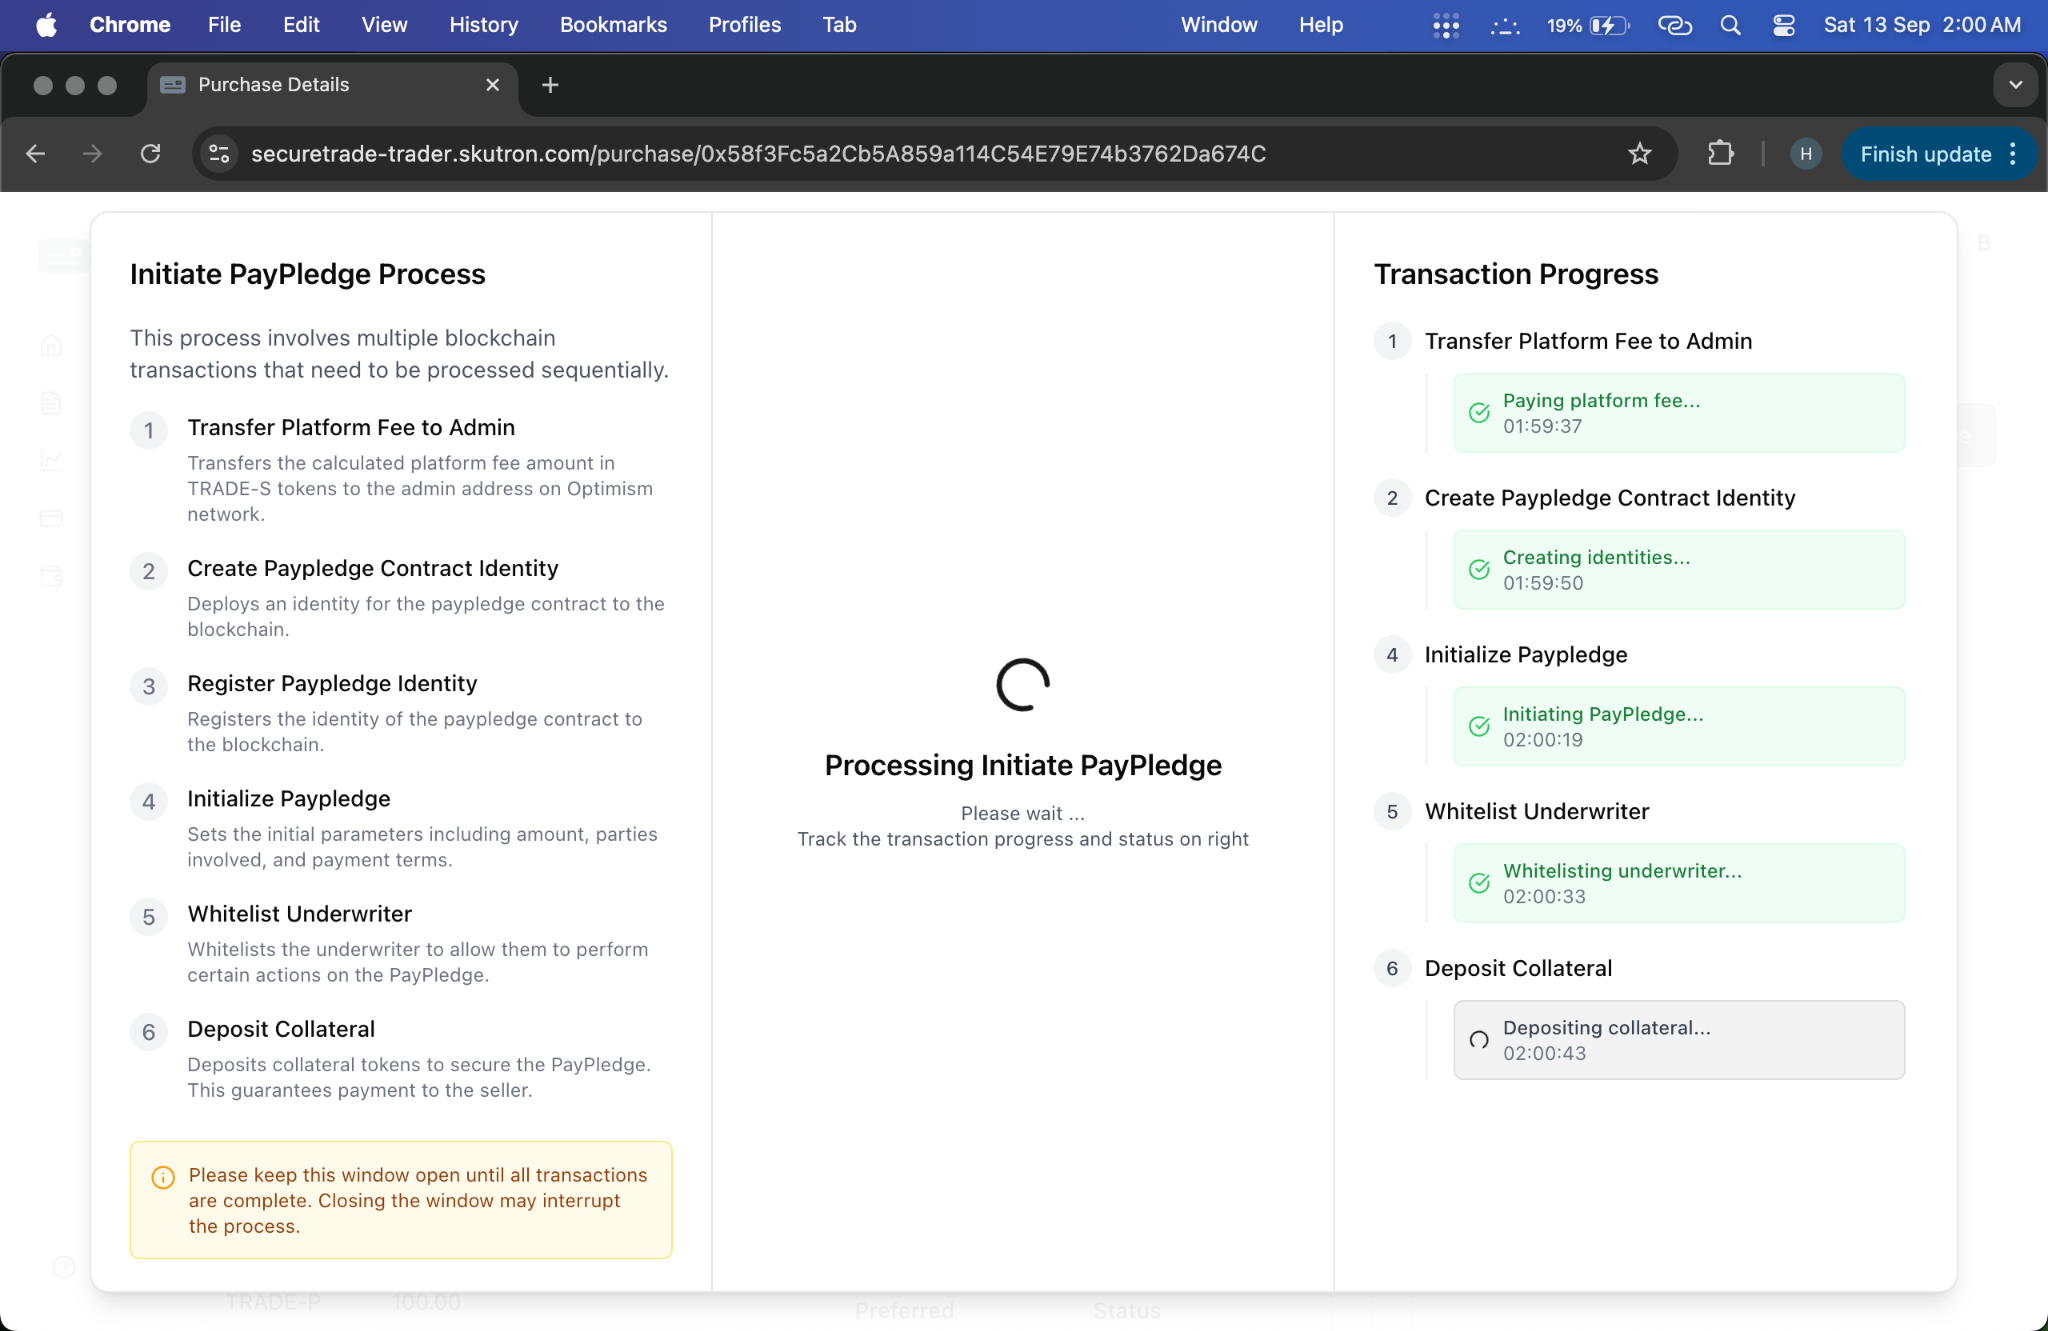
Step 15: Trader Initiates PayPledge as Buyer
- Action: Trader reviews and initiates PayPledge based on seller request
- System Response: PayPledge status changes to "Initiated"
- Screenshot:
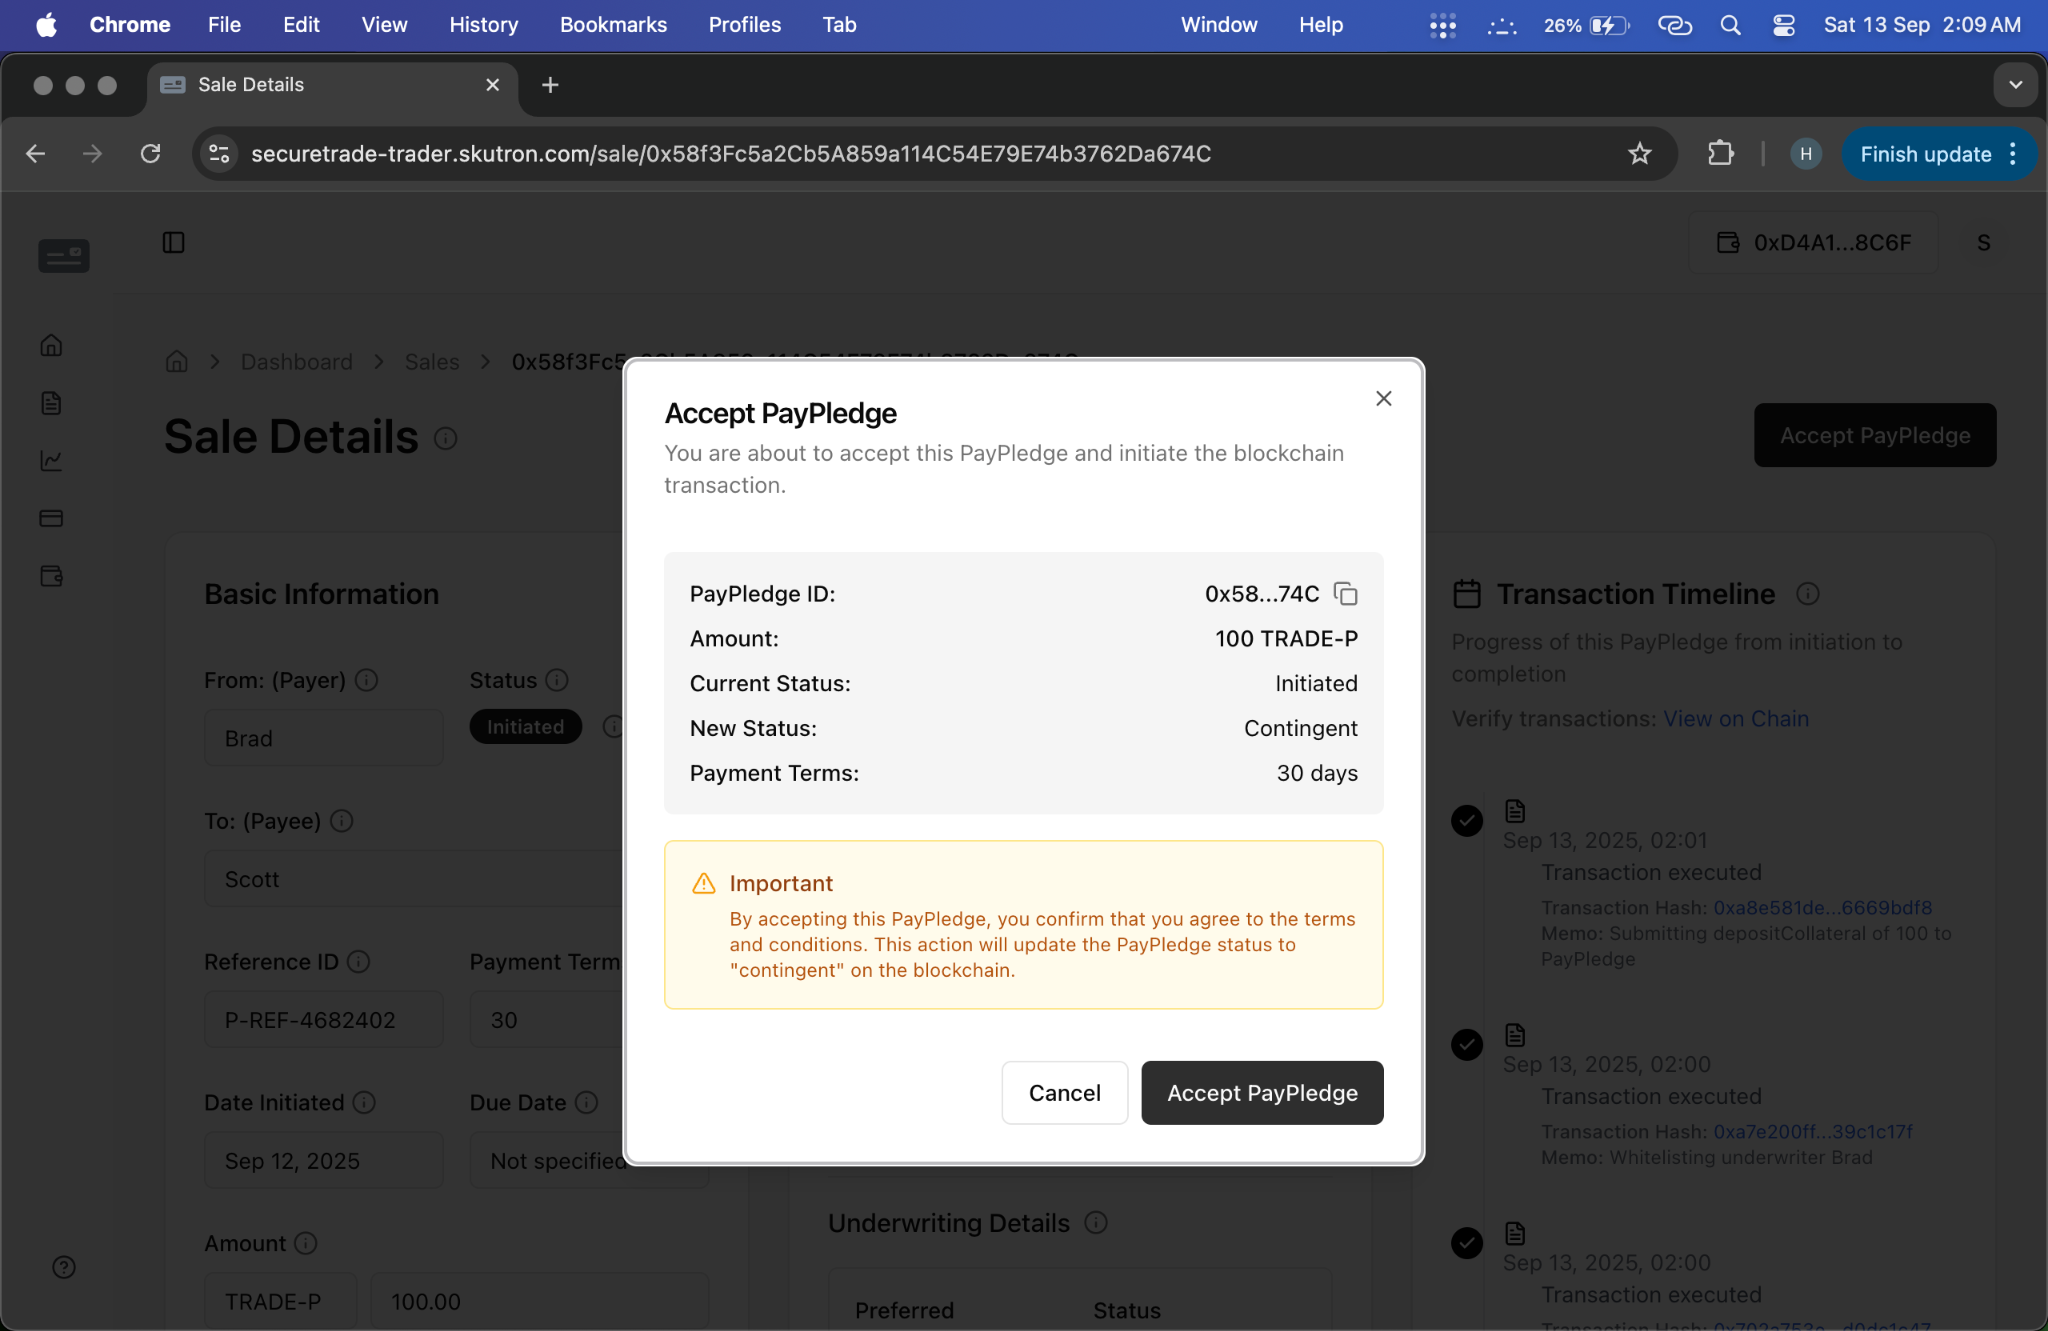
Step 16: Trader Accepts PayPledge as Seller
- Action: Trader reviews PayPledge terms and accepts as a seller
- System Response: PayPledge status changes to "Contingent"
- Screenshot:
Phase 4: Transaction Execution (Steps 17-18)
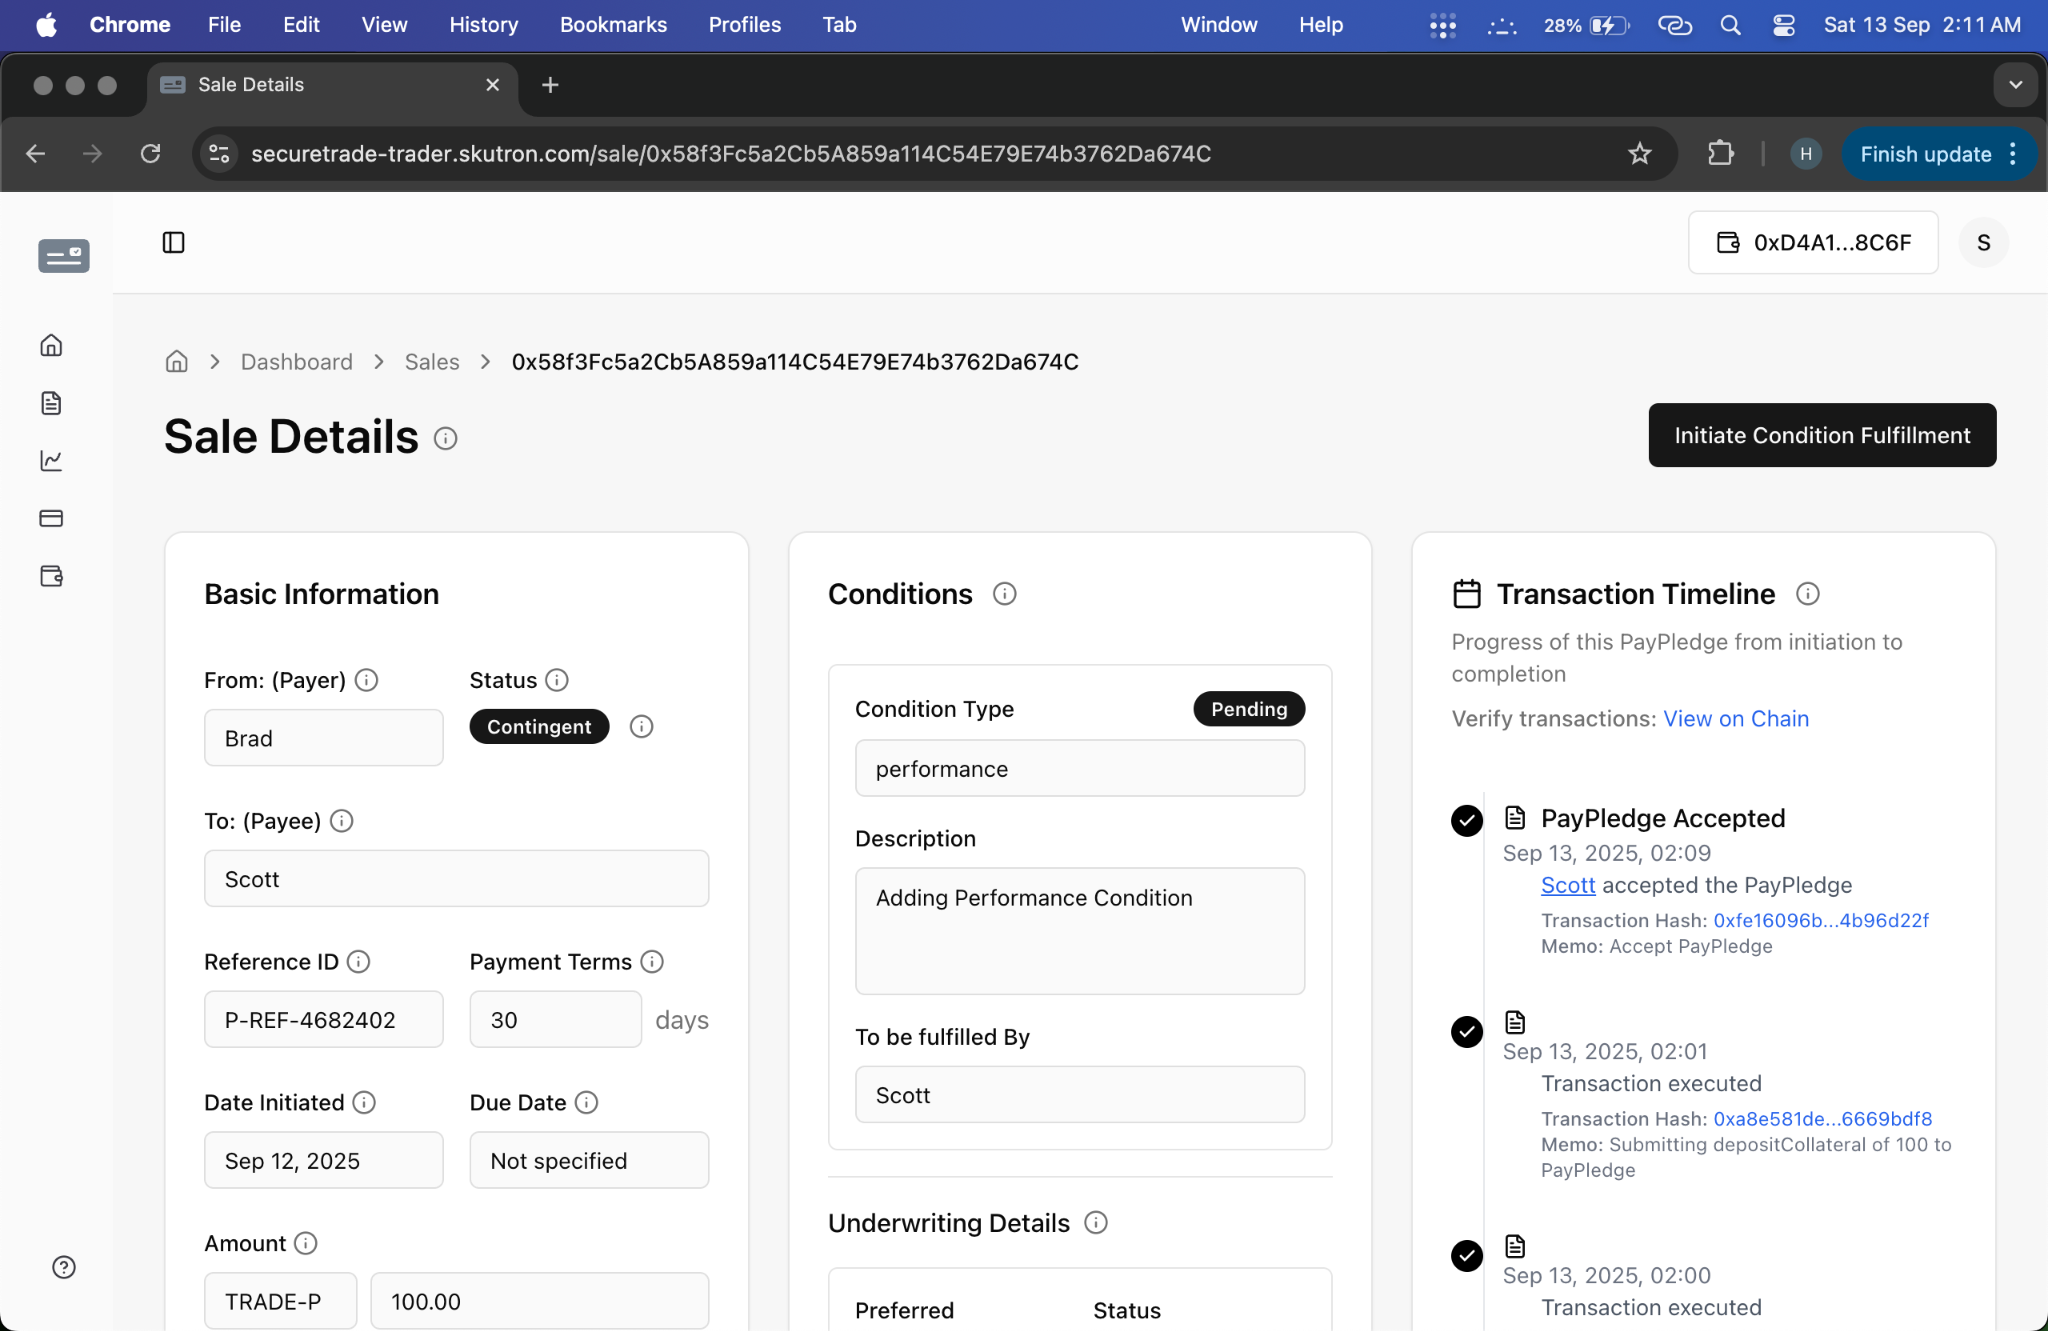
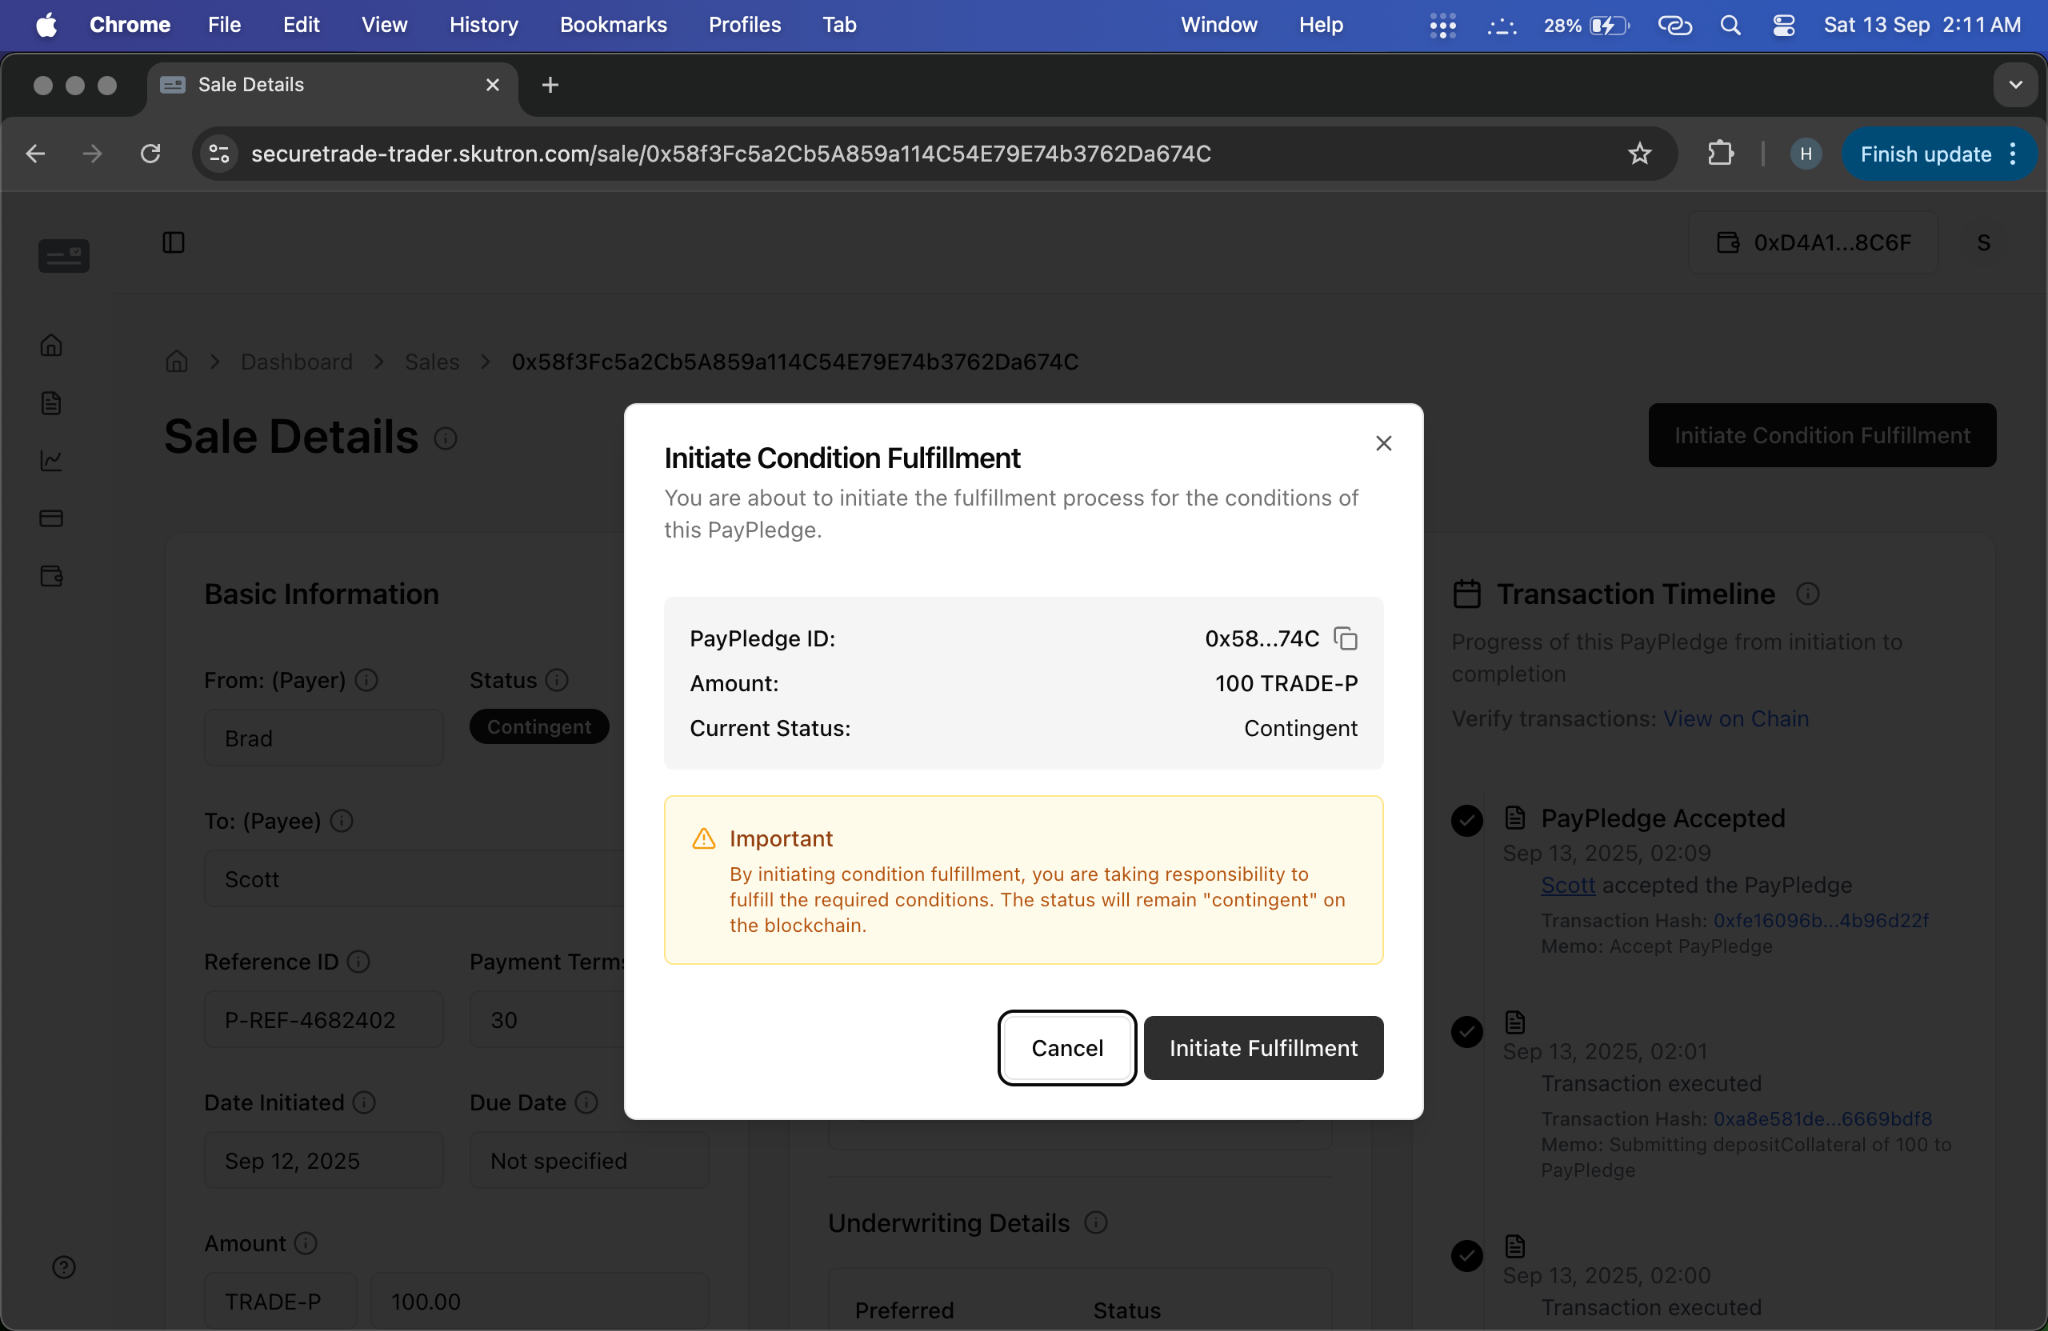
Step 17: Trader Initiates Condition Fulfillment as Seller
- Action: Trader begins fulfilling performance conditions as a seller
- System Response: PayPledge status shows "In Progress"
- Screenshot:
- Video: Condition Fulfillment
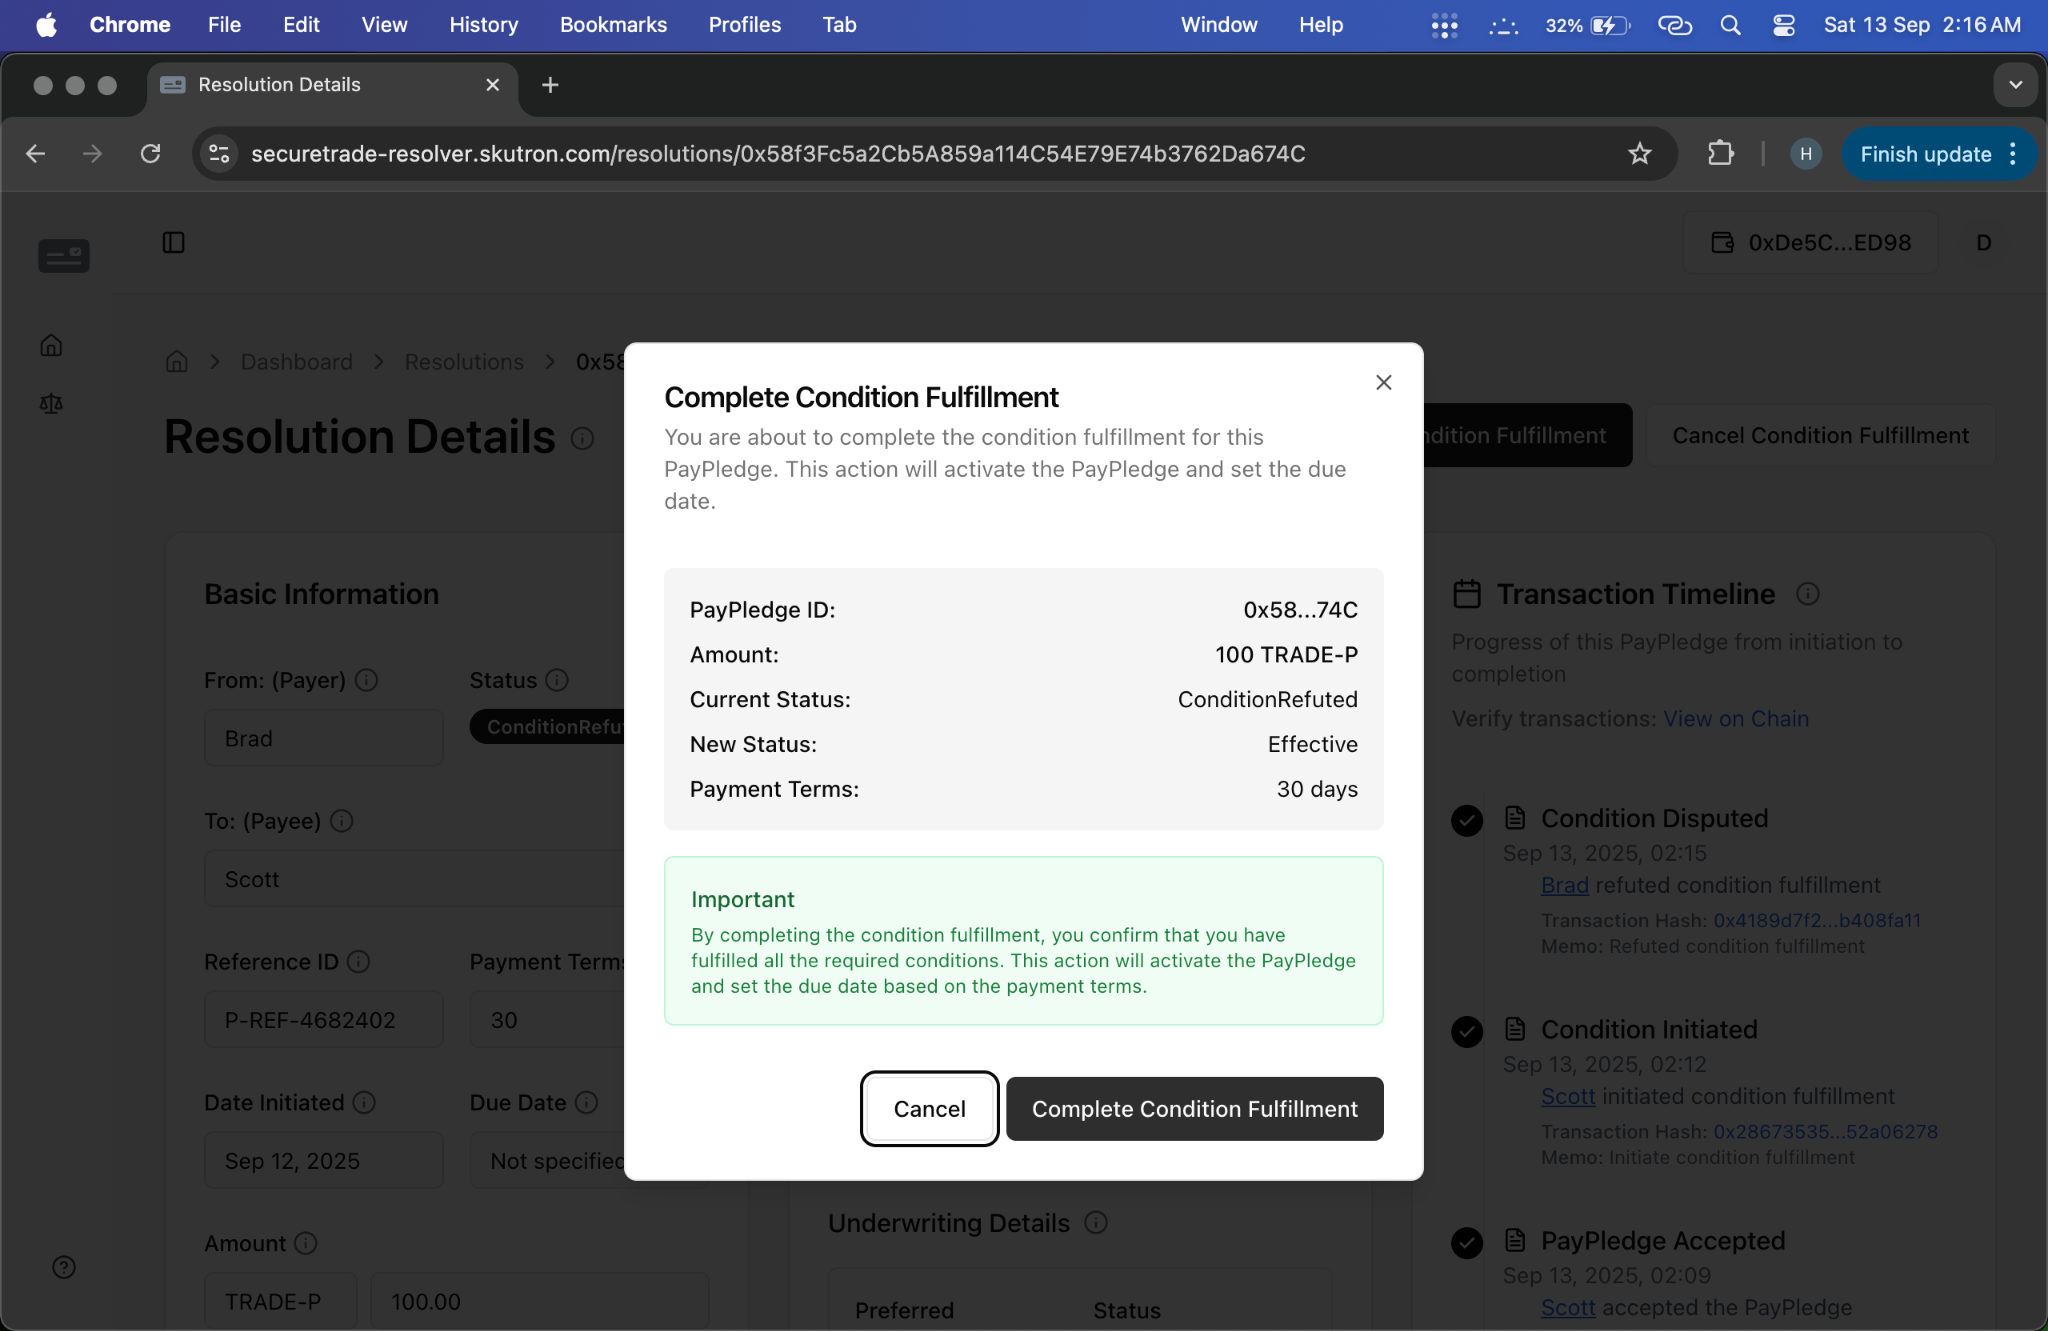
Step 18: Trader Completes Condition Fulfillment as Seller
- Action: Trader provides evidence of completed performance as a seller
- System Response: PayPledge status changes to "Effective"
- Screenshot:
Phase 5: Settlement & Resolution (Steps 19-20)
Step 19: Trader Settles PayPledge as Buyer
- Action: Trader initiates settlement process as a buyer
- System Response: PayPledge status changes to "Discharging"
- Video: Discharge Initiation
Step 20: Trader Withdraws Tokens as Seller
- Action: Trader withdraws their collateral tokens as a seller
- System Response: Tokens transferred to trader's wallet
- Video: Discharge Completion
Key Features
- Smooth Transaction Flow: No disputes or refutations needed
- Automated Processing: System handles most steps automatically
- Clear Status Updates: Each step shows clear progress indicators
- User-Friendly Interface: Intuitive design for easy navigation
- Fast Settlement: Quick completion without external intervention
Benefits
- Seamless Onboarding: Email-based registration eliminates complex wallet setup
- Pre-funded Wallets: Immediate access to trading capabilities
- Email Notifications: Proactive communication about PayPledge requests
- Flexible Settlement: Both on-chain and off-chain payment options
- Automated Lifecycle: Smart contract-driven PayPledge management
- Fast Processing: Quick completion without dispute resolution delays
Phase Navigation
- Phase 1: Setup & Onboarding - Foundation setup
- Phase 2: Credit Management - Credit line establishment
- Phase 3: PayPledge Creation - Transaction initiation
- Phase 4: Transaction Execution - Performance fulfillment
- Phase 5: Settlement & Resolution - Final settlement
Related Resources
- Complete Workflow Videos - Video demonstrations
- Flow with Resolver - Dispute resolution scenario
- Trader Role Guide - Trader responsibilities
- Resolver Role Guide - Resolver responsibilities
- Underwriter Role Guide - Underwriter responsibilities